Introduction
Welcome to the world of digital music! With the advancement of technology, downloading music has become a convenient and popular way to enjoy your favorite tunes anytime, anywhere. Whether you’re a music enthusiast or just looking to expand your collection, this guide will walk you through the steps of how to download music to your files.
Before we dive into the process, it’s important to note that downloading copyrighted music without permission from the artists or proper licensing is illegal. However, there are plenty of legal platforms available where you can find a vast selection of music to download and enjoy legally.
In this guide, we will explore the steps involved in downloading music from legal and reliable platforms, organizing your downloaded music files, and transferring them to your devices for easy access. Additionally, we’ll provide some troubleshooting tips along the way to help you navigate any potential challenges you may encounter.
Downloading music has never been easier, and the steps we’ll cover are applicable to various devices, including computers, smartphones, and tablets. So, whether you’re a Windows or Mac user, an iPhone aficionado or Android enthusiast, these guidelines will help you get your favorite tunes onto your devices hassle-free.
So, let’s get started and embark on an exciting journey of discovering, acquiring, and organizing your music collection! Remember, music has the power to elevate our moods, evoke emotions, and transport us to different realms. With this guide, you’ll have everything you need to fill your files with melodies that resonate with you.
Step 1: Choose a Legal and Reliable Platform
The first and most crucial step in downloading music to your files is to choose a legal and reliable platform. With countless websites and apps available, it’s essential to select a platform that offers a wide range of music and ensures a secure and trustworthy experience.
When searching for a platform, consider the following factors:
- Legality: Ensure that the platform operates within the bounds of copyright laws and offers licensed music downloads. This ensures that you are supporting artists and their work while enjoying your favorite tracks.
- Reputation: Look for platforms that have a good reputation and positive user reviews. This indicates a reliable and reputable service that consistently delivers high-quality music files.
- Selection: Check if the platform offers a diverse and extensive music library that caters to your preferences. Whether you enjoy mainstream hits or niche genres, a platform with a wide selection will provide you with ample choices.
- Download Options: Consider the available download options. Some platforms may offer different file types or formats, allowing you to choose the one that suits your needs and device compatibility.
- User Experience: Assess the platform’s user interface and overall user experience. A well-designed and intuitive platform will make it easier for you to search, preview, and download music, enhancing your overall downloading experience.
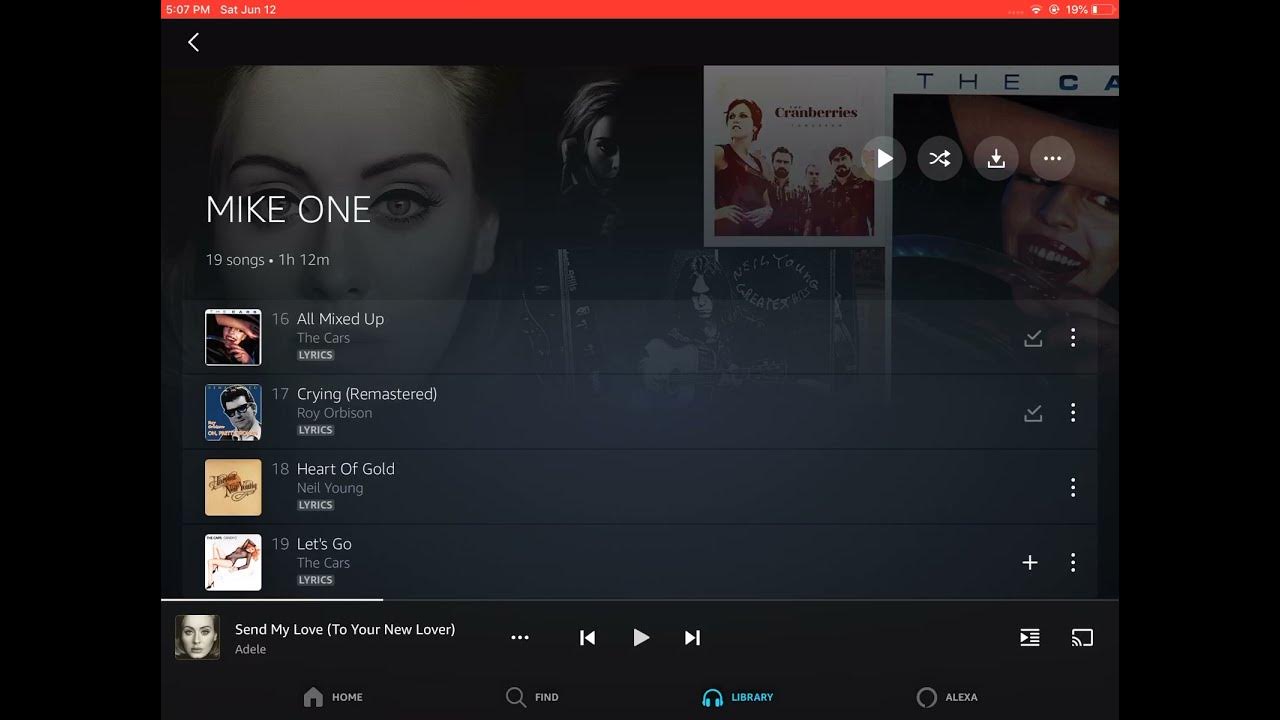
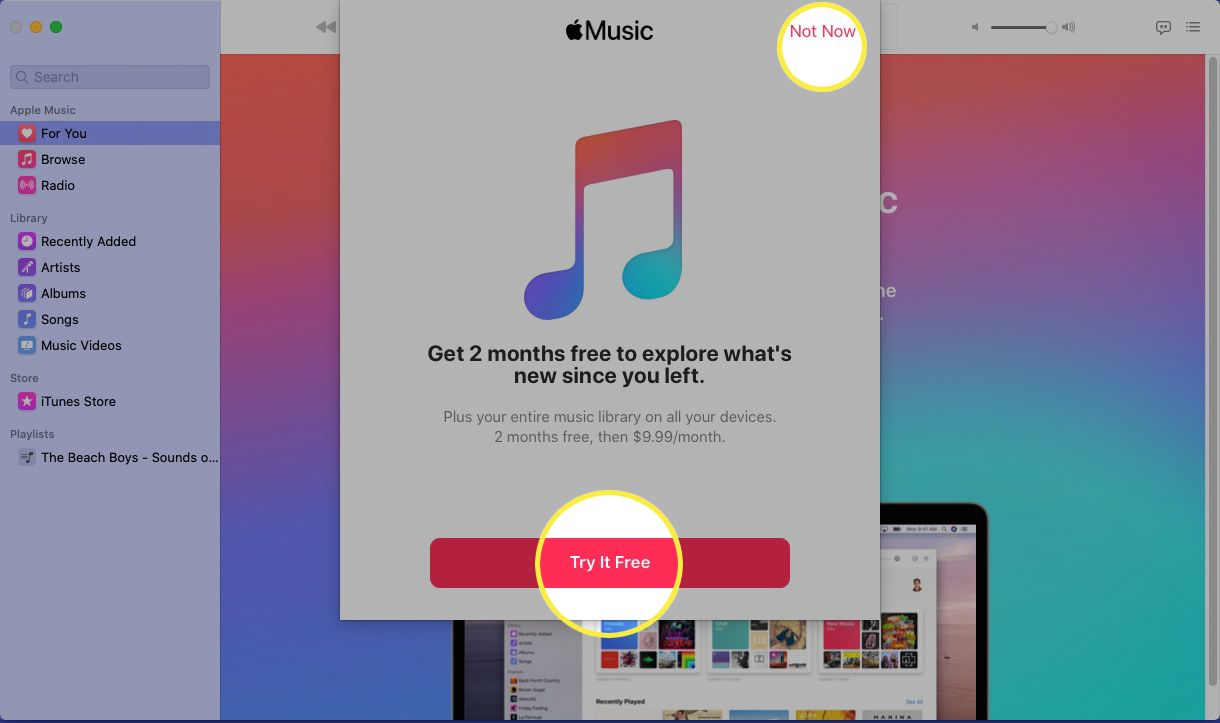
Popular legal and reliable platforms include streaming services like Spotify, Apple Music, and Amazon Music, which offer the option to download music for offline listening. Additionally, there are dedicated music download platforms such as Bandcamp, SoundCloud, and Beatport, where you can purchase and download music directly from independent artists and labels.
Once you have selected a suitable platform, you can proceed to the next steps, which include creating an account and searching for your favorite music. Remember, choosing a legal and reliable platform not only ensures you have a seamless downloading experience but also supports the artists and the music industry as a whole.
Step 2: Create an Account (if required)
After selecting a legal and reliable platform to download music from, the next step is to create an account, if required. Not all platforms will require an account, but creating one offers several benefits, such as personalized recommendations, access to exclusive content, and the ability to create playlists.
Here are the general steps to create an account:
- Visit the Platform: Open the website or app of the chosen music platform. Look for a “Sign up” or “Register” option, usually located on the homepage or in the navigation menu.
- Provide Your Information: Fill out the required fields in the registration form. Typically, this includes your name, email address, and password. Some platforms may also ask for additional details such as your date of birth or music preferences.
- Verify Your Account: In some cases, the platform may send a verification email to the address you provided during registration. Click on the verification link within the email to confirm your account.
- Create Username: Choose a unique username that will represent your profile on the platform. This is how other users will identify and connect with you.
- Set Preferences: Upon creating an account, you may have the option to customize your preferences, such as genre preferences or artists you enjoy. This information will help the platform personalize recommendations based on your tastes.
- Agree to Terms and Conditions: Read and accept the platform’s terms and conditions, which outline the rules and guidelines for using their service.
Remember to choose a strong and secure password for your account to protect your personal information and ensure the security of your downloads.
Creating an account is a simple process that only takes a few minutes. Once your account is set up, you’ll have access to various features and benefits offered by the platform. These can include personalized music recommendations, the ability to create playlists, and the options to save your favorite songs for easy access.
Now that you have created an account (if necessary), you’re ready to move on to the next step: searching for and downloading your desired music files. The process may vary slightly depending on the platform, but our guide will provide you with the general steps to follow.
Step 3: Search for Music
With your account set up, it’s time to search for the music you want to download. The search process will vary depending on the platform you’re using, but the general steps are similar.
Here’s how to search for music on most platforms:
- Navigate to the Search Bar: Locate the search bar on the platform’s website or app. It’s usually located at the top of the page or in a prominent position for easy access.
- Enter Your Search Criteria: Type the name of the artist, song title, album, or any keywords that are relevant to the music you’re looking for. The platform will then display a list of results based on your search query.
- Refine Your Search: If you’re getting too many results or want to be more specific, you can use additional filters or search options provided by the platform. This may include filtering by genre, release date, popularity, or even specific features like remixes or live performances.
- Browse the Results: Review the search results and browse through the available options. Most platforms display a preview of the music, allowing you to listen to a snippet before making a decision.
- Select Your Desired Music: Once you find the specific track or album you want to download, click on it to access more details and options. This may include additional songs from the same artist, related tracks, or remixes.
It’s important to note that some platforms may offer both streaming and downloading options. If you’re specifically looking to download the music file, make sure to click on the proper download button or link provided on the platform.
Remember that different platforms have different search functionalities and layouts. Familiarize yourself with the specific features and options available on the platform you’re using to maximize your searching experience.
Once you’ve found the music you want to download, you’re ready to proceed to the next step: selecting and downloading the music file. In the following section, we’ll provide you with the necessary steps to make the downloading process smooth and hassle-free.
Step 4: Select and Download the Music File
Now that you have found the music you want to download, it’s time to select and download the music file. The process may vary slightly depending on the platform you’re using, but the general steps remain similar.
Here’s how to select and download the music file:
- Check the Details: Before proceeding with the download, double-check the details of the music file you have selected. This includes the song title, artist, album, and any additional information. Ensure that it’s the correct version and quality you desire.
- Choose the Download Format: Some platforms offer multiple file formats or quality options for downloads. Select the format that is compatible with your devices and suits your preferences. Common options include MP3, AAC, FLAC, and WAV files.
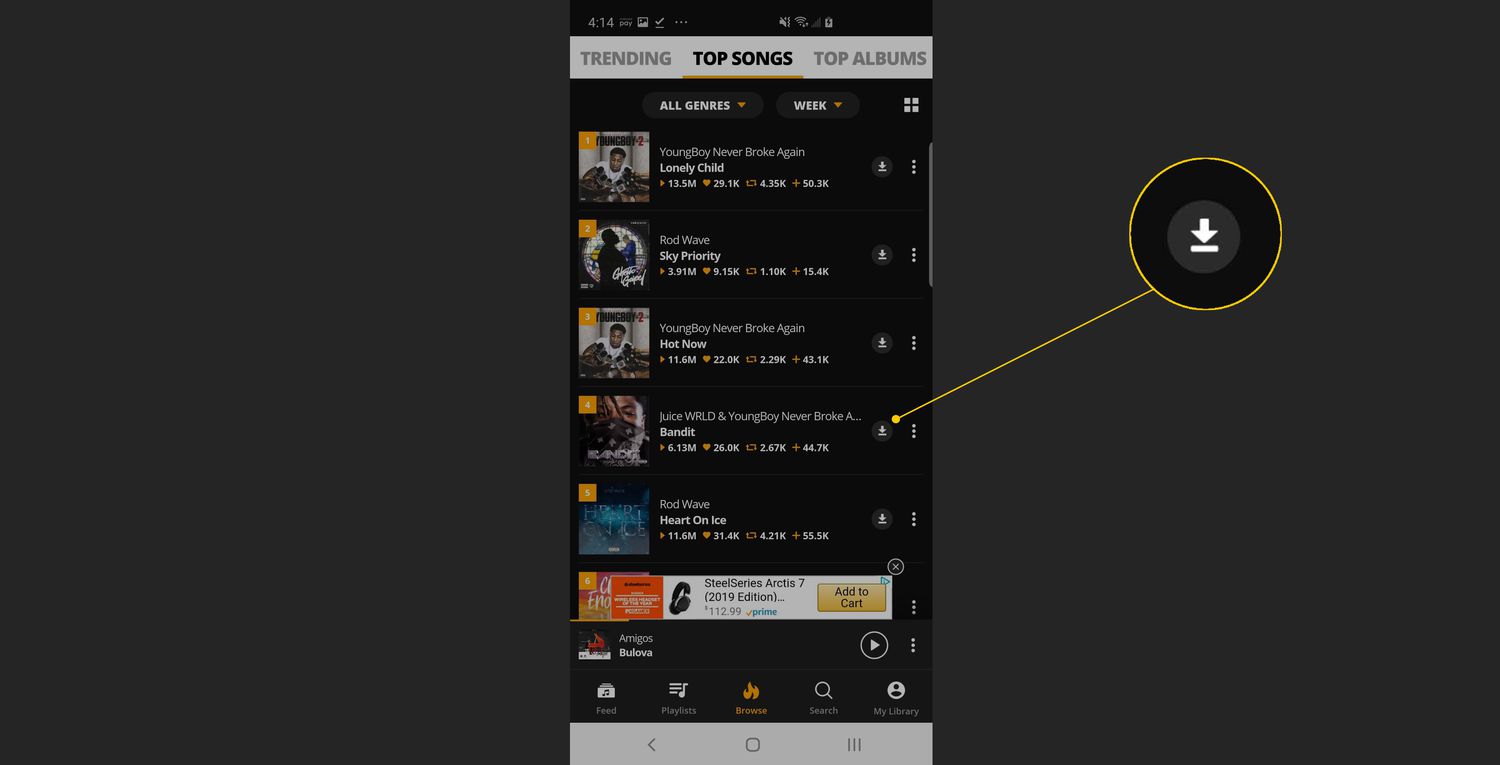
- Click on the Download Button: Look for a “Download” button or link near the music file. Click on it to initiate the download process. The platform may prompt you to confirm the download or specify a destination folder on your device.
- Wait for the Download to Complete: Depending on the size of the file and your internet connection speed, the download may take a few seconds to minutes. During this time, ensure that you have a stable internet connection and avoid interrupting the download process.
- Locate the Downloaded Music File: Once the download is complete, locate the downloaded music file in your designated download folder or the folder you specified during the download process. You can now enjoy the music file and transfer it to your preferred devices.
Remember to respect the terms and conditions set by the platform and use the downloaded music files for personal use only. Sharing or distributing copyrighted music without proper authorization is illegal and unethical.
By following these steps, you can easily select and download your desired music files. Now that you have successfully downloaded the music, let’s move on to the next step: organizing your downloaded music files for easy access and enjoyment.
Step 5: Organize Downloaded Music Files
After downloading your favorite music, it’s important to organize your files to ensure easy access and a seamless listening experience. Proper organization allows you to find specific songs, albums, or genres quickly and creates a more enjoyable music library. Here are some steps to organize your downloaded music files:
- Create Folders: Start by creating folders to categorize your music. You can create folders based on genres, artists, albums, or any other categorization that makes sense to you. This helps keep your music collection organized and makes it easier to locate specific songs.
- Organize by Metadata: Many music files come with embedded metadata, such as artist name, album title, and track number. Use a music management software or media player to automatically organize your music files based on this metadata. This saves you time and ensures consistency in your library.
- Edit Metadata: If your music files are missing or have incorrect metadata, you can manually edit the information using music management software or media players. This allows you to update album art, fix song titles, or add missing details for a polished and accurate music library.
- Add Descriptive File Names: Renaming your music files with descriptive file names can make it easier to find and identify specific songs. Include relevant information such as the artist, song title, and album name in the file name to provide a clear indication of its contents.
- Sort and Arrange: Once your music files are organized within folders, you can further sort and arrange them based on your preferences. You can sort by artist name, album title, release date, or any other criteria that suits your listening habits.
- Create Playlists: To further enhance your music organization, consider creating playlists based on your mood, genre preferences, or specific themes. Playlists allow you to curate a collection of songs that you can easily access and enjoy without searching for individual tracks.
Remember to regularly maintain and update your music organization system as you download new songs or albums. This ensures that your music library stays organized and continues to provide a seamless listening experience.
By taking the time to organize your downloaded music files, you can easily find and enjoy your favorite songs. Now that your music collection is well-organized, let’s move on to the next step: transferring your downloaded music files to your devices for on-the-go listening.
Step 6: Transfer Music Files to Devices
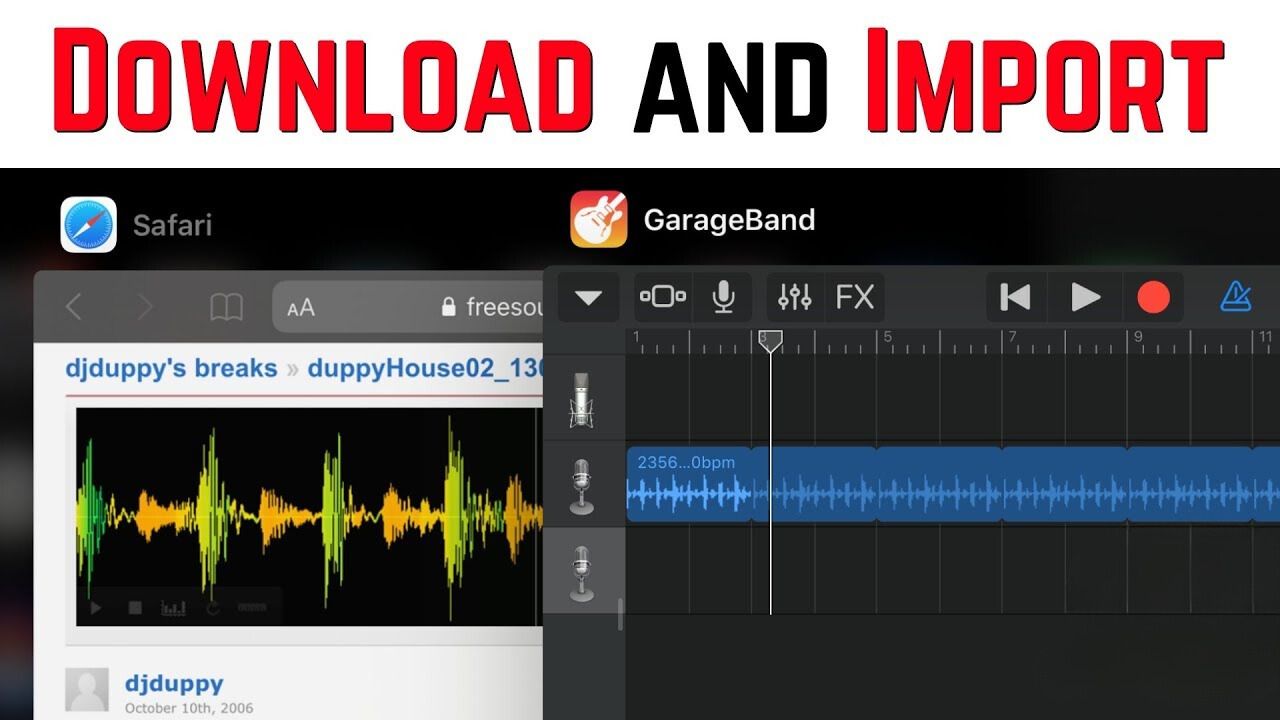
Once you have organized your downloaded music files, the next step is to transfer them to your devices for easy access and on-the-go listening. Whether you want to enjoy your music on a smartphone, tablet, or portable media player, the process of transferring music files is relatively straightforward. Here’s how to transfer your music files to devices:
- Connect Your Device: Use the appropriate cable (such as a USB cable) or connect wirelessly to your device to establish a connection between your computer and the device. Ensure that your device is recognized and visible on your computer.
- Locate the Music Folder: Open the folder containing your organized music files on your computer. This is the folder where you saved or organized your downloaded music files.
- Select and Copy: Select the desired music files you want to transfer to your device. You can select individual songs, albums, or entire folders based on your preferences. Right-click on the selection and choose the “Copy” option.
- Paste into Device: Open the folder or internal storage of your connected device on your computer and navigate to the location where you want to store your music files. Right-click in the folder and select the “Paste” option to transfer the selected music files from your computer to your device.
- Wait for the Transfer: Depending on the size of the music files and the transfer speed, the transfer process may take a few seconds to minutes. Ensure that you do not disconnect the device or interrupt the transfer process to avoid any potential data loss or corruption.
- Eject the Device: Once the transfer is complete, safely eject or disconnect your device from your computer. This ensures that all files are properly saved and avoids any potential data corruption.
Keep in mind that the exact process may vary slightly depending on the device and operating system you are using. However, the basic principle of connecting, selecting, copying, and pasting remains the same.
Now that you have successfully transferred your music files to your device, you can enjoy your favorite tunes anytime, anywhere. Simply open your preferred music player app on your device to access and listen to your downloaded music files.
In the final section, we’ll provide some troubleshooting tips and additional techniques to enhance your music downloading experience.
Step 7: Troubleshooting and Tips
While downloading and managing your music files, you may encounter some common issues or challenges. In this step, we’ll explore troubleshooting tips and provide additional recommendations to enhance your overall music downloading experience.
Here are some troubleshooting tips and tips:
- Slow Downloads: If you experience slow download speeds, try connecting to a faster and more stable internet connection. Additionally, close any unnecessary applications or downloads running in the background to allocate more bandwidth to your music downloads.
- Incomplete Downloads: If a download is interrupted or incomplete, try restarting the download process from the beginning. Ensure that you have a stable internet connection throughout the entire download process to avoid any interruptions.
- File Compatibility: Before downloading a music file, check the compatibility with your devices and media players. Some file formats may not be supported on certain devices or require specific codecs to play. Convert or download alternative formats if necessary.
- Backup your Music: It’s always a good idea to have a backup of your downloaded music files. Regularly back up your music collection to an external hard drive, cloud storage, or another device to prevent data loss in case of device failure or accidental file deletion.
- Subscribe to Music Streaming Services: Consider subscribing to music streaming services that allow offline downloads, like Spotify Premium or Apple Music. This provides a vast collection of music without the need for individual downloads and allows you to discover new music easily.
- Explore Free and Legal Platforms: If you’re on a budget or prefer not to purchase music, explore free and legal platforms like SoundCloud, Jamendo, or the Free Music Archive. These platforms offer a wide selection of music from independent artists that you can download and enjoy legally.
- Stay Updated with New Releases: Follow your favorite artists, record labels, or music blogs to stay updated on new music releases. This ensures that you’re always aware of the latest songs and albums available for download.
By following these troubleshooting tips and implementing additional recommendations, you can enhance your music downloading experience and overcome any potential challenges you may encounter.
Congratulations! You have successfully completed all the steps to download, organize, and transfer your music files. Now you can enjoy your favorite tunes on the go and build an impressive music library.
Remember to always download music from legal and authorized sources, respect copyright laws, and support the artists and the music industry. Happy listening!
Conclusion
Congratulations on completing the journey of learning how to download music to your files! By following the steps outlined in this guide, you can now enjoy your favorite tunes at your fingertips. From choosing a legal and reliable platform to creating an account, searching for music, selecting and downloading files, organizing your collection, and transferring music to your devices, you have gained the skills to curate a personalized music library.
Remember to always download music from authorized sources and respect copyright laws to support the artists and the music industry. There are a multitude of legal platforms available that provide an extensive selection of music for you to explore and enjoy.
Take advantage of the organization tips provided to keep your music library well-structured and easily accessible. Creating folders, organizing by metadata, editing file names, and utilizing playlists will enhance your listening experience and save you time in the long run.
In addition, troubleshoot any issues you may encounter along the way by following the tips we’ve provided. Slow downloads, incomplete files, and compatibility concerns can be addressed with proper internet connectivity, restarting downloads, ensuring file compatibility, and backing up your music files.
Lastly, continue to explore and discover new music experiences. Subscribe to streaming services for convenient access to an expansive music catalog, and stay up to date with new releases from your favorite artists. Embrace the ever-evolving world of music as you expand your collection and refine your musical tastes.
Music has the incredible power to evoke emotions, create connections, and enrich our lives. As you embark on your music downloading journey, may your collection be filled with songs that resonate with you on a deep level.
Now, it’s time to turn up the volume, press play, and immerse yourself in the incredible world of music!