Introduction
Welcome to the world of Google Play Music, where you can find an extensive collection of your favorite songs, albums, and playlists. Whether you’re a music enthusiast or just looking to add some uplifting tunes to your day, Google Play Music has got you covered. One of the most advantageous features of the app is the ability to download music for offline listening, ensuring you can enjoy your favorite tracks even when you’re without an internet connection.
In this guide, we will walk you through the process of downloading music in Google Play, providing you with a step-by-step tutorial to make the most of this fantastic feature. Whether you’re on a road trip, working out at the gym, or simply relaxing at home, having your favorite songs at your fingertips can enhance any listening experience.
With Google Play Music, you have the option to download both individual songs and entire albums. This flexibility allows you to curate your personalized music library, ensuring you have a diverse collection of tracks to suit your every mood and preference. Additionally, we’ll also cover how to access and manage your downloaded music, as well as enable downloading on mobile data for those moments when you’re not connected to Wi-Fi.
If you’re ready to embark on a musical journey, let’s delve into the step-by-step process of downloading music in Google Play. Get your headphones ready, and let the beats flow!
Step 1: Open Google Play Music app
The first step to downloading music in Google Play is to open the Google Play Music app on your mobile device. If you haven’t already installed the app, you can easily download it from the Google Play Store and sign in to your Google account.
Once you’ve launched the app, you’ll be greeted with the main interface, where you can explore various sections such as Home, Browse, Radio, and Library. The Home section offers curated playlists and recommendations, while the Browse section allows you to search for specific songs, artists, and albums. The Radio tab lets you discover new music based on your preferences, and the Library section enables you to access your personal music collection.
To navigate between sections, you can simply tap on the respective icons at the bottom of the screen. Take a moment to familiarize yourself with the app’s layout and features, as this will make the downloading process even more seamless.
Now that you have the Google Play Music app open, you’re ready to embark on your journey to download music. Let’s move on to the next step and find the music you want to download.
Step 2: Find the music you want to download
Once you have opened the Google Play Music app, the next step is to find the music you want to download. There are a few different ways to discover the songs and albums you’re looking for:
- Browse: Tap on the “Browse” tab at the bottom of the screen to search for specific songs, artists, or albums. You can explore popular genres, top charts, new releases, and more. Alternatively, you can use the search bar at the top of the screen to directly input your search terms. Once you find the desired music, click on it to access the album or song details.
- Recommended for You: Swipe through the “Recommended for You” section on the home screen to discover personalized suggestions based on your listening history and preferences. Google Play Music uses algorithms to recommend songs and artists that align with your taste, making it easier to find new music you’ll enjoy.
- Explore Playlists: Tap on the “Playlists” section in the home screen or browse through the various categories of playlists, such as mood-based playlists, artist-curated playlists, and genre-specific playlists. These curated collections offer a convenient way to find music that suits your current mood or desired vibe.
Remember, the power to find your favorite music lies at your fingertips. Take your time exploring different sections of the app to discover new artists, genres, and songs that resonate with you. Once you’ve located the music you wish to download, let’s move on to the next step and learn how to download individual songs or entire albums.
Step 3: Download individual songs or albums
Now that you’ve found the music you want to download, it’s time to start building your offline collection. Google Play Music allows you to download both individual songs and entire albums, giving you the flexibility to curate your personal library. Here’s how you can do it:
- Individual Songs: To download an individual song, simply navigate to the song’s details page by tapping on the desired track. Once on the details page, you’ll notice a down arrow icon next to the song title. Tap on this icon to initiate the download. The song will now be added to your offline library, and you can access it even without an internet connection.
- Entire Albums: If you want to download an entire album, go to the album’s details page by tapping on the album cover or title. On the album page, you’ll find a similar down arrow icon, usually located at the top right or bottom of the screen, depending on the app version. Tap on this icon to initiate the download of the entire album. Once downloaded, all songs from the album will be available for offline listening.
As you download more songs and albums, you can check the progress of your downloads in the “Downloads” section of the app. This section will display all the music you’ve downloaded, allowing you to manage your offline collection efficiently.
Downloading music is not only convenient for offline listening but also ensures that you can enjoy your favorite tracks without worrying about data usage or a stable internet connection. Now that you know how to download individual songs and albums, let’s move on to the next step and enable downloading on mobile data.
Step 4: Enable downloading on mobile data
By default, Google Play Music only allows downloads when you are connected to a Wi-Fi network to help minimize data usage. However, if you have a sufficient mobile data plan or need to download music on the go, you can enable downloading on mobile data. Here’s how you can do it:
- Open the Google Play Music app and go to the app’s settings. You can usually access the settings by tapping on the three-line menu icon in the top left corner of the screen, then selecting “Settings.”
- In the settings menu, look for the “Download on Wi-Fi only” option or a similar setting that restricts downloading to Wi-Fi networks.
- Toggle off the “Download on Wi-Fi only” option to enable downloading on mobile data. Keep in mind that this may lead to increased data usage, so make sure you have a sufficient mobile data plan to avoid any unforeseen charges.
Once you’ve enabled downloading on mobile data, you can freely download songs and albums even when you’re not connected to a Wi-Fi network. However, it’s important to be mindful of your data usage and consider downloading larger files only when you have a stable and fast mobile data connection.
With the option to download on mobile data enabled, you now have the flexibility to expand your offline music library wherever and whenever you please. Now, let’s move on to the next step and learn how to download music for offline listening.
Step 5: Download music for offline listening
With Google Play Music, you can easily download music for offline listening, allowing you to enjoy your favorite tracks anytime, anywhere, without the need for an internet connection. Here’s how you can download music for offline listening:
- Navigate to the song, album, or playlist that you want to download for offline listening.
- Tap on the three-dot menu icon located next to the song, album, or playlist.
- In the menu that appears, select the “Download” or “Download album” option. This will initiate the download process.
Once the download is complete, the music will be saved to your device’s storage, and you’ll be able to access it in the “Downloads” section of the Google Play Music app. These downloaded tracks will be available for offline listening, even if you’re in airplane mode or without an internet connection.
Downloading music for offline listening is especially beneficial when you’re traveling, in areas with weak or no network coverage, or simply want to conserve your mobile data. It ensures you never miss out on your favorite songs and allows you to create tailored playlists or enjoy full albums without interruptions.
Remember, the amount of music you can download depends on the available storage space on your device. It’s a good practice to periodically manage your downloaded music and delete any tracks or albums you no longer need, freeing up space for new downloads.
Now that you’ve successfully downloaded music for offline listening, let’s move on to the next step and learn how to access your downloaded music.
Step 6: Access downloaded music
Once you have downloaded music in Google Play Music, accessing your offline library is a breeze. Here’s how you can access your downloaded music:
- Open the Google Play Music app on your device.
- Navigate to the “Library” section of the app. You can usually find it by tapping on the button that looks like three horizontal lines or the music note icon in the bottom or top navigation bar.
- Within the “Library” section, you’ll find different options, such as “Songs,” “Albums,” “Artists,” and “Playlists.” Tap on the relevant option to view the corresponding section.
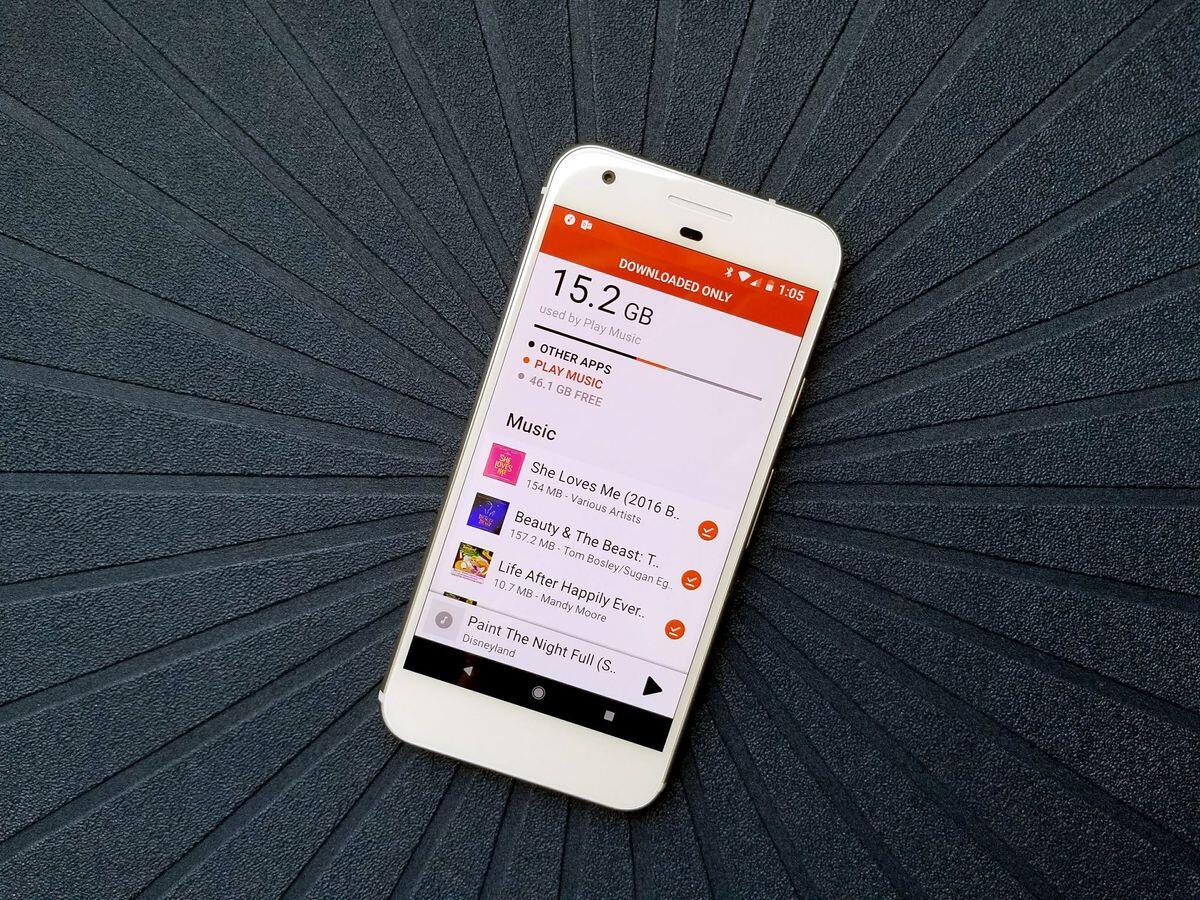
- From the chosen section, you’ll see a filter option that allows you to switch between “All Music” and “Downloaded Only.” Tap on the “Downloaded Only” filter to display only the music you have downloaded for offline listening.
- Scroll through the list to find the specific songs, albums, artists, or playlists that you have downloaded. Tap on the desired item to start playing the music.
By accessing the “Downloaded Only” filter, you can easily navigate through the music you have downloaded and enjoy your favorite tracks offline, without consuming data or requiring an internet connection.
It’s worth noting that accessing downloaded music can vary slightly depending on the version of the Google Play Music app you are using. However, the general steps mentioned above should help you locate your offline library in most versions of the app.
Now that you know how to access your downloaded music, let’s move on to the final step and learn how to delete downloaded music when you no longer need it.
Step 7: Delete downloaded music
Deleting downloaded music in Google Play Music is a straightforward process that allows you to manage your offline library and free up storage space on your device. Follow these steps to delete downloaded music:
- Launch the Google Play Music app on your device.
- Navigate to the “Library” section of the app by tapping on the appropriate icon in the bottom or top navigation bar.
- Within the “Library” section, select the option that corresponds to the type of music you want to delete, such as “Songs,” “Albums,” “Artists,” or “Playlists.”
- Scroll through the list and find the item you want to remove. Tap and hold on the desired song, album, artist, or playlist to select it.
- Once selected, you will see checkboxes appear next to all the downloaded items. Tap on the checkbox next to the music you want to delete.
- After selecting the desired content, locate the trash bin icon or a similar delete option, usually located at the top or bottom of the screen. Tap on it to delete the selected music.
- If you want to delete all of your downloaded music, look for a “Delete All” or “Clear Downloads” option within the “Settings” of the app. This will remove all your downloaded music at once.
By deleting downloaded music that you no longer need, you can effectively manage your offline library and create space for new downloads. It’s a good practice to regularly review your downloaded music and remove any songs, albums, artists, or playlists that are no longer of interest or you’ve already listened to.
Keep in mind that deleting downloaded music will not affect your online library or any songs that you have added to your personal collection in the cloud. It only removes the local copies of the tracks that you have downloaded for offline listening.
Now that you know how to delete downloaded music, you have complete control over your offline library. Congratulations on mastering the process of downloading and managing music in Google Play Music!
Conclusion
Congratulations! You have successfully learned how to download and manage music in Google Play Music. With the ability to download individual songs and entire albums, you have the power to create a personalized offline music collection that can be enjoyed anytime, anywhere.
We started by opening the Google Play Music app and exploring its various sections to find the music we wanted to download. Then, we learned how to download individual songs and albums with just a few taps. Enabling downloading on mobile data allowed us to expand our offline library beyond Wi-Fi networks.
With our music successfully downloaded, we discovered how to access our offline library in the Google Play Music app. Filtering the view to display only downloaded music made it easy to find and enjoy our favorite tracks without an internet connection.
Finally, we learned how to manage our offline library by deleting downloaded music when it was no longer needed. This helped us free up storage space on our devices and make room for new downloads.
Whether you’re on a road trip, in a remote area, or just want to conserve your mobile data, having your favorite music available offline enhances your listening experience. Google Play Music provides an excellent platform to discover and enjoy a vast collection of songs and playlists.
So go ahead, let the music play, and enjoy the seamless experience of accessing your downloaded songs and albums in Google Play Music. With your newfound knowledge and the power of offline listening, you can always have the perfect soundtrack to accompany you on your musical journey.