Introduction
Welcome to the world of Minecraft! Whether you’re a seasoned player or just starting your adventure, you know that Minecraft offers seemingly endless possibilities for creativity and exploration. One of the many ways to enhance your gameplay experience is by downloading custom maps, which allow you to discover new and exciting worlds created by the Minecraft community. In this guide, we will show you how to download and install Minecraft maps specifically for Xbox.
Downloading maps for Xbox can be a bit different from other platforms, but fear not! We will walk you through the steps, ensuring that you can easily access and enjoy the vast collection of custom maps available.
Before we dive into the process, it’s important to note that downloading custom maps requires a few prerequisites. First and foremost, make sure that your game is up to date. Minecraft regularly releases updates that introduce new features, bug fixes, and compatibility improvements. By ensuring you have the latest version of the game, you’ll be able to enjoy the best possible experience when exploring custom maps.
Secondly, you’ll need an Xbox Live account. Having an account will give you access to various features, including the ability to download maps directly from the marketplace. Don’t worry if you don’t have an account yet – creating one is quick and easy, and it opens up a whole new world of possibilities for your Minecraft adventures.
Now that we have the basics covered, let’s dive into the step-by-step process of downloading and installing Minecraft maps on Xbox. Whether you prefer to transfer maps via USB, use Minecraft Realms, or access them through the Xbox Live Marketplace, we’ve got you covered. So, let’s get started on this exciting journey of exploration and creativity!
The Basics of Minecraft Maps for Xbox
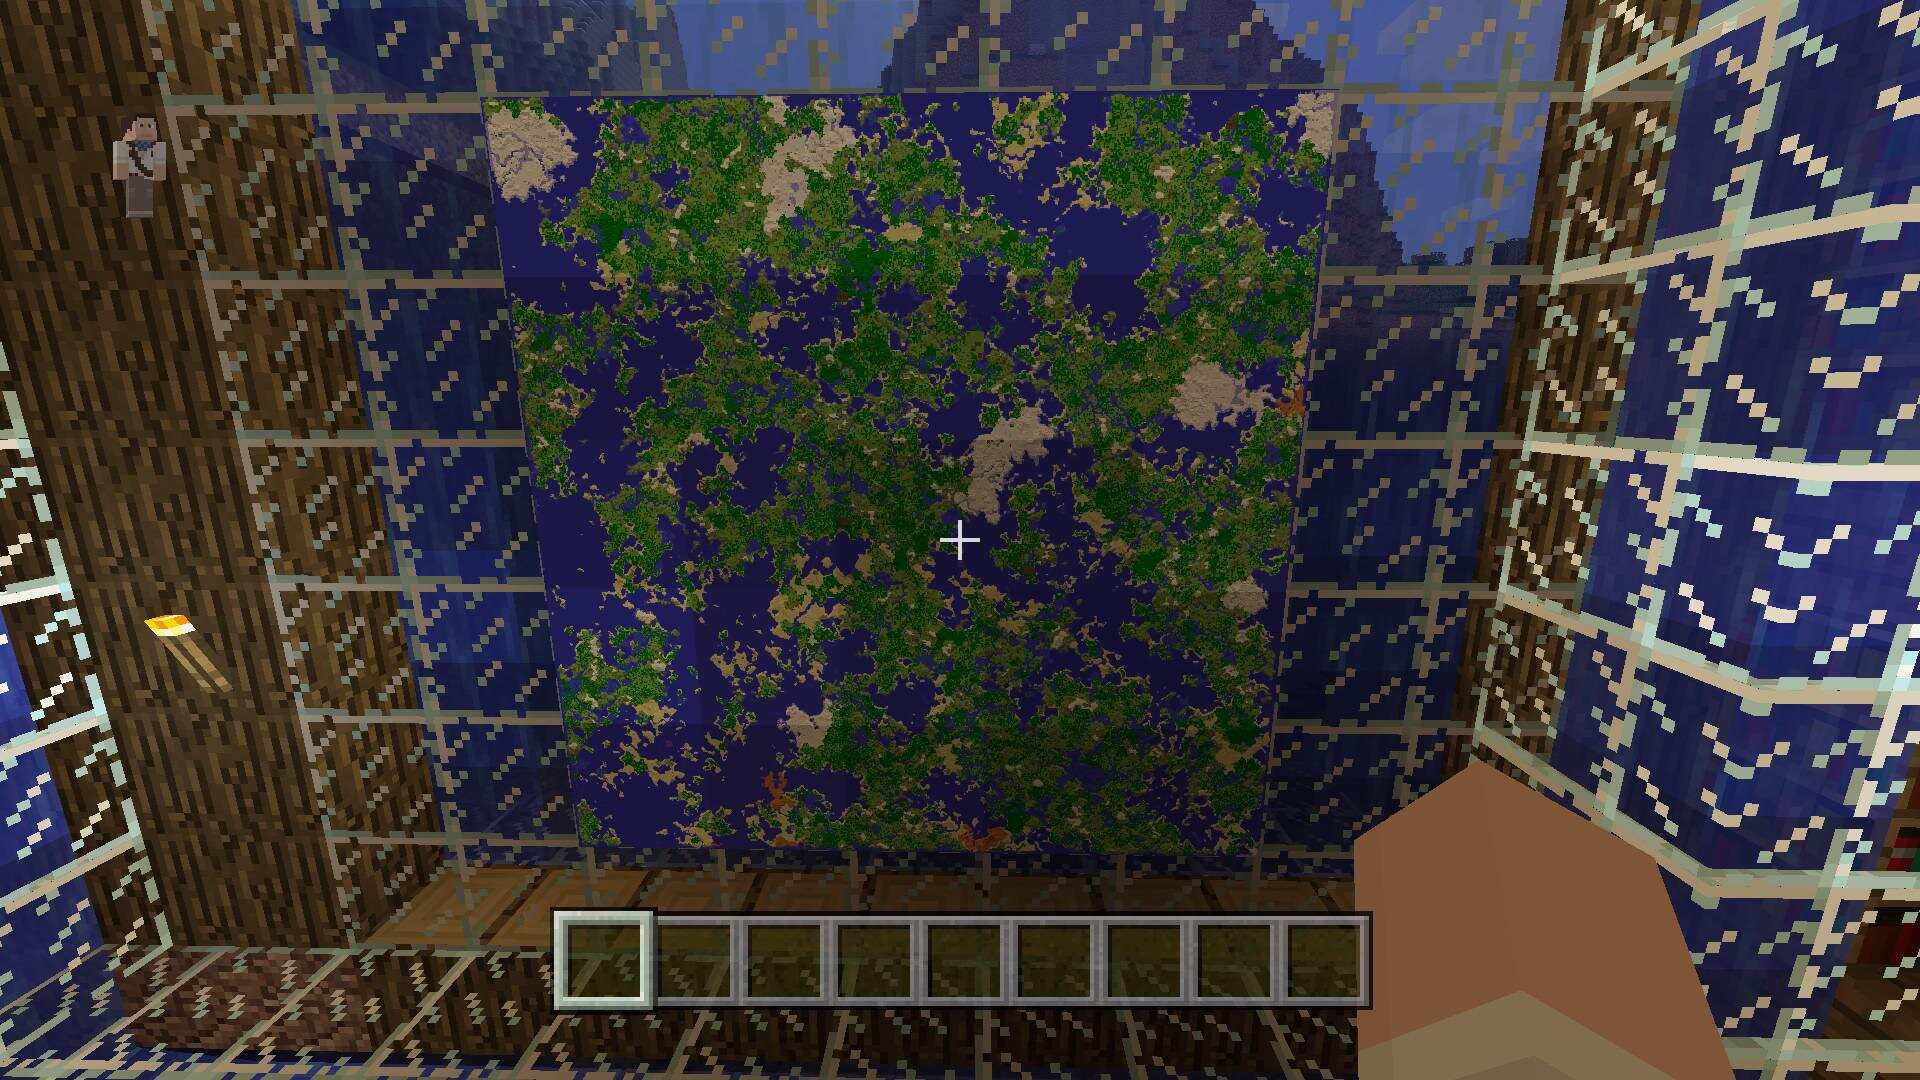
Before we jump into the process of downloading and installing Minecraft maps for Xbox, let’s familiarize ourselves with the basics. Minecraft maps are custom worlds created by the Minecraft community. These maps feature unique landscapes, structures, and challenges, offering a fresh and exciting experience for players.
Each map has its own theme and objectives, ranging from survival challenges to puzzle-solving adventures or even recreations of famous landmarks. With a wide variety of maps available, you’re sure to find something that suits your style and interests.
Custom maps are created using Minecraft’s built-in map editor, where players can unleash their creativity and design intricate worlds. This means that every map is a product of hours of hard work, imagination, and attention to detail from talented individuals within the Minecraft community.
Maps designed specifically for Xbox must be in a compatible format to work with the console. The maps you download will be in the “.mcworld” file format, which is a compressed file containing all the necessary world data and resources. It’s important to note that not all maps are compatible with Xbox, so make sure to look for maps explicitly labeled as “Xbox Edition” or “Bedrock Edition.”
Now that you understand what Minecraft maps are and the file format they come in, let’s move on to the process of finding and downloading these amazing creations for your Xbox. Whether you’re looking to embark on epic quests, explore hidden dungeons, or build in a breathtaking virtual world, custom maps will add a whole new dimension to your Minecraft gameplay.
Step 1: Update your game
Before you start downloading and installing Minecraft maps for Xbox, it’s crucial to ensure that your game is up to date. Regular updates are released by the Minecraft team to enhance gameplay, fix bugs, and introduce new features. By updating your game, you’ll have the best experience and compatibility when downloading and playing custom maps.
To update your game on Xbox, follow these simple steps:
- Turn on your Xbox console and navigate to the “My Games & Apps” section.
- Locate the Minecraft game tile and press the “Menu” button on your controller (the button with three horizontal lines).
- A menu will appear on the right side of the screen. Select “Manage game & add-ons.”
- In the “Updates” tab, you’ll see a list of available updates for your game. If an update for Minecraft is available, it will appear in this section.
- Select the update and choose “Update All” to download and install the latest version of the game.
Depending on the size of the update and the speed of your internet connection, the update process may take some time. It’s important to ensure that your console remains connected to the internet and powered on until the update is completed.
Once the update is finished, you’re ready to move on to the next step and start exploring the vast universe of custom Minecraft maps available for Xbox.
Keep in mind that regularly updating your game is essential to stay up to date with the latest features and improvements. Minecraft’s developers frequently release updates to keep the game fresh and exciting, so checking for updates on a regular basis is recommended.
Step 2: Finding and Downloading Maps
Once you have updated your Minecraft game, it’s time to find and download the custom maps you want to explore on your Xbox. There are a few different methods you can use to find and download maps, so let’s explore each one.
Method 1: Downloading Maps from Websites
One of the most popular ways to find and download Minecraft maps for Xbox is by visiting websites that specialize in hosting and sharing custom maps created by the Minecraft community. These websites offer a wide variety of maps in different categories, making it easy to find something that suits your interests.
To download maps from websites, follow these steps:
- Use your preferred web browser and search for websites that offer Minecraft maps for Xbox.
- Once you find a reliable website, browse through the available maps and choose the one you want to download.
- Click on the download button or link associated with the map.
- The map will be downloaded to your computer or device as a “.mcworld” file.
Method 2: Using Minecraft Realms
If you have access to Minecraft Realms, you can also search and download maps directly within the game. Minecraft Realms is a subscription-based service that allows you to create and join multiplayer worlds hosted on dedicated servers.
Here’s how to download maps using Minecraft Realms:
- Launch Minecraft on your Xbox console.
- Go to the “Play” tab and select “Minecraft Realms” from the menu.
- Click on “Create New” or “Join Realm” to access the Minecraft Realms menu.
- In the Minecraft Realms menu, you can browse different categories of maps and select the one you want to download.
- Once you find a map you’re interested in, choose “Download” to add it to your Minecraft game.
Method 3: Using Xbox Live Marketplace
If you prefer a more streamlined and integrated experience, you can also find and download maps directly from the Xbox Live Marketplace. The marketplace offers a curated selection of maps, making it easy to discover and download new creations.
Follow these steps to download maps from the Xbox Live Marketplace:
- On your Xbox console, go to the Xbox dashboard.
- Select “Store” from the available options.
- In the store, navigate to the “Games” or “Apps” category and search for “Minecraft.”
- Choose the “Minecraft” game and navigate to the “Add-ons” section.
- Browse the available add-ons, including maps, and select the one you want to download.
- Follow the on-screen prompts to confirm the download and add the map to your game.
By using these methods, you’ll be able to find and download a wide range of Minecraft maps to expand your Xbox gaming experience. Once you have downloaded the maps, you’re ready to move on to the next step: transferring the maps to your Xbox console.
Step 3: Transfer the Map to your Xbox
Now that you have downloaded your desired Minecraft map, it’s time to transfer it to your Xbox console. There are a few different methods you can use to accomplish this, so let’s explore each one.
Method 1: Using a USB Drive
If you prefer to transfer the map to your Xbox using a USB drive, follow these steps:
- Connect a USB drive to your computer with the downloaded map file on it.
- Create a new folder on the USB drive and name it “Minecraft” (without the quotes).
- Open the folder and create another folder inside it named “Saves” (without the quotes).
- Copy the downloaded map file (in .mcworld format) into the “Saves” folder on the USB drive.
- Eject the USB drive from your computer safely.
- Insert the USB drive into one of the available USB ports on your Xbox console.
- Launch Minecraft on your Xbox and select “Play” from the main menu.
- Navigate to the “Create New” or “Load” option, and your saved map should appear in the list.
- Select the map and press “Play” to start exploring!
Method 2: Using Minecraft Realms
If you downloaded the map using Minecraft Realms, you can easily access it within the game. Here’s how:
- Launch Minecraft on your Xbox console.
- Go to the “Play” tab and select “Minecraft Realms” from the menu.
- Click on “Join Realm” to access your realms.
- Your downloaded map should appear in the list of realms you can join.
- Select the map and click “Join” to start playing!
Method 3: Using Xbox Live Marketplace
If you downloaded the map from the Xbox Live Marketplace, it will automatically be added to your game. Here’s how to access it:
- Launch Minecraft on your Xbox console.
- Go to the “Play” tab and select “My worlds” from the menu.
- Your downloaded map should appear in the list of available worlds.
- Select the map and press “Play” to begin your adventure!
By using these methods, you’ll be able to transfer the downloaded map to your Xbox console and start playing it. Whether you choose to use a USB drive, Minecraft Realms, or the Xbox Live Marketplace, the process should be straightforward and seamless. Now that the map is installed, it’s time to dive into the world of custom Minecraft creations and explore all the wonders they have to offer.
Method 1: Using a USB Drive
Using a USB drive to transfer Minecraft maps to your Xbox console is a convenient method that allows you to easily transport the map files from your computer to your console. Follow these steps to transfer the map using a USB drive:
- Connect a USB drive to your computer. Make sure it has enough free space to store the map file.
- Create a new folder on the USB drive and name it “Minecraft” (without the quotes).
- Open the “Minecraft” folder and create another folder inside it named “Saves” (without the quotes). This is where the map files will be stored.
- Locate the downloaded Minecraft map file on your computer. It should be in the “.mcworld” file format.
- Copy the downloaded map file and paste it into the “Saves” folder on the USB drive.
- Safely eject the USB drive from your computer.
- Insert the USB drive into one of the available USB ports on your Xbox console.
- Turn on your Xbox console and launch Minecraft.
- In the main menu, select “Play” and then choose either “Create New” or “Load” to access your saved maps.
- You should see the transferred map listed among your saved maps. Select it and press “Play” to start exploring!
Transferring the map using a USB drive provides a direct and straightforward method to bring custom Minecraft maps to your Xbox console. It eliminates the need for an internet connection during the transfer process, making it suitable for cases where you may not have an internet connection readily available.
Make sure to keep your USB drive safely stored after transferring the map. This allows you to reuse it for future map transfers or other storage needs. Remember to regularly check for new Minecraft map releases and have fun exploring the vast library of custom maps available for Xbox!
Method 2: Using Minecraft Realms
If you have access to Minecraft Realms, you can easily download and play custom Minecraft maps directly within the game. Minecraft Realms is a subscription-based service that allows you to create and join multiplayer worlds hosted on dedicated servers. Follow these steps to download maps using Minecraft Realms:
- Launch Minecraft on your Xbox console.
- Go to the “Play” tab and select “Minecraft Realms” from the menu.
- If you already have a Realm, click on “Join Realm” to access your realms. Otherwise, click on “Create New” to create a new realm.
- In the Minecraft Realms menu, you’ll find different categories of maps available for download.
- Browse through the available maps or use the search option to find a specific map that interests you.
- Once you find a map you want to download, select it and click on the “Download” button.
- The map will begin downloading and will be added to your Minecraft Realms account.
- After the download is complete, you can select the downloaded map from your realms list and click “Join” to start playing!
Using Minecraft Realms provides an integrated experience, allowing you to effortlessly browse, download, and play custom maps within the Minecraft game. It offers a convenient way to explore a wide variety of maps shared by the Minecraft community.
Remember that Minecraft Realms requires an active subscription to access its features. If you don’t have a Minecraft Realms subscription, you may need to consider other methods, such as using a USB drive or the Xbox Live Marketplace, to download and install custom maps for your Xbox.
Enjoy the vast selection of custom maps available through Minecraft Realms and embark on thrilling adventures with friends or solo in the unique worlds created by the Minecraft community. Let your creativity run wild as you explore new challenges and landscapes in these exciting maps!
Method 3: Using Xbox Live Marketplace
Downloading and installing custom Minecraft maps on your Xbox is made even simpler with the Xbox Live Marketplace. The Marketplace provides a curated selection of maps that you can easily browse, download, and play directly within the Minecraft game. Here’s how to use the Xbox Live Marketplace to access custom maps for your Xbox:
- Turn on your Xbox console and navigate to the Xbox dashboard.
- Select “Store” from the available options.
- In the Store, search for “Minecraft” and choose the Minecraft game from the results.
- Navigate to the “Add-ons” section, where you’ll find various downloadable content for Minecraft, including maps.
- Browse through the available maps, either by category or by searching for a specific map.
- Select the map you want to download and click on it to access its details and pricing information.
- If the map is free, select the “Get” or “Download” button to initiate the download. If it’s a paid map, follow the prompts to complete the purchase and download process.
- Once the download is complete, launch Minecraft on your Xbox console.
- Go to the “Play” tab and select “My worlds” to view your downloaded maps.
- Choose the downloaded map from the list and click “Play” to start your adventure!
Using the Xbox Live Marketplace to download and install custom maps offers a streamlined and user-friendly experience. You can easily find and access a wide range of maps, both free and paid, that have been specifically curated for Xbox users.
Keep in mind that some maps may require additional resource packs or compatible Minecraft versions. Make sure to review the details and requirements of each map before downloading to ensure a smooth gameplay experience.
Enjoy the simplicity and convenience of the Xbox Live Marketplace as you browse, download, and dive into the captivating worlds created by Minecraft community members. Expand your Minecraft experience with these fantastic custom maps!
Step 4: Installing the Map
Now that you have successfully transferred the downloaded map to your Xbox console, it’s time to install it and get ready to embark on your new Minecraft adventure. The process of installing the map may vary depending on the method you used to transfer it. Let’s explore the installation process for each method:
Method 1: Using a USB Drive
If you transferred the map using a USB drive, follow these steps to install it:
- Launch Minecraft on your Xbox console.
- Go to the “Play” tab and select “Create New” or “Load” to access your saved maps.
- In the list of saved maps, you should see the transferred map. Select it to highlight it.
- Press the “A” button on your controller to reveal additional options for the map.
- Select the “Install” option to begin the installation process.
- Wait for the map to install. Once the installation is complete, you will be taken back to the world selection screen.
- Select the installed map and press “Play” to start playing on your newly installed map!
Method 2: Using Minecraft Realms
If you downloaded the map using Minecraft Realms, the installation process is automatically handled for you. Simply follow these steps:
- Launch Minecraft on your Xbox console.
- Go to the “Play” tab and select “Minecraft Realms” from the menu.
- In the Minecraft Realms menu, you’ll find your downloaded map listed among your realms.
- Select the downloaded map to display additional options.
- Click “Play” to start playing the map instantly. The installation process is completed automatically by Minecraft Realms.
Method 3: Using Xbox Live Marketplace
If you downloaded the map from the Xbox Live Marketplace, the installation process is straightforward:
- Launch Minecraft on your Xbox console.
- Go to the “Play” tab and select “My worlds” to access your downloaded maps.
- In the list of downloaded maps, select the map you want to install.
- Choose the “Play” option to start the installation process.
- Wait for the map to install. Once the installation is complete, you will be taken to the starting point of the map.
Method 1: Using a USB Drive
If you have downloaded a custom Minecraft map onto a USB drive, you can easily install it on your Xbox console using the following steps:
- Insert the USB drive containing the downloaded map into one of the available USB ports on your Xbox console.
- Turn on your Xbox console and launch Minecraft.
- In the main menu, select “Play” and then choose either “Create New” or “Load”.
- Scroll through your saved maps or navigate to the “World Templates” section.
- Highlight the map slot where you want to install the new map.
- Press the “Y” button on your controller to open the “Select World” menu.
- Choose the option to “Move” the map.
- Select the USB drive from the list of storage devices.
- Highlight the downloaded map file and press the “A” button to initiate the transfer.
- Wait for the transfer to complete. The map will be installed onto your Xbox console.
- Once the installation is finished, you can launch the map and start exploring its unique world.
Using a USB drive to install Minecraft maps offers a simple and convenient method to bring custom creations to your Xbox console. It allows you to easily transfer maps from your computer and play them directly on your console.
Remember to keep your USB drive safely stored after the installation. You can reuse it for future map transfers or other storage needs. Additionally, make sure to regularly check for new Minecraft maps and let your creativity soar as you venture into new and exciting virtual worlds.
Method 2: Using Minecraft Realms
If you have access to Minecraft Realms, installing custom Minecraft maps onto your Xbox console becomes even more convenient. Minecraft Realms allows you to easily browse and install maps directly within the game. Follow these steps to install a map using Minecraft Realms:
- Launch Minecraft on your Xbox console.
- From the main menu, navigate to the “Play” tab and select “Minecraft Realms”.
- In the Minecraft Realms menu, you will find a wide selection of maps available to explore.
- Browse through the maps using the categories or search for specific maps by name.
- Select the map you want to install and press the “A” button on your controller to access more details.
- Click the “Install” button to start the installation process.
- Wait for the installation to complete. The map will be automatically installed onto your Xbox console.
- Once the installation is finished, you can start playing the newly installed map directly from the Minecraft Realms menu.
Using Minecraft Realms simplifies the process of installing custom maps by integrating it directly within the Minecraft game. The available maps are carefully curated to ensure a high-quality and enjoyable experience for players.
Remember that Minecraft Realms requires an active subscription to access its features. If you don’t have a Minecraft Realms subscription, you may need to consider other methods, such as using a USB drive or downloading maps from the Xbox Live Marketplace, to install custom maps for your Xbox console.
Enjoy the ease of using Minecraft Realms to install new maps and embark on exciting adventures in the vast collection of custom Minecraft worlds available!
Method 3: Using Xbox Live Marketplace
The Xbox Live Marketplace provides a convenient and seamless way to install custom Minecraft maps directly onto your Xbox console. With a curated selection of maps available, you can easily browse, download, and install maps within the Minecraft game. Follow these steps to install a map using the Xbox Live Marketplace:
- Turn on your Xbox console and navigate to the Xbox dashboard.
- Select the “Store” option from the available menu.
- In the Store, search for “Minecraft” and choose the Minecraft game from the search results.
- Within the Minecraft game page, navigate to the “Add-ons” section.
- Browse through the available maps or use the search function to find a specific map.
- Select the map you want to install to view its details and pricing information.
- If the map is free, click on the “Get” or “Download” button. If it is a paid map, follow the prompts to complete the purchase and initiate the download.
- Once the download is complete, launch Minecraft on your Xbox console.
- Go to the “Play” tab and select “My worlds” to access your downloaded maps.
- Choose the downloaded map from the list and select the “Play” option to start playing!
Using the Xbox Live Marketplace provides a seamless and integrated experience for downloading and installing custom Minecraft maps onto your Xbox console. The marketplace offers a curated selection of maps, making it easy to find and explore new adventures crafted by the Minecraft community.
Ensure you have an active internet connection during the download process to ensure a smooth and uninterrupted installation. Additionally, regularly check the Xbox Live Marketplace for new map releases to keep your gameplay experience fresh and exciting.
Immerse yourself in the incredible world of custom Minecraft maps available through the Xbox Live Marketplace and unleash your creativity in these unique and captivating virtual worlds!
Step 5: Enjoying the Map
After successfully installing the downloaded Minecraft map on your Xbox console, it’s time to immerse yourself in the adventure and start enjoying the map’s unique features, challenges, and environments. Here are a few tips to enhance your experience and make the most out of your custom map:
Explore and Discover
Take your time to explore the intricacies of the map. Custom maps often feature hidden secrets, intricate landscapes, and exciting places to discover. Whether it’s a hidden treasure chest, a secret passage, or a breathtaking vista, keep an eye out for hidden surprises as you navigate through the virtual world.
Work Towards Objectives
Many custom maps come with specific objectives or challenges for you to complete. Read the map’s description or any accompanying documents to understand the objectives and work towards their completion. These objectives may involve puzzles to solve, tasks to complete, or specific goals to achieve. Engaging with the map’s objectives will provide a sense of progression and accomplishment as you journey through the map.
Interact and Customize
Custom maps often provide interactive elements and opportunities for customization. Experiment with the different mechanics and features available within the map. This could include building structures, customizing your character, or interacting with in-game characters and NPCs. Make the map your own and leave your mark on its virtual world.
Engage with the Community
Custom maps have vibrant communities of creators and players who share their experiences, tips, and feedback. Join online forums or Minecraft communities to connect with fellow players and map creators. Share your experiences, ask questions, and contribute to the community. Participating in the community will deepen your understanding and appreciation of custom Minecraft maps.
Create and Share Your Own Maps
Feeling inspired by the custom maps you’ve played? Consider trying your hand at map creation. Minecraft offers powerful tools to build and design your own custom maps. Let your creativity flow and craft your own unique adventures to share with the community. Embrace the spirit of creativity and contribute to the ever-growing world of custom Minecraft maps.
Remember, the beauty of custom maps is that they offer a fresh and unique gameplay experience. Each map has its own story to tell and challenges to overcome. Embrace the journey, immerse yourself in the map’s world, and enjoy the moments of discovery, wonder, and accomplishment that lie ahead as you explore the depths of custom Minecraft maps on your Xbox.
Conclusion
Congratulations on successfully learning how to download and install Minecraft maps for your Xbox console! By following the step-by-step process and utilizing the various methods available, you can now access a whole new world of adventure and creativity within the Minecraft universe.
Custom maps offer a unique and exciting way to experience Minecraft, allowing you to explore new landscapes, overcome challenges, and engage with the vibrant community of players and creators. Whether you choose to download maps from websites, use Minecraft Realms, or access the Xbox Live Marketplace, the options are endless.
Remember to keep your game updated to ensure compatibility and access to the latest features and improvements. Also, familiarize yourself with the specific installation process for each method, whether it’s using a USB drive, Minecraft Realms, or the Xbox Live Marketplace.
Once you’ve installed a map, take the time to fully immerse yourself in the unique world created by talented map creators. Explore, discover hidden treasures, complete objectives, customize your experience, and engage with the community. The possibilities are endless when it comes to custom maps for Minecraft on Xbox.
Lastly, don’t forget that you can also unleash your own creativity by creating and sharing your own maps. Deepen your connection to the Minecraft community by participating in forums and discussions, sharing your experiences, and contributing to the ever-growing library of custom Minecraft maps.
So, put on your adventuring gear, grab your controller, and get ready to embark on incredible journeys within the vast array of custom Minecraft maps available for your Xbox console. Whether you’re seeking thrilling quests, awe-inspiring landscapes, or mind-bending puzzles, there’s a map out there waiting for you to discover. Enjoy the adventure and happy gaming!


