Introduction
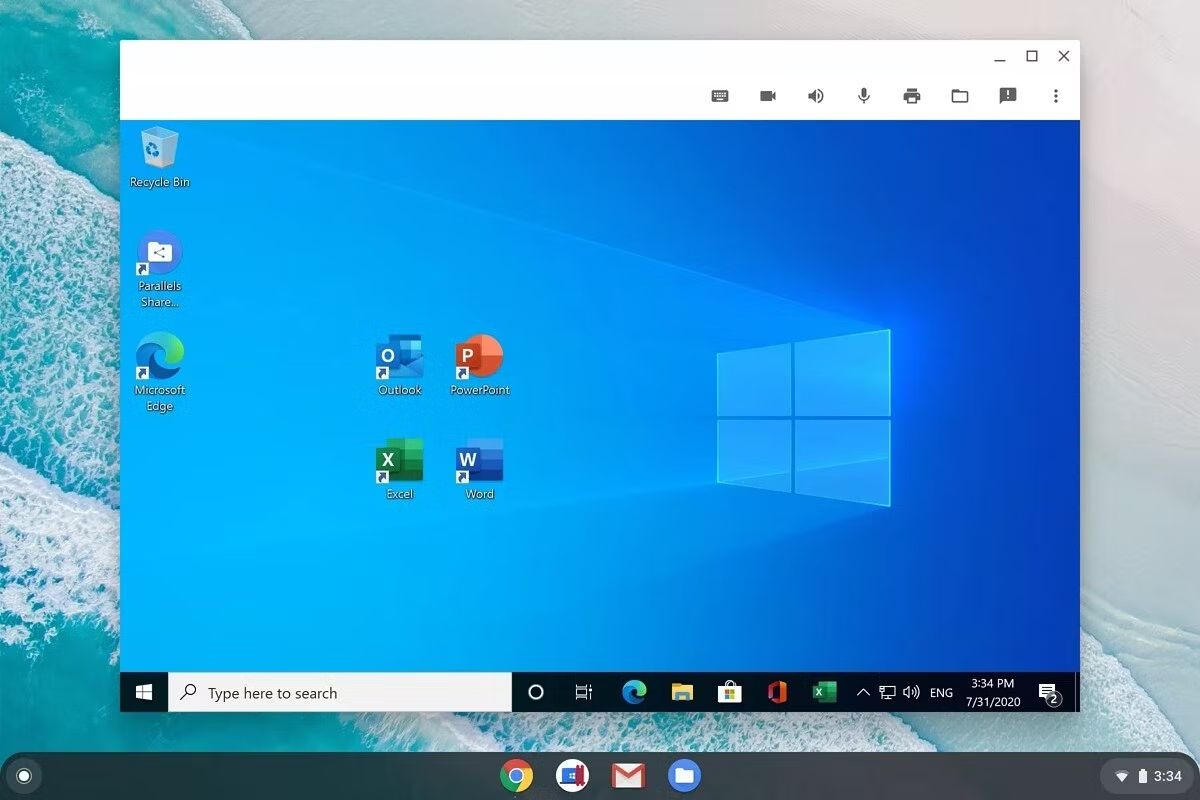
Chromebooks have gained popularity for their affordability and simplicity. However, one drawback for some users is the limited range of applications available on Chrome OS. Microsoft Word, a widely used word processing software, is not natively supported on Chromebooks. But fear not! There is a way to download and use Microsoft Word on your Chromebook.
In this guide, we will walk you through the steps to download Microsoft Word on your Chromebook, allowing you to enjoy all the features and functionality of this powerful word processor. Whether you’re a student needing to write essays or a professional looking to create polished documents, having Microsoft Word on your Chromebook can greatly enhance your productivity.
Note that to download and use Microsoft Word on your Chromebook, you will need to have access to the Google Play Store. This feature is available on most modern Chromebook models, but if your device does not have it, you may not be able to install and use Microsoft Word. Before proceeding, ensure that your Chromebook meets the system requirements and has the necessary software updates.
So, let’s get started and bring the functionality of Microsoft Word to your Chromebook!
Step 1: Check System Requirements
Before you begin the process of downloading Microsoft Word on your Chromebook, it is essential to check if your device meets the necessary system requirements. This will ensure smooth installation and optimal performance of the application.
Here are the system requirements you should consider:
- Operating System: Ensure that your Chromebook is running an updated version of Chrome OS. Microsoft Word requires at least Chrome OS version 53 or later to be compatible.
- Storage Space: Check the available storage space on your Chromebook. Microsoft Word is a relatively large application, and you will need enough free space for the download and installation. It is recommended to have at least 1GB of free storage.
- Memory (RAM): Make sure your Chromebook has sufficient memory. While Microsoft Word can run on Chromebooks with 2GB of RAM, a device with 4GB or more RAM will provide a better user experience.
- Internet Connection: Ensure that your Chromebook has a stable internet connection. While you can use Microsoft Word offline after installation, you will need an internet connection to download and install the application from the Google Play Store.
To check your Chrome OS version, go to the “Settings” menu, then click on “About Chrome OS.” Here, you will find the information about your operating system version.
By verifying these system requirements, you can ensure a smooth installation process and avoid any compatibility issues when downloading Microsoft Word on your Chromebook.
Step 2: Install Google Play Store
In order to download and install Microsoft Word on your Chromebook, you’ll first need to ensure that the Google Play Store is installed and enabled on your device. The Google Play Store is the official app store for Android applications, including Microsoft Word.
Follow the steps below to install the Google Play Store on your Chromebook:
- Open Settings: Click on the system tray located in the bottom-right corner of the screen and click on the gear icon to access the settings menu.
- Go to “Google Play Store”: In the settings menu, scroll down and click on “Google Play Store” in the “Google Play Store” section.
- Enable Google Play Store: Check the box next to “Enable Google Play Store on your Chromebook.”
- Agree to terms: A confirmation window will appear with the terms of service. Click on “Agree” to proceed.
- Sign in to your Google Account: If you haven’t already signed in to your Google Account, you will be prompted to do so. Enter your login credentials and follow the on-screen instructions.
- Wait for installation: Your Chromebook will now download and install the Google Play Store. This process may take a few minutes, so be patient.
- Restart your Chromebook: Once the installation is complete, you will be prompted to restart your Chromebook. Click on “Restart” to apply the changes.
After your Chromebook restarts, the Google Play Store will be available on your device. Now, you’re one step closer to downloading and installing Microsoft Word on your Chromebook. Let’s move on to the next step!
Step 3: Download and Install Microsoft Word
With the Google Play Store now enabled on your Chromebook, you can easily download and install Microsoft Word. Follow these steps to get Microsoft Word up and running on your device:
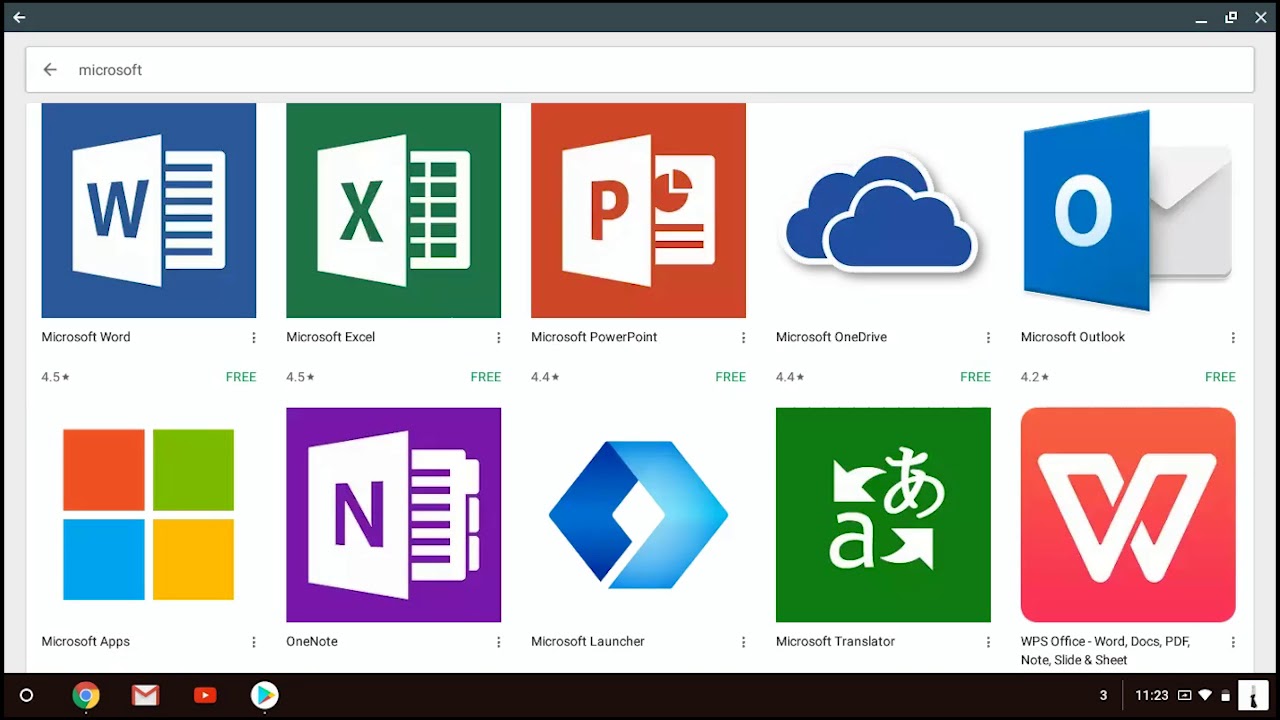
- Open the Google Play Store: Click on the launcher in the bottom-left corner of the screen, then click on the Google Play Store icon.
- Search for Microsoft Word: In the search bar at the top of the screen, type “Microsoft Word” and press Enter.
- Select Microsoft Word: From the search results, click on the Microsoft Word app.
- Click on “Install”: On the app page, click on the “Install” button to begin the installation process.
- Give necessary permissions: You may be prompted to grant certain permissions to Microsoft Word. Review the permissions requested, and if you’re comfortable, click on “Accept” to proceed with the installation.
- Wait for the installation: The download and installation process will begin. This may take a few moments, depending on your internet connection speed.
- Launch Microsoft Word: Once the installation is complete, click on the “Open” button to launch Microsoft Word on your Chromebook.
Now that you have successfully downloaded and installed Microsoft Word, you can enjoy all the features and functionality of this powerful word processing application on your Chromebook. In the next step, we’ll guide you through the setup process for Microsoft Word on Chromebook.
Step 4: Set Up Microsoft Word on Chromebook
After installing Microsoft Word on your Chromebook, you’ll need to go through a quick setup process to personalize your experience and make the most of the application’s features. Follow these steps to set up Microsoft Word on your Chromebook:
- Launch Microsoft Word: Open the Microsoft Word app on your Chromebook by clicking on its icon in the app launcher or by searching for it in the search bar.
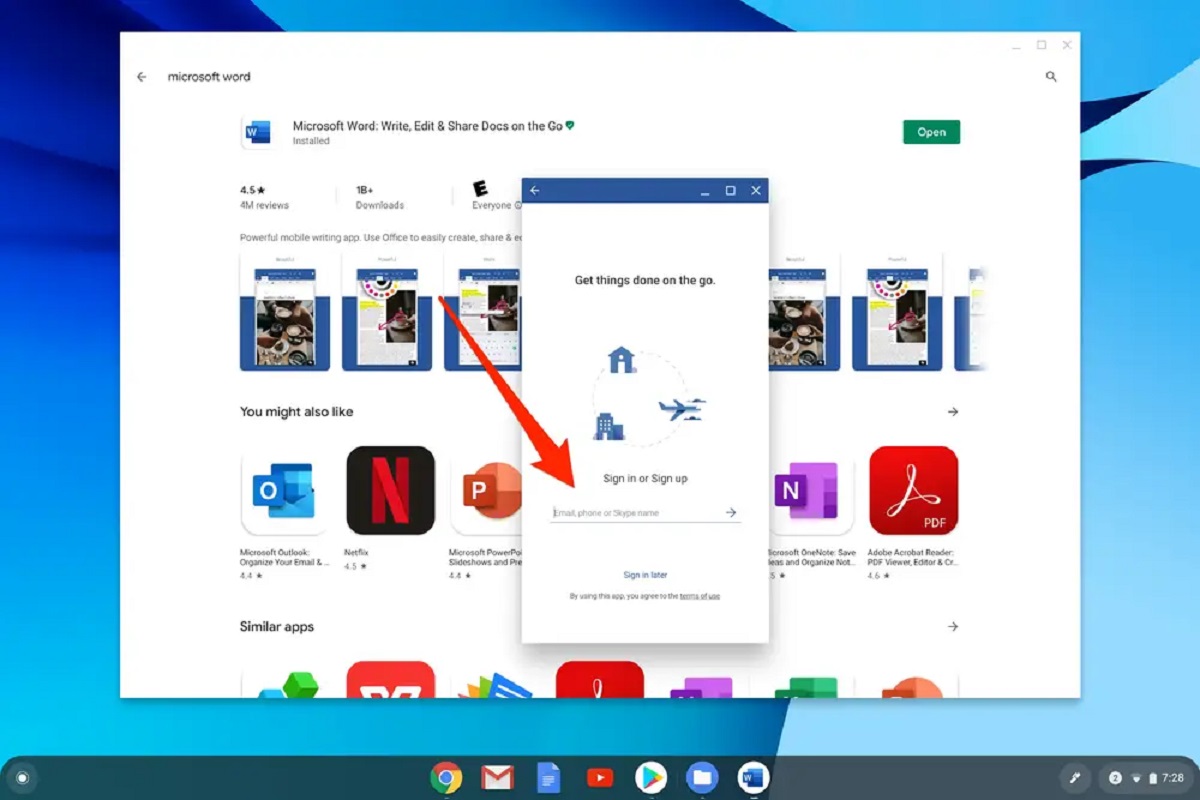
- Sign in to your Microsoft Account: If you already have a Microsoft Account, sign in with your email address and password. If you don’t have an account, click on “Create one” to set up a new account.
- Accept Terms and Conditions: Read and accept the terms and conditions presented to you. These terms outline the usage and privacy policies of Microsoft Word.
- Choose your preferred settings: Customize your experience by selecting your preferred options for autosave, AutoSave frequency, and other settings. These settings can be modified later from the options menu within Microsoft Word.
- Explore the user interface: Familiarize yourself with the user interface of Microsoft Word. Take some time to navigate through the various tabs and features to get comfortable with the layout.
- Sync your documents: If you have existing documents stored in your Microsoft Account’s cloud storage (OneDrive), you can sync them to your Chromebook by signing in to your account and allowing access to your files.
- Customize your preferences: Customize your preferences by accessing the settings menu within Microsoft Word. Here, you can modify various options such as font size, default document format, and other personalization settings.
Once you have completed the setup process, Microsoft Word is ready to use on your Chromebook. You can start creating, editing, and formatting documents to your heart’s content. In the next step, we’ll guide you on how to sign in and access Microsoft Word on your Chromebook.
Step 5: Sign in and Access Microsoft Word
Now that you have set up Microsoft Word on your Chromebook, it’s time to sign in to your Microsoft Account and start using the application. Follow these steps to sign in and access Microsoft Word:
- Launch Microsoft Word: Open the Microsoft Word app on your Chromebook by clicking on its icon in the app launcher or by searching for it in the search bar.
- Click on “Sign In”: On the home screen of Microsoft Word, click on the “Sign In” button located at the top-right corner of the window.
- Enter your Microsoft Account credentials: In the sign-in window, enter your email address and password associated with your Microsoft Account. If you don’t have an account, select the “Create one” option to set up a new account.
- Authenticate your account: Depending on your security settings, you may be asked to verify your account using a security code or by approving the sign-in request on another device.
- Access your documents: After successfully signing in, you will be able to access your existing documents, as well as create new ones. Use the familiar Microsoft Word interface to write, format, and edit your documents seamlessly.
- Save and sync your documents: As you work on your documents, make sure to save them regularly to avoid losing any changes. Microsoft Word on Chromebook has built-in autosave functionality, but it’s always a good practice to save manually. Your documents will be synced automatically to your Microsoft Account’s cloud storage (OneDrive) for easy access from other devices.
By signing in to your Microsoft Account, you can enjoy the full functionality of Microsoft Word, including saving documents, accessing cloud storage, and utilizing collaboration features with other users. So go ahead, sign in, and start maximizing your productivity with Microsoft Word on your Chromebook!
Conclusion
Congratulations! You have successfully downloaded, installed, and set up Microsoft Word on your Chromebook. You can now enjoy all the features and functionality of this powerful word processing software, whether you’re a student, professional, or casual user.
Having Microsoft Word on your Chromebook allows you to create professional-looking documents, collaborate with others, and work on your projects with ease. You can now write essays, reports, resumes, and any other documents with confidence and efficiency.
Remember to take advantage of the sync and cloud storage capabilities offered by Microsoft Word. By signing in with your Microsoft Account, your documents will be saved automatically and can be accessed from other devices, ensuring seamless productivity and continuity.
As you continue using Microsoft Word on your Chromebook, don’t forget to explore the wide range of features and options available. Experiment with different formatting styles, utilize templates, and make use of the various editing and proofreading tools to enhance your writing.
If you ever encounter any issues or have questions about using Microsoft Word on your Chromebook, Microsoft provides comprehensive support resources, including forums, tutorials, and customer support services, to help you navigate any challenges you may face.
So, go ahead and make the most of Microsoft Word on your Chromebook. Create, edit, and collaborate with confidence and enjoy the convenience of having a powerful word processing tool at your fingertips. Increase your productivity and unleash your creativity with Microsoft Word on your Chromebook today!