Overview
Have you just bought the Oculus Quest 2 and are eager to start playing some exciting games? Look no further! This comprehensive guide will walk you through the step-by-step process of downloading and installing games on your Oculus Quest 2 headset. Whether you’re a seasoned gamer or new to virtual reality, this article will provide all the information you need to get started.
Before we dive into the downloading process, let’s take a moment to understand the basic requirements. The Oculus Quest 2 is a standalone VR headset that allows you to play a wide range of games and experiences without the need for a PC or console. To download games, you’ll need a reliable internet connection and an active Oculus account. Additionally, it’s important to ensure that your headset is set up and connected to Wi-Fi.
Once you’ve got everything sorted, you’re ready to embark on your virtual gaming journey. The Oculus Quest 2 offers a vast library of games, ranging from thrilling adventures to immersive puzzles and multiplayer experiences. With the ability to download and install games directly from the Oculus Store, you’ll have access to an ever-expanding collection of virtual reality entertainment.
To download games, simply browse through the Oculus Store using your Oculus Quest 2 headset. You can explore featured games, bestsellers, or even search for specific titles. Once you’ve found a game you’re interested in, the download process is as simple as a few taps. Depending on the size of the game and the speed of your internet connection, the download time may vary.
After the download is complete, you’ll need to install the game onto your Oculus Quest 2 headset. This process is typically automatic, but it’s essential to ensure that you have enough storage space available. The Oculus Quest 2 comes with varying storage capacities, so managing your games library is crucial to optimize space.
With these basics in mind, let’s dive into the step-by-step process of downloading and installing games on your Oculus Quest 2 headset. Get ready to immerse yourself in a world full of adventure, excitement, and endless possibilities!
Prerequisites
Before you start downloading games on your Oculus Quest 2, there are a few prerequisites you need to fulfill to ensure a smooth gaming experience. Here are the essential things you’ll need:
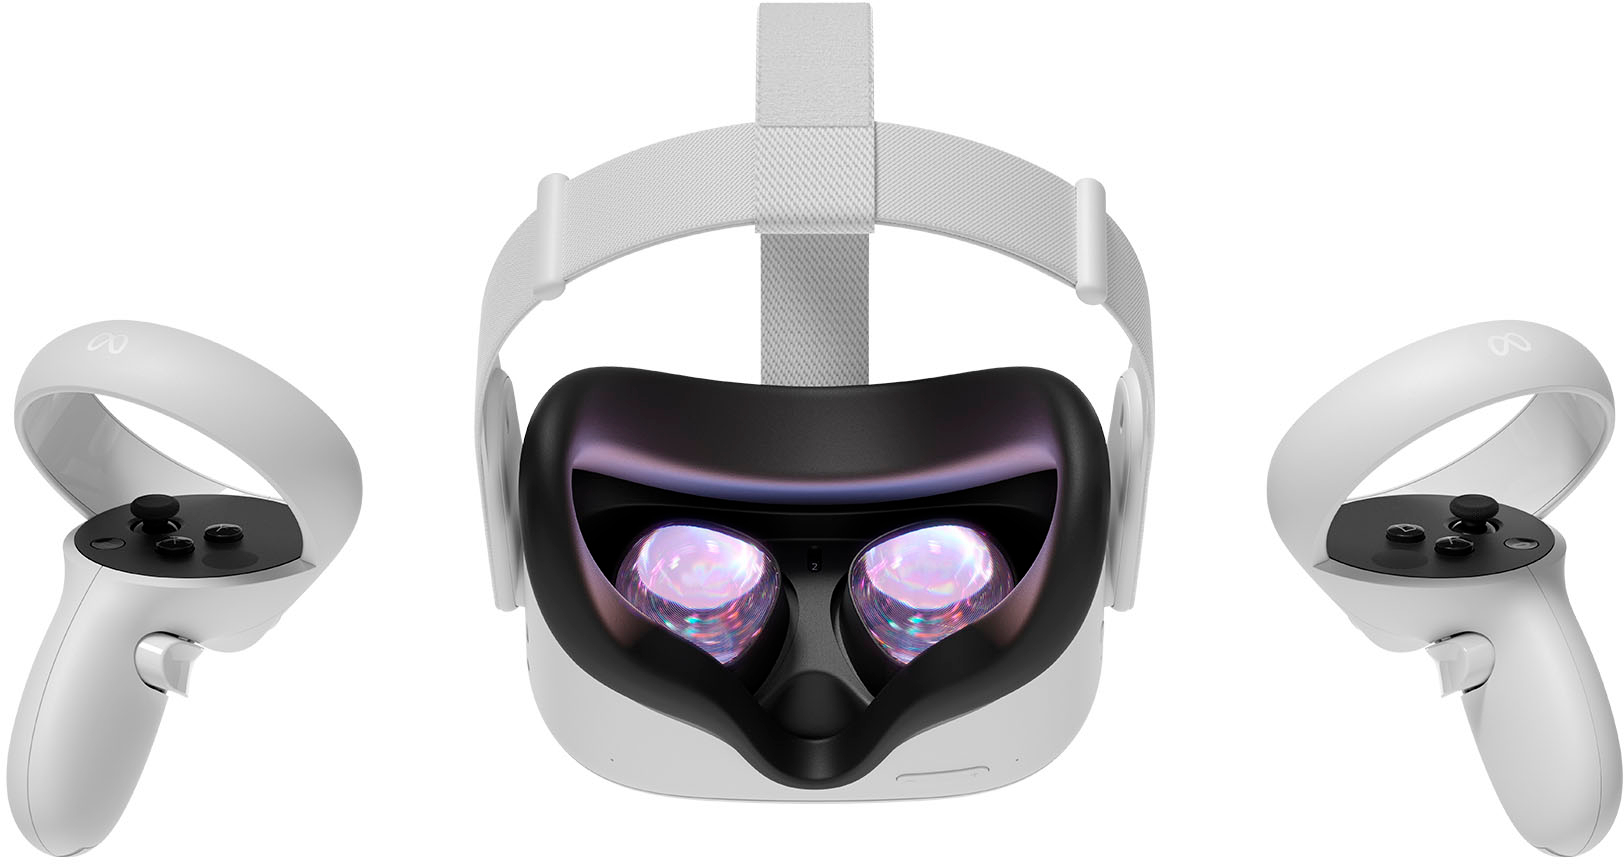
- An Oculus Quest 2 headset: Make sure you have a functioning Oculus Quest 2 headset. This standalone virtual reality device allows you to play games without the need for additional gaming consoles or PCs.
- A stable internet connection: Connect your Oculus Quest 2 to a reliable Wi-Fi network. A stable internet connection is essential for downloading games and ensuring smooth gameplay.
- An Oculus account: If you don’t already have one, create an Oculus account. This account will allow you to access and download games from the Oculus Store.
- Available storage space: Check the available storage space on your Oculus Quest 2 headset. Games can vary in size, so ensure that you have enough space to accommodate your desired games.
- A power source: Ensure that your Oculus Quest 2 is charged or connected to a power source. Downloading games can consume battery life, and you wouldn’t want your gaming session to get interrupted halfway through.
- A comfortable gaming space: Find a comfortable area to play your VR games. Make sure you have enough room to move around, as some games might require physical movements.
- Patience: Downloading and installing games can take some time, depending on the game’s size and your internet speed. Be patient and allow the download process to complete without interruption.
By fulfilling these prerequisites, you’ll be well-prepared to begin downloading and enjoying the vast collection of games available on the Oculus Quest 2. Now that you have everything in order, let’s move on to the next steps to get you started on your virtual reality gaming adventure!
Step 1: Set Up Your Oculus Quest 2
Before you can start downloading games on your Oculus Quest 2, you need to ensure that the headset is properly set up. Follow these steps to set up your Oculus Quest 2:
- Put on the headset: Gently put on the Oculus Quest 2 headset and adjust the straps to ensure a comfortable fit.
- Adjust IPD (Interpupillary Distance): Slide the physical IPD adjustment on the bottom of the headset to align the lenses with your eyes. This will help optimize your viewing experience.
- Pull up the guardian system: The guardian system is a safety feature that helps you define the boundaries of your playspace. Follow the on-screen instructions to set up the guardian system and create a safe area for gameplay.
- Pair your controllers: Follow the on-screen instructions to pair your Oculus Touch controllers with the headset. This will enable you to interact with the virtual world.
- Adjust the straps: Make sure the straps are securely fastened to ensure stability during gameplay. Adjust the straps to fit your head comfortably.
- Calibrate the headset: Follow the calibration instructions on the screen to calibrate the headset. This will ensure accurate head tracking and a smooth gaming experience.
- Complete the initial setup: Follow the on-screen prompts to complete the initial setup process. This includes selecting your preferred language, connecting to Wi-Fi, and signing in with your Oculus account.
Once you’ve completed these steps, your Oculus Quest 2 headset will be ready to download and play games. Ensure that the headset is charged or connected to a power source to avoid any interruptions during the downloading process. Now that your Oculus Quest 2 is set up and ready to go, let’s move on to the next step: connecting your headset to Wi-Fi.
Step 2: Connect Your Oculus Quest 2 to Wi-Fi
In order to download games on your Oculus Quest 2, you’ll need to connect it to a Wi-Fi network. Follow these steps to connect your Oculus Quest 2 to Wi-Fi:
- Go to the home screen: Put on your Oculus Quest 2 headset and navigate to the home screen. You can do this by pressing the Oculus button on the right controller.
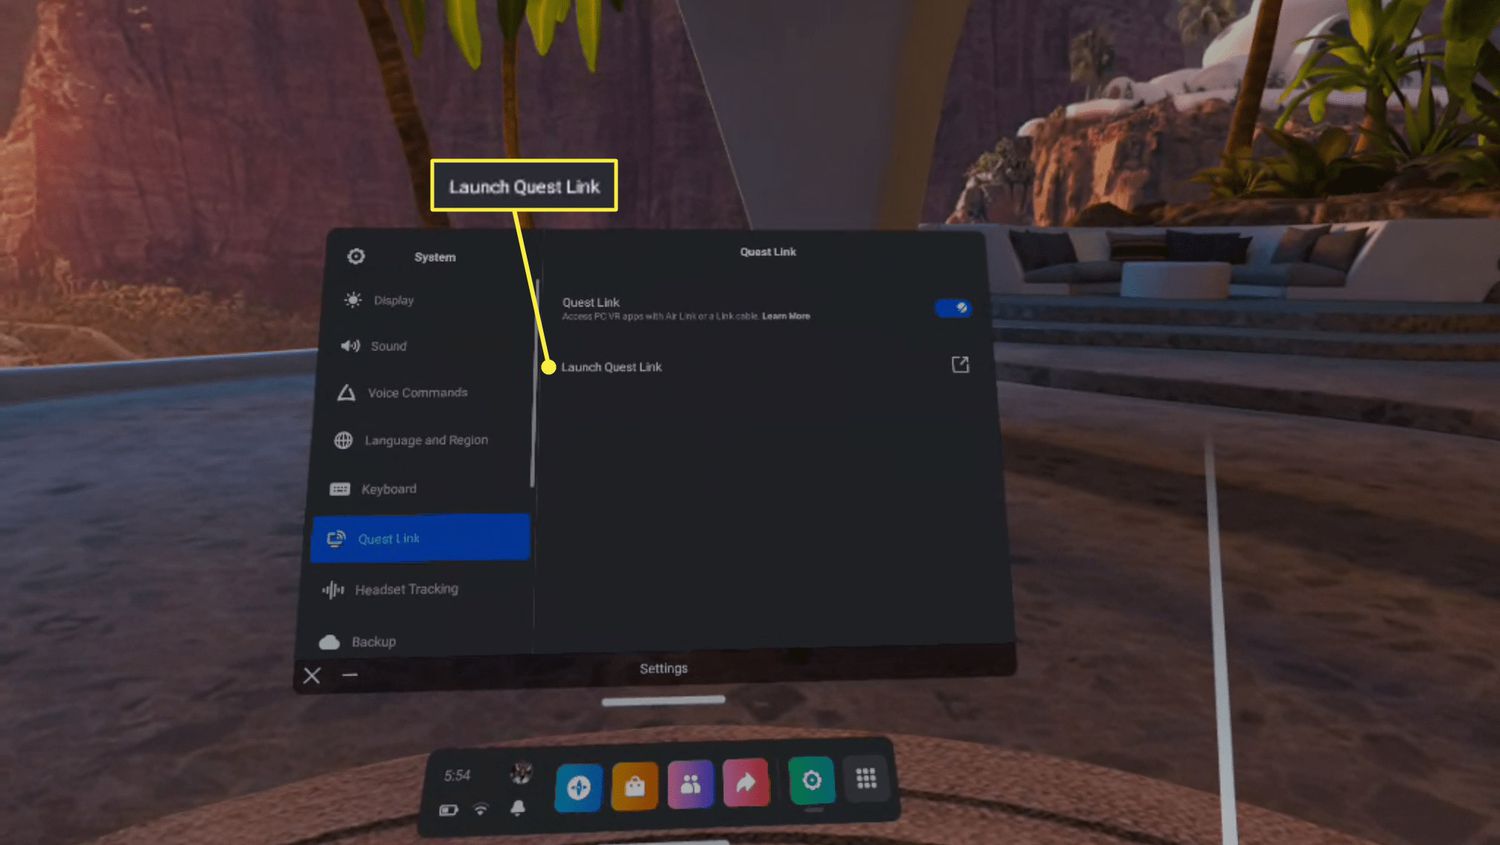
- Select the settings: Look for the settings icon, which looks like a gear, and select it using the right controller.
- Select the Wi-Fi option: In the settings menu, scroll down and find the Wi-Fi option. Use the right controller to select it.
- Choose your Wi-Fi network: A list of available Wi-Fi networks will appear on the screen. Use the right controller to select your desired network.
- Enter your Wi-Fi password: If your Wi-Fi network is password-protected, a keyboard will appear on the screen. Use the right controller to enter your Wi-Fi password.
- Connect to the network: Once you’ve entered the Wi-Fi password, select the “Connect” button using the right controller. Your Oculus Quest 2 will try to connect to the selected Wi-Fi network.
- Confirm the connection: If the connection is successful, you’ll see a confirmation message on the screen. You are now connected to Wi-Fi and ready to download games!
It’s important to note that a stable and reliable Wi-Fi connection is crucial for a smooth gaming experience. Make sure you are within range of your Wi-Fi network and that the signal strength is strong. If you’re experiencing any issues with the Wi-Fi connection, try moving closer to the router or resetting your router if needed.
Now that your Oculus Quest 2 is connected to Wi-Fi, you’re ready to move on to the next step: opening the Oculus Store to browse and find your favorite games to download and enjoy!
Step 3: Open the Oculus Store
Now that your Oculus Quest 2 is connected to Wi-Fi, it’s time to open the Oculus Store and explore the wide variety of games available. Follow these steps to open the Oculus Store:
- Put on your Oculus Quest 2 headset: Ensure that your headset is properly fitted and turned on.
- Go to the home screen: If you’re not already on the home screen, press the Oculus button on the right controller to navigate to it.
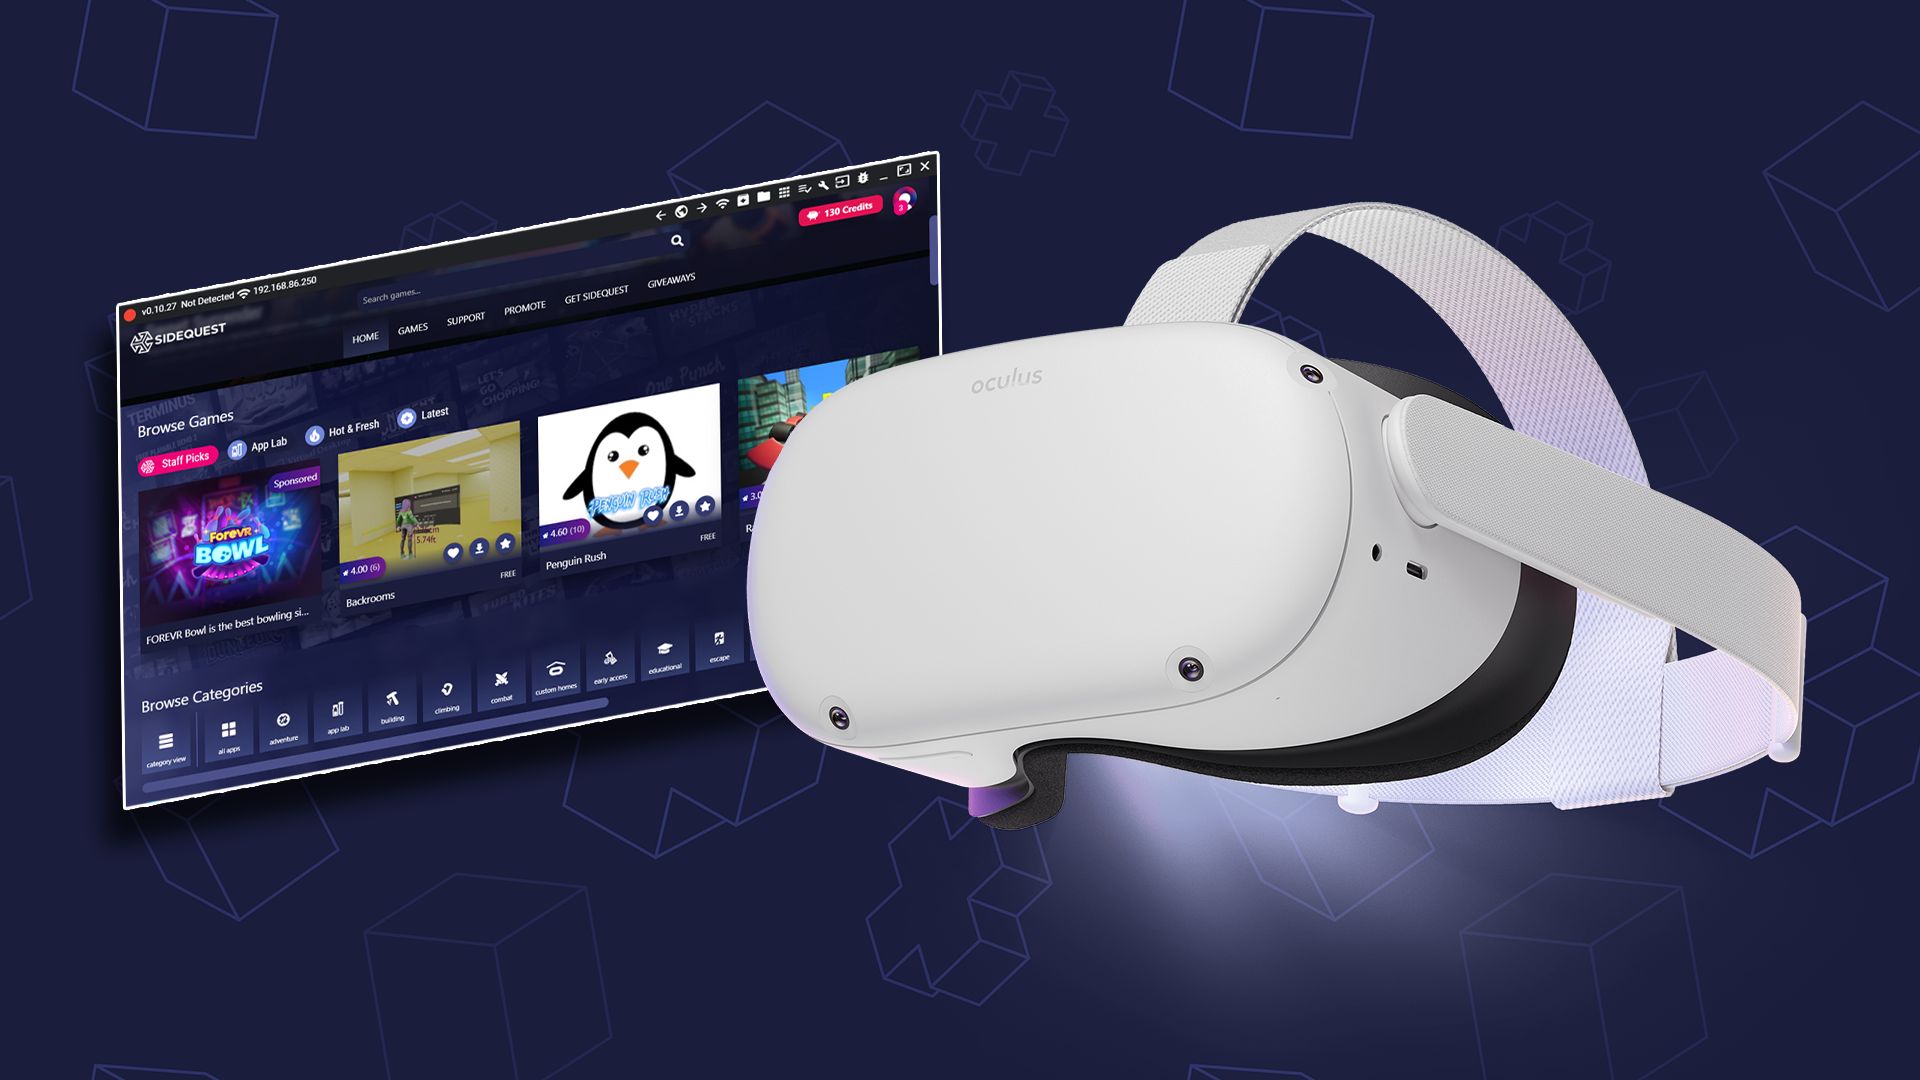
- Find the Oculus Store: Look for the icon that represents the Oculus Store. It’s an icon with a small shopping bag and the Oculus logo. You can find it by using your right controller to scroll through the available apps and games.
- Select the Oculus Store: Once you’ve found the Oculus Store icon, use the right controller to select it. This will open the Oculus Store and take you to the main storefront.
- Explore featured games: On the main storefront of the Oculus Store, you’ll find a selection of featured games. These are the games that Oculus is highlighting and recommending. Take some time to browse through them and see if any catch your interest.
- Browse game categories: If you have a specific genre or type of game in mind, you can explore the various game categories. These categories include action, adventure, puzzle, sports, and many more. Use the right controller to navigate through the categories and find games that suit your preferences.
- Search for specific games: If you have a particular game in mind that you want to download, you can use the search function. Select the search icon, usually represented by a magnifying glass, and then use the on-screen keyboard to type in the name of the game. Use the right controller to navigate the keyboard and select the letters.
Once you’ve opened the Oculus Store and explored the available games, you’re ready to move on to the next step: selecting a game to download. The Oculus Store offers a vast library of games and experiences, so take your time to find the ones that resonate with you.
Step 4: Browse and Find Games
Now that you’ve opened the Oculus Store on your Oculus Quest 2, it’s time to browse and find the games that pique your interest. Follow these steps to browse and find games:
- Explore featured games: Start by checking out the featured games. These are usually showcased on the main storefront of the Oculus Store. Oculus highlights popular and recommended games in this section, making it a great place to discover new titles.
- Check out categories: If you have a specific genre or type of game in mind, browse through the various game categories. The Oculus Store offers categories such as action, adventure, puzzle, sports, and more. Use the navigation options with your right controller to explore the different categories and find games that match your preferences.
- Read game descriptions and reviews: Once you find a game that catches your eye, click on it to access the game’s page. Here you’ll find a detailed description of the game, including its features and gameplay mechanics. Take the time to read through the description and check out any available screenshots or videos. Additionally, scroll down to see user reviews and ratings, which can provide valuable insights into the game’s quality.
- Consider game prices and discounts: On each game’s page, you’ll find information about its price. Take note of any discounts or promotions that may be available. Oculus often offers sales and deals on games, so keep an eye out for cost-saving opportunities.
- Check system requirements: Before making a purchase, ensure that you meet the game’s system requirements. Some games may have specific hardware or software prerequisites. Make sure your Oculus Quest 2 meets the necessary criteria to avoid any compatibility issues.
- View additional game details: On the game’s page, you may find additional details such as the developer, release date, and supported languages. This information can help you make an informed decision.
- Add games to your wishlist: If you’re interested in a game but not ready to purchase it yet, you can add it to your wishlist. This allows you to keep track of games you’re interested in and receive notifications for any discounts or promotions.
Take your time to explore the Oculus Store, read descriptions, and check out reviews. Finding the right games for your Oculus Quest 2 will enhance your gaming experience. Once you’ve found a game you want to download, move on to the next step: selecting and initiating the download process.
Step 5: Select a Game to Download
After browsing and exploring the games on the Oculus Store, it’s time to select a game that you want to download and play on your Oculus Quest 2. Follow these steps to select a game:
- Choose a game: Review the games you’ve explored and consider which one you’d like to play. Take into account the game’s genre, description, reviews, price, and any other relevant factors.
- Select the game: Once you’ve made your decision, navigate to the game’s page and use your right controller to select the “Buy” or “Add to Cart” button. If the game is free, you may see a “Download” button instead.
- Confirm your purchase: If the game has a price, you’ll be prompted to confirm your purchase. Follow the on-screen instructions to complete the payment process. If you’re adding the game to your cart, you can proceed to checkout when you’re ready.
- Enter payment information: If you’re making a purchase, you’ll need to enter your payment information. The Oculus Store accepts various payment methods, including credit/debit cards and PayPal. Follow the prompts and provide the necessary information to proceed.
- Review your purchase: Before finalizing the purchase, review the order summary to ensure that everything is correct. Verify the game, price, and any discounts applied. If everything looks good, confirm your purchase.
- Wait for the download to start: If you’re purchasing a game, the download will start automatically after the transaction is completed. If the game is free, the download will begin immediately. Keep your Oculus Quest 2 connected to Wi-Fi and patient as the download progresses.
- Monitor the download progress: While the game is downloading, you can monitor the progress on the Oculus Quest 2 display. You’ll see a progress bar indicating how much of the game has been downloaded. The speed of the download will depend on the game’s size and your internet connection.
Once the game is downloaded and installed, you’ll be ready to jump into the immersive world of virtual reality gaming on your Oculus Quest 2. Now that you’ve selected a game to download, let’s move on to the next step: the actual downloading process.
Step 6: Downloading Games
After selecting a game to download on your Oculus Quest 2, it’s time to initiate the download process. Follow these steps to download games onto your Oculus Quest 2 headset:
- Wait for the purchase to complete: If you’ve purchased a game, wait for the transaction to complete. The download will begin automatically once the purchase is successful. If the game is free, the download will start immediately.
- Monitor the download progress: Keep an eye on the download progress. On your Oculus Quest 2 headset, you’ll see a notification or progress bar indicating the status of the download. This allows you to track how much of the game has been downloaded and estimate the remaining time.
- Stay connected to Wi-Fi: During the download process, make sure your Oculus Quest 2 remains connected to a stable Wi-Fi network. Interrupting the Wi-Fi connection may disrupt the download and require you to start over.
- Be patient: The download speed depends on several factors, including the size of the game and your internet connection speed. Larger games may take longer to download, so be patient and allow the process to run its course. Use this time to prepare yourself for the upcoming gaming experience.
- Avoid interruptions: Minimize any activities that may interfere with the download process. Avoid turning off your Oculus Quest 2 or navigating away from the download screen. If you need to step away, ensure that your headset remains connected to power and Wi-Fi.
- Download multiple games simultaneously (optional): If you want to download multiple games at once, you can do so on the Oculus Quest 2. Simply repeat the previous steps for each game you wish to download. Keep in mind that downloading multiple games simultaneously may slow down the overall download speed.
- Wait for the download to complete: Once the download progress reaches 100% and the game is fully downloaded, you’ll receive a notification indicating that the download is complete. At this point, you’re ready to move on to the next step: installing the downloaded game onto your Oculus Quest 2.
By following these steps, you’ll successfully download games onto your Oculus Quest 2 headset. Remember to stay connected to Wi-Fi, be patient during the download process, and avoid any interruptions. Now that you’ve downloaded the games, it’s time to install them and get ready to embark on your virtual reality adventures!
Step 7: Installing Downloaded Games
Once you’ve successfully downloaded games onto your Oculus Quest 2, the next step is to install them onto your headset. Follow these steps to install the downloaded games:
- Access your library: Put on your Oculus Quest 2 headset and navigate to the home screen. Look for the “Library” option using the right controller. This will take you to your game library, where you can manage and install your downloaded games.
- Find the downloaded game: In your library, locate the game that you’ve downloaded and want to install. Use the right controller to highlight the game’s icon.
- Select the game for installation: With the downloaded game selected, click on the “Install” button using your right controller. This will start the installation process.
- Wait for the installation to complete: The installation process may take some time, depending on the game’s size and complexity. During the installation, you’ll see a progress bar indicating how much of the game has been installed. Be patient and allow the installation to finish.
- Check the installation status: Monitor the installation progress on your Oculus Quest 2 headset. Once the progress reaches 100% and the game is fully installed, you’ll receive a notification informing you that the installation is complete.
- Enjoy your installed game: With the game successfully installed, you’re now ready to enjoy it on your Oculus Quest 2! Return to your library or the home screen, locate the game, and select it to start playing. Follow any on-screen prompts or instructions to begin your virtual reality gaming experience.
- Manage your installed games: To manage your installed games, you can organize them within your library, uninstall games you no longer want to play, or update games when new updates are available. These management options allow you to keep your game library organized and up-to-date.
By following these steps, you’ll successfully install your downloaded games onto your Oculus Quest 2 headset. Make sure to monitor the installation progress, be patient during the installation, and enjoy the immersive adventure that awaits you. Now that your game is installed, it’s time to dive into the virtual reality world and have an incredible gaming experience!
Step 8: Managing Your Games Library
Once you have downloaded and installed games on your Oculus Quest 2, it’s important to manage your gaming library efficiently. Follow these steps to effectively manage your games and ensure your library remains organized:
- Access your library: Put on your Oculus Quest 2 headset and navigate to the home screen. Look for the “Library” option using the right controller. This will take you to your game library, where you can view and manage your installed games.
- Organize your games: Within your library, you can organize your games for easier access. Use the right controller to select a game and choose the “Move” or “Create Folder” option. You can create folders based on genres or personal preferences and move games into them accordingly.
- Uninstall games: If you no longer want to keep a specific game on your Oculus Quest 2, you can uninstall it from your library. Select the game in your library, choose the “Uninstall” option, and confirm your decision. This will remove the game from your headset and free up storage space for other games.
- Update games: Periodically, game developers release updates to improve performance and add new features. To ensure you’re playing the latest version of a game, go to your library, select the game that requires an update, and choose the “Update” option. This will initiate the update process and bring your game up to date.
- Explore additional content: Some games offer additional downloadable content (DLC) or expansion packs to enhance your gaming experience. Within your library, check if any of your installed games have DLC available. If interested, select the game, find the DLC section, and browse the available content.
- Use the wishlist: If you come across games that you’re interested in but not ready to purchase, you can add them to your wishlist. This allows you to keep track of games you want to buy or monitor for potential discounts. To add a game to your wishlist, select the game and choose the “Add to Wishlist” option.
By effectively managing your games library, you can easily find and play your favorite games, keep your storage space optimized, and stay up to date with game updates and additional content. Take advantage of the organization features and regularly review your library to ensure it reflects the games you enjoy playing. Now that you know how to manage your games library, you’re ready to fully immerse yourself in the exciting world of virtual reality gaming on your Oculus Quest 2!
Conclusion
Congratulations! You have now completed the step-by-step process of downloading, installing, and managing games on your Oculus Quest 2. By following these instructions, you have gained the knowledge and skills necessary to navigate the Oculus Store, select games, and enjoy immersive experiences in the world of virtual reality.
The Oculus Quest 2 provides an incredible gaming platform that allows you to explore a wide variety of games and experiences without the need for additional hardware or consoles. With its ease of use and impressive graphics, the Oculus Quest 2 has quickly become a popular choice for both seasoned gamers and VR newcomers.
Remember, before embarking on your gaming adventures, ensure that you have fulfilled the prerequisites such as having a functioning Oculus Quest 2 headset, a stable internet connection, an Oculus account, and sufficient storage space. These will ensure a seamless and enjoyable gaming experience.
Take advantage of the Oculus Store’s vast library of games, including various genres and categories. Browse through featured games and explore different categories to find the ones that align with your interests and preferences. Read game descriptions, reviews, and consider discounts to make informed decisions.
Once you have selected and downloaded your desired games, be patient during the download and installation process. Stay connected to Wi-Fi and avoid any interruptions to ensure the smooth and successful completion of the download process.
Managing your games library is crucial to keep it organized and up to date. Create folders, uninstall games you no longer play, and stay updated by installing game updates. The wishlist feature allows you to track games you’re interested in and be notified of any promotions or discounts.
Now that you’re equipped with the knowledge and understanding of how to download, install, and manage games on your Oculus Quest 2, it’s time to dive into the immersive world of virtual reality gaming. Enjoy the exciting adventures, thrilling challenges, and immersive experiences that await you on your virtual reality journey!