Introduction
Welcome to this tutorial on how to download and use custom fonts in Canva! If you’re tired of using the same fonts provided by Canva and want to add a unique touch to your designs, you’re in the right place. Custom fonts can dramatically enhance the aesthetic appeal of your creations and make them stand out from the crowd.
Canva is a popular graphic design tool used by professionals, entrepreneurs, and individuals to create stunning graphics for social media, marketing materials, presentations, and more. While Canva offers a wide range of fonts, you might have a specific font in mind that isn’t available in their default selection.
The good news is that you can easily download your desired font from the internet and install it on your computer. Once the font is installed, you can upload it to Canva and use it in your designs. In just a few simple steps, you’ll be able to unleash your creativity and incorporate the perfect font into your Canva projects.
In this tutorial, we’ll guide you through the process of choosing and downloading a font, installing it on your computer, and using it in Canva. Whether you’re a beginner or an experienced Canva user, follow along to give your designs a personalized touch with custom fonts.
Step 1: Choose and Download the Font
The first step in using custom fonts in Canva is to select and download the font of your choice. There are numerous websites that offer a wide variety of free and paid fonts. Here’s how you can choose and download a font:
- Begin by exploring font libraries and websites. Some popular websites where you can find fonts include Google Fonts, DaFont, and Font Squirrel. You can browse through their extensive collections and choose a font that suits your design aesthetic.
- Consider your design needs and the purpose of the font. Are you looking for something elegant, playful, or professional? Think about the message you want to convey through your design and choose a font that aligns with it.
- Once you’ve found the perfect font, look for a download button or link on the font’s website. Click on it to start the download process. Fonts are typically downloaded in a compressed file format such as .zip or .rar.
- Locate the downloaded file on your computer and extract its contents if necessary. Most operating systems have built-in tools that allow you to extract files from compressed folders.
It’s important to note that when downloading fonts, you should always ensure that the font is licensed for commercial use if you plan on using it in your Canva designs for business purposes. Some fonts have specific usage restrictions, so be sure to read the license information provided by the font creator or website.
By following these steps and selecting a font that aligns with your design vision, you’re now ready to move on to the next step – installing the font on your computer.
Step 2: Install the Font on Your Computer
After downloading the font file, the next step is to install it on your computer. By doing so, you’ll be able to use the font not only in Canva but also in other applications such as Microsoft Word, Adobe Photoshop, or any software that allows you to customize text styles. Here’s how you can install the font:
- Locate the font file that you downloaded. It is usually found in your computer’s “Downloads” folder or the destination folder you specified during the download process. The font file will typically have an extension like .otf (OpenType font) or .ttf (TrueType font).
- Double-click on the font file to open it. This action will initiate the font installation process.
- A preview of the font will appear, allowing you to have a glimpse of how it looks. Look for an “Install” button or an option that says “Install Font.” Click on it to proceed.
- The font will now be installed on your operating system. This process may take a few seconds, depending on the size of the font file.
- Once the installation is complete, you can verify if the font is successfully installed by checking your font library in the computer’s settings or in an application that allows you to change fonts.
It’s worth mentioning that the installation steps may vary slightly depending on your operating system (Windows or macOS) or the application you’re using. However, the general idea of installing fonts remains the same across different platforms.
Congratulations! You’ve successfully installed the font on your computer. Now, let’s move on to the next step and learn how to access Canva’s text tool.
Step 3: Access Canva’s Text Tool
Now that you have your desired font installed on your computer, it’s time to access Canva’s text tool to begin using it in your designs. Canva offers a user-friendly interface with intuitive design tools. Here’s how you can access Canva’s text tool:
- Go to the Canva website (www.canva.com) and log in to your account. If you don’t have an account, you can create one for free.
- Once logged in, you’ll be directed to your Canva homepage. Click on the “Create a design” button, which will bring up a menu with various design options.
- Select the type of design you want to create, such as a social media post, presentation, or flyer. Canva offers a wide range of design templates for different purposes.
- After choosing a template, Canva’s editing interface will appear. On the left side of the screen, you’ll see a toolbar with various design elements to choose from. Click on the “Text” tab to access Canva’s text tool.
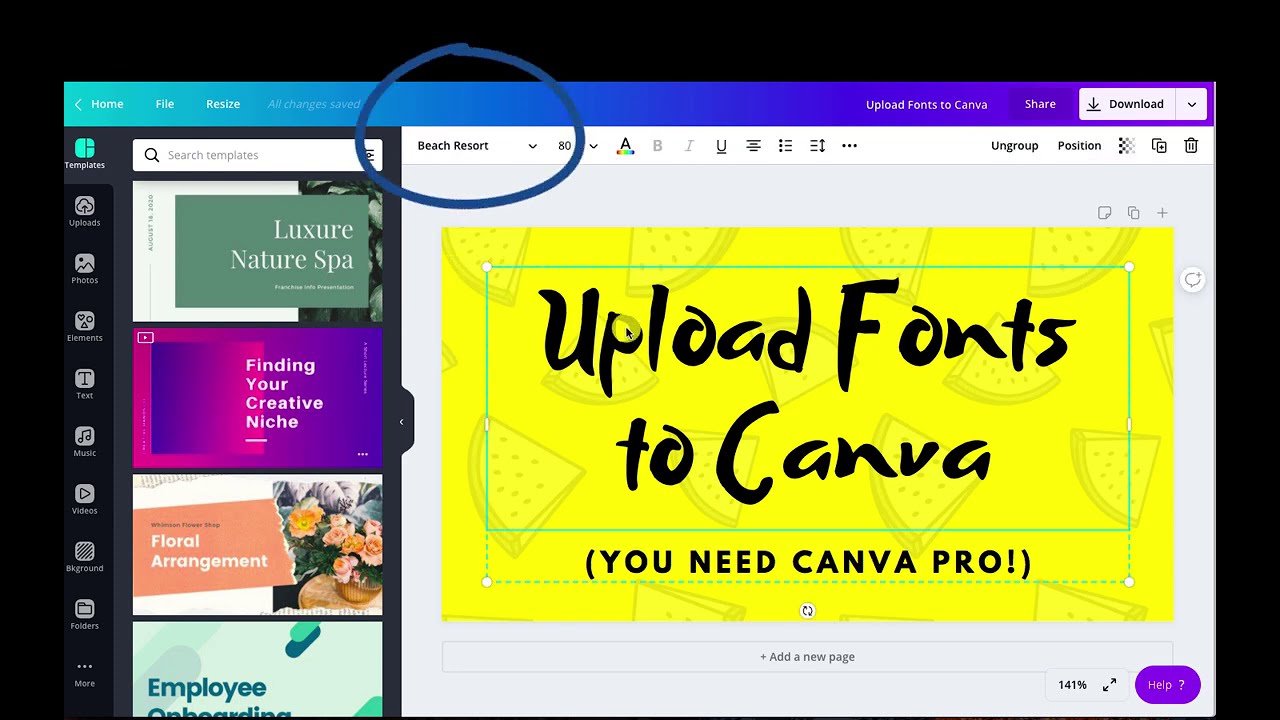
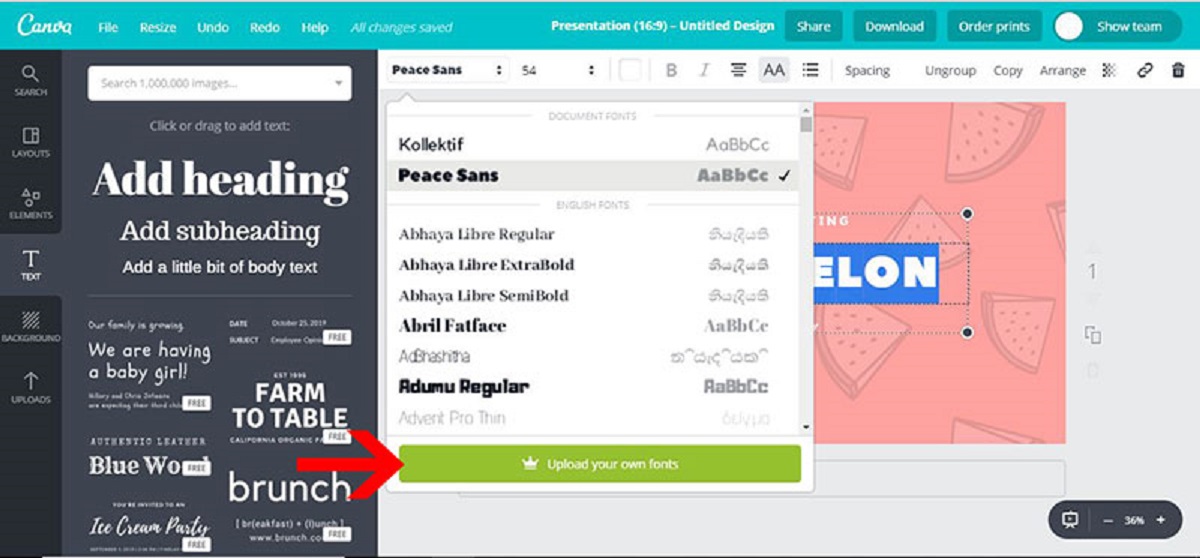
- A menu will expand, displaying a collection of pre-designed text options along with the default Canva fonts. To access your custom font, click on the “Upload a font” button, which is located at the bottom of the menu.
- Canva will prompt you to select the font file from your computer. Locate and select the font file that you previously installed. Once selected, Canva will upload the font and make it available for use in your designs.
Once you have successfully uploaded your font to Canva, you can now utilize it in your designs and customize the text styles with your chosen font. Canva allows you to adjust the font size, color, spacing, and other formatting options to create truly unique and visually appealing text elements.
With Canva’s text tool and your custom font at your disposal, you’re ready to move on to the next step – uploading the font to Canva.
Step 4: Upload the Font to Canva
After accessing Canva’s text tool and selecting your desired font, the next step is to upload the font to Canva. By doing so, you’ll have seamless access to your custom font in all your designs. Here’s how you can upload the font to Canva:
- In Canva’s text tool menu, where you previously uploaded your font file, you’ll find an option to “Browse all your fonts.” Click on this option to view all the fonts you’ve uploaded to Canva.
- A new window will open, displaying all the fonts you’ve uploaded. Locate the font you want to use and click on it to select it.
- The font will now be available in Canva’s text tool menu, alongside the default Canva fonts. You can easily identify your custom font by the “Uploaded” label or any tags you assigned during the upload process.
Once the font is uploaded to Canva, you can use it in any of your designs. Simply select a text element in your design, click on the “Font” dropdown menu in the editing toolbar, and look for your uploaded font in the font list. Click on the font to apply it to the selected text element.
It’s important to note that the uploaded fonts are only available for use within Canva. Other applications on your computer will not have access to these fonts. If you want to use the font in another software, you’ll need to install it on your computer as described in Step 2.
Now that you have successfully uploaded your font to Canva, you’re one step closer to creating stunning and personalized designs. Let’s move on to the final step and learn how to apply the font to your design.
Step 5: Apply the Font to Your Design
You have reached the final step of using custom fonts in Canva – applying the font to your design. With your uploaded font selected, you can now add the perfect typography to your creations. Here’s how you can apply the font to your design:
- Select the text element in your Canva design that you want to customize with the custom font. This can be a heading, subheading, body text, or any other text element you have added to your design.
- In the editing toolbar, click on the “Font” dropdown menu. Navigate through the list of available fonts until you find your uploaded font that you want to use.
- Click on the font to apply it to the selected text element. Canva will automatically update the text with the chosen font.
- Customize the font further by adjusting the font size, color, alignment, spacing, or other text formatting options provided by Canva. This will allow you to fine-tune the appearance of your text to match your design vision.
- Repeat the process for any other text elements in your design that you want to apply the custom font to. Canva allows you to use multiple fonts within a single design, giving you the flexibility to create dynamic and visually appealing compositions.
By applying your custom font to your design, you can now fully embrace your creativity and give your Canva projects a unique and personalized touch. Experiment with different font combinations, styles, and effects to make your design truly stand out.
Remember to save your design once you are satisfied with the application of your custom font. You can download your design in various formats such as JPEG, PNG, or PDF and use it across different platforms or print it out for physical use.
Congratulations! You have successfully learned how to download, install, and use custom fonts in Canva. With this newfound knowledge, you can elevate your design game and create visually captivating graphics that grab attention and leave a lasting impression.
Conclusion
Custom fonts can add a touch of uniqueness and personality to your Canva designs. By following the simple steps outlined in this tutorial, you now have the knowledge and skills to download, install, and use custom fonts in Canva. Let’s recap what you’ve learned:
First, you learned how to choose and download a font from reputable websites that offer a wide range of options. Remember to pay attention to the font’s licensing terms to ensure you can use it in your Canva designs for your intended purposes.
Next, you discovered how to install the font on your computer, allowing you to use it not just in Canva but also in other applications. Installing the font ensures that it is accessible for use whenever and wherever you need it.
You then explored how to access Canva’s text tool, where you can upload and manage your custom fonts. Canva’s user-friendly interface makes it easy to navigate and utilize the text tool to customize your designs with your chosen fonts.
With your font uploaded to Canva, you proceeded to apply it to your design. Canva’s extensive editing features allow you to adjust font size, color, spacing, and other formatting options to create the perfect typographic composition.
By following these steps, you’ve unlocked a world of possibilities to enhance your design projects with custom fonts. The ability to add a personal touch and express your creativity through typography can make a significant difference in your visual communications.
Now, armed with this knowledge, go ahead and explore different fonts, create eye-catching designs, and make a lasting impression with your customized text elements. It’s time to unleash your creative potential and elevate your Canva experience.
So go ahead, have fun, and make your designs truly stand out with the use of custom fonts in Canva!