Introduction
Welcome to the world of Canva, the popular online graphic design tool that allows users to create stunning visuals for various purposes. With its user-friendly interface and wide range of design options, Canva has become a favorite among designers, marketers, and entrepreneurs.
One powerful feature that Canva offers is the ability to add subtitles to your designs. Subtitles can be extremely beneficial for a number of reasons, whether you’re creating social media posts, presentations, or promotional materials. They can help convey your message clearly, make your content more accessible, and captivate your audience’s attention.
In this article, we will guide you through the process of adding subtitles in Canva, ensuring your designs are both visually appealing and informative. We will cover everything from creating your design to choosing the right fonts and sizes, styling and formatting the subtitles, positioning them effectively, and finally, exporting your design.
Whether you’re a seasoned Canva user or just getting started, this article will provide you with the knowledge and tips you need to elevate your design game. So let’s dive in and discover the art of adding subtitles in Canva!
What is Canva?
Canva is a web-based graphic design platform that allows users to create visually appealing designs for a variety of purposes. Whether you’re a professional designer, small business owner, or someone who wants to create eye-catching visuals without any design experience, Canva is the perfect tool for you.
With Canva, you have access to a wide range of design templates, customizable elements, and an extensive collection of images, illustrations, and fonts. This makes it easy for anyone to create professional-quality designs for social media posts, presentations, posters, flyers, invitations, and more.
One of the main reasons behind Canva’s popularity is its user-friendly interface. You don’t need any design skills or experience to use Canva effectively. The drag-and-drop feature allows you to easily add and arrange elements on your canvas, while the intuitive editing tools enable you to customize every aspect of your design.
Another standout feature of Canva is its collaboration capabilities. You can invite team members or clients to work on a design project together, making it an ideal tool for collaborative design work. In addition, Canva offers a convenient sharing and publishing feature, allowing you to share your designs directly on social media platforms or download them for offline use.
Canva is available in both free and paid versions. The free version offers a wide range of design options and elements, while the paid version, called Canva Pro, provides additional features like unlimited storage, advanced design tools, and access to a larger library of design assets.
Overall, Canva is a powerful and versatile design tool that empowers users to create visually stunning designs with ease. Whether you’re an individual or part of a team, Canva makes the design process enjoyable, accessible, and efficient.
Why Use Subtitles in Canva?
Adding subtitles to your designs in Canva can have several advantages and benefits. Let’s explore why incorporating subtitles is crucial in optimizing your visual content:
1. Enhanced Accessibility: Subtitles make your content accessible to a wider audience, including those who are deaf or hard of hearing. By providing text-based captions, you ensure that everyone can engage with and understand your message.
2. Improved User Experience: Subtitles can greatly enhance the user experience by allowing viewers to consume your content in various environments and situations. Whether someone is viewing your design without sound, in a noisy environment, or in a location where audio playback is not feasible, subtitles ensure they can still comprehend your message effortlessly.
3. Increased Engagement: Studies have shown that videos and visual content with subtitles experience higher engagement rates. Including subtitles in your designs can capture viewers’ attention, encourage them to watch your content for longer durations, and improve their overall understanding and retention of information.
4. Language Barrier Elimination: Subtitles can help overcome language barriers, enabling your content to reach a broader audience. By offering subtitles in multiple languages, you can connect with international viewers and expand your reach globally.
5. SEO Optimization: Adding subtitles to your designs in Canva can positively impact your search engine optimization efforts. Search engines can crawl and index the text in subtitles, increasing the visibility and discoverability of your content.
6. Emphasize Key Points: Subtitles can be used strategically to highlight important information or key points in your design. By emphasizing specific words or phrases, you can ensure that your message is effectively conveyed and understood by your audience.
7. Social Media Friendliness: Subtitles are crucial for video content shared on social media platforms where videos typically autoplay without sound. By including subtitles, you can capture viewers’ attention and entice them to watch and engage with your content, even without audio.
In summary, incorporating subtitles in your Canva designs can enhance accessibility, improve user experience, increase engagement, overcome language barriers, optimize SEO, emphasize key points, and make your content more social media-friendly. Now that we understand the importance of subtitles, let’s dive into the step-by-step process of adding subtitles in Canva.
Step 1: Creating Your Design in Canva
The first step in adding subtitles to your design in Canva is to create the design itself. Canva offers a wide range of design templates for various purposes, or you can start with a blank canvas and unleash your creativity. Follow these steps to create your design:
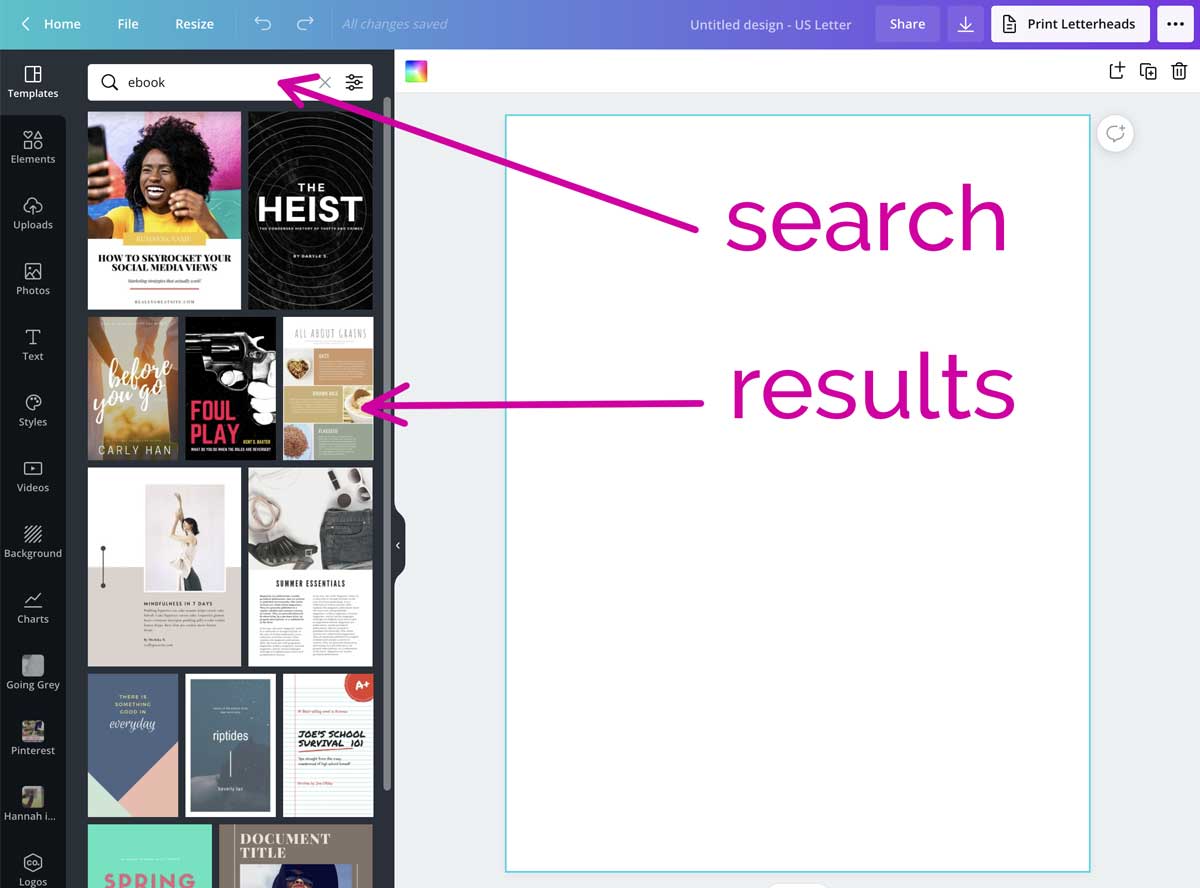
1. Choose a design template: Browse through Canva’s collection of templates and select one that aligns with the purpose and style of your design project. Templates are available for social media posts, presentations, posters, flyers, and more.
2. Select the canvas size: Determine the dimensions and orientation of your design. Canva provides pre-set sizes for different platforms, such as Instagram, Facebook, and LinkedIn, or you can customize the canvas size according to your specific needs.
3. Add background and elements: Customize your design by selecting a background color or image that complements your content. You can also add elements like shapes, lines, frames, and illustrations to enhance the visual appeal of your design.
4. Upload your own images: If you have specific images or graphics you want to include, you can upload them to Canva and easily incorporate them into your design. This allows for greater customization and personalization.
5. Insert placeholder text: If you’re unsure about the exact placement and layout of your subtitles, you can insert placeholder text in the design at this stage. This will help you visualize the overall composition of your design and plan for the placement of the subtitles.
6. Experiment and customize: Canva offers a range of editing tools that allow you to modify text, colors, fonts, and other design elements. Experiment with different options until you achieve the desired look and feel for your design.
7. Save your design: Once you are satisfied with your design, save it on Canva for future reference or download it to your device in the desired file format (such as JPEG or PNG) for further use.
By following these steps, you can create a visually appealing design in Canva as the foundation for adding subtitles. The next steps will guide you through the process of choosing fonts, adding text boxes, styling and formatting the subtitles, positioning them thoughtfully, and ultimately exporting your design with subtitles intact.
Step 2: Choosing the Right Font and Size for Subtitles
Choosing the right font and size for subtitles in your Canva design is crucial to ensure readability and visual harmony. The following steps will guide you in selecting the most appropriate font and size for your subtitles:
1. Consider the purpose and tone of your design: Think about the overall message and style you want to convey with your subtitles. If your design is formal or professional, consider using a clean and modern font. For a more playful or artistic design, you can opt for a decorative or handwritten font.
2. Focus on readability: Subtitles should be easy to read, even at a quick glance. Choose a font that is legible and clear, avoiding overly ornate or stylized fonts that may hinder readability. Sans-serif fonts like Arial, Helvetica, or Open Sans are popular choices for subtitles due to their simplicity and clarity.
3. Consider font size: The font size for subtitles will depend on the size of your design and the amount of text you are including. As a general guideline, aim for a font size that is large enough to be easily read but not so large that it takes up too much space or overwhelms the design. Test different font sizes to find the right balance.
4. Contrast with the background: Ensure that the chosen font color contrasts well with the background of your design. If your background is light, use a dark font color, and vice versa. This will ensure that the subtitles stand out and are clearly visible.
5. Consistency with brand guidelines: If you have established brand guidelines or a specific font associated with your brand, consider using that font for your subtitles. This will help maintain consistency across your designs and reinforce your brand identity.
6. Preview and test: Before finalizing your font and size choices, preview your subtitles at actual size and test them on various devices and screen sizes. This will help you ensure that the subtitles remain readable and visually appealing across different platforms.
Remember, the font and size you choose for your subtitles should enhance the overall design and complement the content rather than distract from it. By considering the purpose, readability, contrast, consistency, and testing the subtitles in your design, you can confidently select the right font and size for your Canva subtitles.
Step 3: Adding Text Boxes for Subtitles
Now that you have chosen the font and size for your subtitles, it’s time to add text boxes in Canva to incorporate your subtitles into the design. Follow these steps to add text boxes and enter your subtitles:
1. Select the Text tool: In the Canva editor, locate the Text tool in the left-hand sidebar. Click on it to access the text options.
2. Choose a text box style: Canva provides various text box styles to choose from. Browse through the options and select a style that complements your design. Alternatively, you can create a custom text box by clicking and dragging on your canvas.
3. Place the text box: Click and drag your cursor on the canvas to create a text box of the desired size. Position it where you want your subtitles to appear in the design. You can always adjust the placement later if needed.
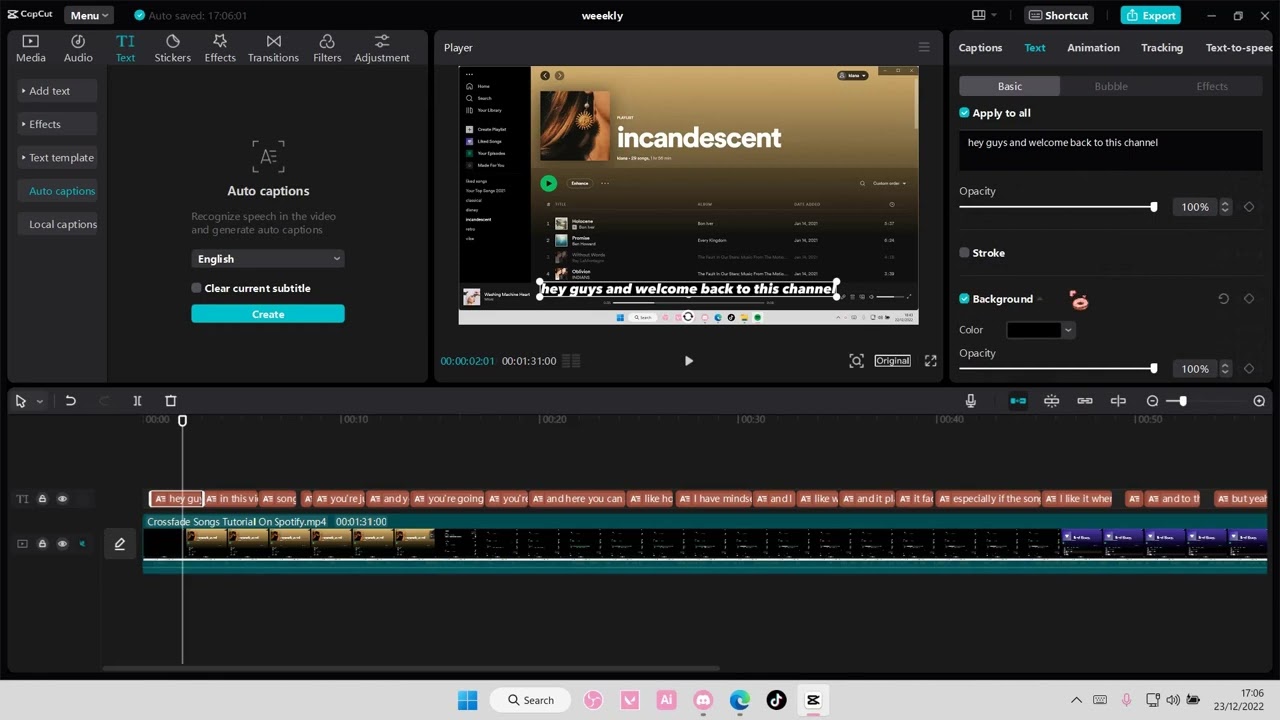
4. Enter your subtitles: Double-click inside the text box to enter your subtitles. Type or paste your subtitle text, ensuring that it fits within the boundaries of the text box. You can format the subtitles, such as applying bold or italic styles, adjusting line spacing, or changing the alignment, using the formatting options available in the top toolbar.
5. Copy and paste: If you have multiple subtitles to add and want them to have a consistent style, you can copy and paste the text box with the subtitles to other parts of your design. This saves time and ensures uniformity.
6. Resize and reposition: You may need to resize or reposition the text box to achieve the desired placement and proportion of your subtitles. To resize, click and drag the corners of the text box. To reposition, click and drag the text box to a new location.
By following these steps, you can easily add text boxes in Canva and input your subtitles. This gives you the flexibility to create visually appealing designs while effectively conveying your message. In the next step, we will explore how to style and format your subtitles to enhance their visual impact.
Step 4: Styling and Formatting the Subtitles
After adding text boxes and entering your subtitles in Canva, it’s time to style and format them to enhance their visual impact. Follow these steps to make your subtitles visually appealing and cohesive with your overall design:
1. Font and color: Customize the font style and color of your subtitles to align with your design theme. Experiment with different font options available in the Canva editor to find the one that best suits your design. Ensure that the font color contrasts well with the background for maximum readability.
2. Typography effects: Canva offers a variety of typography effects that you can apply to your subtitles. Explore options such as bold, italic, underline, strikethrough, and letter spacing to add emphasis or adjust the appearance of your subtitles.
3. Text alignment and orientation: Align your subtitles to the desired position within the text box. You can choose to align them left, center, right, or justify the text. Additionally, Canva allows you to rotate or flip the text, giving you even more creative possibilities.
4. Background and transparency: Customize the background of your text box to make your subtitles stand out. You can add a colored background, gradient, or even apply a transparent background to overlay the subtitles on top of your design elements.
5. Text effects and decorations: Enhance the visual appeal of your subtitles by applying text effects or decorations. Canva provides options like drop shadow, outline, glow, and more. Use these effects sparingly to avoid overwhelming the readability of your subtitles.
6. Consistency across design elements: Maintain consistency in the style and formatting of your subtitles throughout your design. Ensure that the font, color, and other typography settings of your subtitles remain coherent with other text elements in your design to create a cohesive visual experience.
7. Preview and make adjustments: Once you have applied the desired styles and formatting to your subtitles, preview your design at its actual size. This will help you identify any adjustments needed for readability and visual harmony. Make necessary modifications as required.
By taking the time to style and format your subtitles in Canva, you can create visually appealing designs that effectively communicate your message to the audience. In the next step, we will explore how to position the subtitles strategically within your design.
Step 5: Positioning the Subtitles in Your Design
Once you have styled and formatted your subtitles in Canva, it’s time to strategically position them within your design. Follow these steps to ensure that your subtitles are visually appealing and effectively convey your message:
1. Consider composition: Analyze your overall design and assess where subtitles will have the most impact. Look for areas that have empty spaces or where the subtitles can seamlessly integrate with other design elements without overcrowding the visual space.
2. Avoid covering important content: Ensure that your subtitles do not cover essential elements of your design, such as key images, important text, or crucial details. Subtitles should enhance the design, not hinder the comprehension of the main content.
3. Use hierarchy: If your design has multiple layers of information, such as headings, subheadings, and subtitles, use a clear hierarchy to guide the viewer’s attention. Position the subtitles in a logical and structured manner to indicate their importance and relationship to other elements.
4. Balance and symmetry: Aim for a balanced layout by distributing the subtitles evenly throughout your design. If you have multiple subtitles, try to create symmetry or maintain a consistent spacing between them. This creates a visually pleasing and organized design.
5. Experiment with positioning: Don’t be afraid to try different positions for your subtitles. Canva allows you to easily move and adjust text boxes and subtitles, so take advantage of this flexibility. Preview your design with subtitles positioned in various locations to find the one that best complements your overall composition.
6. Consider visual flow: Guide the viewer’s eyes by positioning subtitles in a way that follows the natural reading or viewing pattern. This can help create a smooth and engaging visual flow, leading the audience through your design effortlessly.
7. Align with design elements: If your design includes other visual elements such as lines, shapes, or images, consider aligning your subtitles with those elements. This can create a sense of harmony and integration within the design.
By taking the time to strategically position your subtitles, you can ensure that they enhance the visual appeal and overall impact of your design. In the final step, we will explore how to export your design with subtitles to share it with your audience.
Step 6: Exporting Your Design with Subtitles
After adding subtitles to your design in Canva, it’s time to export and share your final masterpiece with the world. Follow these steps to export your design with subtitles intact:
1. Review and proofread: Before exporting, thoroughly review your design to ensure that the subtitles are correctly positioned, styled, and formatted. Take the time to proofread the text for any spelling or grammatical errors and make any necessary adjustments.
2. Save your design: Click on the “File” tab in the Canva editor and select “Save” to save your design. This will ensure that your progress is saved and can be accessed later for further edits or revisions.
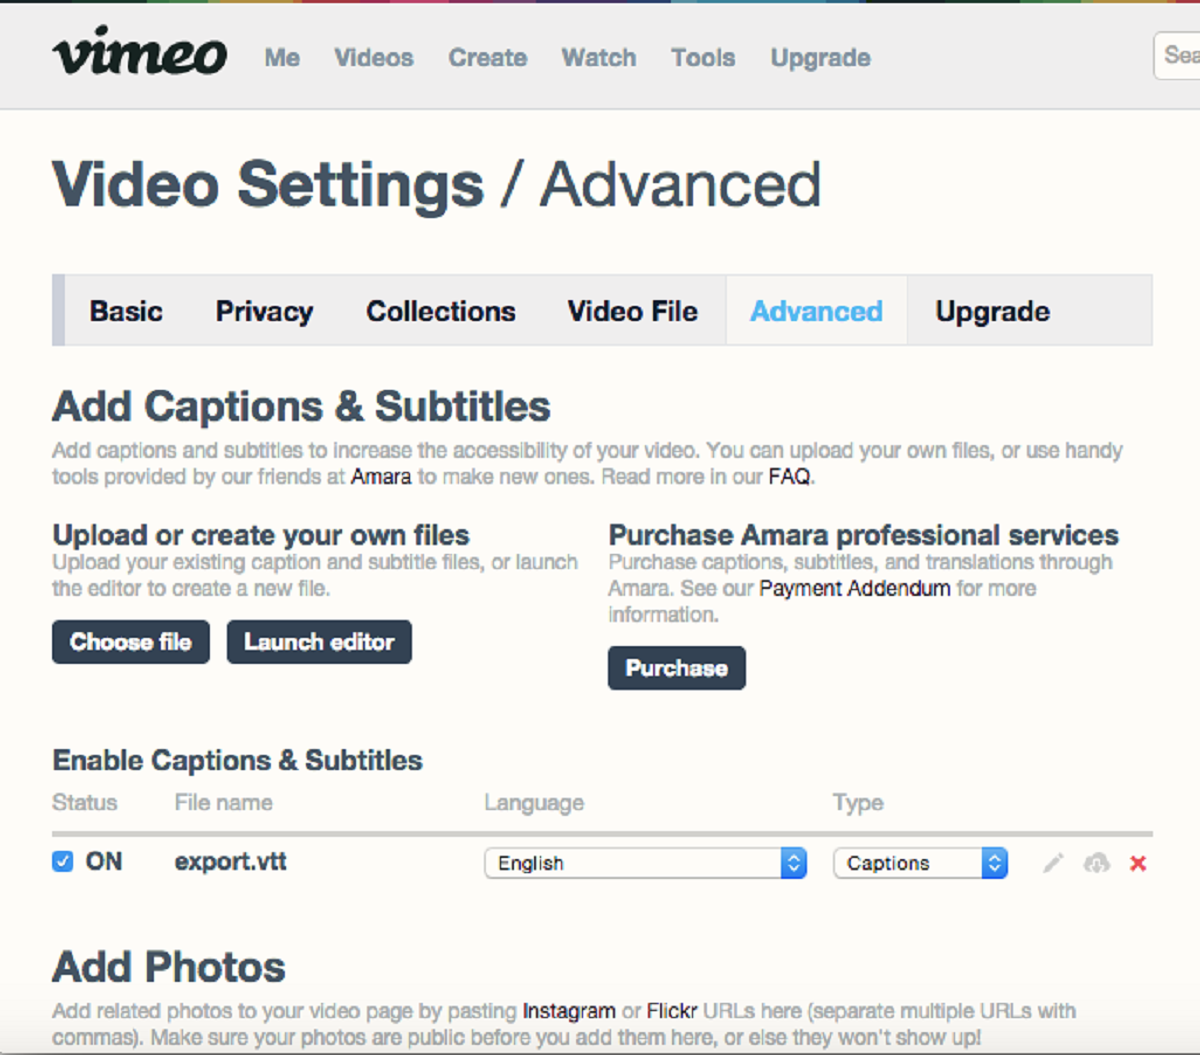
3. Choose the appropriate file format: Canva offers multiple file formats for exporting your design. Select the format that best suits your needs, such as JPEG, PNG, PDF, or even animated formats like GIF or MP4 if your design includes motion or animation.
4. Specify the resolution: If you’re exporting your design for print purposes, ensure that you set the resolution to a suitable level, typically 300 DPI (dots per inch). For digital use, a resolution of 72 DPI is generally sufficient.
5. Select the export location: Determine where you want to save the exported file on your computer or cloud storage. Choose a location that is easily accessible and organized for future use.
6. Rename your file: Giving your exported file a descriptive and meaningful name can help you easily identify it later on. Use a name that reflects the content or purpose of your design.
7. Export the design: Click on the “Download” or “Export” button to initiate the export process. Canva will generate the file with your design and subtitles, and it will be saved to the specified location on your device.
Once your design is exported, you can share it on various platforms, such as social media, websites, emails, or print it for physical distribution. The subtitles will remain intact, ensuring that your audience can engage with your content effectively.
Congratulations! You have successfully completed the final step of exporting your design with subtitles. Now you can proudly showcase your visually captivating design to your target audience.
Conclusion
Adding subtitles to your designs in Canva can elevate the visual appeal while effectively conveying your message to your audience. By following the step-by-step process outlined in this article, you can seamlessly incorporate subtitles into your Canva designs and create visually stunning and informative content.
We started by exploring the world of Canva and its user-friendly interface, highlighting why it has become a go-to tool for designers, marketers, and entrepreneurs. We then delved into the importance of using subtitles in Canva, including enhanced accessibility, improved user experience, increased engagement, language barrier elimination, SEO optimization, and social media friendliness.
Throughout the steps, you learned how to create your design, choose the right font and size for subtitles, add text boxes, style and format the subtitles, strategically position them within your design, and finally, export your design with subtitles intact.
By utilizing these techniques, you can create designs that not only captivate the viewer’s attention but also ensure that your message is easily understood and accessible to a wider audience. Incorporating subtitles in your Canva designs allows you to connect with viewers on a deeper level and make your content more inclusive.
So, whether you’re creating social media posts, presentations, promotional materials, or any other type of visual content, remember the power of subtitles. They can take your design to the next level and leave a lasting impact on your audience.
Now it’s time for you to unleash your creativity and start adding subtitles to your Canva designs. With the knowledge and steps provided in this article, you’re on your way to creating visually stunning and informative designs that engage and captivate your audience.
Happy designing!