Introduction
Custom Zombies maps have become extremely popular among players of Call of Duty: World at War (WaW). These fan-created maps offer unique and thrilling gameplay experiences, allowing players to explore new environments, face challenging enemies, and uncover exciting storylines. As a player, downloading and installing custom Zombies maps can be a great way to breathe new life into your WaW gaming sessions.
If you’re new to the world of custom Zombies maps, you may be unsure of where to start or how to go about finding and downloading these maps. In this guide, we’ll walk you through the steps needed to download custom Zombies maps for WaW and get them up and running in your game.
Before we dive into the steps, it’s important to note that downloading and installing custom Zombies maps typically requires some basic computer knowledge. However, with a little guidance, even less tech-savvy players can enjoy the excitement of playing these unique maps.
So, without further ado, let’s explore the process of downloading and installing custom Zombies maps for WaW.
Understanding Custom Zombies Maps
Custom Zombies maps are user-created levels for Call of Duty: World at War that offer a fresh and unique experience compared to the standard game content. These maps are designed by talented members of the gaming community who put their creativity and passion into crafting exciting gameplay scenarios. Custom Zombies maps often feature new locations, innovative weaponry, challenging objectives, and intricate storylines.
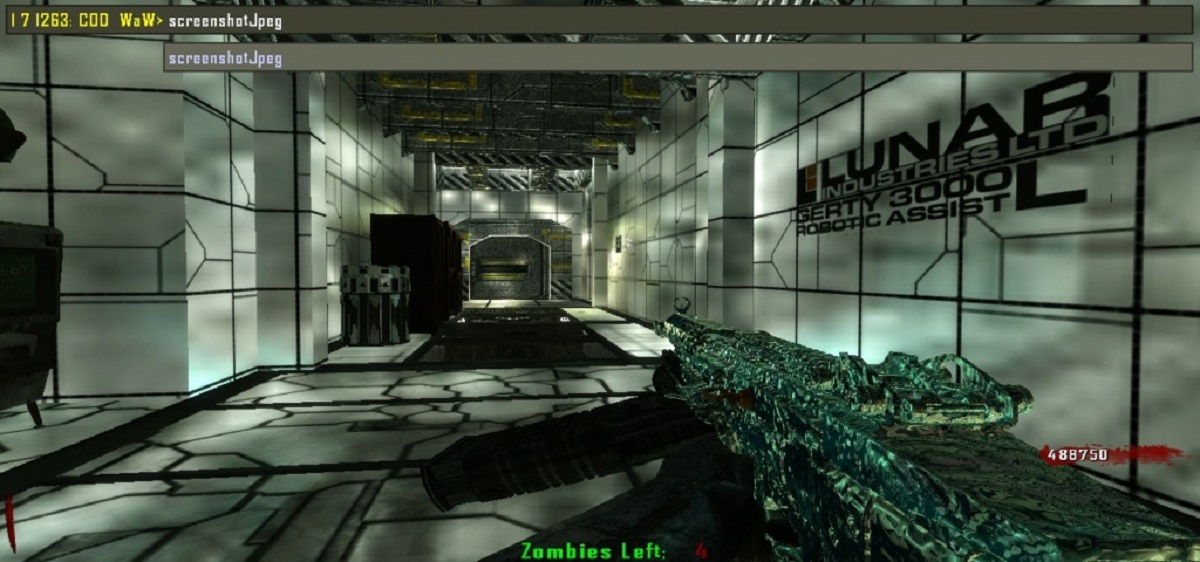
One of the great advantages of custom Zombies maps is the variety they offer. Players can explore new environments such as abandoned cities, research facilities, or even fantasy worlds. Each map has its own distinct theme, allowing for diverse gameplay experiences. Additionally, custom maps often come with their own set of rules, objectives, and gameplay mechanics, adding a new layer of excitement and challenge to the game.
Custom Zombies maps are not officially supported by the game developers, but that hasn’t deterred the dedicated community of map creators from producing high-quality content. These maps have gained immense popularity over the years, with thousands of options available for download.
Downloading and playing custom Zombies maps can open up a whole new world of possibilities for WaW players. It allows them to experience fresh challenges, engage with a passionate community, and discover hidden gems created by fellow gamers.
It’s important to note that custom Zombies maps are typically designed for the PC version of WaW, as this platform offers more flexibility and accessibility for modding. Console players may have limited options when it comes to accessing custom maps, depending on the platform and game version.
Now that we have a basic understanding of what custom Zombies maps are all about, let’s move on to the process of finding and downloading these exciting creations.
Step 1: Finding a Trustworthy Website
When it comes to downloading custom Zombies maps for WaW, it’s important to start with a trustworthy and reliable website. The internet is flooded with various platforms and forums offering custom content, but not all of them are reliable or safe.
To find a reputable website, start by doing some research and reading user reviews. Look for websites that have a positive reputation within the gaming community and are known for hosting high-quality custom Zombies maps. Popular websites often have active forums and a dedicated community that can provide valuable insights and recommendations.
Here are a few key factors to consider when evaluating a potential website:
- Reputation: Look for websites that have been around for a while and have a good track record of providing safe and reliable downloads.
- Community: A thriving community indicates that the website is actively maintained and supported by its users.
- Quality Assurance: Pay attention to websites that have a review process for submitted maps to ensure they meet a certain level of quality.
- Download Metrics: Check if the website provides metrics such as download counts, ratings, and comments from other users to help you gauge the popularity and quality of a map.
- User Feedback: Look for websites where users can provide feedback and ratings for downloaded maps, allowing you to make informed decisions.
- Secure Downloads: Ensure that the website offers secure downloads free from malware or viruses. It’s essential to keep your computer protected.
Remember, it’s always better to be cautious and choose a reputable website to ensure the safety of your computer and the quality of the maps you download. With a little research, you’ll be able to find a reliable platform that will provide you with a plethora of custom Zombies maps to enhance your gaming experience.
Step 2: Downloading the Custom Zombies Maps
Once you’ve found a trustworthy website for custom Zombies maps, it’s time to delve into the exciting process of downloading these unique creations. Follow these steps to download your desired custom Zombies maps:
- Search or browse for the map: Most websites will have a search bar or categories to help you navigate through their collection of custom Zombies maps. You can search for specific maps or explore different categories to find something that suits your preferences.
- Select the desired map: When you find a map that catches your interest, click on it to access its specific page. Here, you will typically find a description of the map, screenshots, user ratings, and download options.
- Choose the correct version: Ensure that the map you’re downloading is compatible with the version of Call of Duty: World at War you have. Some maps may require specific updates or mods, so it’s important to read the requirements before proceeding.
- Click on the “Download” button: Once you’re ready to download the map, click on the designated “Download” button. The file may be in a compressed format such as .zip or .rar to reduce file size. Save the file to a location on your computer where you can easily access it later.
It’s worth mentioning that some custom Zombies maps may come with additional files, such as mods or assets required for the map to function properly. If this is the case, make sure to download and save these files along with the main map.
Now that you have successfully downloaded the custom Zombies map, it’s time to move on to the next step: extracting the map files.
Step 3: Extracting the Maps
After downloading the custom Zombies map files, you will typically need to extract them from their compressed format. Follow these steps to extract the maps:
- Locate the downloaded file: Navigate to the location on your computer where you saved the downloaded map file. It may be in a compressed format such as a .zip or .rar file.
- Extract the files: Right-click on the downloaded file and select the option to extract or unzip the files. This action will extract the contents of the compressed file and create a new folder containing the map files.
- Open the extracted folder: Once the extraction process is complete, open the newly created folder. Inside, you should see various files and folders related to the custom Zombies map.
- Check for additional files or instructions: Some custom Zombies maps may come with additional files, such as readme.txt or installation instructions. Take a moment to review these files to ensure you have all the necessary components and to familiarize yourself with any specific installation instructions provided by the map creator.
Now that you have successfully extracted the map files, it’s time to proceed to the next step: placing the extracted files in the correct folder.
Step 4: Placing the Maps in the Correct Folder
Now that you have the map files extracted, it’s time to place them in the correct folder within your Call of Duty: World at War installation. Follow these steps:
- Locate your WaW installation folder: The location of your World at War installation folder may vary depending on your computer setup. By default, it is typically located in the “Program Files” directory on Windows or the “Applications” directory on Mac.
- Open the “Mods” folder: Within the installation folder, look for a folder named “Mods.” Open this folder to access the directories where you will place the custom Zombies map files.
- Create a new folder for the map: Inside the “Mods” folder, create a new folder with a unique name for your custom map. This folder should have a “.map” extension (e.g., “zm_mymap.map”).
- Move the extracted map files: Move all the files and folders from the extracted map folder into the newly created folder within the “Mods” directory. Make sure to include all the map files as well as any additional files or folders specified in the map’s readme instructions.
Once you have placed the custom Zombies map files in the correct location, you are one step closer to enjoying your new map. However, before you can launch the game with the custom map, there are a few more steps to follow. Let’s proceed to the next step: configuring the game.
Step 5: Configuring the Game
Configuring your game settings is an essential step to ensure that your Call of Duty: World at War is ready to run the custom Zombies map smoothly. Follow these steps to configure the game:
- Launch Call of Duty: World at War: Open the game by double-clicking on its shortcut or launching it from your Steam library.
- Go to the “Mods” menu: Once the game is open, navigate to the “Mods” menu from the main menu. Here, you will see a list of available mods and custom maps installed in the “Mods” folder.
- Enable the custom Zombies map: Locate the folder for your custom Zombies map in the “Mods” menu and select it to enable it. Typically, the game will automatically recognize the custom map if it is placed in the correct folder.
- Adjust any additional settings: Depending on the custom Zombies map and its specific requirements, you may need to adjust additional settings within the game. This could include modifying graphic settings, audio settings, or gameplay options to optimize your experience with the custom map.
Before moving on to the final step, take a moment to ensure that the game is properly configured and ready to launch with the custom Zombies map. Review any specific instructions provided by the map creator in the readme file or on the website to ensure that you haven’t missed any important details.
Now that the game is configured, it’s time to move on to the final step: launching the game with the custom Zombies map.
Step 6: Launching the Game with the Custom Maps
After completing all the previous steps, you’re now ready to launch Call of Duty: World at War and play the custom Zombies map you downloaded. Follow these final steps to launch the game with the custom map:
- Open Call of Duty: World at War: Double-click on the game’s shortcut or launch it from your Steam library to open the game.
- Go to the “Mods” menu: Once the game is open, navigate to the “Mods” menu from the main menu. Here, you should see the custom Zombies map you enabled in the previous step.
- Select the custom Zombies map: Choose the custom Zombies map from the “Mods” menu. Double-check that you have selected the correct map to ensure you launch the intended custom map.
- Start the game: After selecting the custom Zombies map, start the game as you normally would. The game will load with the selected map, and you’ll be ready to embark on a new and exciting Zombies experience!
Once the game loads successfully, you can immerse yourself in the custom Zombies map, exploring its unique environment, navigating challenging obstacles, and battling hordes of the undead. Enjoy the thrill and excitement of playing a custom-created Zombies map designed by passionate members of the gaming community.
Remember to have fun and experiment with different custom Zombies maps available to expand your gameplay options and enhance your Call of Duty: World at War experience.
With these six steps, you’ve learned how to download custom Zombies maps, extract the map files, place them in the correct folder, configure the game settings, and launch the game with the custom maps. Now, it’s time to embark on your custom Zombies adventure and enjoy the immersive gameplay these unique maps have to offer.
Conclusion
Congratulations! You have successfully learned how to download and play custom Zombies maps for Call of Duty: World at War. By following the steps outlined in this guide, you can explore a vast collection of fan-created maps and enjoy thrilling, unique gameplay experiences.
Remember, finding a trustworthy website for downloading custom Zombies maps is crucial to ensure the safety of your computer and the quality of the maps you download. Take the time to research and choose a reputable platform that has a positive reputation within the gaming community.
Once you’ve found a reliable website, you’ll then proceed to download the desired custom Zombies map and extract the files from their compressed format. Placing the extracted map files in the correct folder within your WaW installation is crucial for the game to recognize and load the custom map properly.
Configuring your game settings, enabling the custom map through the “Mods” menu, and launching the game with the selected custom Zombies map complete the process. Now, you can immerse yourself in thrilling gameplay and uncover the mysteries of the unique maps created by passionate members of the gaming community.
Remember to always have fun and explore different custom Zombies maps to keep your gaming sessions fresh and exciting. The diverse range of maps available allows you to embark on various adventures and face new challenges with each gameplay session.
So, gather your friends, prepare your weapons, and enter the world of custom Zombies maps in Call of Duty: World at War. The undead await, and the fate of humanity lies in your hands!