Introduction
Welcome to this guide on how to download Canva designs and insert them into Google Slides! Canva is a versatile graphic design tool that allows users to create beautiful visuals, presentations, and more. Google Slides, on the other hand, is a powerful online presentation platform that enables collaboration and seamless sharing.
Combining the strengths of Canva and Google Slides can help you create stunning presentations with ease. Whether you’re a student, teacher, business professional, or just someone looking to add some flair to your slides, this guide will walk you through the process step by step.
By following the instructions in this guide, you’ll be able to take your designs from Canva and seamlessly incorporate them into your Google Slides presentations. This means you can leverage Canva’s extensive library of design elements, graphics, and templates to create eye-catching visuals, and easily transfer them into Google Slides for seamless presentation creation and sharing.
Before we dive into the steps, it’s important to note that both Canva and Google Slides offer free versions with limited features, as well as premium subscriptions that unlock additional tools and resources. In this guide, we’ll assume you have a basic understanding of both platforms and are using the free versions.
Now, let’s get started with the first step: getting started with Canva. If you’re already familiar with canva, feel free to skip ahead to the appropriate section.
Step 1: Get Started with Canva
If you’re new to Canva, the first thing you’ll need to do is sign up for an account. Head over to the Canva website and click on the “Sign up” button. You can sign up using your Google or Facebook account, or by creating a new Canva account with your email address. Once you’ve signed up, you’ll be taken to the Canva homepage.
On the Canva homepage, you’ll find a plethora of design templates for various purposes such as social media posts, presentations, flyers, and more. Take some time to explore the different categories and template options available. Canva offers both free and premium templates, so make sure to choose one that suits your needs.
Once you’ve selected a template or decided to create a design from scratch, you’ll be taken to the Canva editor. Here, you’ll find a wide range of tools and features to customize your design. The editor is divided into different sections such as the sidebar, toolbar, and canvas.
The sidebar contains various options to customize your design, including elements, text, backgrounds, and more. You can drag and drop elements onto the canvas, resize them, change their color, and arrange them in layers. The toolbar provides additional options such as formatting text, adding filters to images, and adjusting transparency.
Canva also offers a vast library of free and paid elements like images, icons, shapes, and illustrations. You can search for specific elements or browse through the categories to find the perfect visual assets for your design. To add an element to your design, simply click on it and drag it onto the canvas.
Once you’re satisfied with the design, it’s time to move on to the next step: downloading your Canva design as an image file. This will allow you to easily insert it into Google Slides. Stay tuned for the next section!
Step 2: Create Your Design on Canva
Now that you’re familiar with the basics of Canva, it’s time to unleash your creativity and start creating your design. Whether you’re working on a presentation slide, social media graphic, or any other visual project, Canva has the tools and features to bring your ideas to life.
Start by selecting the appropriate design template for your project. Canva offers a wide range of templates with different layouts and themes. You can filter them by category or use the search bar to find a specific template. Once you’ve chosen a template, it will open in the Canva editor.
The editor provides you with a variety of customization options to make your design unique. You can change the text, fonts, colors, and backgrounds to match your brand or personal style. To edit the text, simply click on it and replace it with your own content. You can also resize, rotate, and position the text within the design.
Canva also allows you to upload your own images and incorporate them into your design. If you don’t have specific images in mind, you can explore Canva’s extensive library of stock photos and illustrations. Simply search for the type of image you need, and when you find the perfect one, drag and drop it onto your design.
Another great feature of Canva is the ability to add elements such as icons, shapes, lines, and illustrations. These elements can help enhance the visual appeal of your design and make it more engaging. Similar to images, you can search for specific elements or browse through the categories to find the ones that suit your needs.
Once you’re satisfied with the overall look and feel of your design, take some time to review it and make any necessary adjustments. Check for any spelling errors, ensure the elements are properly aligned, and double-check the color scheme and font choices. It’s always a good idea to get a fresh pair of eyes to review your design before finalizing it.
With your design complete, it’s time to move on to the next step: downloading your Canva design as an image file. This will enable you to insert it into Google Slides with ease. We’ll cover this in detail in the next section. Stay tuned!
Step 3: Download Your Canva Design as an Image
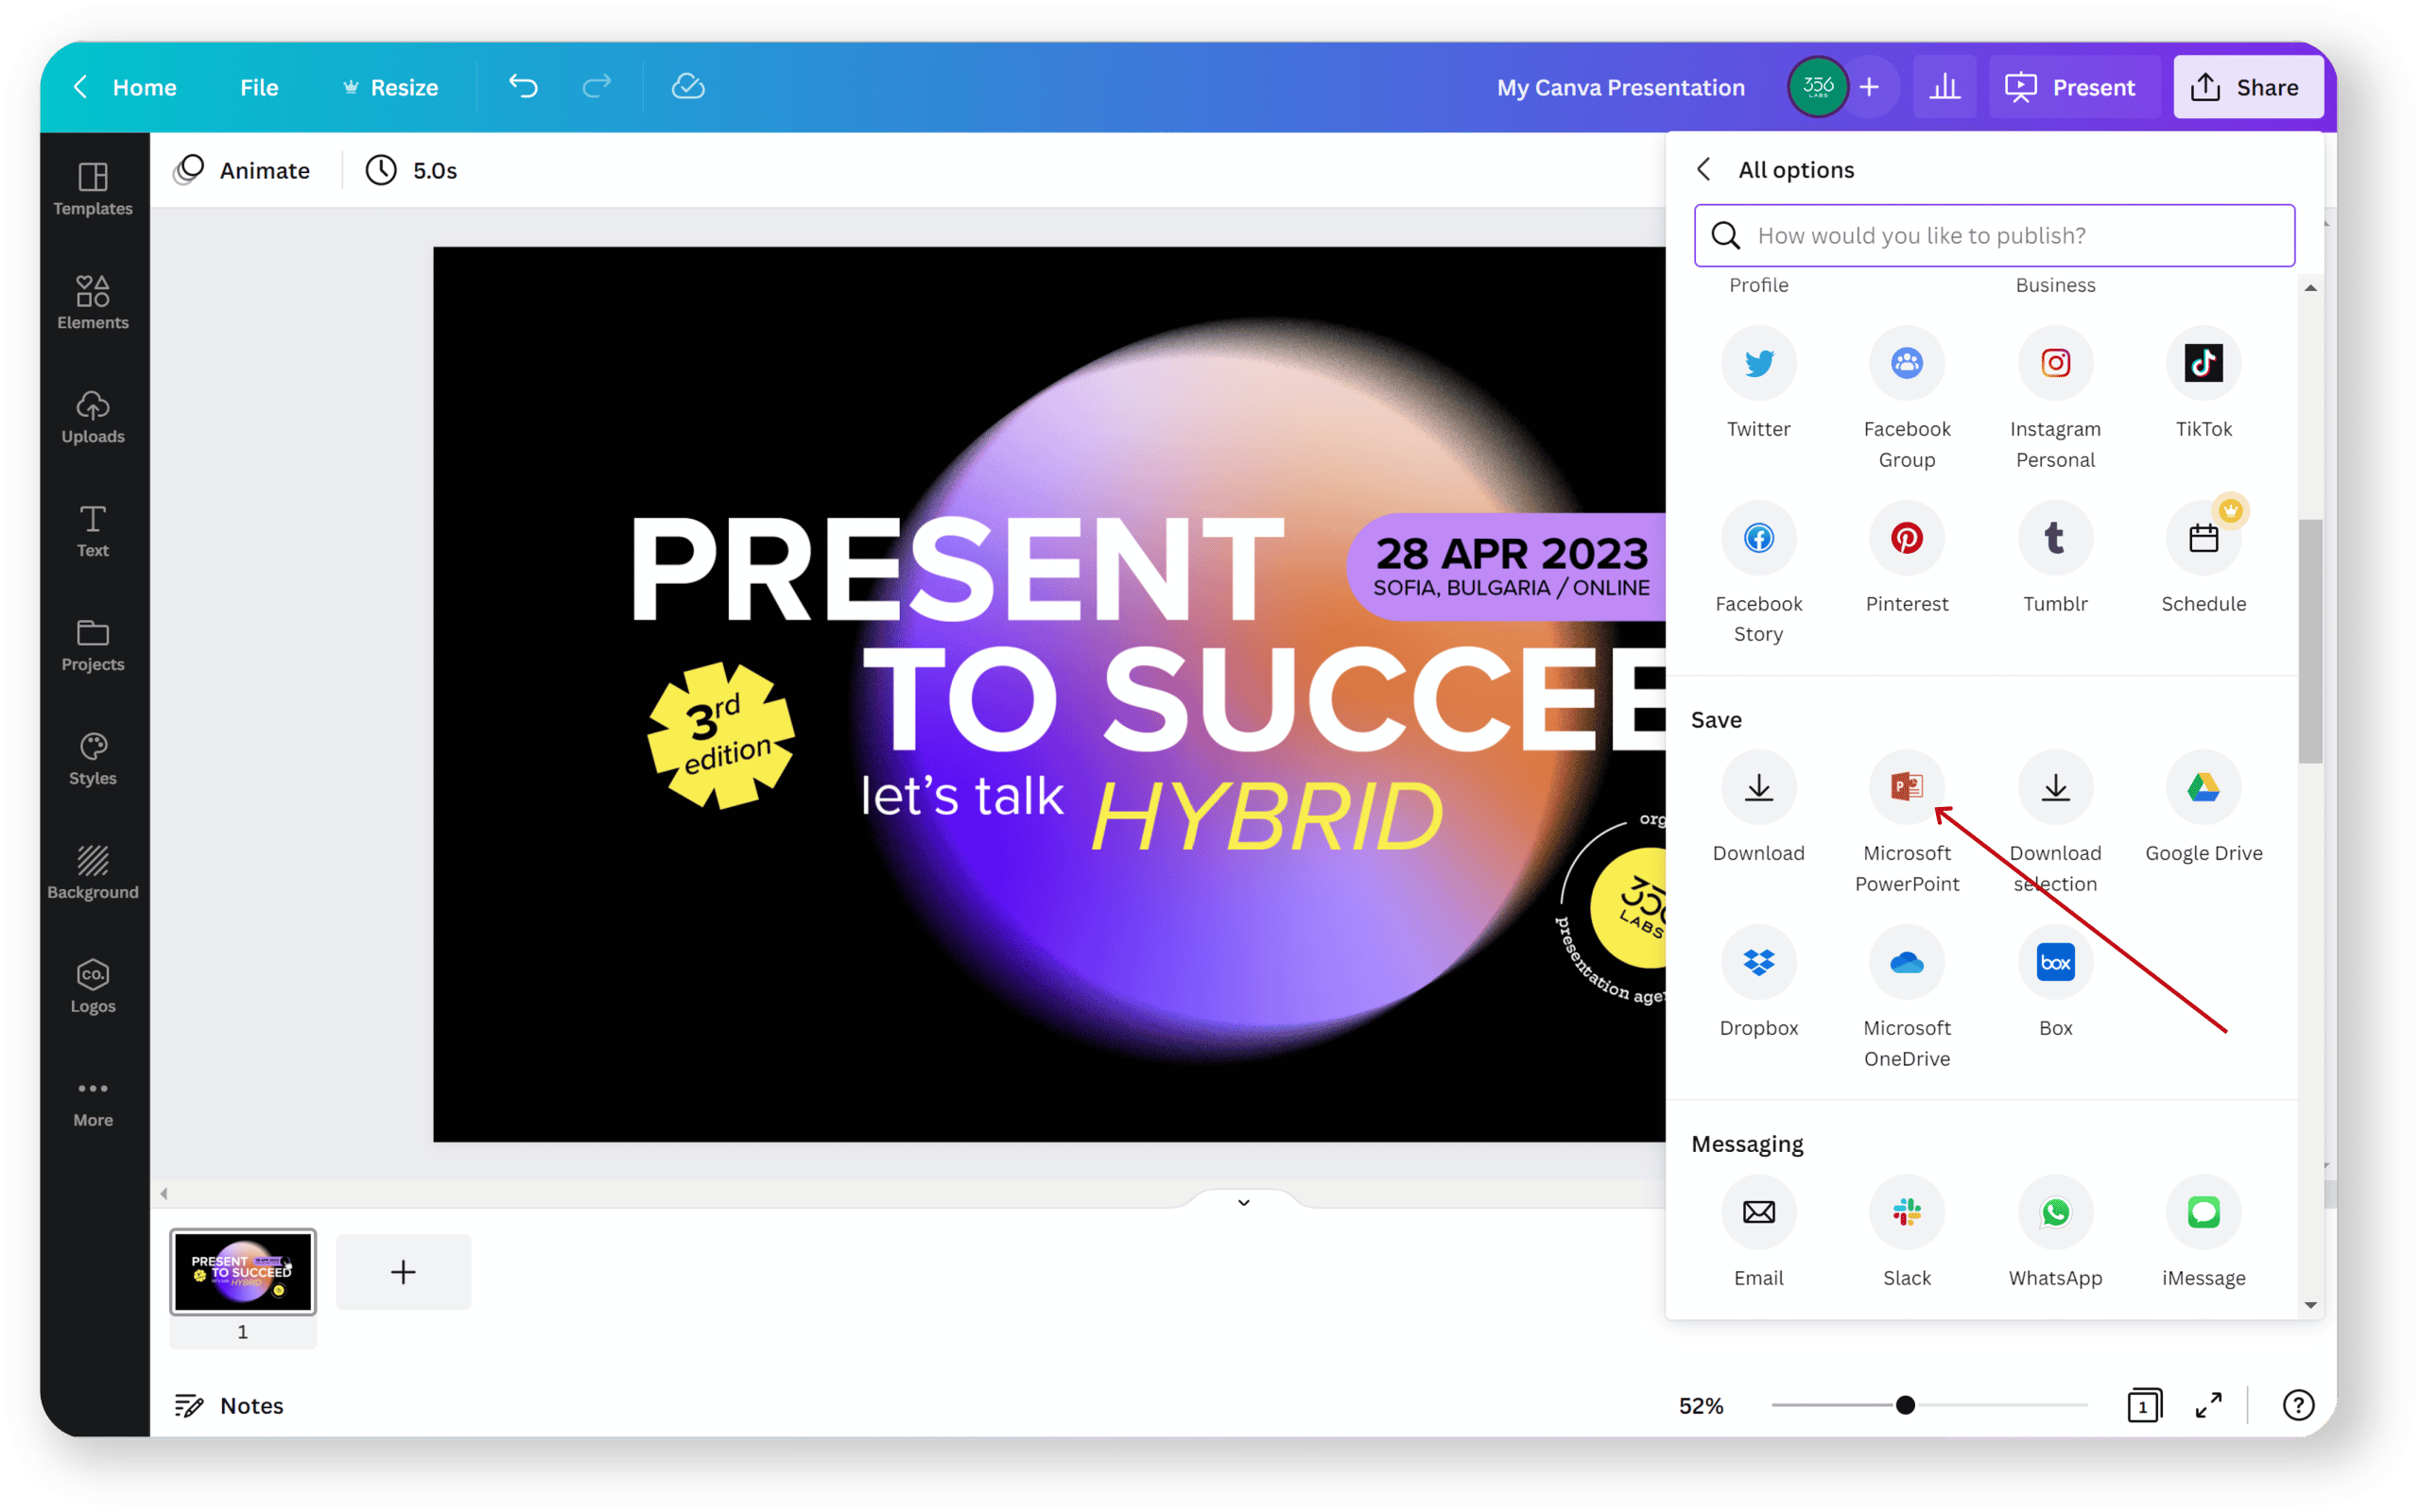
Once you’re satisfied with your design on Canva, it’s time to download it as an image file that can be inserted into Google Slides. Canva offers multiple file formats for downloading your designs, including PNG, JPEG, and PDF. Follow these steps to download your design:
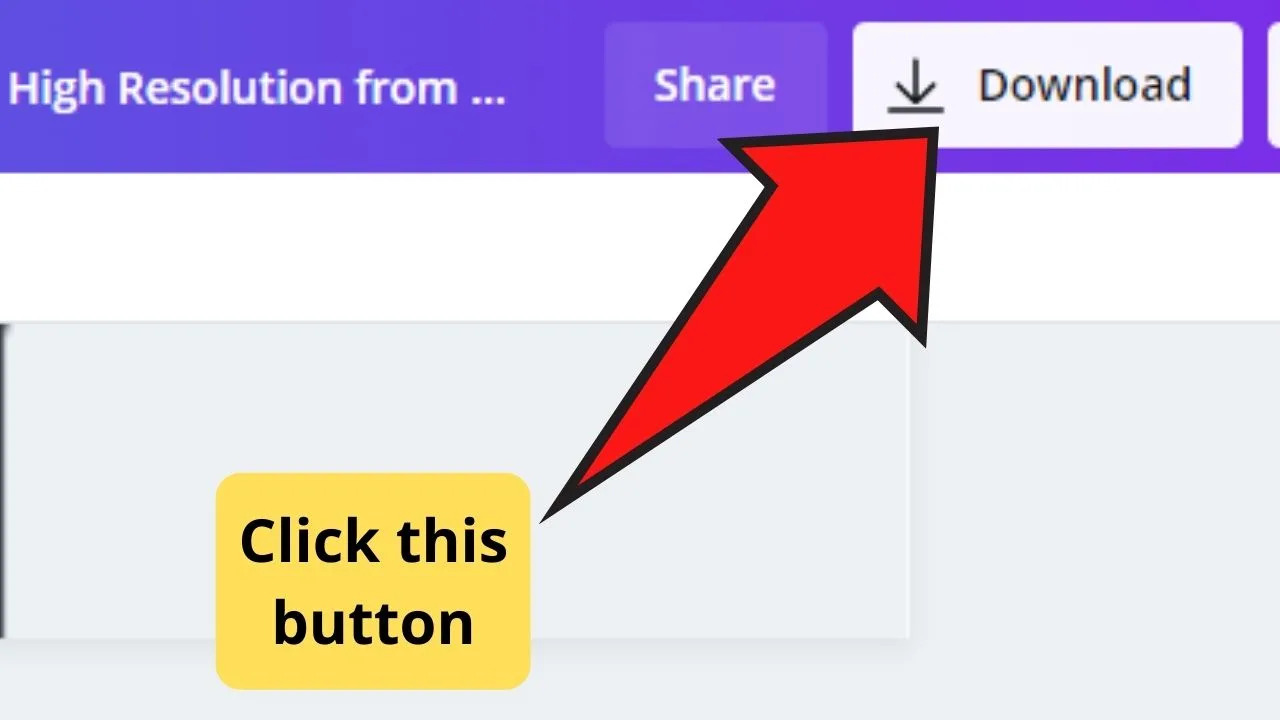
- Click on the “Download” button located at the top right corner of the Canva editor.
- A dropdown menu will appear with the available download options. Select your preferred file format. For most cases, PNG or JPEG format should suffice.
- Canva will then process your design and generate the downloadable image file. Once the file is ready, it will automatically download to your computer.
Before downloading, you may also have the option to choose the quality or resolution of the image. Higher resolutions will result in larger file sizes, so consider the intended use and file size limitations when making your selection.
It’s worth mentioning that if you have a Canva Pro subscription, you’ll have access to additional download options such as downloading designs with transparent backgrounds or downloading animated designs. These advanced features can be particularly useful for creating more dynamic and customizable presentations.
With your Canva design downloaded as an image, you’re now ready to move on to the next step: opening Google Slides. We’ll guide you through the process of inserting your Canva design into Google Slides in the upcoming section. Keep reading to learn more!
Step 4: Open Google Slides
Now that you have your Canva design downloaded as an image, it’s time to open Google Slides. If you don’t already have a Google account, you’ll need to create one to access Google Slides. Follow these steps to open Google Slides:
- Open your web browser and go to the Google Drive website (drive.google.com).
- Sign in to your Google account or create a new one if you don’t have an account.
- Once you’re signed in, click on the “New” button on the left-hand side of the screen.
- A dropdown menu will appear. Select “Google Slides” from the options.
Google Slides will open in a new tab, and you’re now ready to begin creating your presentation. You’ll be presented with a blank slide to start with, and from here, you can add your Canva design to enhance your presentation.
If you already have an existing presentation that you want to insert your Canva design into, you can simply open that presentation instead of creating a new one. Locate the file in your Google Drive, right-click on it, and select “Open with” and then “Google Slides”. This will open your existing presentation in Google Slides.
Now that you have Google Slides open and ready, let’s move on to the next step: inserting your Canva design into Google Slides. This will allow you to seamlessly integrate your Canva design into your presentation and make it visually engaging. We’ll cover this in detail in the next section. Keep reading to learn more!
Step 5: Insert Your Canva Design into Google Slides
Now that you have Google Slides open, it’s time to insert your Canva design into your presentation. Follow these steps to seamlessly integrate your Canva design into Google Slides:
- In Google Slides, navigate to the slide where you want to insert your Canva design. You can click on an existing slide or click on the plus (+) button to add a new slide.
- Once you’re on the desired slide, click on the “Insert” tab in the top menu.
- From the dropdown menu, select “Image”.
- A dialog box will appear with different options to insert the image. Click on “Upload from computer”.
- Navigate to the folder where you saved the Canva design image file, select it, and click on the “Open” button.
- Google Slides will upload the image file and insert it onto your slide.
- You can resize and reposition the image as needed by clicking and dragging the corners or edges.
That’s it! Your Canva design is now inserted into your Google Slides presentation. You can repeat these steps to insert additional Canva designs into different slides as needed.
It’s important to note that the inserted image is static and won’t retain any editable elements or interactive features from Canva. If you want to make any modifications to the design, you’ll need to go back to Canva, make the changes, re-download the design, and then replace the image in Google Slides following the steps outlined above.
You can also use this method to insert multiple Canva designs into the same presentation, creating a cohesive and visually appealing slide deck. Feel free to experiment with different layouts and arrangements to make your presentation stand out.
Now that your Canva design is integrated into Google Slides, it’s time to move on to the next step: editing and customizing your design within Google Slides. We’ll cover this in detail in the next section. Keep reading to learn more!
Step 6: Edit and Customize Your Design in Google Slides
Now that you have inserted your Canva design into Google Slides, you can further enhance and customize it within the platform. Google Slides offers various editing and customization options to make your design pop. Follow these steps to edit and customize your design in Google Slides:
- Select the inserted image by clicking on it once. Handles will appear around the image to indicate that it’s selected.
- From the toolbar at the top, you can adjust the image’s size, position, and rotation using the provided options.
- You can also use the “Format options” or “Format image” button that appears on the toolbar to make additional adjustments such as adjusting the brightness, contrast, and transparency of the image.
- If you want to add text or other elements on top of the image, click on the “Text box” or “Shape” icons in the toolbar and then click on the slide to add the respective element. You can then customize the added elements as desired.
- Google Slides also offers a range of pre-designed themes and templates. If you want to apply a theme or template to your entire presentation or specific slides, click on the “Slide” menu and select “Change theme” or “Apply layout”. Choose from the available options and see how it transforms your design.
- To further customize the slide layout, you can add additional content, such as text boxes, shapes, or images, by selecting the respective options from the “Insert” menu.
- Additionally, you can change the background color or add a background image to your slides by selecting the “Background” option from the “Slide” menu.
These are just a few of the customization options available in Google Slides. Take some time to explore the different features and experiment with different options to create a unique and visually appealing presentation.
Remember that you can always save your changes as you work by clicking on the “Save” button or using the shortcut Ctrl+S (Windows) or Command+S (Mac). This will ensure that your progress is saved, and you can easily pick up where you left off.
With your Canva design now customized in Google Slides, you’re ready to impress your audience with a visually stunning presentation. Take the time to review your slides, make any final adjustments, and practice your presentation delivery.
That wraps up our guide on how to download Canva designs and insert them into Google Slides. We hope you found this guide helpful in leveraging the power of Canva and Google Slides to create captivating presentations. Now go ahead and showcase your creativity with confidence!
Conclusion
In this guide, we explored the process of downloading Canva designs and integrating them into Google Slides. By combining the capabilities of Canva’s design tools with the collaborative and presentation features of Google Slides, you can create visually stunning and engaging presentations.
We began by familiarizing ourselves with Canva, signing up for an account, and exploring its various design templates, customization options, and elements. After creating a design and downloading it as an image file, we moved on to Google Slides.
In Google Slides, we learned how to open the platform, insert our Canva designs into our presentation slides, and customize them according to our preferences. We explored options for resizing, repositioning, and adding text and other elements to our designs.
With the flexibility and versatility of both Canva and Google Slides, the possibilities are endless when it comes to designing and presenting captivating visuals. Whether you’re creating presentations for educational, professional, or personal purposes, these tools can help elevate your content and make a lasting impression.
Remember to continuously explore the features and functionalities offered by both platforms. Keep experimenting with different designs, layouts, and themes to create visually appealing presentations that effectively communicate your message.
Now that you have the knowledge and skills to seamlessly integrate Canva designs into Google Slides, it’s time to put your ideas into action. Take advantage of the resources and flexibility offered by these tools to create impactful presentations that captivate your audience.
We hope this guide has been informative and helpful in your journey to create visually stunning presentations. Embrace your creativity, make the most of Canva and Google Slides, and let your ideas shine!