Introduction
Bookmarks are a handy tool that allows you to save and easily access your favorite websites. Whether you’re switching browsers or simply want to have a backup of your bookmarks, learning how to download and save them is essential. In this guide, we will walk you through the process of downloading bookmarks from your browser so that you can have them readily available whenever you need them.
Bookmarks serve as a quick link to websites you frequently visit, saving you the time and effort of entering the website address manually each time. They are especially useful for websites that do not necessarily appear in search engine results or for those that you want to access directly without going through the hassle of typing in the entire URL.
By downloading your bookmarks, you are ensuring that you always have a backup in case of computer crashes or browser updates. Additionally, if you decide to switch browsers, having a file of your bookmarks makes the transition seamless.
In the following steps, we will guide you through the process of downloading bookmarks from your browser and saving them as an HTML file.
Step 1: Locate your browser’s bookmark manager
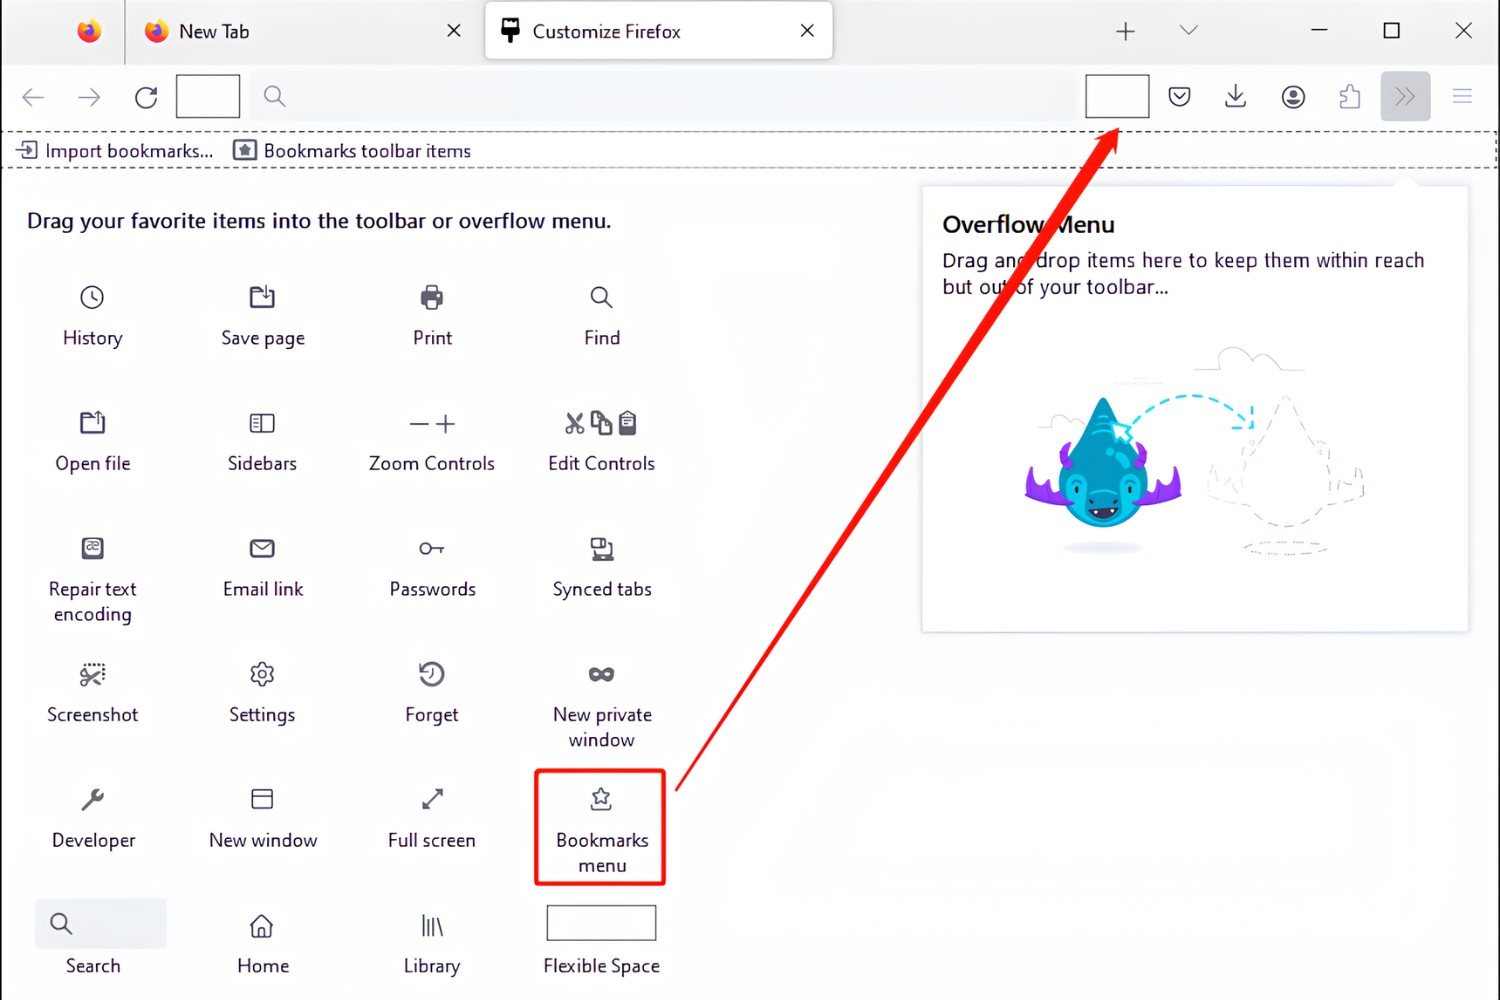
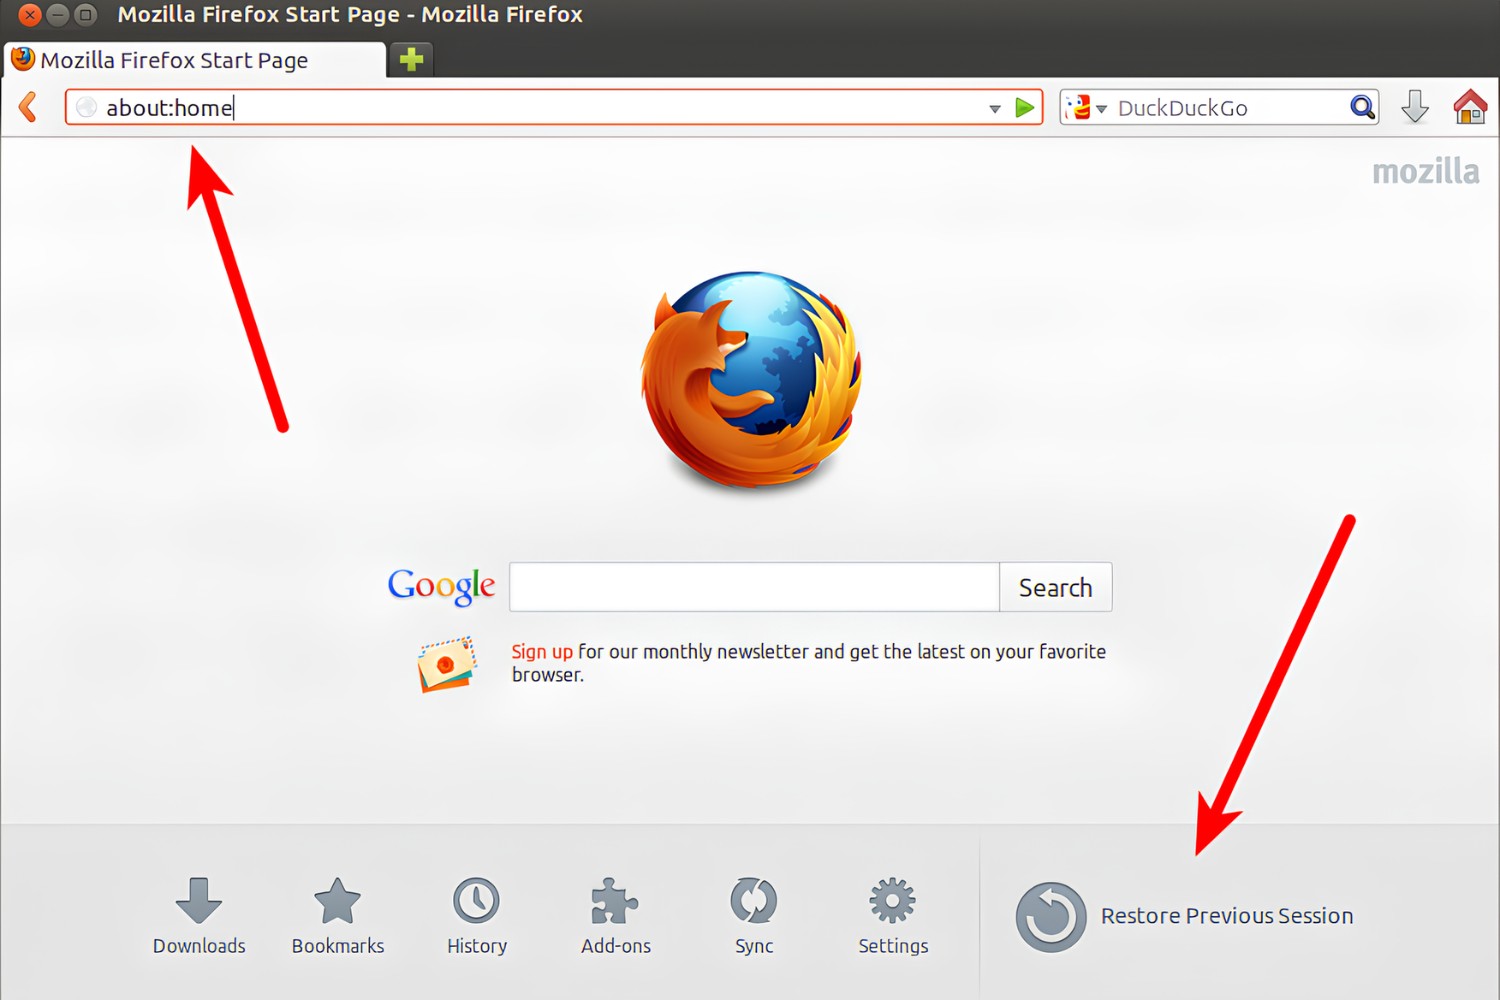
The first step in downloading your bookmarks is to locate the bookmark manager in your web browser. The bookmark manager is the tool that allows you to view, organize, and manage your bookmarks.
The location of the bookmark manager may vary depending on the browser you are using. Here are the steps to find it in some popular browsers:
- Google Chrome: In Chrome, click on the three dots in the top-right corner of the browser window to open the menu. From the menu, hover over “Bookmarks” and then click on “Bookmark manager”. Alternatively, you can use the shortcut “Ctrl + Shift + O” on Windows or “Command + Shift + O” on Mac.
- Mozilla Firefox: In Firefox, click on the three lines in the top-right corner of the browser window to open the menu. From the menu, click on “Bookmarks” and then select “Show All Bookmarks”. You can also use the shortcut “Ctrl + Shift + B” on Windows or “Command + Shift + B” on Mac.
- Microsoft Edge: In Edge, click on the three dots in the top-right corner of the browser window to open the menu. From the menu, hover over “Favorites” and then click on “Manage Favorites”. The shortcut “Ctrl + Shift + O” works as well.
Once you have opened the bookmark manager, you will see a list of all your bookmarks. This is where you can organize your bookmarks into folders, edit their names and URLs, or delete them if needed.
It’s important to note that some browsers may have slightly different names or locations for their bookmark managers. If you are using a different browser, you can try searching for “bookmark manager” in the browser’s help or settings menu to find the correct location.
Step 2: Export bookmarks in HTML format
Once you have located your browser’s bookmark manager, the next step is to export your bookmarks in HTML format. HTML is a widely supported file format that preserves the structure and formatting of your bookmarks.
Here’s how you can export your bookmarks in HTML format:
- Open the bookmark manager in your browser.
- Look for an option or button that allows you to export your bookmarks. In most browsers, this option can be found in the menu of the bookmark manager. For example, in Google Chrome, you can find the “Export bookmarks” option by clicking on the three dots in the top-right corner of the bookmark manager.
- Click on the export option and choose the location on your computer where you want to save the exported HTML file.
Some browsers may give you the option to choose the specific bookmarks or folders you want to export. This can be useful if you only want to export a subset of your bookmarks instead of the entire collection.
After selecting the location to save the HTML file, give it a descriptive name so that it can be easily identified later. For example, you can name it “My Bookmarks” or “Chrome Bookmarks” if you’re exporting from Google Chrome.
Keep in mind that the exporting process may take a few seconds, especially if you have a large number of bookmarks. Once the export is complete, you will have a file saved on your computer that contains all the bookmarks that were exported from your browser.
Exporting your bookmarks in HTML format ensures that you have a convenient way to access and import them into other browsers or devices. The HTML format is compatible with most browsers, making it easy to transfer your bookmarks without losing any data or organization.
Step 3: Save the exported file
Now that you have exported your bookmarks in HTML format, it’s important to save the exported file in a safe and accessible location. This will ensure that you can easily retrieve and import your bookmarks whenever needed.
Here are some steps to save the exported file:
- Choose a location on your computer where you want to store your bookmark backup file. It’s recommended to choose a location that is easy to remember and access.
- Click on the “Save” or “Save As” button in the export dialog box that appears after you have exported your bookmarks. This will open a file explorer window that allows you to navigate to the desired location on your computer.
- Navigate to the chosen location and provide a descriptive name for the exported file. This will help you identify the file easily when you need to import it into another browser or device. For example, you can name it “Bookmarks_Backup.html”.
- Once you have provided a name and chosen the location, click on the “Save” button to save the file.
It’s a good practice to create regular backups of your bookmarks by saving the exported file in multiple locations, such as on an external hard drive or a cloud storage service. This ensures that even if your computer experiences any issues, you can still access your bookmarks from a different device.
Remember to periodically update your bookmark backup file whenever you add or modify bookmarks in your browser. This will ensure that your backup remains up-to-date and reflects your current bookmark collection.
The steps to save the exported file may vary slightly depending on the browser and operating system you are using. However, the general concept remains the same: choose a location and provide a suitable name for the file, then save it for future use.
Step 4: Import bookmarks in another browser
After saving your bookmark backup file, you can easily import your bookmarks into another browser. This allows you to transfer your bookmarks seamlessly and have them available in any browser you choose to use.
Here’s how you can import your bookmarks from the backup file into another browser:
- Open the browser where you want to import your bookmarks. This can be a different browser on the same computer or a browser on a different device.
- Locate the bookmark manager in the browser. The process of accessing the bookmark manager may differ depending on the browser you are using. Refer to Step 1 of this guide for instructions specific to your preferred browser.
- Once you’re in the bookmark manager, look for an option to import bookmarks. This option is typically found in the menu or settings of the bookmark manager.
- Click on the import option and browse for the bookmark backup file that you saved in Step 3. Select the file and click on the “Open” or “Import” button.
- The browser will begin the process of importing the bookmarks from the backup file. This may take a few moments, especially if you have a large number of bookmarks.
- Once the import is complete, you will see your bookmarks added to the bookmark manager in the new browser. They will be organized in the same folder structure as they were in the original browser.
After importing your bookmarks, take a moment to verify that all your bookmarks have been successfully transferred. You can click on the bookmarks to confirm that they lead to the correct websites.
It’s worth noting that the process of importing bookmarks may vary slightly between different browsers. However, the general steps mentioned above should guide you through the process regardless of the browser you’re using.
By following these steps, you can easily import your bookmarks from one browser to another, allowing you to seamlessly access your favorite websites without the need to manually re-enter each website’s URL.