Introduction
Welcome to the world of web scraping and image downloading! Have you ever come across a website with captivating images and wondered how you could download them all at once? Well, you’ve come to the right place. In this article, we will show you a step-by-step process to download all the images from a website, allowing you to have them saved on your computer for personal use, inspiration, or any other creative endeavors.
Downloading images manually from a website can be a time-consuming and tedious process, especially if there are a large number of images to be saved. Luckily, there are tools available that can automate the process, making it much faster and more efficient. With just a few simple steps, you can have all the images you desire in no time.
Before we dive into the step-by-step guide, let’s discuss the importance of choosing the right tool for downloading images. There are numerous tools and software available, each with its own strengths and weaknesses. The tool you choose will depend on your specific needs and requirements.
Some image downloading tools offer additional features, such as the ability to filter images by size, resolution, file type, or even by specific keywords. These features can be useful if you want to download only a specific set of images that meet certain criteria. However, if you’re simply looking to download all the images from a website without any specific filters, a basic image downloader tool will suffice.
Step 1: Choose the right tool
Choosing the right tool for downloading images is crucial to ensure a smooth and efficient process. There are several factors to consider when selecting an image downloader tool:
- User-friendly interface: Look for a tool that has an intuitive and user-friendly interface. This will make it easier for you to navigate through the software and perform the necessary actions without any confusion.
- Compatibility: Make sure the tool is compatible with your operating system. Whether you’re using Windows, Mac, or Linux, ensure that the tool runs smoothly on your chosen platform.
- Speed and performance: Check the tool’s speed and performance capabilities. A fast and efficient tool will allow you to download images more quickly, saving you time and effort.
- Customization options: Consider whether the tool offers customization options. Some tools allow you to adjust the download settings, such as selecting the image format, specifying the image size, or even setting up filters based on certain criteria.
- Reviews and ratings: Before making a decision, take a look at the reviews and ratings of the image downloader tool. This will give you an idea of other users’ experiences and satisfaction with the software.
Based on these factors, you can narrow down your options and choose the tool that best fits your needs. Keep in mind that there are both free and paid options available, so consider your budget and requirements before making a final decision.
Once you have chosen the right tool, you’re one step closer to effortlessly downloading all the images from your desired website. In the following steps, we will guide you through the process of installing, using, and customizing the image downloader tool to suit your preferences. So, let’s move on to Step 2 and get started!
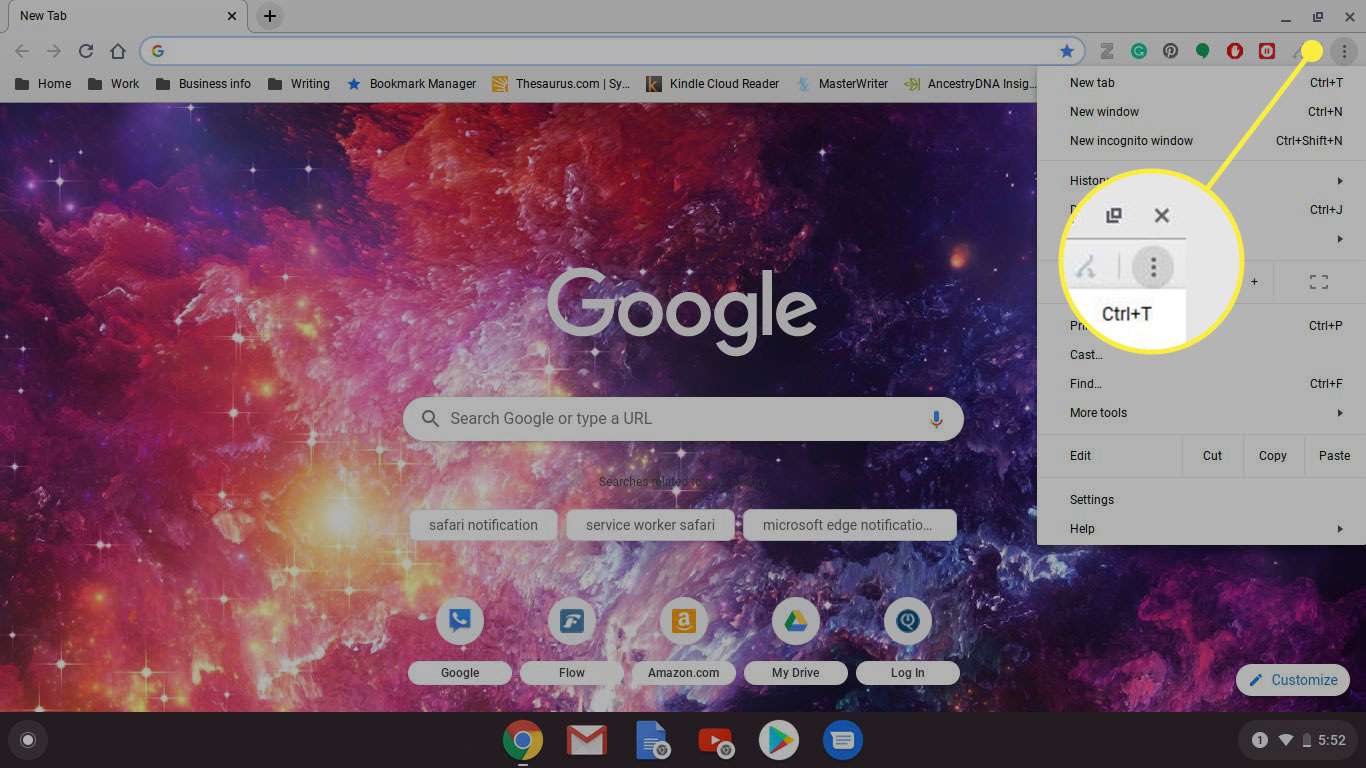
Step 2: Install and open the tool
Now that you’ve chosen the ideal image downloader tool, it’s time to install and open it on your computer. Follow these simple steps to get started:
- Download the tool: Visit the official website of the image downloader tool and find the download link. Click on the link to initiate the download process. Save the installation file to a location on your computer where you can easily access it.
- Run the installer: Locate the downloaded installation file and double-click on it to run the installer. This will initiate the installation process for the image downloader tool. Follow the on-screen prompts and instructions to complete the installation.
- Launch the tool: Once the installation is complete, locate the icon for the image downloader tool on your desktop or in the start menu. Double-click on the icon to open the tool.
After opening the tool, you may be prompted to accept any terms and conditions or configure initial settings. Follow the prompts accordingly to proceed to the main interface of the tool.
It’s important to note that different image downloader tools may have slightly different installation and opening processes. However, the general steps mentioned above should give you a good idea of what to expect when installing and opening the tool.
Now that you have successfully installed and opened the image downloader tool, you’re ready to move on to the next step and start downloading all the images from your chosen website. In the upcoming step, we will guide you through the process of entering the website URL into the tool, so stay tuned!
Step 3: Enter the website URL
Once you have the image downloader tool open and ready, it’s time to enter the website URL from which you want to download the images. Follow these steps to proceed:
- Locate the URL field: In the image downloader tool, you will find a designated field or box where you can enter the website URL. Look for this field on the main interface.
- Copy the website URL: Go to your preferred web browser and navigate to the website you want to download images from. Once you’re on the website, copy its URL from the address bar at the top of the browser.
- Paste the URL into the tool: Return to the image downloader tool and paste the copied URL into the URL field. You can do this by right-clicking on the field and selecting “Paste” or by using the keyboard shortcut CTRL + V (Windows) or Command + V (Mac).
Make sure to enter the complete URL of the website, including the “http://” or “https://” prefix. This ensures that the tool recognizes the website correctly and can access the desired images for download.
Once you have entered the website URL into the downloader tool, take a moment to double-check for any typos or errors. Accurate input is crucial to successfully accessing and downloading the images from the website.
With the website URL now entered into the image downloader tool, you’re ready to take the next step and select the specific images you want to download. In the upcoming section, we will guide you through this process, so keep reading!
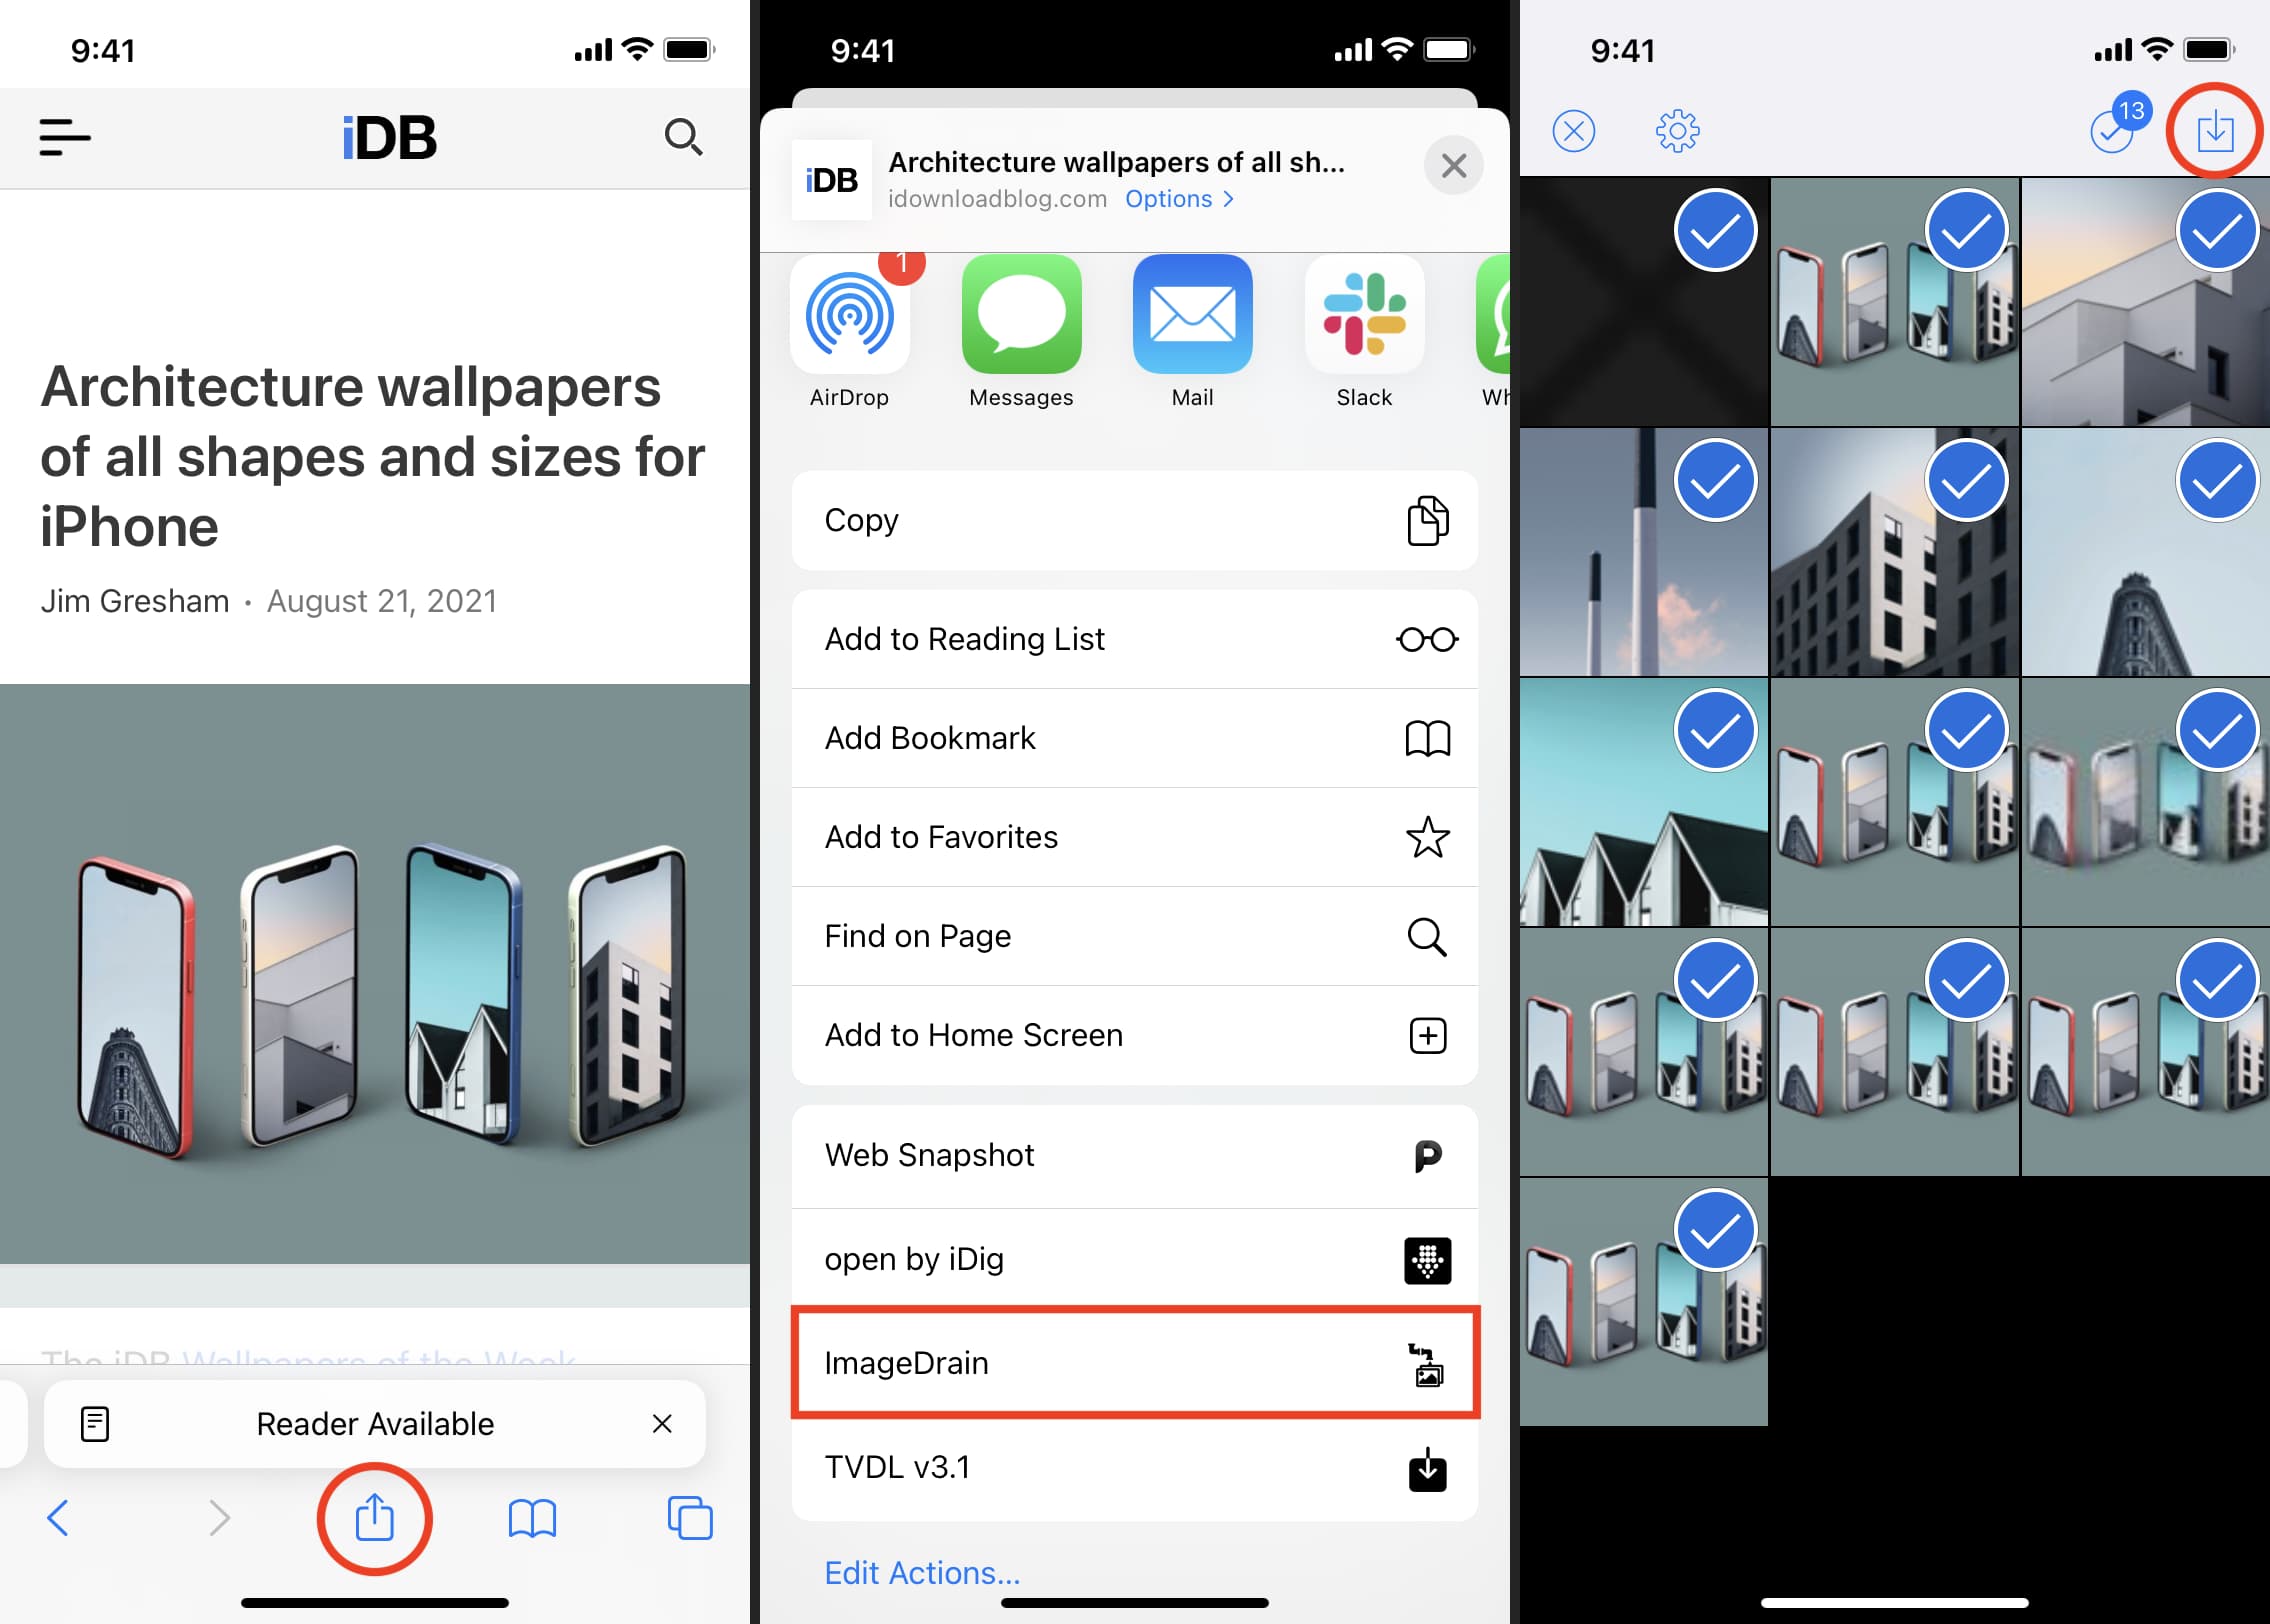
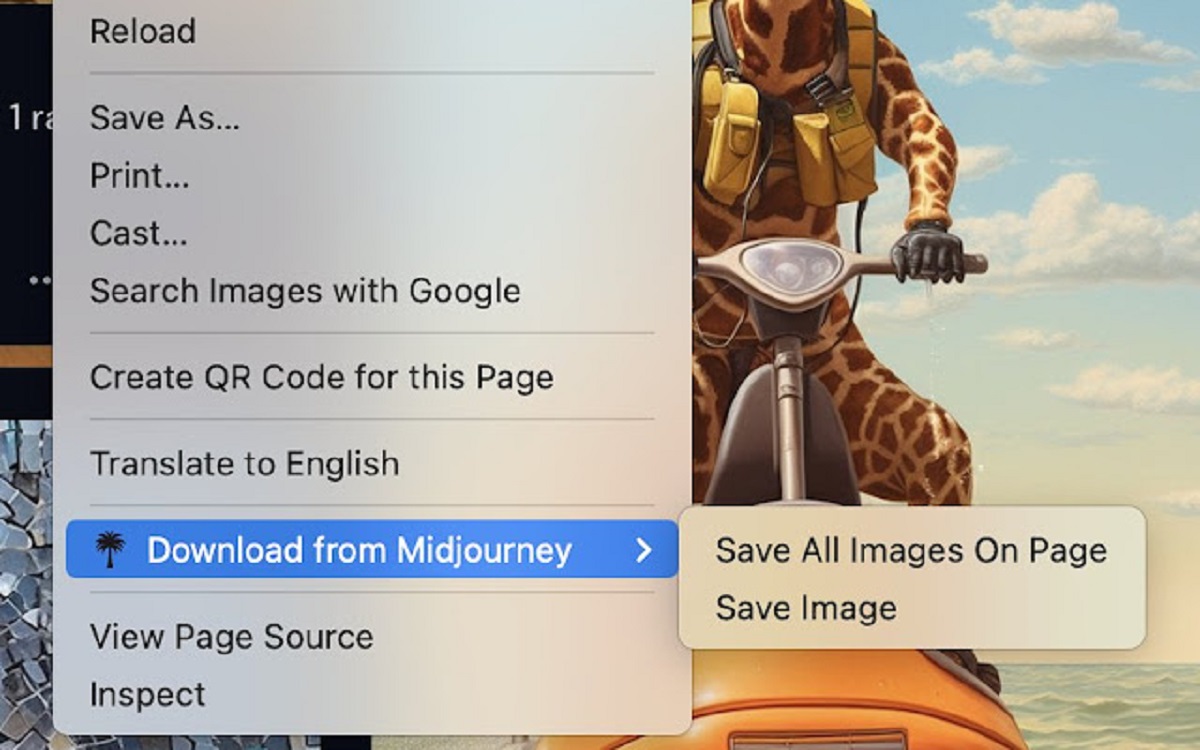
Step 4: Select the images you want to download
Now that you have entered the website URL into the image downloader tool, it’s time to select the specific images you want to download. Depending on the tool you are using, there are a few different ways to do this:
- Manual selection: Some image downloader tools allow you to manually select the images you want to download. This can be done by scrolling through the website and clicking on each image you wish to save. Once selected, the tool will remember your choices and proceed to download those specific images.
- Automatic selection: Other tools offer an automatic selection feature. With this option, the tool will scan the website and detect all the available images for you. This saves you the hassle of manually selecting each image, especially if there are a large number of them on the page.
- Custom selection: Certain tools provide customization options, allowing you to set specific criteria for image selection. For example, you may be able to filter images by size, resolution, file type, or even by specific keywords. This ensures that only images meeting your criteria will be downloaded.
Choose the method that suits your needs and preferences. If you want to download all images from the website, manual or automatic selection may be the best option. If you only want specific types of images or those meeting certain criteria, custom selection is the way to go.
Once you have made your selections, proceed to the next step to customize the download settings (if desired) and start the downloading process. We will guide you through these steps in the forthcoming section, so keep reading to learn more!
Step 5: Customize download settings (optional)
After selecting the images you want to download, you have the option to customize the download settings according to your preferences. While customization is not always necessary, it can enhance your downloading experience. Here are a few settings you might consider:
- Image format: Choose the desired image format for downloading. Common options include JPEG, PNG, GIF, or even SVG for vector images. Select the format that best suits your needs and the compatibility of your device or software.
- Image resolution: If you have specific requirements for image resolution, you can choose to download images in a particular size or quality. Higher resolution images tend to have better clarity but may also result in larger file sizes.
- File naming: Customize the file naming convention for the downloaded images. You can opt for automatic file naming based on image attributes, such as date, time, or website name, or you can define your own naming convention.
- Download location: Specify the folder or directory where you want the downloaded images to be saved. You can choose a default location or select a specific folder on your computer.
Remember, these settings may vary depending on the image downloader tool you are using. Some tools may offer additional options, while others may have a simpler interface with limited customization capabilities. Choose the tool that aligns with your requirements and offers the level of customization you desire.
Once you have customized the download settings (if desired), you are now ready to move on to the next step and start the downloading process. In the upcoming section, we will guide you through the process of initiating the download and provide tips to make it a seamless experience. So, let’s proceed to the next step!
Step 6: Start the downloading process
With the images selected and the download settings customized (if desired), it’s time to initiate the downloading process. Follow these steps to start downloading the images:
- Verify the download settings: Before proceeding, double-check the download settings to ensure everything is as you want it. Confirm the image format, resolution, file naming, and download location.
- Initiate the download: Look for a “Download” or “Start” button on the image downloader tool’s interface. Click on this button to start the downloading process.
- Monitor the progress: During the download, the image downloader tool will display the progress of each image being downloaded. You can keep an eye on the progress bar or percentage indicator to track the overall progress.
- Avoid interruptions and wait: Once the download process has started, avoid interrupting it. Let the tool run in the background until all the selected images have been successfully downloaded.
It’s important to note that the download time may vary depending on the number and size of the images, as well as the speed of your internet connection. Be patient and allow the tool to complete the downloading process without interruptions.
Additionally, some image downloader tools may offer pause/resume options or the ability to download images in batches. If you have a large number of images to download, consider utilizing these features to manage the downloading process more effectively.
Once the download is complete, you’re ready to access your downloaded images. In the subsequent step, we will guide you on how to locate and view your downloaded images, so stay tuned!
Step 7: Wait for the download to complete
After starting the downloading process, it’s important to exercise patience and allow the image downloader tool to complete the download of all selected images. Depending on the number and size of the images, as well as your internet speed, the download process may take varying amounts of time. Follow these steps to effectively wait for the download to complete:
- Avoid interruptions: Once the download process has begun, refrain from interrupting or closing the image downloader tool. Interruptions can disrupt the download and may cause incomplete or corrupted images.
- Monitor the progress: The image downloader tool will typically display the progress of each image being downloaded. You can keep an eye on the progress bar or percentage indicator to track the overall progress of the download.
- Be patient: Depending on the size and quantity of the images, the downloading process may take some time. Exercise patience and allow the tool to run in the background until all the selected images have been successfully downloaded.
- Optimize your internet connection: If you notice slow download speeds, check your internet connection and ensure that no other activities are consuming excessive bandwidth. Closing unnecessary browser tabs or pausing other downloads can help optimize your internet connection for faster image downloads.
Remember, the download time can vary, so it’s essential to be patient throughout the process. Use this time to engage in other tasks or take a short break, but regularly check the progress indicator to see when the download is complete.
Once all the images have been successfully downloaded, you’re ready to proceed to the final step: accessing your downloaded images. In the next section, we will guide you on how to locate and make use of the images you’ve downloaded, so be sure to continue reading!
Step 8: Access your downloaded images
Now that the download process is complete, it’s time to access and explore the images you’ve downloaded. Follow these steps to locate and make use of your downloaded images:
- Open the download folder: Depending on the download settings you specified earlier, the images will be saved in a designated folder or directory on your computer. Locate and open this folder using your computer’s file explorer or finder.
- Organize your images: If desired, you can create subfolders or categories within the download folder to organize your images. This can make it easier to find specific images later and keep your collection well-structured.
- View and enjoy your images: Open the downloaded images using an image viewer or your preferred software. You can now view and appreciate the images you’ve downloaded. If you’ve downloaded images for a specific purpose, such as inspiration or reference, take some time to enjoy and explore them.
- Share or edit your images: Depending on your needs, you might want to edit, share, or use the downloaded images for creative projects. Utilize image editing software or tools to personalize or enhance the images as desired.
Remember to respect copyright laws and the website’s terms of use when using the downloaded images. If you plan to use them for commercial purposes or public distribution, ensure that you have the necessary rights or permissions to do so.
By following these steps, you can easily access and utilize the images you’ve downloaded. Whether it’s for personal enjoyment, creative projects, or professional use, your downloaded images are now at your fingertips.
With that, you’ve completed the entire process of downloading and accessing images from a website. We hope this step-by-step guide has proven helpful in your quest to collect or utilize images for your specific needs.
Conclusion
Congratulations! You have successfully learned how to download all the images from a website. By following the step-by-step guide, you have gained the knowledge and skills to effortlessly save images from your favorite websites for personal use, inspiration, or any other creative endeavors.
Remember, choosing the right image downloader tool is key to a smooth and efficient process. Consider factors such as user-friendliness, compatibility, speed, and customization options when selecting the tool that best suits your needs.
Once you have installed and opened the tool, be sure to enter the website URL correctly. From there, you can manually select images, use automatic selection, or customize the selection based on specific criteria.
If desired, you can further enhance the downloading process by customizing the download settings, such as the image format, resolution, file naming, and download location. These settings allow you to tailor the download experience to your preferences.
After starting the download, patiently wait for the process to complete, avoiding interruptions that may lead to incomplete or corrupted images. Once finished, you can access your downloaded images in the designated folder and organize them according to your preference.
Whether you simply want to view and enjoy the images or use them for creative projects, having the ability to download all the images from a website empowers you to make the most of the visual content available.
Now that you’ve mastered the art of image downloading, feel free to explore different websites, discover captivating images, and enrich your digital library. With your newfound knowledge and skills, the world of web scraping and image downloading is at your fingertips.
Happy downloading!