Introduction
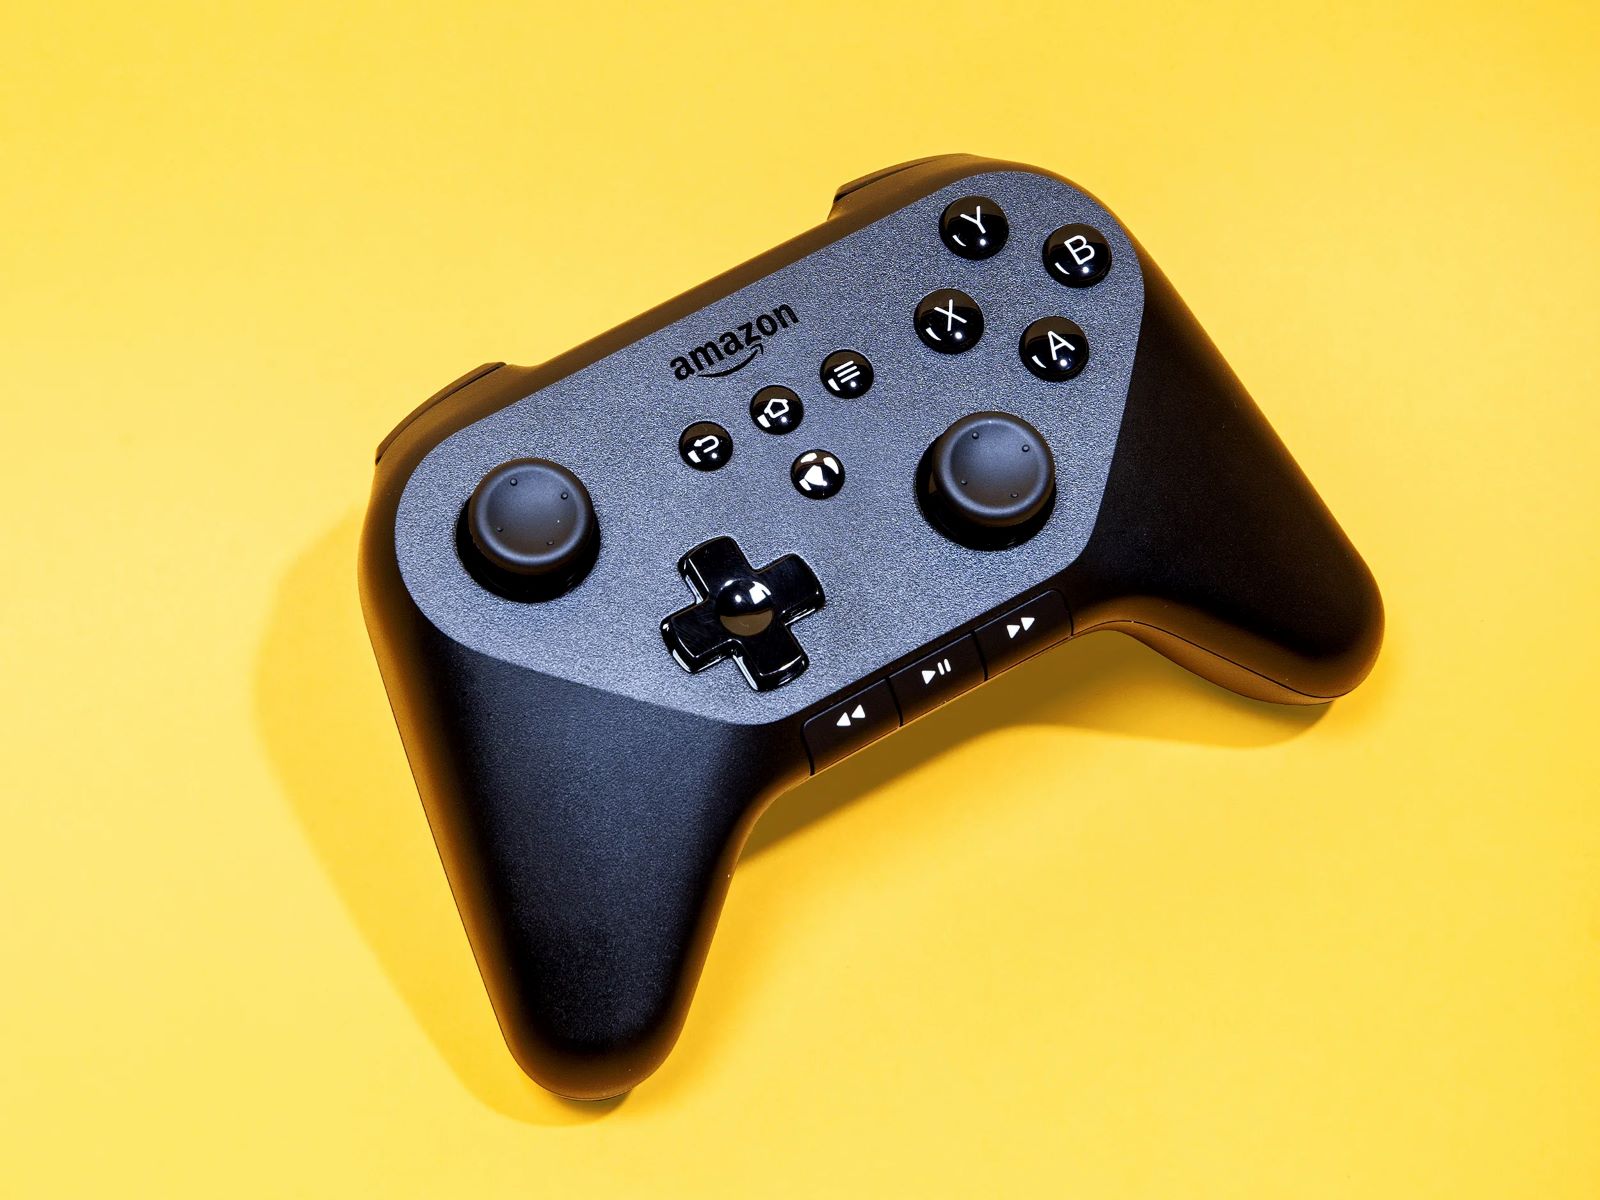
Are you facing issues with the right stick on your Fire TV game controller? Don't worry, you're not alone. Many gamers encounter problems with joystick drift or unresponsiveness, which can be frustrating when trying to enjoy your favorite games. However, there are several troubleshooting steps you can take to address this issue and get your controller back in top condition.
In this guide, we'll explore the common problems associated with the right stick on Fire TV game controllers and provide step-by-step solutions to help you resolve them. Whether it's a matter of cleaning, calibrating, or even replacing the right stick, we've got you covered. By following these simple yet effective techniques, you can restore your controller's functionality and get back to gaming without interruptions.
So, if you're ready to take control of the situation and fix your right stick-related woes, let's dive into the troubleshooting process together. Whether you're a casual gamer or a dedicated enthusiast, ensuring that your controller functions smoothly is essential for an enjoyable gaming experience. Let's roll up our sleeves and get to the bottom of this issue!
Understanding the Issue with the Right Stick
Before delving into the solutions, it’s important to understand the potential issues that can arise with the right stick on your Fire TV game controller. One common problem is joystick drift, where the controller registers movement even when the stick is not being touched. This can lead to erratic camera movements or character actions in games, making precise control nearly impossible. Additionally, the right stick may become unresponsive, failing to register movements or commands as intended.
These issues can be caused by a variety of factors, including dust and debris accumulation within the controller, wear and tear from prolonged use, or even manufacturing defects. Furthermore, environmental factors such as humidity and temperature variations can also contribute to the degradation of the controller’s components over time.
It’s essential to identify the specific nature of the problem with your right stick in order to determine the most effective course of action. By recognizing the symptoms and behaviors exhibited by the controller, you can better diagnose the underlying issue and apply the appropriate solution. Whether it’s a matter of cleaning, calibrating, or replacing the right stick, a clear understanding of the problem is the first step toward resolving it.
By gaining insight into the potential causes of right stick malfunctions, you can approach the troubleshooting process with confidence and precision. With a firm grasp of the issue at hand, you’ll be better equipped to implement the necessary fixes and restore your controller to optimal working condition. Now that we’ve identified the common issues associated with the right stick, let’s move on to the practical steps for resolving these problems.
Cleaning the Right Stick
One of the primary causes of right stick issues in Fire TV game controllers is the accumulation of dust, dirt, and debris within the controller’s mechanisms. Over time, these particles can interfere with the smooth movement and responsiveness of the right stick, leading to erratic behavior and diminished performance. Fortunately, cleaning the right stick and its surrounding components can often alleviate these issues and restore proper functionality to the controller.
To begin the cleaning process, you’ll need a few simple tools: compressed air, cotton swabs, rubbing alcohol, and a precision screwdriver. Start by carefully removing the batteries from the controller to prevent any electrical mishaps during the cleaning procedure. Next, use the precision screwdriver to gently disassemble the controller, taking care to keep track of the screws and components as you go.
Once you’ve accessed the right stick module, use the compressed air to blow away any loose debris and particles that may have accumulated inside. Be thorough but cautious, ensuring that you don’t inadvertently dislodge any vital components or damage the internal circuitry. After removing the loose debris, dip a cotton swab in rubbing alcohol and carefully clean the surfaces around the right stick, including the area beneath the stick and the surrounding contacts.
While cleaning, be mindful of any delicate components and avoid using excessive force that could cause damage. After the initial cleaning, allow the controller to air dry for a few minutes before reassembling it. Once the components are dry, carefully reassemble the controller, taking care to align and secure each part properly.
After reassembly, power on the controller and test the right stick’s responsiveness in a game or calibration menu. With any luck, the cleaning process will have resolved the issues, and the right stick will function as intended once again. If the problems persist, you may need to explore further troubleshooting steps, such as calibrating or replacing the right stick.
By taking the time to clean the right stick and its internal components, you can often eliminate the underlying causes of joystick drift or unresponsiveness, allowing you to enjoy a seamless gaming experience once more.
Calibrating the Right Stick
When facing issues with the right stick on your Fire TV game controller, calibrating the controller can often help resolve responsiveness and accuracy problems. Calibration is a process that ensures the controller’s input signals are accurately interpreted by the gaming system, resulting in precise and consistent movements in games and menus. By following the calibration process, you can potentially mitigate issues such as joystick drift and unresponsiveness.
To begin the calibration process, navigate to the settings menu on your Fire TV and locate the “Controllers and Bluetooth Devices” section. Within this menu, select the option to calibrate the game controller, which will initiate the calibration utility. Follow the on-screen instructions to enter the calibration mode, where you’ll be prompted to manipulate the right stick in various directions and patterns.
During the calibration process, it’s crucial to follow the on-screen instructions precisely, ensuring that you fully engage the right stick’s range of motion as directed. This allows the system to capture and interpret the controller’s input signals accurately, resulting in a calibrated and optimized right stick response. Once the calibration procedure is complete, exit the calibration utility and test the right stick’s performance in a game or menu to assess the effectiveness of the calibration.
If the right stick continues to exhibit issues after calibration, it may be beneficial to repeat the process to ensure accuracy and consistency. Additionally, verifying that the controller’s firmware is up to date and compatible with the gaming system can also contribute to improved performance after calibration.
By calibrating the right stick, you can potentially address issues related to responsiveness, accuracy, and consistency, providing a smoother and more reliable gaming experience. While calibration may not resolve all underlying hardware issues, it often serves as an effective initial step in troubleshooting right stick problems on Fire TV game controllers.
Replacing the Right Stick
If cleaning and calibrating the right stick have not resolved the issues with your Fire TV game controller, it may be necessary to consider replacing the right stick altogether. Over time, prolonged use, wear and tear, or underlying mechanical issues can compromise the functionality of the right stick, leading to persistent problems such as joystick drift or unresponsiveness. Fortunately, replacing the right stick is a viable solution that can restore your controller to optimal working condition.
Before embarking on the replacement process, it’s essential to ensure that you have the appropriate replacement parts and tools on hand. You’ll need a compatible replacement right stick module, a precision screwdriver set, and a clean, well-lit workspace to perform the replacement procedure. Additionally, it’s advisable to reference the manufacturer’s guidelines or instructional resources for your specific controller model to ensure a smooth and accurate replacement.
Begin by carefully disassembling the controller, taking note of the placement and orientation of the existing right stick module. Use the precision screwdriver to remove the screws securing the module in place, being mindful of any delicate components or cables connected to the module. Once the module is detached, gently disconnect any cables or connectors, taking care not to damage the surrounding circuitry.
Next, carefully install the replacement right stick module, ensuring that it is compatible with your controller model and properly aligned with the mounting points. Reconnect any cables or connectors, following the manufacturer’s guidelines to ensure a secure and accurate connection. Once the replacement module is in place, reassemble the controller, taking care to align and secure each component properly.
After reassembly, power on the controller and test the performance of the replaced right stick in a game or calibration menu. If the replacement was successful, the right stick should exhibit improved responsiveness and accuracy, addressing the issues that were previously encountered. If the problems persist, it may be necessary to reevaluate the replacement procedure or seek professional assistance to diagnose any underlying issues.
By replacing the right stick, you can effectively address persistent problems with joystick drift, unresponsiveness, and mechanical issues, restoring your Fire TV game controller to full functionality and ensuring an enjoyable gaming experience.
Conclusion
Addressing issues with the right stick on your Fire TV game controller is essential for maintaining an enjoyable and seamless gaming experience. Whether you’ve encountered joystick drift, unresponsiveness, or other related problems, taking proactive steps to troubleshoot and resolve these issues can help you get back to gaming without interruptions.
By understanding the potential causes of right stick malfunctions and familiarizing yourself with the troubleshooting techniques outlined in this guide, you can approach the resolution process with confidence and precision. From cleaning and calibrating the right stick to considering a replacement, the solutions presented here offer practical and effective ways to address a range of issues that may arise with your controller.
It’s important to remember that patience and attention to detail are key when implementing these troubleshooting steps. Whether you’re carefully cleaning the internal components, following the calibration process, or replacing the right stick, thoroughness and precision can significantly impact the success of these efforts.
Furthermore, staying informed about the specific requirements and guidelines for your Fire TV game controller model is crucial for executing these solutions accurately. Consulting the manufacturer’s resources and instructional materials can provide valuable insights and ensure that you approach the troubleshooting process in a well-informed manner.
Ultimately, by taking the initiative to address right stick issues and restore your controller to optimal working condition, you can continue to enjoy your favorite games with the responsive and accurate controls you expect. Whether you’re a casual gamer or a dedicated enthusiast, a well-maintained and fully functional game controller is an essential tool for immersive and enjoyable gaming experiences.
So, armed with the knowledge and techniques outlined in this guide, you can confidently tackle right stick-related issues and reclaim the smooth, precise control you need to excel in your gaming adventures. By implementing these solutions, you can ensure that your Fire TV game controller remains a reliable and responsive companion for all your gaming endeavors.


