Introduction
When your game controller starts acting up, it can be frustrating and put a damper on your gaming experience. Whether it's unresponsive buttons, stick drift, or worn-out parts, you don't always have to rush to buy a new one. With a little know-how and some basic tools, you can often fix the issues yourself. Not only does this save you money, but it also gives you a sense of satisfaction in knowing that you've revived your trusty controller.
In this guide, we'll walk you through the steps to troubleshoot and repair common problems with game controllers. From cleaning and maintenance to addressing specific issues like button malfunctions and stick drift, we'll cover the essential techniques to get your controller back in top shape.
So, grab your tools and let's dive into the world of game controller repair. Whether you're a casual gamer or a dedicated enthusiast, these tips will help you keep your gaming gear in prime condition, ensuring that you're always ready for the next gaming adventure.
Tools and Materials Needed
Before you embark on fixing your game controller, it’s essential to gather the necessary tools and materials. Here’s what you’ll need:
- Clean, dry cloth: Use this to wipe down the exterior of the controller and remove any dust or grime.
- Cotton swabs: Ideal for reaching small crevices and cleaning delicate areas.
- Isopropyl alcohol: An effective solvent for cleaning and disinfecting the controller’s surfaces.
- Compressed air: Useful for blowing away dust and debris from hard-to-reach areas.
- Small screwdriver set: To open the controller and access its internal components.
- Replacement parts (if necessary): Depending on the issue, you may need to replace buttons, thumbsticks, or other components. Ensure you have the correct replacements on hand.
- Controller-specific repair guides: These can be found online and provide detailed instructions for disassembling and repairing specific controller models.
Having these tools and materials readily available will streamline the repair process and ensure that you can address a wide range of controller issues. With the right equipment at your disposal, you’ll be well-prepared to tackle any challenges that arise during the repair process.
Cleaning the Controller
Regular cleaning is essential to maintain the functionality and longevity of your game controller. Over time, dust, dirt, and sweat can accumulate on the surface and within the crevices of the controller, leading to sticky buttons and unresponsive controls. Here’s a step-by-step guide to effectively clean your controller:
- Prepare the Controller: Turn off the controller and remove any batteries or power source. This prevents accidental activation during the cleaning process.
- Exterior Cleaning: Use a clean, dry cloth to wipe down the exterior of the controller, removing any visible dirt or grime. Pay attention to the seams and edges where dust tends to accumulate.
- Button and Crevice Cleaning: Dampen a cotton swab with isopropyl alcohol and gently clean around the buttons, triggers, and thumbsticks. Be careful not to oversaturate the swab to prevent liquid from seeping into the controller.
- Compressed Air: Use compressed air to blow away dust and debris from the gaps around the buttons and analog sticks. This helps dislodge any trapped particles that may affect the controller’s performance.
- Drying Time: Allow the controller to air dry for a few minutes to ensure that any residual moisture evaporates before reassembly.
By following these cleaning steps regularly, you can prevent dirt and grime from interfering with the controller’s functionality. This simple maintenance routine can significantly extend the lifespan of your controller and keep it in optimal condition for an enhanced gaming experience.
Fixing Button Issues
Unresponsive or sticky buttons can be a common problem with game controllers, often caused by debris or wear and tear. Here’s how you can address button issues:
- Identify the Problematic Buttons: Test each button to determine which ones are malfunctioning. Take note of the specific buttons that require attention.
- Controller Disassembly: Use a small screwdriver to carefully open the controller, exposing the internal components and the button mechanisms.
- Cleaning the Buttons: Gently clean the button contacts and surrounding areas with a cotton swab dipped in isopropyl alcohol. This helps remove any dirt or residue that may be affecting the button’s responsiveness.
- Inspecting the Button Contacts: Examine the button contacts for signs of wear or corrosion. If necessary, use a clean, dry cloth to carefully wipe the contacts and remove any buildup.
- Reassembly and Testing: Once the buttons and contacts are clean, reassemble the controller and test the buttons to ensure that they are functioning properly.
By addressing button issues promptly and performing regular maintenance, you can keep your controller’s buttons in optimal condition, ensuring a seamless gaming experience without any frustrating input delays or unresponsive controls.
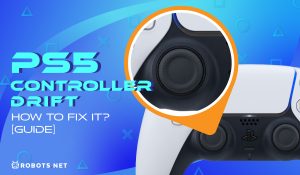
Repairing Stick Drift
Stick drift, characterized by the controller’s analog sticks registering movement without any input, can significantly hinder gameplay. To rectify this issue, follow these steps:
- Identify the Drifting Stick: Determine which analog stick is experiencing drift by navigating the controller’s settings or observing in-game movements.
- Controller Disassembly: Use a small screwdriver to carefully open the controller, granting access to the internal components, including the problematic analog stick.
- Cleaning the Analog Stick Mechanism: Use a cotton swab lightly moistened with isopropyl alcohol to clean around the base of the analog stick. This helps remove any debris or residue that may be causing the drift.
- Inspecting the Analog Stick Module: Examine the analog stick module for signs of wear or damage. If necessary, gently clean the module and contacts with a dry cloth to ensure optimal performance.
- Reassembly and Calibration: After cleaning and inspecting the analog stick, reassemble the controller and calibrate the analog sticks in the system settings to ensure accurate input detection.
By addressing stick drift proactively and maintaining the analog sticks, you can enjoy precise and responsive control during gaming sessions, eliminating the frustration caused by unintended movements and erratic input.
Replacing Worn Out Parts
Over time, the components of a game controller can undergo wear and tear, leading to diminished performance and functionality. When certain parts become worn out, it may be necessary to replace them to restore the controller’s effectiveness. Here’s how to approach the replacement of worn-out parts:
- Identify the Worn-Out Components: Assess the controller’s performance and functionality to pinpoint any specific parts that are exhibiting signs of wear, such as buttons, thumbsticks, or triggers.
- Procure Replacement Parts: Obtain the appropriate replacement parts for the specific components that require attention. Ensure that the replacements are compatible with your controller model.
- Controller Disassembly: Utilizing a small screwdriver, carefully disassemble the controller to access and replace the worn-out parts.
- Part Replacement: Remove the worn-out components and install the new replacement parts, ensuring a secure and proper fit within the controller’s housing.
- Reassembly and Testing: Once the replacement parts are in place, reassemble the controller and conduct thorough testing to verify that the new components have restored the controller’s functionality.
By promptly addressing worn-out parts and replacing them with high-quality replacements, you can prolong the lifespan of your game controller and maintain its performance at a level that enhances your gaming experience.
Testing the Controller
After performing the necessary repairs and maintenance on your game controller, it’s crucial to thoroughly test its functionality to ensure that the issues have been effectively addressed. Here’s a comprehensive guide to testing the controller:
- Power On and Connectivity: Ensure that the controller powers on and establishes a stable connection with the gaming console or computer.
- Button Responsiveness: Test each button and trigger to verify their responsiveness and accuracy. Confirm that all inputs are registered correctly.
- Analog Stick Calibration: Check the analog sticks for any remaining drift or irregularities. Calibrate the sticks in the system settings to guarantee accurate input detection.
- Functionality Across Games: Test the controller’s performance across a variety of games to assess its functionality in different scenarios and genres.
- Long-Term Performance: After conducting initial tests, continue using the controller over an extended period to monitor its sustained performance and ensure that the repairs have provided lasting solutions.
By rigorously testing the controller following repairs and maintenance, you can be confident in its reliability and performance, allowing you to fully immerse yourself in your gaming experiences without the distraction of controller-related issues.