Introduction
The HoloLens is a revolutionary piece of technology that introduces augmented reality to the workplace. With its ability to overlay digital information in the real world, the HoloLens offers endless possibilities for improving productivity and enhancing collaboration in office environments.
In this article, we will explore the process of setting up objects for your office using the HoloLens. Whether you want to display 3D models, visualizations, or interactive elements, the HoloLens allows you to bring your virtual creations into the physical space, creating a truly immersive experience.
By selecting the right objects and strategically positioning them in your office, you can optimize the effectiveness of the HoloLens and tailor the augmented reality to meet your specific needs. This guide will provide you with step-by-step instructions on how to set up objects, customize interactions, and troubleshoot any issues that may arise along the way.
Before we dive into the details, let’s take a closer look at how the HoloLens works and what makes it such an incredible tool for transforming your office environment.
Understanding HoloLens
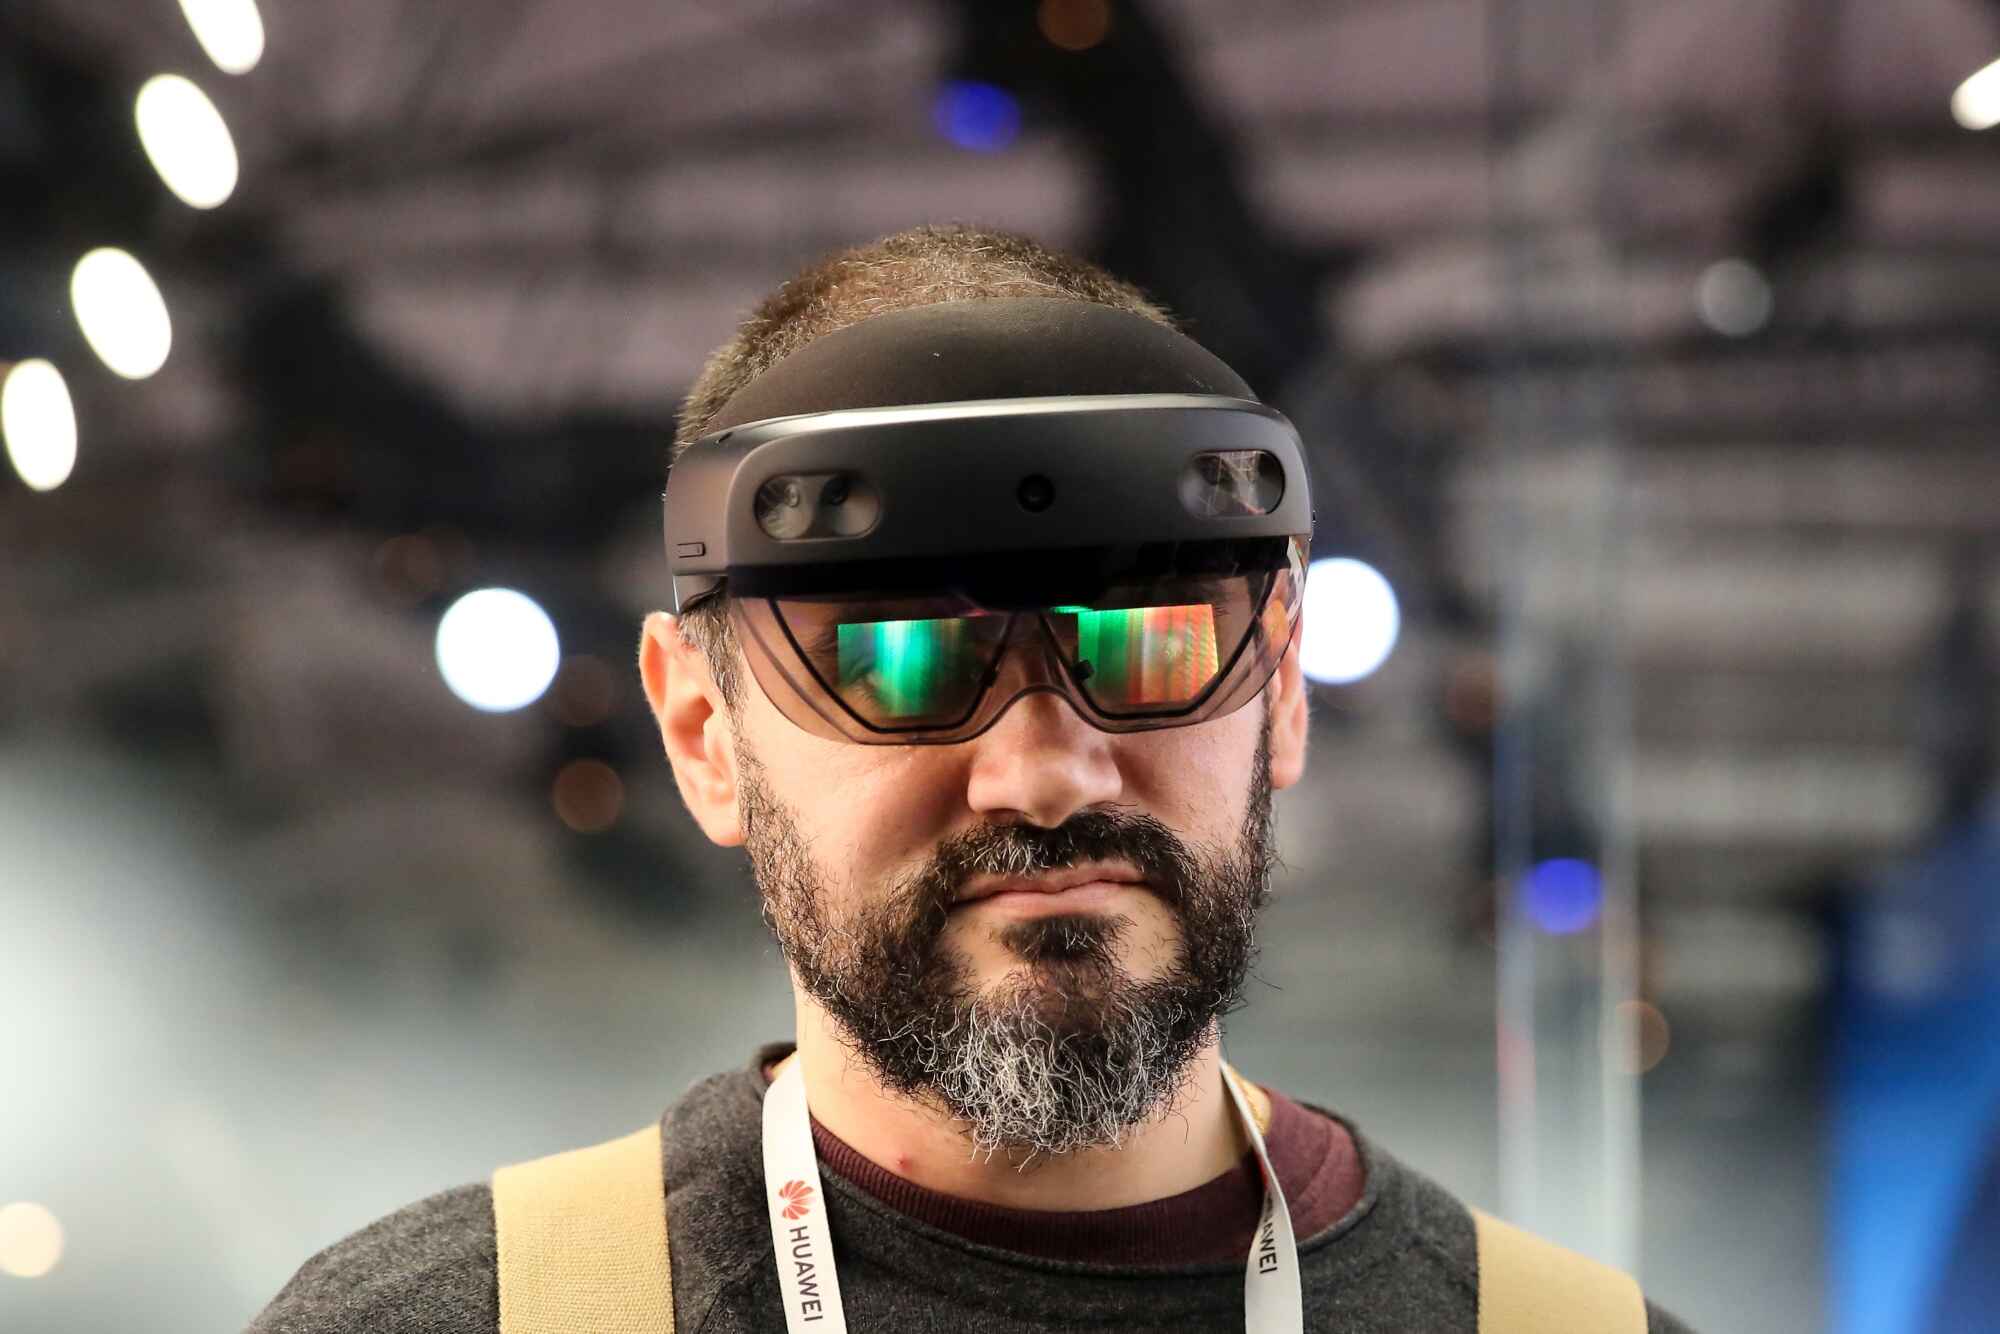
The HoloLens is a cutting-edge augmented reality device developed by Microsoft. Unlike virtual reality headsets that completely immerse you in a virtual world, the HoloLens overlays holographic images onto the real world, blending the physical and digital realms seamlessly.
The device uses a combination of sensors, cameras, and a high-resolution display to track your movements and accurately map the environment around you. This enables the HoloLens to understand the context of your surroundings and place holograms in a way that appears natural and realistic.
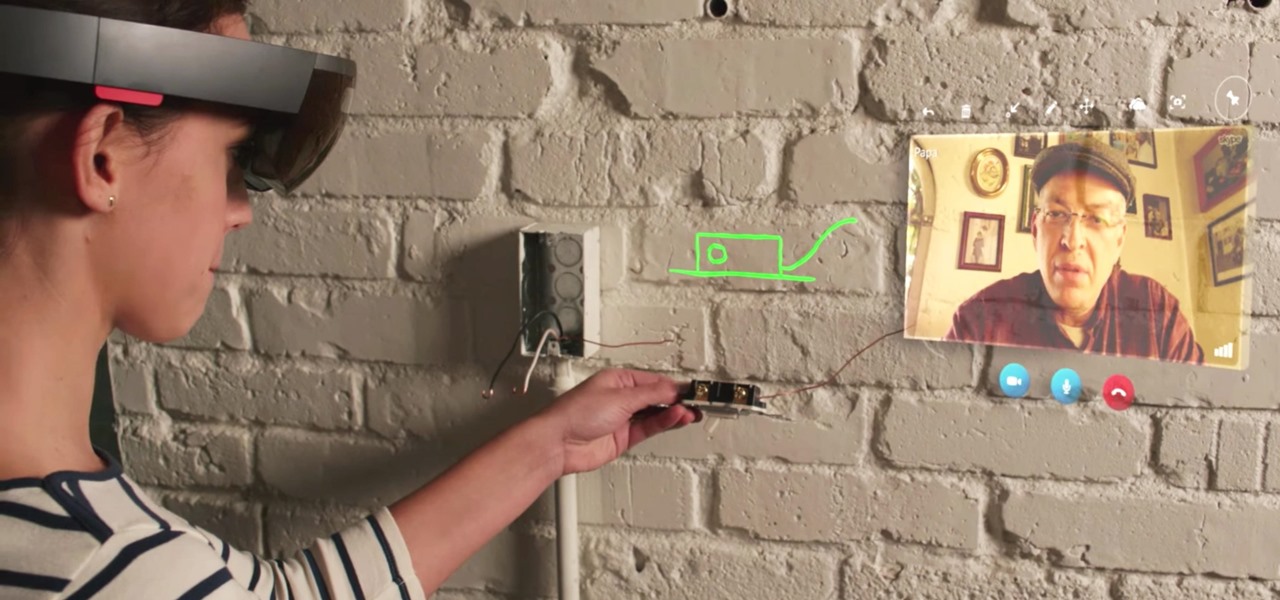
One of the key features of the HoloLens is its ability to recognize and interact with real-world objects. Through object recognition technology, the HoloLens can identify physical objects in your office space and interact with them in various ways. This opens up a world of possibilities for creating interactive experiences and enhancing productivity.
Additionally, the device is equipped with spatial sound, allowing you to hear audio cues and holographic elements as if they were actually present in the physical space. This helps to create a more immersive and realistic experience while using the HoloLens.
Understanding the capabilities and limitations of the HoloLens is crucial for optimizing your experience with object placement and interactivity. By familiarizing yourself with the device’s functionalities, you can make informed decisions when selecting and positioning objects in your office.
Now that we have a basic understanding of the HoloLens, let’s move on to the next section where we will explore the process of selecting objects for your office space.
Selecting Objects for Your Office
When it comes to selecting objects for your office, the possibilities are endless. You can choose to display 3D models of products, visualizations of data, or even interactive elements that enhance collaboration and communication.
Before deciding on the objects to incorporate, consider the goals and needs of your workplace. Are you looking to showcase your company’s products or services? Or perhaps you want to have virtual whiteboards for brainstorming sessions? Assessing your objectives will help you narrow down the types of objects that will best suit your office environment.
It’s also essential to consider the size and placement of the objects. The HoloLens has a limited field of view, so you want to ensure that the selected objects are visible and accessible without obstructing the user’s view. Opt for objects that are visually engaging and relevant to your business or workflow.
Furthermore, take into account the interaction possibilities. The HoloLens allows you to interact with virtual objects using gestures and voice commands. Choose objects that can provide meaningful interactions, such as rotating 3D models or accessing information by tapping on labels.
Lastly, ensure that the objects you select are compatible with the HoloLens platform. Microsoft provides a range of development tools and resources to help you create or find pre-made holographic content that can be integrated seamlessly into your office environment.
By carefully selecting objects that align with your workplace objectives and considering their size, placement, and interaction possibilities, you can create an engaging and productive augmented reality experience for your office space.
Now that you have an idea of the objects you want to incorporate, the next section will guide you through the steps of preparing your office space for the HoloLens.
Preparing Your Office Space
Before you can start setting up objects for the HoloLens in your office, it’s important to prepare the physical space to ensure optimal performance and user experience. Here are some key steps to follow:
- Clean and declutter: Start by tidying up your office space and removing any unnecessary items or clutter. This will provide a clean and unobstructed environment for the HoloLens to accurately track your movements and map the surroundings.
- Create a designated area: It’s recommended to have a designated area in your office specifically dedicated to using the HoloLens. This area should have enough room for you to move around comfortably without bumping into objects or walls. Clear the space and mark the boundaries if needed.
- Check lighting conditions: Ensure that your office space has adequate lighting, as it can affect the performance of the HoloLens. Avoid overly bright or dim lighting, as they may interfere with the device’s sensors. If necessary, adjust the lighting to a balanced level that allows for clear holographic projections.
- Consider privacy: If you’re working with sensitive information or simply prefer privacy, consider using partitions or screens to create a secluded area for using the HoloLens. This will minimize distractions and provide a more focused experience.
- Secure loose cables: Take the time to secure any loose cables or wires in your office space. This will not only prevent any accidents or tripping hazards but also ensure a clean and organized setup.
By following these steps, you can create an optimized and user-friendly environment for using the HoloLens in your office. Now that your office space is ready, the next section will guide you through the process of installing and calibrating the HoloLens.
Installing and Calibrating HoloLens
Now that you have prepared your office space, it’s time to install and calibrate your HoloLens device. Follow these steps to ensure a successful setup:
- Charge the device: Before getting started, make sure your HoloLens is fully charged. Connect it to the charger and allow it to charge until the battery is at a sufficient level.
- Put on the HoloLens: Gently put on the HoloLens headset, adjusting the straps for a snug and comfortable fit. The device should rest comfortably on your head, with the lenses aligned properly in front of your eyes.
- Turn on the HoloLens: Press and hold the power button located on the side of the HoloLens device until you see the logo and hear the startup sound. The device will boot up, and you will be guided through the initial setup process.
- Set up your account: Follow the on-screen instructions to sign in with your Microsoft account or create a new one. This will allow you to access the HoloLens features and content.
- Calibrate the device: During the setup process, you will be prompted to perform a calibration to ensure accurate tracking of your movements. Follow the instructions to calibrate the HoloLens by gazing at specific points in your environment.
Once the setup and calibration are complete, you’re ready to start using the HoloLens in your office. Make sure to familiarize yourself with the device’s controls and functions, such as gesture interactions and voice commands, to maximize your productivity and efficiency.
In the next section, we will delve into the process of setting up object recognition, which will enable the HoloLens to identify and interact with real-world objects in your office space.
Setting Up Object Recognition
Object recognition is a key feature of the HoloLens that allows the device to identify and interact with real-world objects in your office. By setting up object recognition, you can create dynamic and engaging augmented reality experiences. Follow these steps to enable object recognition:
- Open the HoloLens app: On your HoloLens device, open the HoloLens app by selecting the corresponding icon in the start menu.
- Navigate to settings: Within the HoloLens app, navigate to the settings menu. This is typically represented by a gear or cog icon.
- Find object recognition settings: Look for the object recognition settings within the app’s settings menu. It may be located under a specific category, such as “Interactions” or “Sensors.”
- Enable object recognition: Once you have found the object recognition settings, toggle the switch to enable it. This will activate the HoloLens’ ability to identify and interact with real-world objects.
- Configure object recognition: Depending on the HoloLens model and software version, you may have additional options to configure the object recognition settings. These options can include adjusting the sensitivity or specifying the types of objects to be recognized.
- Train the HoloLens: After enabling object recognition, it’s recommended to train the HoloLens to recognize specific objects in your office. This can be done by selecting “Train Object” or a similar option in the settings menu and following the on-screen instructions to capture images of the objects for recognition.
By setting up object recognition on your HoloLens, you can enhance the augmented reality experience by incorporating real-world objects into your digital workspace. This opens up a wide range of possibilities for creating interactive and immersive content in your office.
In the next section, we will discuss the process of positioning objects in your office and optimizing their placement for an optimal HoloLens experience.
Positioning Objects in Your Office
Once you have set up object recognition on your HoloLens, it’s time to position the objects in your office to create an immersive augmented reality experience. Follow these guidelines to optimize the placement of objects:
- Consider the user’s perspective: When positioning objects, take into account the user’s perspective and ensure that the holograms appear in a natural and intuitive manner. Place objects at eye-level or within the user’s reach for easy interaction.
- Utilize the physical environment: Take advantage of the physical surroundings in your office to create context and enhance the realism of the holograms. For example, if you’re displaying a 3D model of a product, position it near a table or desk to mimic a real-life scenario.
- Avoid obstructing the view: Be mindful of the HoloLens’ limited field of view and avoid placing objects that may obstruct the user’s vision. Keep the area surrounding the holograms clear to maintain visibility and prevent distractions.
- Create interactive experiences: Position objects in a way that encourages user interaction. Make sure they’re easily accessible and allow for intuitive gestures or voice commands to manipulate or access information about the objects.
- Ensure proper lighting: Adequate lighting is essential for a seamless augmented reality experience. Avoid placing objects in areas with excessive glare or dim lighting, as it can impact the visibility and realism of the hologram.
- Test and iterate: Once you have positioned the objects, thoroughly test the placement by using the HoloLens in your office space. Ensure that the holograms appear in the desired locations and that the user can interact with them comfortably. If needed, make adjustments and iterate on the positioning to achieve the desired effect.
By carefully positioning objects in your office, you can create engaging and immersive experiences for HoloLens users. Whether you’re showcasing products, visualizing data, or providing interactive elements, strategic object placement can enhance productivity and creativity in your workplace.
In the next section, we will explore how to customize object interactions to further enhance the HoloLens experience in your office.
Customizing Object Interactions
Customizing object interactions is a key aspect of creating immersive and engaging experiences with the HoloLens in your office. By tailoring the way users can interact with holograms, you can enhance productivity and user satisfaction. Here are some ways to customize object interactions:
- Gestures: The HoloLens allows users to interact with holograms using various hand gestures. Customize the gestures associated with specific actions, such as pinch to resize an object or air tap to select an option. Consider user ergonomics and ensure that the gestures are intuitive and comfortable.
- Voice commands: Take advantage of the HoloLens’ speech recognition capabilities by customizing voice commands for controlling holograms. Assign specific voice commands to perform actions like rotating an object, activating a feature, or retrieving information. Keep the commands short, memorable, and easy to pronounce.
- Physical object interaction: If you have real-world objects that are recognized by the HoloLens, customize the interactions they offer. For example, tapping a recognized object could display additional information, overlay a virtual interface, or trigger a specific action related to the object.
- Contextual interactions: Customize the interactions based on the context or proximity of the user. For instance, as the user approaches a holographic display, it could automatically expand or offer additional interactive elements. Consider the user’s position and movement within the office space to provide dynamic and contextually relevant interactions.
- Gesture feedback: Provide visual or haptic feedback to users when they perform a gesture. This feedback can confirm that the gesture was recognized and the desired action has been triggered. Use animations, sounds, or gentle vibrations to enhance the user’s sense of control and engagement.
- User preferences: Allow users to customize their own interaction preferences within your HoloLens application. Provide options for gesture sensitivity, voice command customization, or the ability to choose alternative interaction methods if needed.
By customizing object interactions, you can create a personalized and intuitive user experience with the HoloLens in your office. Customization not only improves usability but also increases user engagement and productivity.
In the next section, we will discuss testing and troubleshooting techniques to ensure a smooth and efficient HoloLens experience in your office.
Testing and Troubleshooting
Testing and troubleshooting are essential steps in ensuring a smooth and efficient HoloLens experience in your office. Here are some guidelines for testing and troubleshooting your HoloLens setup:
- Test object recognition: Ensure that the HoloLens can accurately recognize and interact with the objects in your office. Test different objects and their interactions to ensure that they function as intended.
- Test gestures and voice commands: Perform thorough testing of the gestures and voice commands you have customized. Make sure they are responsive and accurately trigger the desired actions. Adjust sensitivity settings if necessary to improve recognition and response.
- Check for performance issues: Monitor the performance of the HoloLens during usage. Look out for any lag, delays, or freezing that might affect the user experience. If performance issues arise, check for potential factors such as network connectivity, available storage space, or excessive application running in the background.
- Ensure proper calibration: Regularly recalibrate the HoloLens to maintain accurate tracking and alignment with your office space. If you notice any drift or misalignment, perform the calibration process again to correct it.
- Stay up to date: Keep your HoloLens software and applications up to date to ensure compatibility, stability, and access to the latest features and improvements. Check for updates regularly and install them as needed.
- Seek support when needed: If you encounter persistent issues or difficulties, don’t hesitate to seek support from Microsoft or other HoloLens communities. They can provide guidance and troubleshooting tips specific to your situation.
By thoroughly testing and troubleshooting your HoloLens setup, you can ensure that the device performs optimally and delivers a seamless augmented reality experience in your office. Regular testing and maintenance contribute to a reliable and efficient workflow.
With all the necessary testing and troubleshooting measures in place, you are now ready to fully embrace the potentials of the HoloLens in your office.
Conclusion
Setting up objects for the HoloLens in your office can transform the way you work and collaborate. By leveraging the unique capabilities of augmented reality, you can create immersive experiences that enhance productivity and creativity. Throughout this article, we have explored various aspects of setting up objects for the HoloLens, from understanding the device to customizing interactions.
Understanding the HoloLens and its capabilities is crucial to making informed decisions when selecting objects and positioning them in your office. By considering the user’s perspective, utilizing the physical environment, and customizing interactions, you can create a seamless and engaging augmented reality experience.
It’s important to prepare the office space by decluttering, ensuring proper lighting, and creating an optimal environment for the HoloLens to function at its best. Installing and calibrating the device, as well as enabling object recognition, are essential steps in the setup process.
Testing and troubleshooting play a significant role in maintaining the performance and effectiveness of your HoloLens experience. Regularly testing interactions, checking for performance issues, and staying up to date with software updates are key to a smooth user experience.
By following these guidelines, you can harness the true potential of the HoloLens to enhance your office environment, boost productivity, and enable innovative ways of working and collaborating.
Now that you have a deeper understanding of setting up objects for the HoloLens, it’s time to embark on your augmented reality journey and explore the limitless possibilities this revolutionary technology has to offer in your office space.