Introduction
When it comes to creating immersive experiences and pushing the boundaries of technology, the HoloLens stands at the forefront. Developed by Microsoft, the HoloLens is a cutting-edge mixed reality headset that brings holographic content into the real world. Whether you are a developer, designer, or simply a technology enthusiast, understanding how to create animations for HoloLens can take your projects to the next level.
Animations play a crucial role in enhancing user interactions and bringing virtual objects to life within the HoloLens environment. From creating realistic movements to conveying information and guiding user attention, animations provide a seamless and engaging experience for HoloLens users.
In this article, we will delve into the world of HoloLens animations and explore the techniques and tools needed to create high-quality animations specifically tailored for this revolutionary device.
Throughout this guide, we will cover various aspects of HoloLens animations, ranging from understanding the basics to advanced animation scripting and optimization techniques. We will also explore how to create and import 3D models and assets for your animations, set up rigging and skinning, and take advantage of Unity’s animation tools.
Furthermore, we will discuss how to apply physics-based animations to enhance the realism of your holographic objects and provide tips for optimizing performance and ensuring smooth animations on the HoloLens device.
Whether you are developing games, educational experiences, or practical applications, mastering the art of HoloLens animations can greatly impact the overall user experience and make your projects truly stand out in the mixed reality landscape.
So, let’s dive in and explore the fascinating world of HoloLens animations!
What is HoloLens?
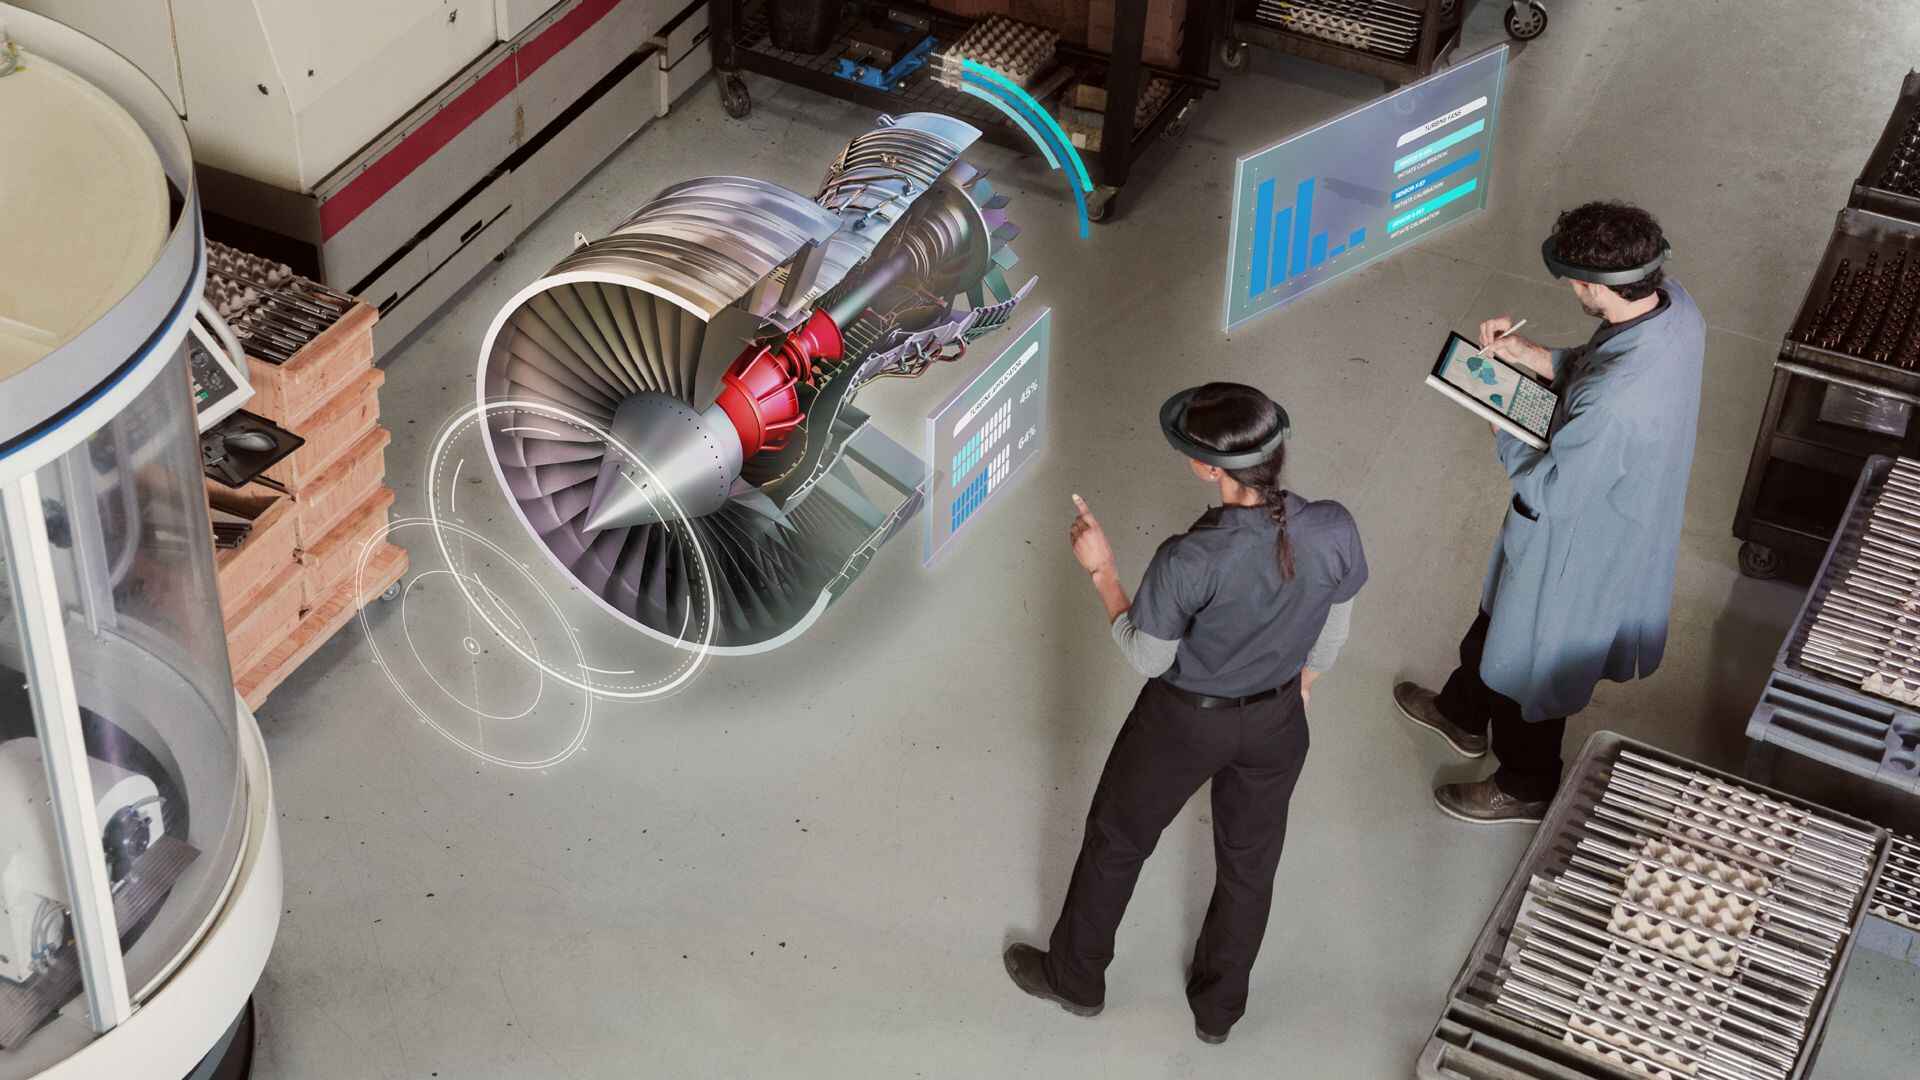
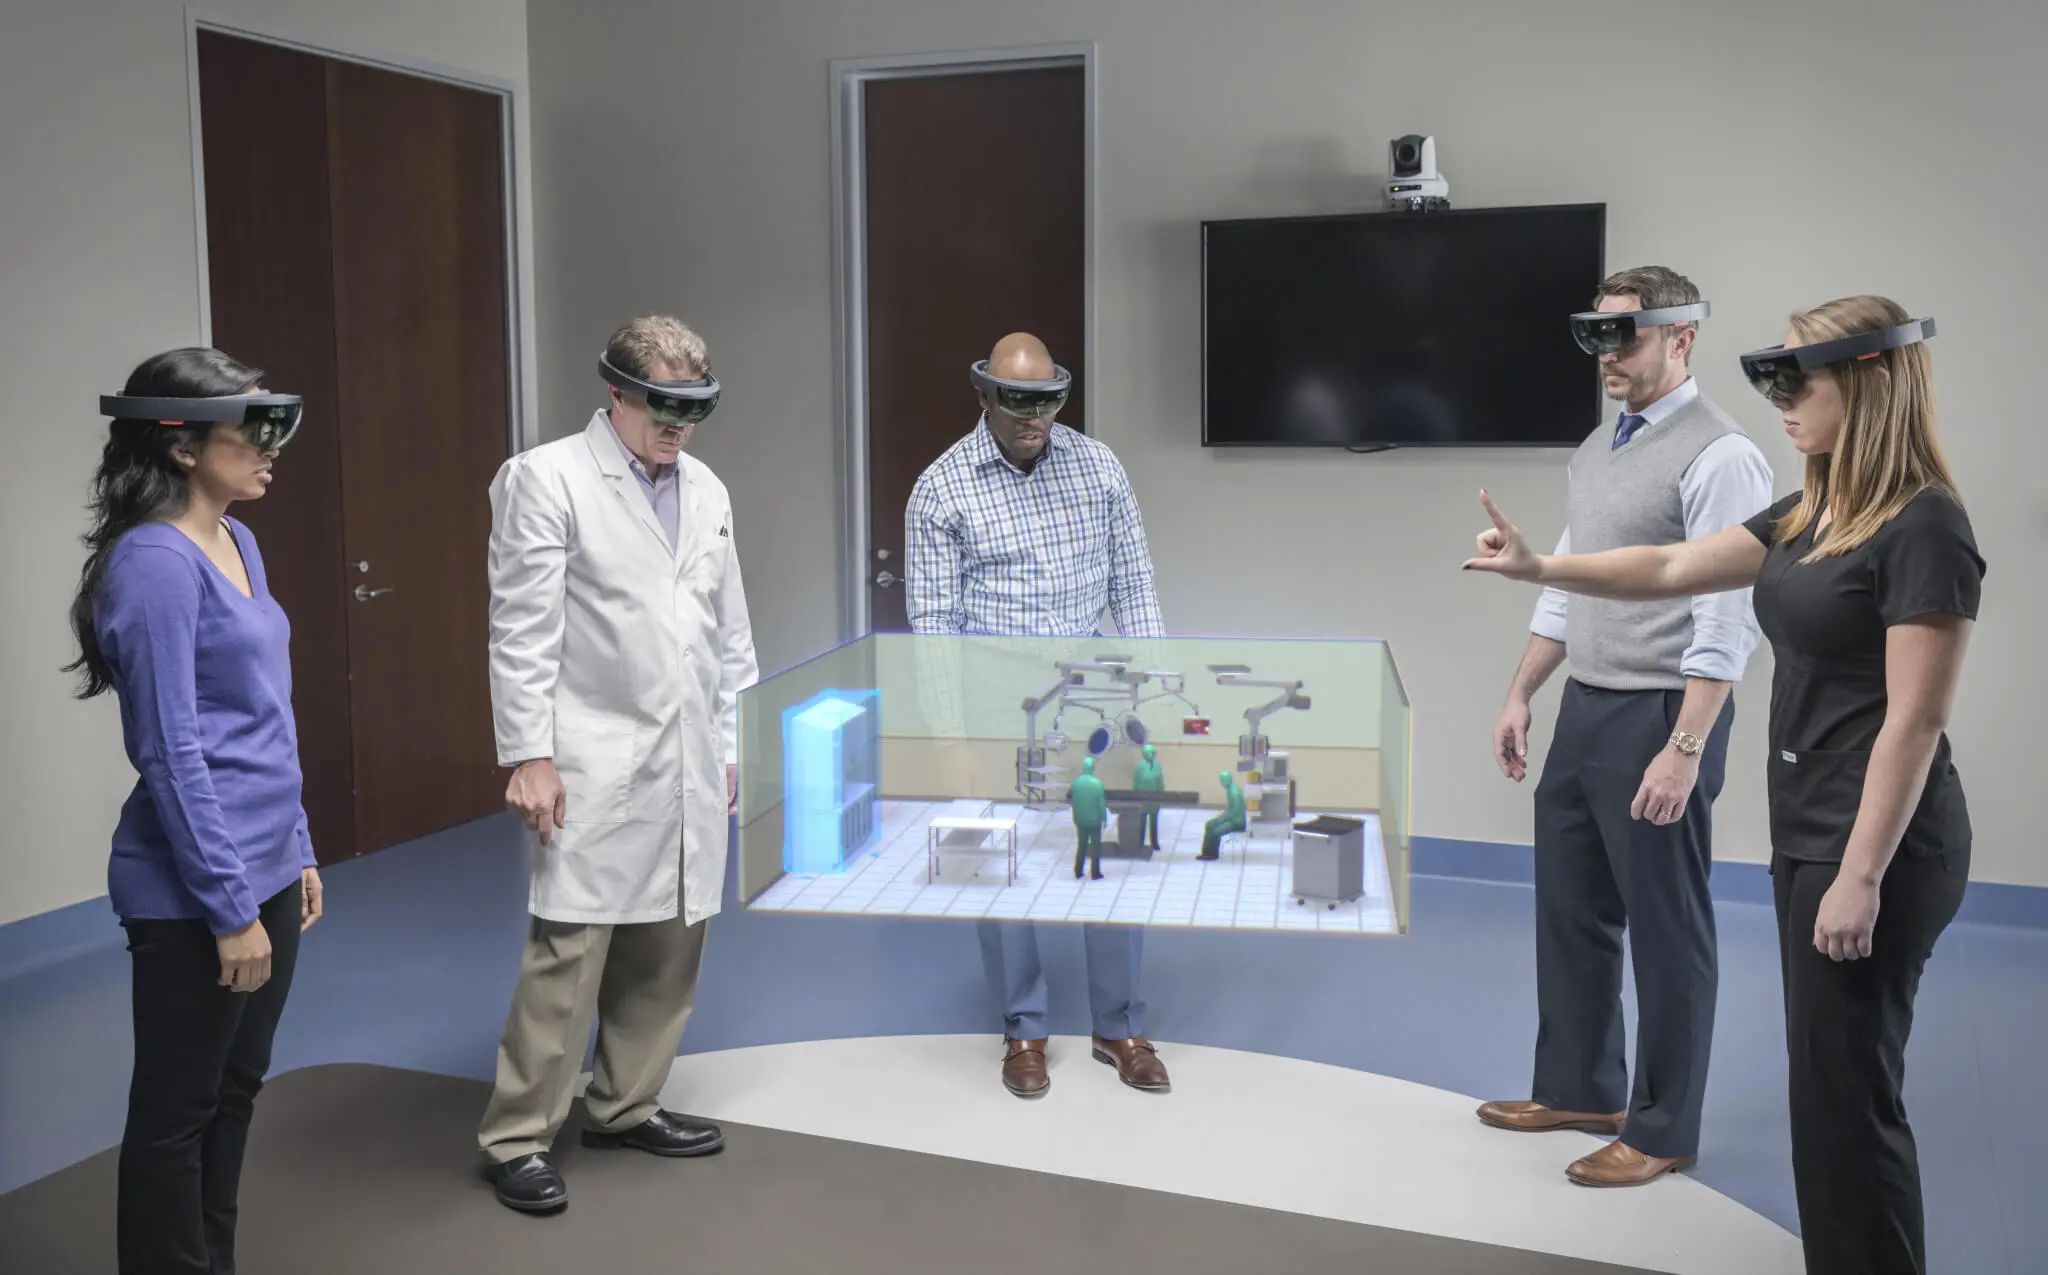
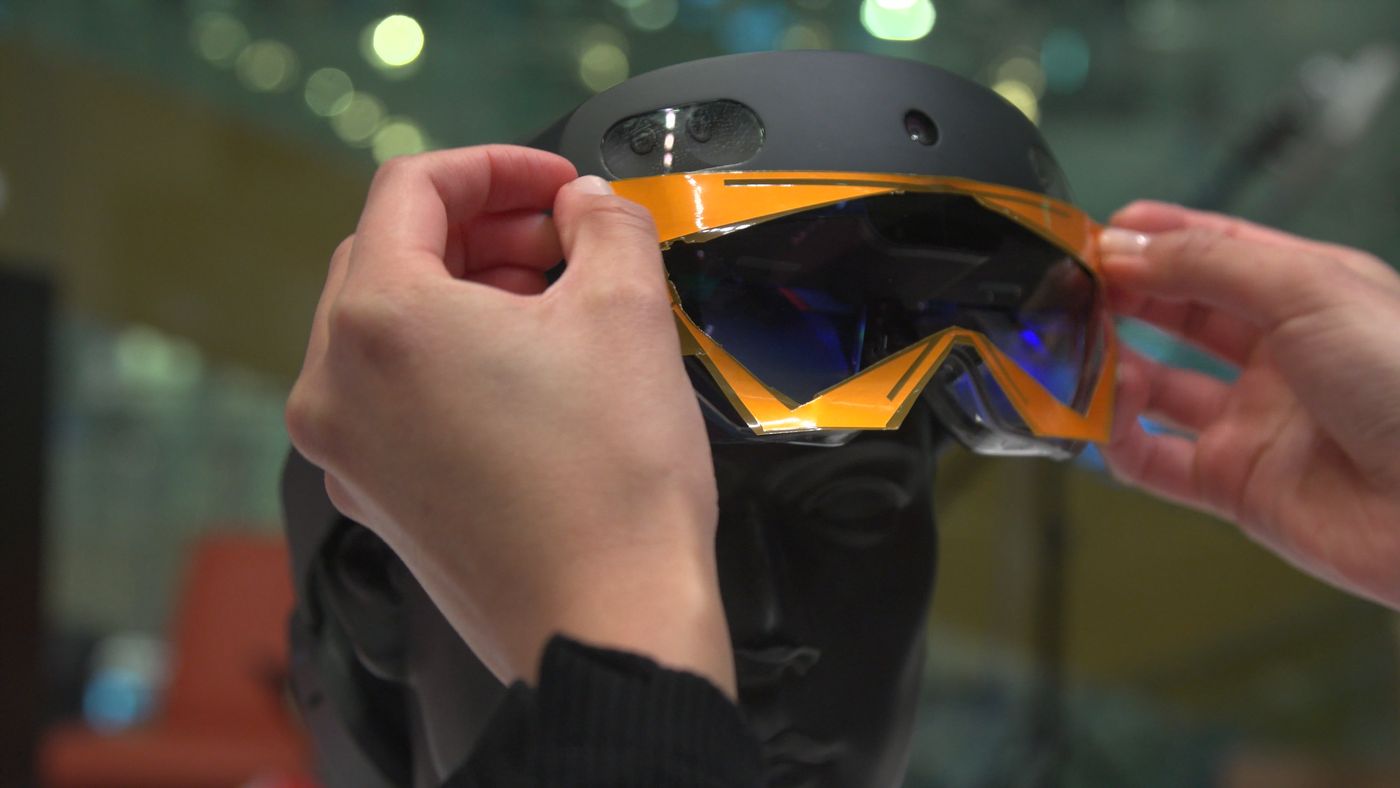
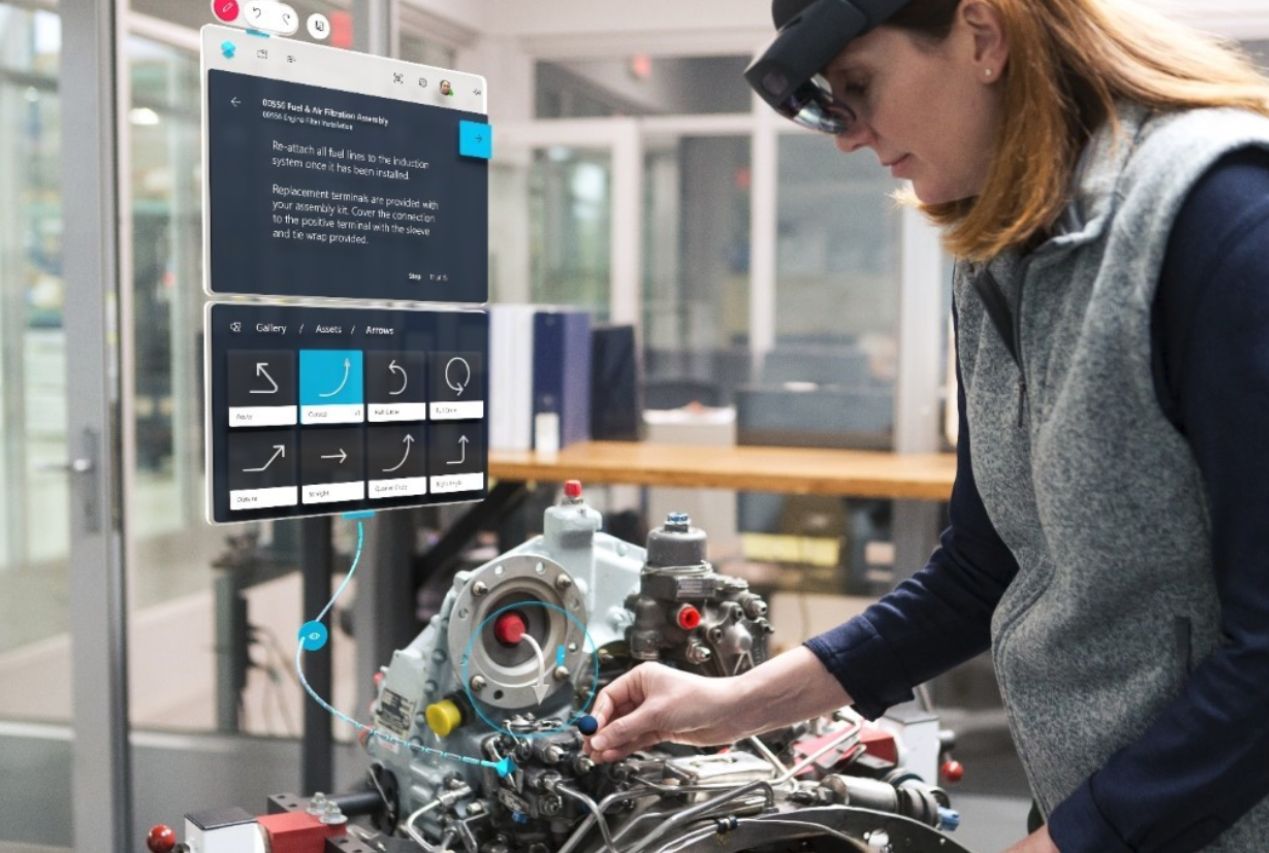
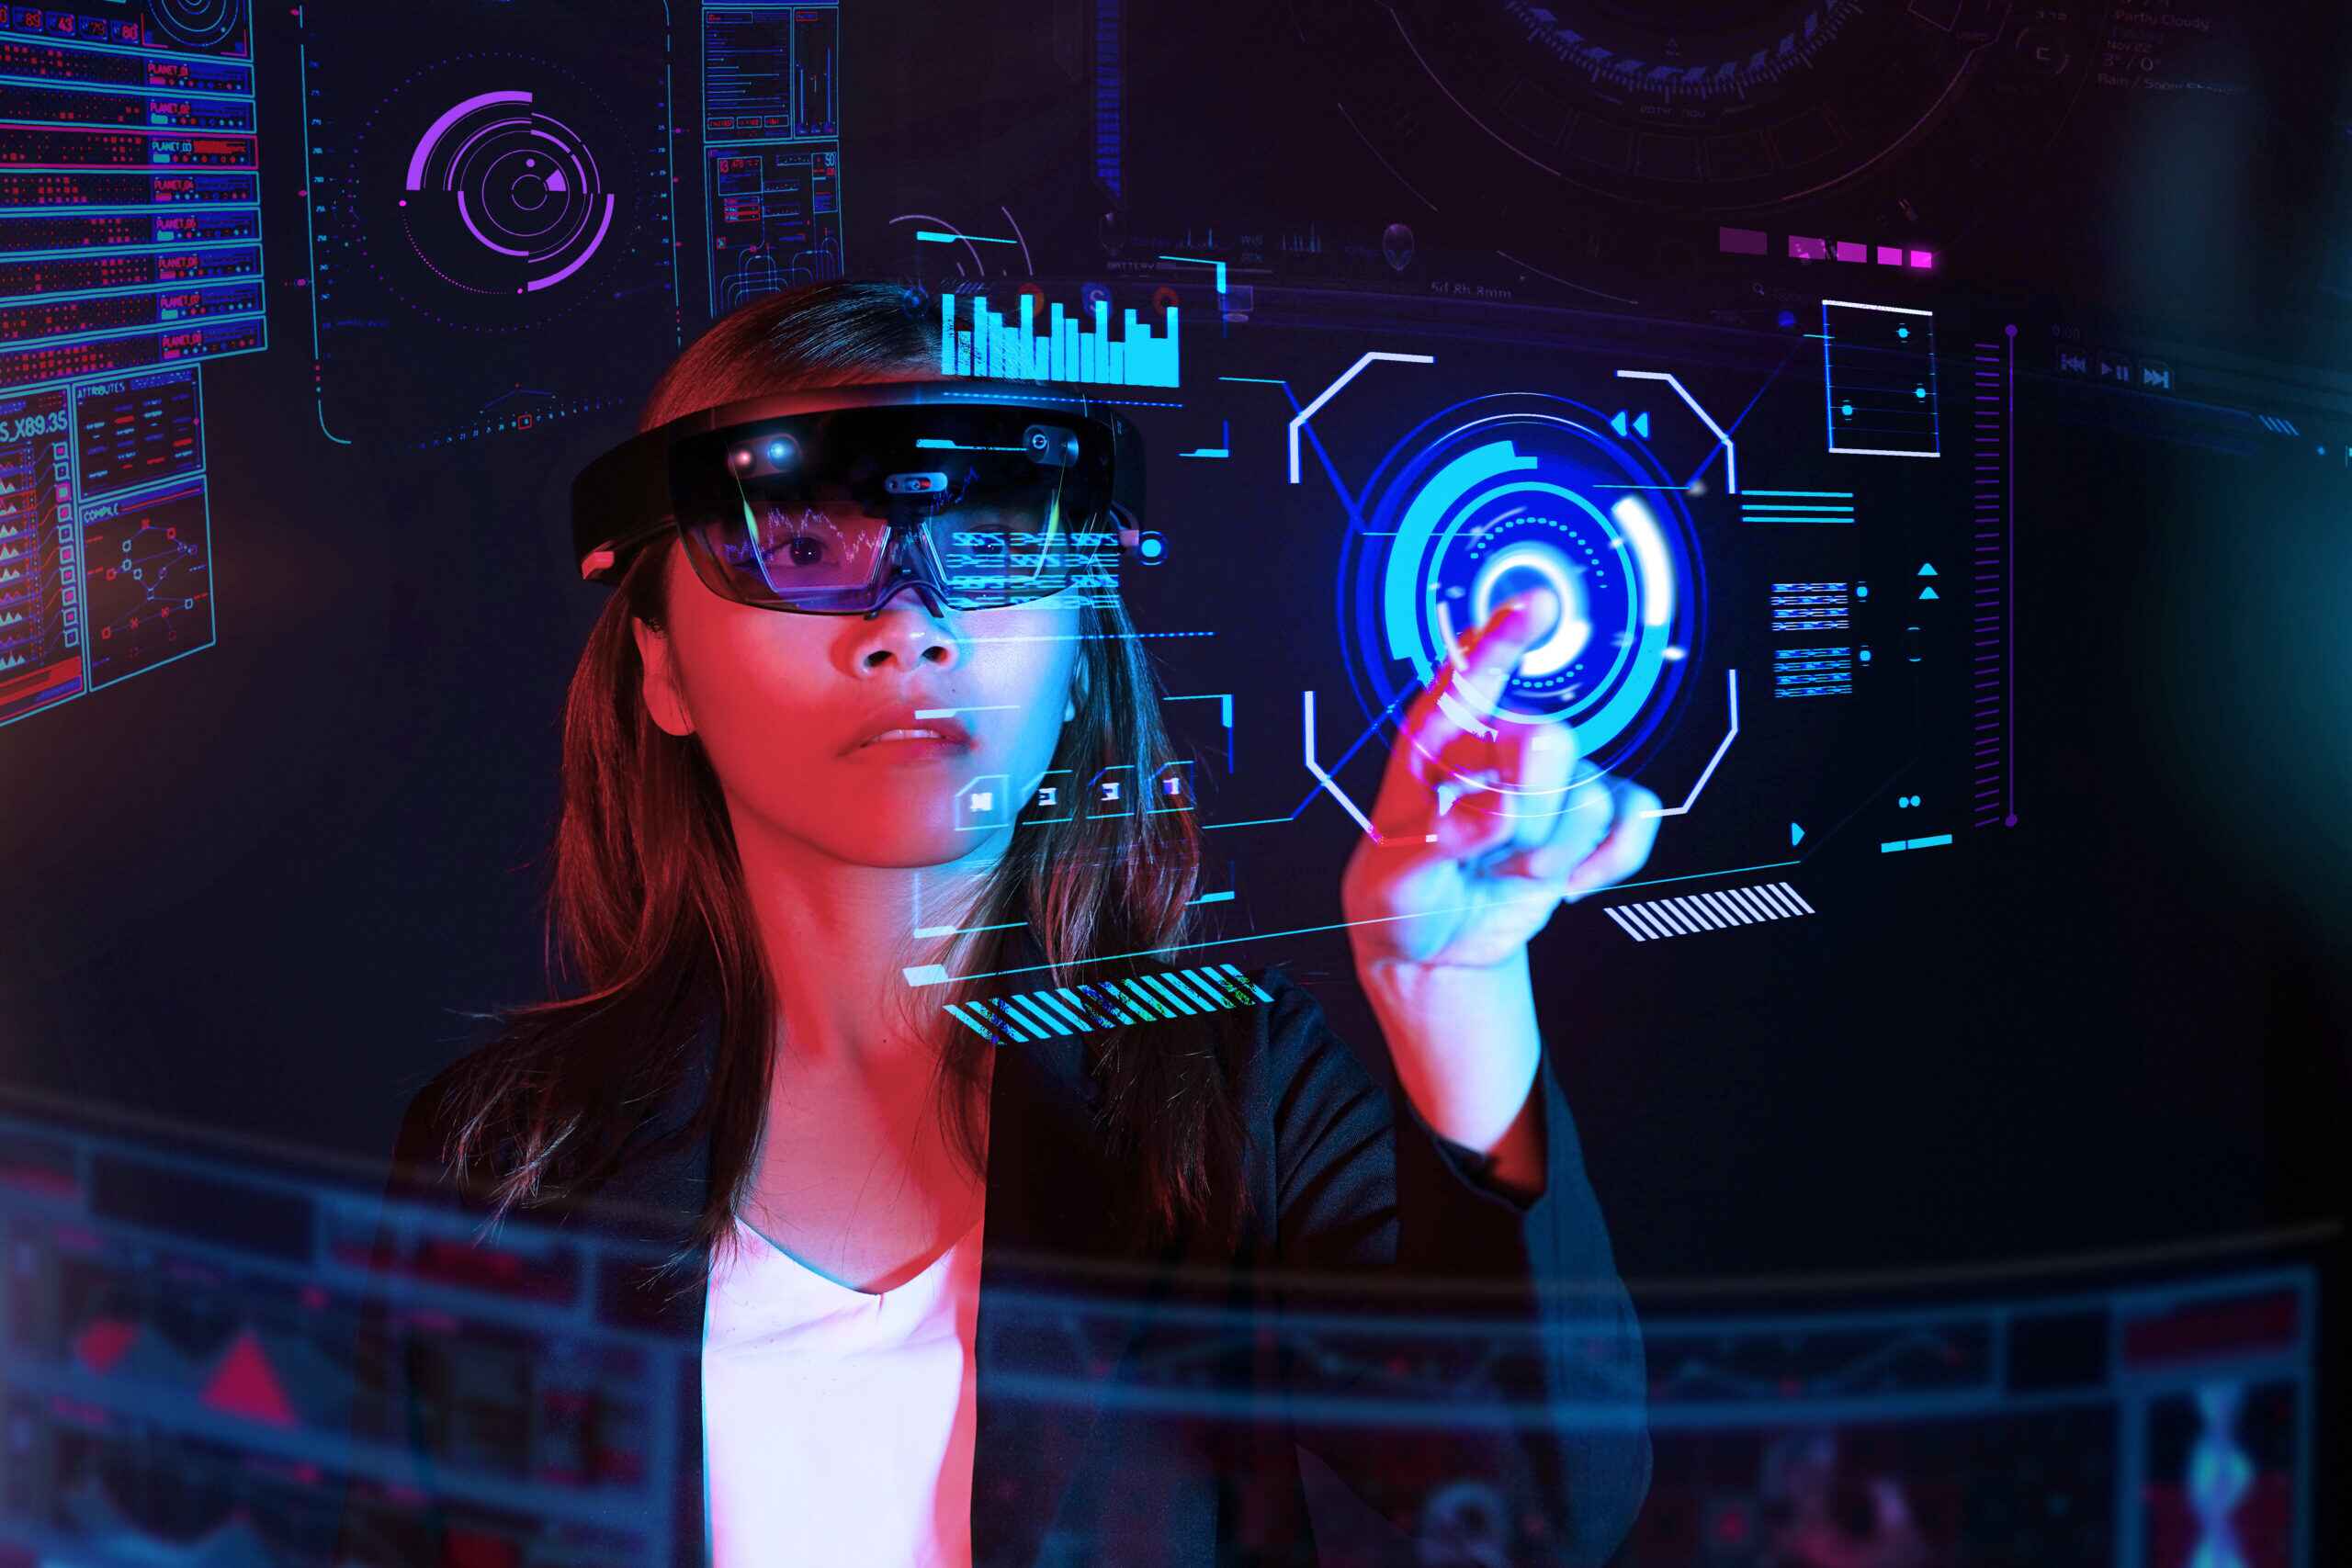
The HoloLens is a revolutionary mixed reality device developed by Microsoft. It is a head-mounted display that combines virtual reality (VR) and augmented reality (AR) technologies, allowing users to interact with holographic content in the real world.
Unlike virtual reality headsets, which fully immerse the user in a virtual environment, the HoloLens overlays digital holograms onto the user’s physical surroundings. This enables users to see and interact with virtual objects while still being aware of their real-world environment. This unique blend of virtual and real elements creates a mesmerizing mixed reality experience.
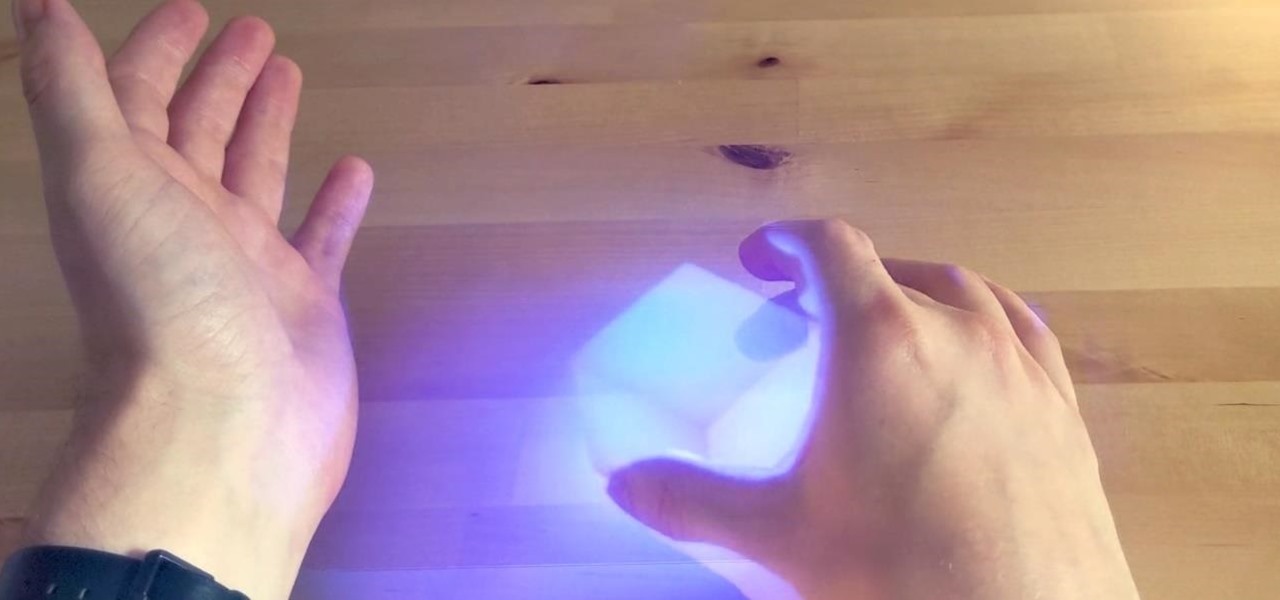
HoloLens incorporates a variety of sensors, including multiple cameras, motion sensors, and depth sensors. These sensors enable precise tracking of the user’s head movements, spatial mapping of the environment, and gesture recognition. As a result, users can interact with holograms using their hands, gestures, and even voice commands.
The device is equipped with high-quality spatial sound technology, allowing users to hear holographic sounds as if they were coming from specific locations in their real environment. This further enhances the immersive nature of the HoloLens experience.
The HoloLens operates on the Windows Mixed Reality platform and offers a wide range of applications across various industries. From gaming and entertainment to education, design, and industrial applications, the HoloLens unlocks endless possibilities for creating innovative and engaging experiences.
Whether it’s exploring virtual models, conducting remote collaborations, or visualizing complex data in 3D, the HoloLens provides a truly spatial computing experience that seamlessly integrates virtual content into the real world.
As a developer or designer, understanding how to harness the power of HoloLens opens up a world of opportunities to create captivating mixed reality experiences that blur the line between the virtual and physical realms.
Now that we have a grasp of what the HoloLens is and its capabilities, let’s explore why animations are crucial in creating immersive experiences on this groundbreaking device.
Why Use Animations for HoloLens?
Animations play a vital role in creating engaging and immersive experiences on the HoloLens. They bring virtual objects to life, enhance user interactions, and provide important visual cues and feedback. Here are several reasons why using animations is essential when developing for the HoloLens:
- Enhancing Realism: Animations add a sense of realism to holographic objects by simulating natural movements, physics-based interactions, and lifelike behaviors. This helps to bridge the gap between the digital and physical worlds, making the holograms feel more tangible and believable.
- Guiding User Attention: Animations can be used to direct the user’s focus and guide their attention to specific elements or actions within the holographic experience. By visually highlighting or animating certain objects, you can draw the user’s gaze and ensure they don’t miss important information or interactions.
- Conveying Information: Animations can be a powerful way to convey information and communicate complex concepts in a more intuitive and visually engaging manner. By animating data visualizations, diagrams, or instructional sequences, you can simplify understanding and enhance the overall user learning experience.
- Adding Interactivity: Interactive animations allow users to directly manipulate and interact with holographic objects. By providing intuitive gestures or touch-based interactions, animations enable users to grasp, move, rotate, or resize virtual content within their real environment, fostering a deeper sense of engagement and control.
- Creating Immersive Experiences: Engaging animations help to transport users into a captivating mixed reality world. Whether through dynamic transitions, atmospheric effects, or visually stunning sequences, animations can elevate the overall experience and create a sense of wonder and immersion.
By leveraging animations effectively, developers and designers can unlock the full potential of the HoloLens platform and create memorable and compelling mixed reality experiences. However, it’s important to understand the basics of HoloLens animation before diving into the creation process.
In the next section, we will explore the fundamentals of HoloLens animation, including keyframe animation, Unity animation tools, and scripting techniques. This knowledge will serve as a solid foundation for designing and implementing animations that bring your holographic projects to life.
Understanding HoloLens Animation Basics
Before diving into the creation of animations for HoloLens, it’s important to have a solid understanding of the basic principles and concepts involved. Here are some key aspects of HoloLens animation that you should be familiar with:
- Keyframe Animation: Keyframe animation is a fundamental technique in creating smooth and realistic motion. It involves specifying key poses or positions at specific points in time, and the computer interpolates the frames in between to create smooth transitions. In HoloLens development, keyframe animation is used to animate holographic objects, such as moving them across the environment, rotating, scaling, or changing their appearance.
- Unity Animation Tools: Unity is a popular game development engine that can also be used for creating HoloLens projects. It provides a range of animation tools and features that make it easier to create and control animations. Unity’s Animation window allows you to create and edit animations using a timeline-based interface, while the Animation Controller provides a visual way to manage and blend multiple animations together.
- Scripting Animations in Unity: In addition to using Unity’s animation tools, you can also script animations using C# in Unity. This gives you more control and flexibility over the animation behavior. By writing scripts, you can dynamically control properties such as position, rotation, scale, and even trigger complex animations based on user input or other events.
- Mecanim Animation Controller: Mecanim is Unity’s animation system that allows you to create complex animation behaviors and transitions. It provides a graphical interface for creating state machines, defining animation states, transitions, and blending parameters. With Mecanim, you can create interactive and dynamic animations that respond to user input or changes in the environment.
- Importing and Applying Animations: To use animations created in external software, such as Autodesk Maya or Blender, they need to be imported into Unity. Unity supports various animation file formats, and you can apply these animations to your holographic objects. Once imported, you can apply the animations to objects using keyframes or script-based animation techniques.
- Applying Physics-Based Animations: In certain scenarios, you may want to incorporate physics simulations into your HoloLens animations. Unity provides a robust physics engine that can be used to simulate realistic physics-based interactions, such as object collisions, gravity, and forces. By applying physics-based animations, you can create more lifelike and dynamic interactions between holograms and the environment.
By familiarizing yourself with these fundamental concepts, you will be well-equipped to create compelling and interactive animations for your HoloLens projects. In the next sections, we will dive deeper into the process of planning, creating, and optimizing animations specifically tailored for the HoloLens device, using the power of the Unity engine.
Planning Your Animation
Proper planning is crucial when creating animations for HoloLens. Taking the time to plan your animation workflow and envision the desired outcome will ensure a smooth and efficient animation creation process. Here are some key considerations for planning your HoloLens animations:
- Define Animation Goals: Start by defining the goals of your animation. What message or information are you trying to convey? Are you aiming for a realistic, playful, or stylized look? Clearly defining your objectives will help you stay focused and create animations that align with your project’s vision.
- Storyboarding: Storyboarding is a visual representation of your animation sequence. It involves sketching out key frames or scenes to map the flow and timing of the animation. Storyboarding allows you to plan camera angles, character movements, and transitions, giving you a clear roadmap to follow during the animation creation process.
- Consider User Experience: Keep the user experience in mind when planning your animations. Think about the user’s perspective and how the animations will enhance their interaction with the holographic objects. Consider factors such as timing, responsiveness, and clarity of the animation to ensure a seamless and intuitive user experience.
- Optimize Performance: HoloLens is a mobile platform with limited processing power. To ensure smooth performance of your animations, it’s important to optimize the animation assets and reduce unnecessary computational overhead. Consider factors such as polygon count, texture sizes, and the number of animated objects to maintain a balance between visual quality and performance.
- Iterate and Refine: Animation creation is an iterative process. Start with rough sketches or prototypes and gradually refine your animations based on feedback and testing. Evaluate the effectiveness of your animations in achieving your goals and make adjustments as necessary.
By carefully planning your animations, you can streamline your workflow and create animations that captivate and engage users within the HoloLens environment. Once you have a solid plan in place, you can move on to the next steps, such as creating 3D models and assets, setting up rigging and skinning, and delving into the animation creation process.
In the following sections, we will explore these steps in more detail, providing you with the necessary knowledge and techniques to bring your HoloLens animations to life.
Creating 3D Models and Assets
Creating 3D models and assets is an essential step in the process of animating for HoloLens. These assets serve as the foundation for your animations, allowing you to bring virtual objects to life within the mixed reality environment. Here are some key considerations when creating 3D models and assets for HoloLens:
- Choose the Right Software: There are several software options available for creating 3D models, such as Autodesk Maya, Blender, or 3ds Max. Choose a software that suits your workflow and level of expertise. These software tools provide a wide range of features and capabilities for creating detailed and visually appealing 3D models.
- Consider the HoloLens Field of View: The HoloLens has a limited field of view, and objects too close to the user’s eyes may appear cut off or distorted. When creating 3D models, ensure that key elements and animations are within the user’s field of view to provide a seamless and immersive experience.
- Optimize Geometry and Complexity: To ensure smooth performance on the HoloLens, optimize your 3D models by reducing unnecessary complexity. Use efficient polygonal modeling techniques, remove unseen geometry, and simplify the mesh where possible. Lower polygon counts result in faster rendering times and better performance.
- Create Proper UV Mapping and Texturing: UV mapping is the process of unwrapping the 3D model’s surface to apply 2D textures accurately. Ensure that UV maps are properly laid out and optimized for efficient texture use. Apply textures that enhance the realism or aesthetic appeal of your models, considering factors such as shading, lighting, and material properties.
- Design for Interaction: When creating 3D models for HoloLens, consider how users will interact with the objects in the mixed reality environment. Design features that allow for intuitive and natural user interactions, such as grabbable handles, touch-sensitive surfaces, or responsive animations triggered by user gestures.
- Consider Scale and Proportions: Maintain appropriate scale and proportions for your 3D models within the HoloLens environment. Ensure that objects appear realistic and are correctly scaled in relation to the real-world environment. Proper scale and proportions contribute to the overall sense of immersion and believability.
- Test and Iterate: Test your 3D models within the HoloLens environment to evaluate their appearance, functionality, and performance. Use the device’s spatial mapping capabilities to place virtual objects in the real world. Iterate and refine your models based on user feedback and testing to ensure optimal results.
Creating high-quality 3D models and assets is a key ingredient for successful HoloLens animations. With well-designed and optimized assets, you can create compelling and immersive mixed reality experiences that captivate users within the holographic environment. Once you have your 3D models ready, the next step is to rig and skin them for animation.
In the upcoming sections, we will explore the process of rigging and skinning 3D models, as well as the different techniques and tools available for animating these models within the HoloLens ecosystem.
Rigging and Skinning
Rigging and skinning are essential processes in preparing 3D models for animation in HoloLens. Rigging involves creating a skeletal structure, known as a rig, that serves as the framework for animating the model. Skinning, on the other hand, involves associating the model’s vertices with the rig’s joints to enable realistic deformation during animation. Here are some key aspects to consider when rigging and skinning your 3D models:
- Create a Rig: Begin by creating a rig that matches the structure and movement of your 3D model. The rig should consist of bones or joints that mimic the skeletal structure of the object. Rigging software, such as Autodesk Maya or Blender, offers tools to create and manipulate rigs efficiently.
- Define Joint Hierarchy: Organize the joints of your rig in a hierarchical structure. This hierarchy ensures that the movements of each joint influence the movement of the attached joints correctly. Consider the natural movement of the object and the desired animation outcomes when defining the joint hierarchy.
- Weight Paint Your Skinning: Weight painting is the process of assigning weights to the vertices of the model to determine their influence on the rig’s joints. Ensure that the weights are properly distributed to achieve smooth and natural deformations during animation. Use weight painting tools in your 3D software to adjust the influence of each joint on the model’s vertices.
- Test and Refine: Test the rig and skinning by animating the model and evaluating how it deforms. Make adjustments to the rig and skinning weights as needed to correct any issues like unwanted deformations or unnatural movements. Iterate and refine the rigging and skinning process until you achieve the desired animation results.
- Consider Advanced Rigging Techniques: Depending on the complexity of your 3D model and the desired animation effects, you may need to implement more advanced rigging techniques. These can include inverse kinematics (IK) for precise control of joint movements, custom constraints to restrict specific movements, or facial rigging for expressive facial animations.
- Test Rig Performance: Once the rig is set up, test its performance within the HoloLens environment. Check for any performance bottlenecks or issues that may affect the smoothness of the animation. Optimize the rig if necessary by reducing unnecessary joints or simplifying the rig’s complexity.
Proper rigging and skinning are vital for creating lifelike and natural-looking animations in HoloLens. By carefully setting up the rig and ensuring accurate skinning, you can achieve realistic movements and deformations that enhance the overall quality of your animations. With the rig and skinning in place, you can move on to the next step of animating your 3D models using keyframes or Unity’s animation tools.
Next, we will explore keyframe animation techniques and how to utilize Unity’s animation tools to bring your 3D models to life within the HoloLens environment.
Keyframe Animation
Keyframe animation is a fundamental technique used to create smooth and realistic motion in HoloLens animations. It involves specifying key poses or positions at specific points in time, and the computer interpolates the frames in between to create smooth transitions. Keyframe animation is widely used for animating holographic objects, such as moving them across the environment, rotating, scaling, or changing their appearance. Here are some key aspects to consider when implementing keyframe animation for HoloLens:
- Plan Keyframes: Start by planning the keyframes for your animation sequence. Determine the starting and ending poses, and any intermediate poses that define the movement or transformation. Consider the timing and spacing of the keyframes to achieve the desired animation effect.
- Set Keyframes in Animation Timeline: Use your chosen animation software, such as Autodesk Maya or Unity, to set the keyframes in the animation timeline. This allows you to precisely control the timing and position of the keyframes. Ensure that you have a smooth transition between the keyframes to avoid jerky or unnatural movements.
- Interpolate Between Keyframes: The computer interpolates the frames between the keyframes to create smooth motion. The method of interpolation determines how the computer calculates the positions, orientations, or scales of the object between keyframes. Common interpolation methods include linear, Bezier, spline, or quaternion interpolation.
- Consider Easing Functions: To add more organic and natural movement to your animations, consider incorporating easing functions. Easing functions control the acceleration and deceleration of the animation, giving a sense of weight and realism to the moving objects. Use easing functions, such as ease-in, ease-out, or ease-in-out, to achieve smooth and natural transitions.
- Adjust Animation Curves: Animation curves allow you to fine-tune the interpolation between keyframes. By adjusting the curves, you can control the speed, intensity, or timing of certain aspects of the animation. Experiment with different curve shapes to achieve the desired animation effect.
- Preview and Refine: Preview your keyframe animation to evaluate the overall motion and make any necessary adjustments. If the animation doesn’t look as expected, refine the keyframe positions, interpolation methods, or easing functions until you achieve the desired result. Iterate and test your animation to ensure that it aligns with your vision.
Keyframe animation provides a powerful way to create smooth and realistic motion in HoloLens animations. By effectively planning the keyframes, setting them in the animation timeline, interpolating between keyframes, and refining the animation curves, you can bring your holographic objects to life within the mixed reality environment. With keyframe animation in place, you can explore further animation techniques using Unity’s animation tools or scripting to add more complexity and interactivity to your HoloLens animations.
In the next sections, we will delve into using Unity’s animation tools and scripting animations in Unity to create dynamic and interactive animations specifically tailored for the HoloLens experience.
Using Unity Animation Tools
Unity, a popular game development engine, provides a range of powerful animation tools that can be utilized to create dynamic and compelling animations for HoloLens. These tools offer a visual interface and intuitive workflows that make it easier to create, manipulate, and control animations. Here are some key aspects to consider when using Unity’s animation tools:
- Animation Window: Unity’s Animation window is a key tool for creating and editing animations. It provides a timeline-based interface where you can set keyframes, adjust animation curves, and preview your animation in real-time. The Animation window allows you to animate various properties of objects, including positions, rotations, scales, and even material properties.
- Animation Controller: Unity’s Animation Controller allows you to manage and blend multiple animations together. It provides a graphical interface for creating state machines, defining animation states, transitions, and blending parameters. The Animation Controller enables you to create complex and interactive animations that respond to user input or changes in the environment.
- Keyframe Animation: Unity’s animation tools support keyframe animation, allowing you to set keyframes at specific points in time and interpolate between them to create smooth motion. You can easily manipulate keyframes, adjust animation curves, and add easing functions to achieve desired movement effects. The Animation window provides a visual perspective of your animation sequence, making it easier to fine-tune and refine your animations.
- Timeline: Unity’s Timeline feature enables more advanced control over animations and cinematic sequences. It allows you to create and manipulate animation tracks, audio tracks, and control the timing and sequencing of various elements in your animation. The Timeline provides a comprehensive overview and a higher level of control for creating more complex and synchronized animations.
- Animation Events: Unity’s animation tools also allow you to trigger events during specific points in the animation timeline. Animation events can execute custom scripts or functions, enabling you to create interactive elements and trigger actions based on the animation state. Animation events enhance the interactivity of your HoloLens animations and allow for dynamic and responsive experiences.
- Preview and Playback: Unity provides a powerful preview and playback functionality, allowing you to see your animations in action. You can preview your animations directly in the Unity Editor or play them within the HoloLens device itself using the Unity Remote app. This makes it easier to iterate and refine your animations until you achieve the desired results.
By leveraging Unity’s animation tools, you can efficiently create and control animations for your HoloLens projects. Whether you are using keyframe animation, setting up animation controllers, or utilizing the Timeline feature, Unity provides an extensive set of tools to help you craft immersive and interactive animations that enhance the HoloLens experience.
Next, we will explore scripting animations in Unity, which offers even more flexibility and control to create dynamic and interactive HoloLens animations.
Scripting Animations in Unity
In addition to using Unity’s animation tools, scripting allows for more advanced control and customization of animations in HoloLens projects. By scripting animations in Unity using the C# programming language, you have the flexibility to create dynamic and interactive animations that respond to user input or changes in the environment. Here are some key aspects to consider when scripting animations in Unity:
- Accessing Animation Components: In Unity, you can access animation components and properties using scripting. By referencing the appropriate components, such as Animator or Animation, you can control animation playback, change animation states, and manipulate individual animation properties.
- Animating Transform Properties: With scripting, you can animate various transform properties of game objects, such as position, rotation, and scale. By modifying these properties over time, you can create dynamic and lifelike motion within your HoloLens animations. Scripting also allows for more complex animations, such as procedural or physics-based motions.
- Using Animation Curves: Unity’s AnimationCurve class enables you to define custom animation curves programmatically. These curves allow you to control the interpolation and timing of keyframes in your animations. With animation curves, you can achieve precise control over object movements, including acceleration, deceleration, and overshoot effects.
- Controlling Animation States: Scripting allows you to manage animation states and transitions dynamically. You can trigger animation state changes based on user input, events, or conditions in your HoloLens project. By scripting transitions between animation states, you can create seamless and responsive animations that adapt to user interactions.
- Using Blend Trees: Blend trees, also known as blend trees, enable you to control the blending of multiple animations based on parameters or variables. With scripting, you can modify these parameters and seamlessly blend between animations, allowing for smoother transitions and complex animation compositions.
- Implementing Animation Events: Animation events in Unity can be scripted to trigger specific actions at defined points in the animation timeline. By attaching scripts to animation events, you can synchronize other game behaviors, play sounds, spawn particles, or perform any custom logic to enhance the interactivity and immersion of your HoloLens animations.
Scripting animations in Unity empowers you with a high level of control and flexibility over your HoloLens animations. By utilizing animation components, animating transform properties, using animation curves, controlling animation states, utilizing blend trees, and implementing animation events through scripts, you can create dynamic and interactive experiences that respond to user input and the virtual environment.
Next, we will explore Unity’s Mecanim animation system, which provides a visual interface for creating complex animation behaviors and transitions between different animation states in HoloLens projects.
Mecanim Animation Controller
Unity’s Mecanim animation system provides a powerful toolset for managing complex animation behaviors and seamlessly transitioning between different animation states in HoloLens projects. Mecanim offers a visual interface that allows you to create and control animation states, define transitions, and apply blending parameters to create diverse and interactive animations. Here are key aspects to consider when utilizing Mecanim Animation Controller in Unity:
- State Machines: Mecanim uses state machines to organize and control animations. Each state represents an animation or a group of related animations. By defining animation states, you can manage the flow of animations based on various conditions, such as user input, events, or game logic.
- Transitions: Transitions allow for smooth transitions between animation states. Unity provides several transition types, including direct transitions, crossfades, and blends. By scripting conditions or using parameters, you can control when and how transitions occur, giving you full control over the flow of your animations.
- Blend Trees: Blend trees enable you to blend and interpolate multiple animations based on weighted parameters. By using blend trees, you can create smooth and complex transitions between different animation clips based on input variables or conditions. Blend trees offer flexibility and control over animation blending, allowing for seamless and dynamic animation compositions.
- Transition Conditions: Condition-based transitions provide a way to define criteria for transitioning between animation states. Mecanim allows you to specify conditions based on parameters, variables, or input triggers. By setting up appropriate conditions, you can trigger transitions only when specific criteria are met, making your animations more dynamic and adaptive.
- Parameters: Unity allows you to define parameters that influence the behavior of your Mecanim Animation Controller. Parameters can be set and modified through scripts or other game logic. By utilizing parameters, you can dynamically control the animations, adjust blending weights, or drive transitions based on changing conditions.
- Layering: Mecanim supports layering, which allows you to blend animations from different layers simultaneously. With layering, you can prioritize and manage animations independently, enabling more intricate and complex animation compositions. Layering is particularly useful when working with multiple animation states simultaneously, such as combining locomotion with upper body animations.
The Mecanim Animation Controller in Unity provides a robust framework for creating intricate and interactive animations for HoloLens projects. By utilizing state machines, transitions, blend trees, transition conditions, parameters, and layering, you can orchestrate complex animation behaviors and create immersive and dynamic experiences within the HoloLens environment.
Next, we will explore the process of importing and applying animations to your HoloLens project in Unity, allowing you to bring your animations to life within the mixed reality environment.
Importing and Applying Animations
Importing and applying animations to your HoloLens project in Unity is a crucial step in bringing your animations to life within the mixed reality environment. Unity provides a straightforward process for importing animations from external software and applying them to your 3D models. Here are key aspects to consider when importing and applying animations in Unity:
- Animation Formats: Unity supports various animation file formats, such as FBX, BVH, and Collada (DAE). Ensure that your animations are saved in a compatible format that Unity can recognize and import seamlessly. Check the Unity documentation for the supported file formats and any specific requirements for each format.
- Importing Animations: To import animations into Unity, simply drag and drop the animation files into the Unity project window or use the Import button. Unity will automatically analyze the animation files and convert them into Animation Clips that can be applied to your 3D models.
- Setting Animation Properties: Once imported, you can fine-tune various animation properties within Unity. Adjust factors such as playback speed, looping, and blend-in/out durations to achieve the desired animation behavior. Unity provides a user-friendly interface to modify these properties and preview the animation in real-time.
- Applying Animations: To apply animations to your 3D models, you will need to attach the Animation or Animator component to the GameObject that represents the model. Then, in the Animation window or Animator Controller, you can assign the imported Animation Clips to specific animation states or blend trees, depending on your desired animation behavior.
- Animation Blending: Unity allows you to blend multiple animations together to create smooth transitions or layered animation compositions. By setting up appropriate blend trees and parameters, you can control the weights and blending of animations, achieving seamless transitions and complex animation behaviors.
- Testing and Refining: After applying animations to your 3D models, preview and test them within Unity to ensure they behave as expected. Make any necessary adjustments to the animation properties, blending weights, or transition conditions to refine the animation results. Iteratively test and refine your animations to achieve the desired look and feel.
By importing and applying animations in Unity, you can seamlessly integrate your animated 3D models into the HoloLens environment. With the ability to set animation properties, apply animations to specific states or blend trees, and experiment with animation blending, you can create immersive and dynamic animations that enhance the overall experience of your HoloLens project.
In the following sections, we will explore how to apply physics-based animations, optimize animation performance, and test and debug your animations to ensure they deliver smooth and high-quality experiences on the HoloLens device.
Applying Physics-Based Animations
Applying physics-based animations can add an extra layer of realism and interactivity to your HoloLens projects. By simulating physics principles, such as gravity, collisions, and forces, you can create dynamic and lifelike interactions between holographic objects and the environment. Here are key aspects to consider when applying physics-based animations in HoloLens:
- Unity Physics Engine: Unity incorporates a robust physics engine that can be leveraged to apply physics-based animations. The built-in physics engine provides accurate simulations of real-world physics, allowing objects to respond naturally to forces and interactions.
- Adding Physics Components: To apply physics-based animations, you need to add physics components to your GameObjects in Unity. These components include Rigidbody for simulating physical movement, Collider for detecting collisions with other objects, and Joint components for applying constraints or connecting objects together.
- Applying Forces and Impulses: By manipulating the Rigidbody component in your GameObjects, you can apply forces or impulses to initiate movement or respond to user interactions. Forces can be applied continuously, while impulses provide a sudden burst of force. By adjusting the magnitude and direction of these forces, you can control the animation of your objects.
- Setting Constraints: Unity’s Joint components enable you to apply constraints to your physics-based animations. For example, you can use the Hinge Joint to create rotating mechanisms or the Fixed Joint to connect objects together. Setting up appropriate constraints ensures that the physics-based animations behave as intended.
- Collision Detection: With Collider components, you can detect and respond to collisions between objects. Utilize Unity’s collision events and scripts to trigger specific animations, sounds, or other interactive elements when collisions occur. This allows you to create dynamic and realistic interactions between holographic objects and the virtual environment.
- Testing and Tweaking: Physics-based animations may require careful tuning to achieve the desired results. Test and tweak the parameters of the physics components, such as mass, drag, or friction, to fine-tune the animation behavior. Iteratively test and iterate your physics-based animations to ensure they provide a realistic and satisfying experience.
By applying physics-based animations, you can create dynamic and engaging interactions within your HoloLens project. Simulating real-world physics principles adds depth and realism to the animations and enhances the user’s sense of immersion. With Unity’s built-in physics engine and the ability to control forces, constraints, and collisions, you can create captivating and interactive holographic experiences.
In the upcoming sections, we will delve into optimization and performance tips for your animations, as well as testing and debugging techniques to ensure smooth and high-quality animation experiences on the HoloLens device.
Optimization and Performance Tips
Optimizing animations for performance is essential to ensure smooth and responsive experiences on the HoloLens device. Here are some key optimization and performance tips to consider when creating animations for HoloLens:
- Reduce Polygon Count: Minimize the polygon count of your 3D models. High polygon counts can negatively impact performance, especially on a mobile device like HoloLens. Use efficient polygonal modeling techniques, such as using fewer subdivisions or removing unnecessary details, to achieve an optimal balance between visual quality and performance.
- Optimize Texture Sizes: Optimize texture sizes to reduce memory usage and improve performance. Use texture compression formats suitable for HoloLens, such as ASTC, to achieve a smaller footprint. Adjust texture sizes to the appropriate resolution based on the target display size and the distance between the user and the holographic objects.
- Use LOD (Level of Detail): Implement level of detail techniques to reduce the detail level of objects that are far from the user’s view. Lower levels of detail can significantly improve performance while maintaining visual fidelity. Unity provides tools that automatically switch between different LOD models based on the distance from the user.
- Limit Animations and Animated Objects: Use animations strategically and avoid excessive use of complex animations. Limit the number of animated objects on the screen simultaneously, as each animation adds computational overhead. Consider using static objects or fading animations when they are out of the user’s immediate view.
- Bake Animations: Consider baking complex animations into simpler forms whenever possible. Baked animations are pre-calculated and therefore have reduced runtime overhead. Bake animations that don’t require real-time interactions or dynamic changes to improve performance.
- Reuse Animation Components: Reuse animation components and assets whenever possible. Avoid duplicating unnecessary components, such as colliders or rigidbodies, on multiple objects. Sharing animation components reduces memory usage and processing overhead.
- Optimize Scripted Animations: If scripting animations in Unity, optimize your code by minimizing unnecessary calculations or updates. Use caching and pooling techniques to reuse objects and avoid memory allocations during animation updates.
- Profile and Analyze Performance: Use Unity’s profiling tools to identify performance bottlenecks and optimize your animations further. Monitor frame rates, memory usage, and rendering performance to identify areas that require improvement. Utilize the Unity Profiler and performance analysis features to diagnose and optimize performance issues.
By following these optimization and performance tips, you can ensure that your animations deliver a smooth and responsive experience on the HoloLens device. Striking the right balance between visual quality and performance optimization is crucial for creating captivating and seamless holographic experiences.
In the next section, we will explore testing and debugging techniques specific to animations in HoloLens projects, allowing you to identify and resolve any issues that may arise during the development process.
Testing and Debugging your Animation
Testing and debugging your animations in HoloLens projects are essential steps to ensure they function as intended and provide a seamless user experience. Here are key testing and debugging techniques to consider when working with animations for the HoloLens:
- Device Testing: Test your animations directly on the HoloLens device to evaluate their appearance and performance in the actual mixed reality environment. This allows you to experience the animations as users would and identify any issues that may arise due to the device’s constraints.
- Interaction Testing: Interact with your animations to ensure they respond appropriately to user input. Test gestures, voice commands, or any other methods of user interaction that are part of your animation logic. Ensure that the animations trigger and behave correctly when users interact with holographic objects.
- Performance Testing: Measure and monitor the performance of your animations. Check for any performance bottlenecks, such as excessive frame rate drops, high CPU or GPU usage, or excessive memory consumption. Use Unity’s profiling tools to identify and optimize code or animation-related performance issues.
- Debugging: Debug your animation scripts and components to identify and resolve any issues. Use breakpoints, logging statements, or Unity’s debugging tools to track and analyze the execution of your animation code. Inspect variables and step through the code to catch any logic errors or unexpected behaviors.
- Iterative Testing: Continuously iterate and test your animations as you make changes or additions. Regularly review and refine your animations based on user feedback and your own observations. Test and iterate to ensure that the animations align with your design and deliver the desired user experience.
- Validation and Usability Testing: Validate your animations by conducting usability testing with actual users. Gather feedback on the effectiveness, intuitiveness, and user satisfaction with the animations. Make necessary adjustments based on user input to improve the overall quality and usability of your HoloLens animations.
Testing and debugging your animations are critical steps in the development process, allowing you to identify and resolve any issues before deploying your HoloLens project. By thoroughly testing the functionality, performance, and user experience of your animations, you can ensure that they contribute seamlessly to the immersive and engaging nature of the mixed reality environment.
With a combination of device testing, interaction testing, performance testing, debugging, and iterative testing, you can fine-tune your animations and deliver high-quality experiences on the HoloLens device.
Conclusion
Creating animations for HoloLens is an exciting process that allows you to bring virtual objects to life within the mixed reality environment. By understanding the fundamentals of HoloLens animation and utilizing the powerful tools provided by Unity, you can craft immersive and interactive experiences that captivate users.
Throughout this guide, we explored various aspects of HoloLens animation, from planning and creating 3D models to rigging, keyframe animation, and applying physics-based animations. We also delved into using Unity’s animation tools, scripting animations, and optimizing performance. Testing and debugging techniques were highlighted to ensure smooth and robust animation experiences on the HoloLens device.
Remember that proper planning and storyboarding are crucial in creating engaging animations. Using animations to enhance realism, guide user attention, convey information, and add interactivity provides a seamless and immersive user experience. By leveraging Unity’s animation tools, such as the Animation window, Animation Controller, and Timeline, you can create dynamic and interactive animations closely tailored to HoloLens applications.
Additionally, scripting animations in Unity enables you to have finer control and flexibility over animation behaviors. By combining scripting with Unity’s animation components and parameters, you can create dynamic interactions and responsive animations that adapt to user input and the virtual environment.
Don’t forget the importance of optimization and performance. By reducing polygon counts, optimizing textures, reusing components, and thoroughly testing your animations, you can achieve smooth and efficient performance on the HoloLens device.
Lastly, validation and usability testing with actual users provide valuable insights to refine and improve your animations. Incorporating user feedback helps ensure that your animations meet the expectations and needs of your target audience, resulting in a more engaging and impactful experience.
Now that you have gained a comprehensive understanding of HoloLens animation, it’s time to apply these techniques and unleash your creativity to create remarkable and immersive experiences in the fascinating world of mixed reality.