Introduction
Welcome to the world of Cash App, the popular mobile payment app that allows you to send and receive money, pay bills, and make purchases with ease. Whether you’re new to Cash App or looking to create a new account, this guide will walk you through the process step-by-step.
Cash App offers a convenient way to manage your finances right from your smartphone. With its user-friendly interface and robust features, you can send money to friends and family, split bills, and even invest in stocks and Bitcoin. Plus, Cash App is widely accepted by businesses, making it effortless to pay for your purchases at participating retailers.
In this article, we will outline the simple steps you need to follow to create a new Cash App account. By the end of this guide, you’ll become a confident Cash App user, ready to make seamless transactions and enjoy all the benefits offered by the app. So, let’s dive in!
Step 1: Download the Cash App
The first step to creating a new Cash App account is to download the app on your smartphone. Cash App is available for both iOS and Android devices, so head over to the App Store (for iPhone users) or Google Play Store (for Android users) and search for “Cash App”.
Once you find the official Cash App application, tap on the “Download” or “Get” button to start the installation process. Depending on your internet connection speed, the app should download and install within a few minutes.
After the installation is complete, you will see the Cash App icon on your home screen or in the app drawer. Tap on the icon to open the app and proceed to the next step.
It is worth mentioning that Cash App is a legitimate and secure application. However, to avoid any potential risks, it is always recommended to download the app from the official app stores and ensure that you have the latest version installed.
Step 2: Open the Cash App
Now that you have downloaded the Cash App, it’s time to open the app and get started. Locate the Cash App icon on your smartphone’s home screen or in the app drawer and tap on it to launch the application.
When you open the Cash App for the first time, you will be greeted with a welcome screen. Take a moment to familiarize yourself with the key features and options available on the app’s home screen.
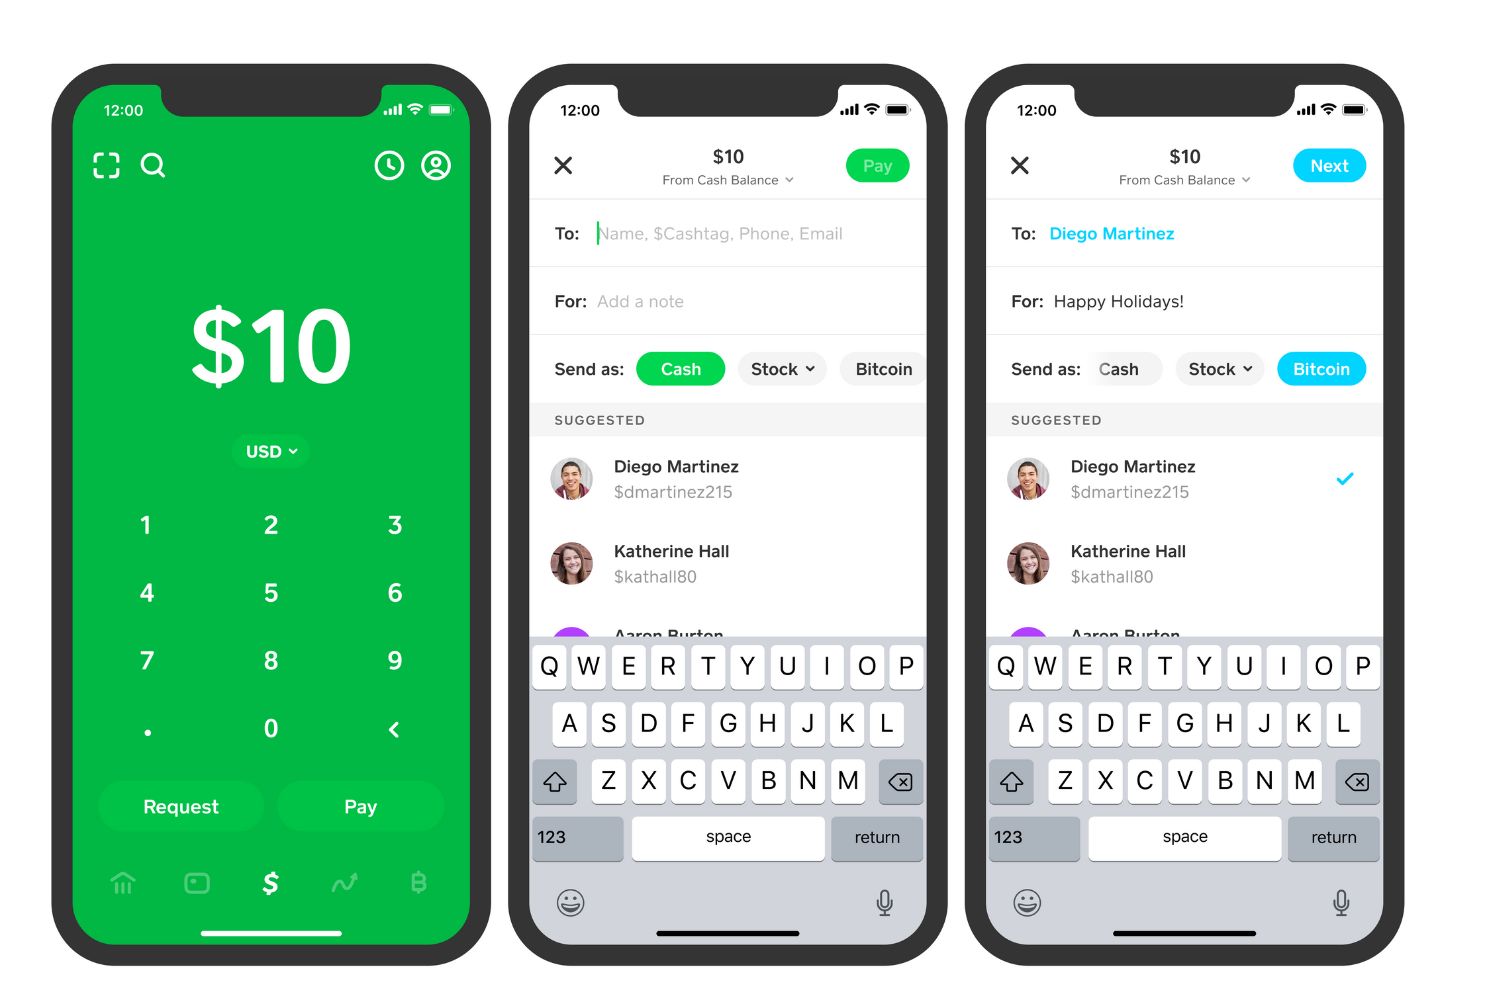
The home screen is where you will find your Cash App balance, transaction history, and various buttons for sending, receiving, and requesting money. Additionally, you will have access to features like investing in stocks and Bitcoin, as well as options to add a bank account, debit or credit card, and customize your profile settings.
At the bottom of the app’s interface, you will see a navigation bar with icons representing different sections of the app. These icons include the Cash Card, Investing, Bitcoin, and the Activity tab. You can easily switch between these sections by tapping on the respective icons.
Opening the Cash App is the gateway to managing your money, making payments, and exploring the app’s diverse features. Once you have familiarized yourself with the app’s interface, you’re ready to move on to the next step and dive deeper into the account creation process.
Step 3: Select “Sign Up”
After opening the Cash App, you will land on the welcome screen, which displays various options to choose from. To create a new Cash App account, locate the “Sign Up” button and tap on it.
The “Sign Up” button is typically found at the bottom of the welcome screen, but the app’s design may vary slightly depending on the version you are using. Look for the button that prompts you to create a new account and tap on it to proceed.
By selecting “Sign Up”, you are indicating your intention to create a fresh Cash App account. This will initiate the registration process and prompt you to provide the necessary information to set up your account.
Before moving on to the next step, make sure you have a stable internet connection to ensure a seamless registration process. It is also recommended to have your personal information handy, such as your phone number, email address, and any other details that may be required during the sign-up process.
Once you have successfully selected “Sign Up,” you are one step closer to creating your new Cash App account. With the account creation process initiated, you’ll be prompted to enter your phone number, email, and other relevant information to verify your identity and secure your account.
Keep in mind that the “Sign Up” button is the key that unlocks the door to a world of effortless money management and transactions with Cash App. So, go ahead and tap on that button to start your journey towards a more convenient and efficient financial experience.
Step 4: Enter Your Phone Number or Email
After selecting “Sign Up”, Cash App will prompt you to enter either your phone number or email address. This information is essential for creating your account and ensuring that you can securely access and manage your funds.
To proceed, carefully enter your phone number or email address in the designated field. Make sure to double-check for any typos or errors to avoid any issues with your account set up.
If you choose to enter your phone number, Cash App will send a verification code to that number via SMS. You will need to enter the code in the app to confirm your ownership of the phone number provided.
Alternatively, if you opt to enter your email address, Cash App will send a verification email. Check your inbox for an email from Cash App and click on the verification link within the email to confirm your ownership of the email address.
Providing either your phone number or email address is crucial, as it serves as your contact information and a way for Cash App to communicate important account-related updates, notifications, and security alerts.
Ensure that you have access to the phone number or email address you enter, as Cash App will use this information for future communication purposes. Additionally, make sure that the contact information you provide is accurate and up-to-date to avoid any complications with your account.
By entering your phone number or email address in this step, you are on your way to establishing your Cash App account and enjoying the numerous features and benefits the app has to offer.
Step 5: Enter the Verification Code
After providing your phone number or email address in the previous step, Cash App will send you a verification code to confirm your ownership. This verification step is crucial for ensuring the security and integrity of your account.
Check your phone’s SMS inbox or your email inbox, depending on the contact information you provided. Look for a message from Cash App containing a unique verification code.
Once you have located the verification code, open the Cash App and enter the code in the designated field. Be sure to input the code correctly to complete the verification process successfully.
Verifying your account through the entered code is essential for two reasons. Firstly, it confirms that you are the rightful owner of the phone number or email address provided during the sign-up process. This helps protect your Cash App account from unauthorized access.
Secondly, the verification process ensures that you have entered your contact information accurately. By successfully entering the verification code, you validate that you have access to the phone number or email address registered with your Cash App account.
If you encounter any issues receiving the verification code or entering it correctly, double-check that you entered your phone number or email address accurately in the previous step. You may also need to ensure that your phone is connected to a stable network or that your email service is functioning correctly.
Once you have entered the verification code, Cash App will confirm your verification and move you forward in the account creation process. With the verification step completed, you are now closer to enjoying the seamless and convenient features offered by Cash App.
Step 6: Create a $Cashtag
After successfully verifying your account, Cash App will prompt you to create a unique identifier called a $Cashtag. A $Cashtag is a personalized tag that represents your Cash App account and makes it easier for others to send you money.
To create your $Cashtag, think of a unique and easy-to-remember name or phrase that you would like to use as your identifier. It can be your name, username, or any word that represents you or your brand.
Once you have decided on a $Cashtag, enter it in the provided field. Cash App will automatically check if the $Cashtag you’ve chosen is available. If it’s already taken, you’ll need to try a different variation until you find an available one.
Having a $Cashtag simplifies the process of receiving funds from friends, family, or even customers if you’re using Cash App for business purposes. Instead of providing your phone number or email address, you can simply share your unique $Cashtag.
Keep in mind that your $Cashtag cannot be changed once it is set, so choose wisely. It should accurately represent your identity and be easy for others to remember. However, it’s important to note that a $Cashtag cannot contain spaces or special characters, and it must start with a dollar sign ($).
By creating a $Cashtag, you are personalizing your Cash App experience and making it more convenient for others to send you money. Once you have successfully created your $Cashtag, you can move on to the next steps of completing your account setup and exploring the various features of Cash App.
Step 7: Link and Verify Your Bank Account
Linking and verifying your bank account is an important step in setting up your Cash App account. It allows you to easily transfer money between your bank and Cash App, making transactions more seamless.
To begin, tap on the “Banking” or “Bank Account” option in the Cash App menu. You will then be prompted to enter the necessary information, such as your bank account number, routing number, and other required details.
Once you have entered the required information, Cash App will securely connect with your bank to verify the account. This is usually done through an instant verification process, which may require you to provide additional details or authorize the connection with your bank.
Verification ensures that you are the legitimate owner of the bank account you wish to link. It is crucial for the security and integrity of your financial transactions within Cash App.
If the instant verification process is successful, you will receive a notification confirming that your bank account has been linked to Cash App. You will then be able to transfer funds between your Cash App balance and bank account as needed.
In some cases, instant verification may not be an option or may not be successful. In such situations, Cash App provides alternative methods for verifying your bank account, such as manual verification or adding your debit card to link your bank account.
It’s important to note that Cash App takes data security seriously and ensures that your banking information is protected. However, it is always recommended to exercise caution and only link your bank account to trusted and reputable applications like Cash App.
By linking and verifying your bank account, you can enjoy the convenience of transferring funds between your Cash App and bank account seamlessly. This opens up a world of possibilities for managing your finances and making transactions with peace of mind.
Step 8: Add a Debit or Credit Card
In addition to linking your bank account, Cash App allows you to add a debit or credit card to your account. This enables you to make purchases, send money, and withdraw cash using your card directly through the app.
To add a debit or credit card to your Cash App account, navigate to the “Cards” or “Payment Cards” section within the app. Tap on the option to add a new card and follow the prompts to enter the required card information.
Ensure that you have your card handy so that you can accurately enter the card number, expiration date, security code, and any additional information that might be requested.
Once you have entered the card details, Cash App will securely process the information. This process may include verifying your card through a small transaction or by sending a one-time code to your mobile number or email address associated with the card.
The ability to add a debit or credit card to Cash App offers several advantages. Firstly, it provides an additional payment method for making purchases or sending money to others. Secondly, it allows you to withdraw cash from ATMs using your Cash App card.
It’s important to note that Cash App may charge fees for certain card transactions, such as ATM withdrawals. Familiarize yourself with the fee structure and terms of use to make informed decisions when using your card.
By adding a debit or credit card to your Cash App account, you enhance the flexibility and convenience of your usage. This feature extends your spending power and provides more options for managing your finances through the app.
Step 9: Customize Your Security Settings
When using any financial application, including Cash App, it is crucial to prioritize your account security. Cash App provides several security features that you can customize to further protect your account and ensure a safe financial experience.
To access and customize your security settings, navigate to the “Settings” or “Security” section within the Cash App menu. Here, you will find various options to enhance the security of your account.
One of the essential security features is enabling two-factor authentication (2FA). With 2FA enabled, you will receive a verification code via SMS or email every time you log in to your Cash App account, adding an extra layer of protection against unauthorized access.
You can also set up a Touch ID or Face ID (if supported by your device) to secure access to your Cash App account. This ensures that only you can log in and access your funds.
Another crucial security setting is the ability to control notifications. By customizing your notification preferences, you can choose which activities or transactions you want to receive alerts for, allowing you to monitor your account’s activity closely.
Furthermore, Cash App allows you to set up a unique Cash PIN. This is a four-to six-digit code that you can use to authorize transactions, ensuring that only you can initiate transfers or make payments using your Cash App account.
It is important to regularly review and update your security settings to adapt to changing circumstances and stay ahead of potential threats. Make sure to choose a strong, unique password for your Cash App account and avoid using the same password for multiple accounts.
By taking the time to customize your security settings, you are proactively safeguarding your Cash App account from unauthorized access and potential fraudulent activities. This provides peace of mind and ensures a secure environment for managing your finances.
Step 10: Set Up Your Cash App Profile
The final step in creating your Cash App account is setting up your profile. Your profile allows you to personalize your Cash App experience and provide relevant information to others who may want to send you money or connect with you.
To begin setting up your Cash App profile, navigate to the “Profile” or “Settings” section within the app. Here, you can add or update your profile picture, display name, and other details.
Adding a profile picture is a great way to personalize your Cash App account and make it easily recognizable to your contacts. You can upload a photo from your device or take a new picture using your smartphone’s camera.
Next, enter a display name that you are comfortable using. This name will be visible to others who interact with you on Cash App, so make sure it accurately represents your preferred identity.
Other optional profile details that you can include are your location and a short bio. Adding a location can help others identify you and ensure that they are sending money or connecting with the correct person.
Lastly, take a moment to review and adjust your privacy settings. You can choose whether to make your profile details visible to all Cash App users or limit them to your trusted contacts.
Customizing your Cash App profile allows you to present yourself authentically and makes it easier for others to find and connect with you. It also provides an additional layer of security as your contacts can verify your profile details before initiating any transactions.
Keep in mind that your Cash App profile is a representation of yourself, so ensure that the information you provide is accurate and appropriate. Take the opportunity to showcase your personality and make your profile unique.
With your profile set up, you have completed the final step to create your Cash App account. Now, you can confidently navigate the app, send and receive money, make purchases, and enjoy the many features and benefits Cash App offers.
Conclusion
Congratulations! You have successfully learned how to create a new Cash App account. By following the step-by-step guide outlined in this article, you have gained the knowledge and confidence to start using Cash App for seamless money management and transactions.
Cash App offers a convenient and user-friendly platform for sending and receiving money, paying bills, and even investing in stocks and Bitcoin. With its plethora of features and wide acceptance by businesses, Cash App has become a popular financial tool for many individuals and small businesses.
Throughout the account creation process, we covered various steps, from downloading the app to customizing your profile. It is essential to remember that maintaining the security of your Cash App account is of utmost importance. Be sure to enable two-factor authentication, set a strong PIN, and review your privacy settings regularly.
Now that you have your Cash App account set up, take some time to explore and familiarize yourself with the app’s features. From splitting bills with friends to making purchases and investing, Cash App offers a wide range of capabilities to manage your finances effectively.
Should you have any questions or encounter any difficulties while using Cash App, referring to the app’s support resources or reaching out to their customer service is always a good idea. They are there to assist you with any concerns or inquiries you may have.
With your new Cash App account, you are now equipped to enjoy the convenience, efficiency, and security that Cash App brings to your financial transactions. So go ahead, send money, receive payments, and make the most of Cash App’s innovative features.