Introduction
Having easy access to your financial information is crucial in today’s fast-paced world. With the FNB E-wallet, you can conveniently manage your finances on the go, including checking your account balance. Whether you’re on a shopping spree or need to keep tabs on your expenses, knowing how to check your FNB E-wallet balance is essential.
In this article, we will guide you through the simple steps to check your FNB E-wallet balance. Whether you’re a new user or need a refresher, we’ve got you covered. By the end of this guide, you’ll be able to effortlessly track your funds and stay on top of your financial game.
Before diving into the steps, it’s important to ensure that you have already registered for an FNB E-wallet. If you haven’t done so, don’t worry! We’ll start from the beginning and walk you through the process. With everything set in place, let’s get started on accessing your FNB E-wallet balance.
Step 1: Register for an FNB E-wallet
Before you can start checking your FNB E-wallet balance, you need to ensure that you have registered for an account. The registration process is quick and straightforward. Here’s how you can get started:
- Visit the FNB website or download the FNB Banking App from your smartphone’s app store.
- Click on the “Register” button on the homepage or within the app to begin the registration process.
- Provide the required information, which includes your personal details, contact information, and identification documents.
- Follow the on-screen prompts to create a unique username and secure password for your FNB E-wallet account.
- Once your registration is complete, you will receive a confirmation message with your account details.
It’s important to note that you may be required to verify your identity through additional steps, such as providing a valid proof of address or undergoing a video call verification process. This is to ensure the security of your account and protect against fraudulent activities. Make sure to follow any additional instructions provided during the registration process.
Once you have successfully registered for an FNB E-wallet account, you’re ready to move on to the next step of checking your balance. Let’s proceed to the next section to find out how.
Step 2: Navigate to the FNB E-wallet menu
Now that you have registered for an FNB E-wallet account, it’s time to navigate to the menu where you can check your balance. Follow these simple steps:
- Open the FNB Banking App on your smartphone or visit the FNB Mobile Banking website on your computer.
- Log in to your FNB E-wallet account using your username and password.
- Once logged in, you will be directed to the main dashboard of the app or website.
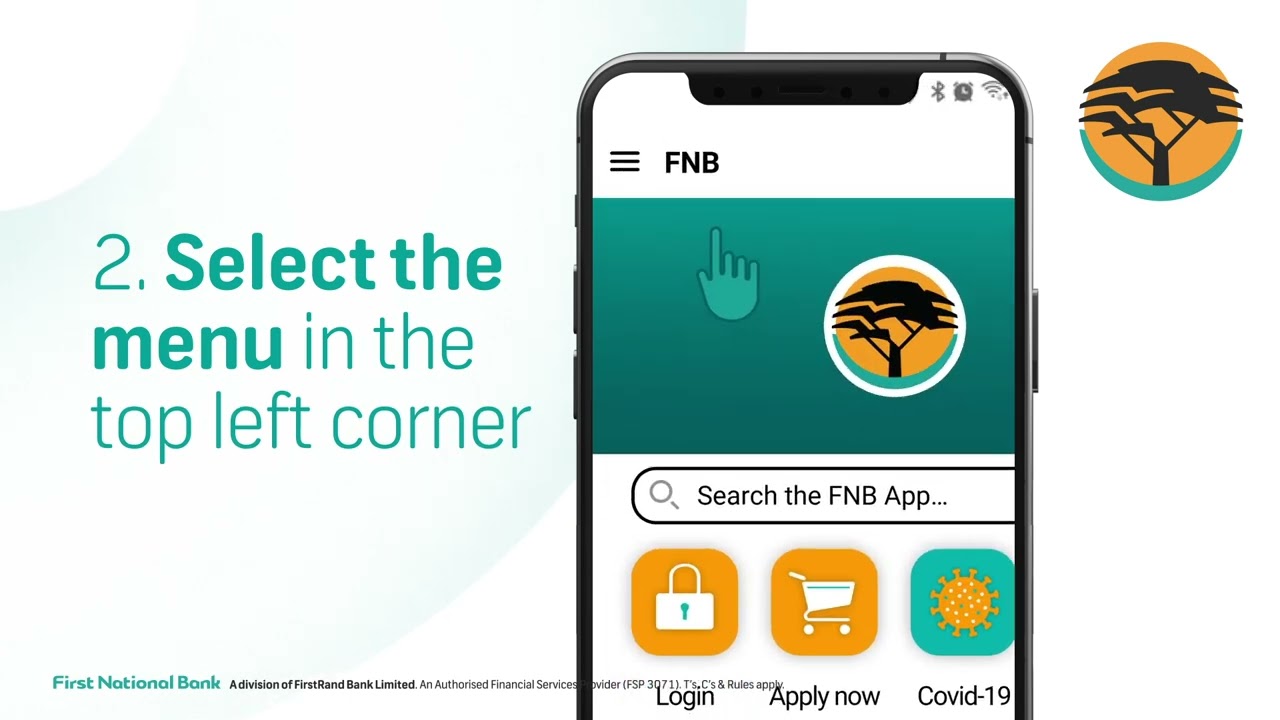
- Look for the “Menu” button, usually located in the top left corner of the screen.
- Click or tap on the “Menu” button to reveal a drop-down list of options.
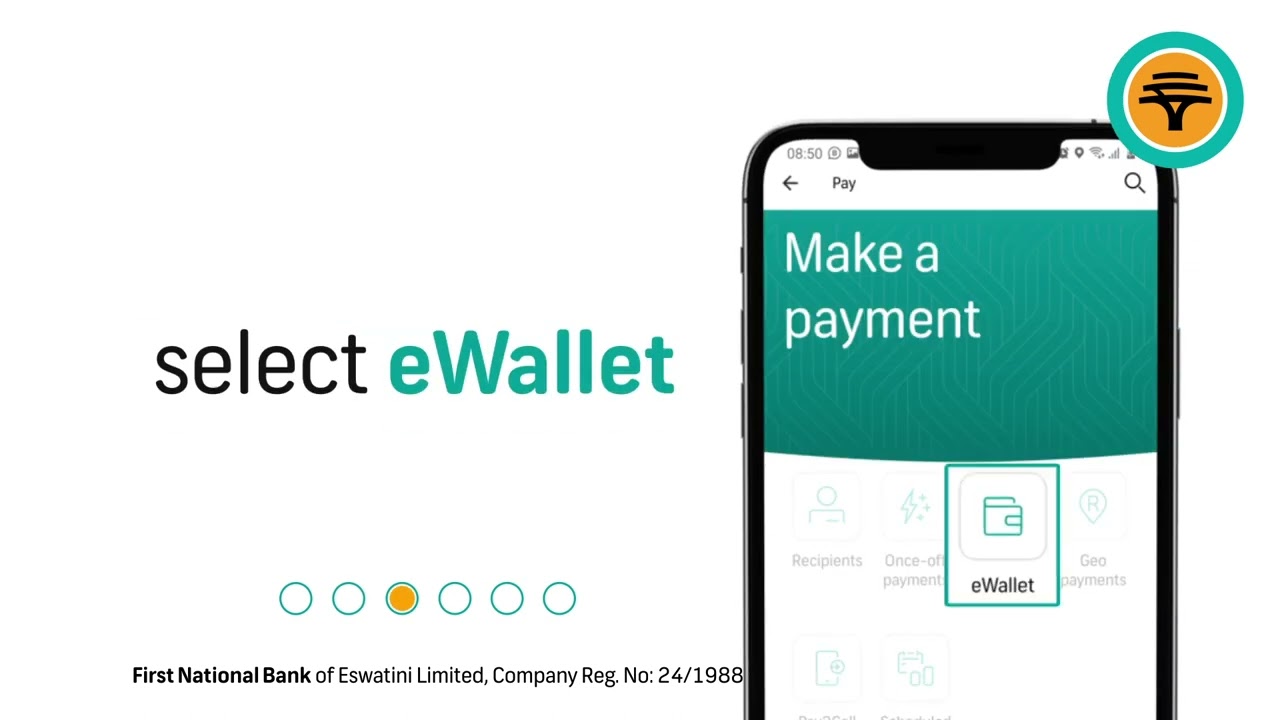
- Scroll through the options until you find “FNB E-wallet” or a similar name that represents your digital wallet.
- Click or tap on “FNB E-wallet” to access the dedicated section of your account.
By following these steps, you will be able to navigate to the FNB E-wallet menu where you can find all the essential features and functions, including the balance check option. With that said, let’s move on to the next step and discover how you can view your actual account balance.
Step 3: Select “Balance” from the menu options
Now that you have successfully reached the FNB E-wallet menu, it’s time to proceed with checking your account balance. Follow the steps below to select the “Balance” option:
- Look for the list of menu options available within the FNB E-wallet section.
- Scan through the menu until you locate the “Balance” option.
- Click or tap on the “Balance” option to proceed.
Make sure to click or tap on the option that specifically mentions “Balance” or a similar word representing the account balance. This will take you to the page where you can view your current funds.
Note that the specific location of the “Balance” option may vary depending on the layout of the app or website. However, it is typically placed within easy reach, allowing you to conveniently monitor your account balance at any time.
Now that you have selected the “Balance” option, you’re one step closer to knowing exactly how much is in your FNB E-wallet. Let’s proceed to the next section to learn how to view your balance.
Step 4: Enter your PIN to view your balance
Entering your personal identification number (PIN) is the final step to access your FNB E-wallet balance. Follow the instructions below to view your balance:
- After selecting the “Balance” option from the previous step, you will be directed to a new page.
- On this page, you will see a field where you can enter your PIN.
- Using the keyboard or the numeric keypad on your device, enter the four-digit PIN associated with your FNB E-wallet account.
- Double-check your entered PIN to ensure it is accurate.
- Once you have entered your PIN, click or tap on the “Submit” or “View Balance” button.
After submitting your PIN, the system will validate it and retrieve your current account balance. Within seconds, you should see your balance displayed on the screen.
Remember to keep your PIN confidential and avoid sharing it with anyone. This ensures the security of your FNB E-wallet account and protects your funds from unauthorized access.
Congratulations! You have successfully followed all the steps to check your FNB E-wallet balance. It’s now easier for you to stay updated on your finances and make informed decisions about your spending.
If there are any discrepancies or issues with your balance, it’s recommended to contact FNB customer support for immediate assistance. They will be able to address any concerns and provide you with the necessary guidance.
Conclusion
Checking your FNB E-wallet balance is a simple and important task that allows you to stay in control of your finances. By following the steps outlined in this guide, you can easily access your account balance and make informed decisions about your spending.
Remember, before you can check your balance, you need to ensure that you have registered for an FNB E-wallet account. The registration process is quick and easy, and once completed, you can proceed to the next steps.
Navigating to the FNB E-wallet menu is the next step, where you’ll find the “Balance” option among the available menu options. Clicking or tapping on this option will lead you to a page where you can enter your PIN.
Entering your PIN is the final step to view your balance. Make sure to double-check your entered PIN for accuracy before submitting it. Once validated, your account balance will be displayed on the screen.
Now that you know how to check your FNB E-wallet balance, you can easily monitor your funds and keep track of your financial transactions. Regularly reviewing your balance is an essential practice to ensure that everything is in order and to detect any possible discrepancies or unauthorized activities.
If you have any concerns or issues regarding your account balance, it’s always best to reach out to FNB customer support for assistance. They are equipped to handle any queries and provide you with the necessary guidance.
Keep track of your FNB E-wallet balance and stay on top of your finances. Enjoy the convenience and peace of mind that comes with knowing your financial standing at any given time.