Introduction
Welcome to the world of e-wallets! As digital payment methods continue to gain popularity, e-wallets have emerged as a convenient and secure way to make transactions on the go. With just a few taps on your smartphone, you can pay for purchases, transfer money, and manage your finances seamlessly.
But what exactly is an e-wallet pin and why is it important? An e-wallet pin is a unique numeric code that acts as a password to access your e-wallet account. It acts as a safeguard to ensure that only authorized individuals can perform transactions and access sensitive information within your e-wallet.
In this article, we’ll guide you through the steps to get your e-wallet pin. Whether you’re a new user or looking to update your existing pin, we’ve got you covered. Rest assured, the process is simple and easy to follow!
By the end of this article, you’ll be equipped with the knowledge to secure your e-wallet account with a personalized pin. So, let’s dive right in and get started!
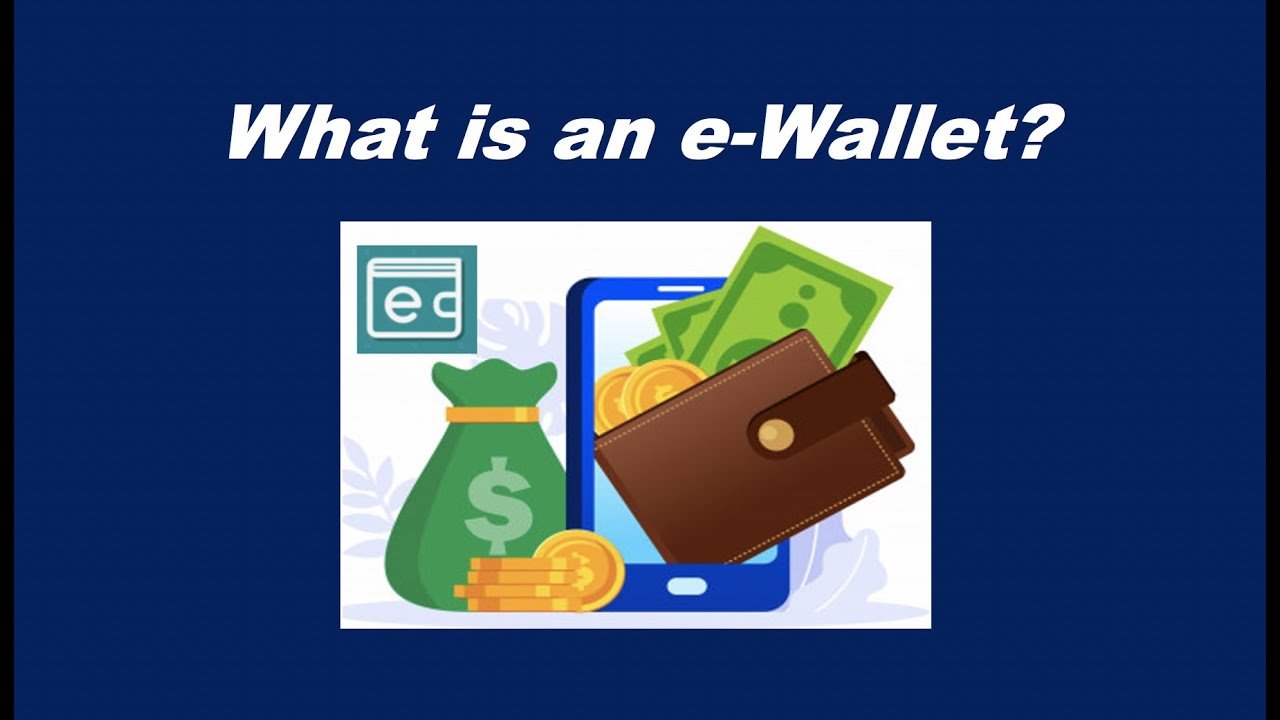
What is an e-wallet pin?
An e-wallet pin is a crucial security feature that adds an extra layer of protection to your e-wallet account. Think of it as a digital lock that keeps your financial information safe from unauthorized access. It is a numeric code that you create and use to authenticate yourself when accessing your e-wallet.
Unlike a traditional wallet, where you physically protect your money with a lock or zipper, an e-wallet relies on a pin for security. This pin serves as a password, ensuring that only you can access and perform transactions within your e-wallet.
When setting up an e-wallet, you will be prompted to choose a pin code that meets certain requirements, such as a minimum length and a combination of numbers. It’s important to choose a unique and secure pin that cannot be easily guessed by others.
Once you have set up your e-wallet pin, you will be prompted to enter it every time you access your account, whether it’s to make a payment, transfer funds, or view your transaction history. This adds an additional layer of protection, even if your smartphone or device is lost or stolen.
Remember, your e-wallet pin should be kept confidential and not shared with anyone. Treat it as you would treat your ATM pin or any other sensitive password. This will help ensure the security of your financial transactions and protect your personal information.
Now that you understand what an e-wallet pin is and why it’s important, let’s move on to the steps to get your e-wallet pin.
Steps to get your e-wallet pin
Now that you’re familiar with what an e-wallet pin is, let’s walk through the steps to get your very own pin. Whether you’re setting up a new e-wallet account or looking to change your existing pin, these steps will guide you through the process:
- Register for an e-wallet account: If you don’t already have an e-wallet account, start by downloading the e-wallet app of your choice from your device’s app store. Follow the registration process and provide the necessary information to create your account.
- Complete the KYC process: Depending on the e-wallet provider and local regulations, you may need to complete a Know Your Customer (KYC) process. This typically involves providing identification documents to verify your identity.
- Navigate to the security settings: Once you have successfully registered and completed the KYC process, open the e-wallet app and navigate to the security settings. This is usually located in the account or profile section of the app.
- Select ‘Change PIN’ option: Within the security settings, look for an option called “Change PIN” or something similar. Tap on it to proceed further.
- Verify your identity: To ensure the security of your e-wallet account, you may be prompted to verify your identity before changing the pin. This can be done through various methods such as providing your password, answering security questions, or using biometric authentication.
- Set a new e-wallet pin: Once your identity is verified, you will be prompted to enter a new pin code. Choose a pin that is secure and memorable, but not easily guessable by others. Avoid using common combinations like 1234 or repeating numbers.
- Confirm and save your new pin: After entering your new pin, you will usually be asked to confirm it by re-entering the same pin. Double-check that you’ve entered it correctly and then save the changes.
And there you have it! By following these steps, you can easily get your e-wallet pin and ensure the security of your account.
It’s important to note that the steps may vary slightly depending on the e-wallet provider and app you are using. However, most e-wallet apps have a similar process for setting up or changing your pin code.
Now that you have your e-wallet pin, you can confidently make transactions and manage your finances with ease. Enjoy the convenience and security that e-wallets offer!
Register for an e-wallet account
The first step to getting your e-wallet pin is to register for an e-wallet account. If you haven’t already chosen an e-wallet provider, take some time to research and select one that suits your needs.
To register for an e-wallet account, follow these simple steps:
- Choose your e-wallet provider: Look for reputable e-wallet providers in your region. Consider factors such as availability, user reviews, features, and security. Popular e-wallet providers include PayPal, Venmo, Google Pay, and Apple Pay.
- Download the e-wallet app: Once you’ve selected an e-wallet provider, go to your device’s app store and download the app corresponding to your chosen provider. The app is typically available for both iOS and Android devices.
- Launch the app and sign up: Open the e-wallet app and click on the “Sign Up” or “Create Account” button. Fill in the required information such as your name, email address, and phone number as prompted by the app.
- Set a strong password: Choose a strong and unique password for your e-wallet account. Ensure that it contains a combination of upper and lowercase letters, numbers, and special characters. This will help strengthen the security of your account.
- Agree to terms and conditions: Read through the terms and conditions of the e-wallet provider and agree to them. Make sure you understand the terms regarding fees, privacy, and liability.
- Verify your email and/or phone number: Some e-wallet providers may require email or phone number verification to prevent fraudulent activities. Follow the instructions provided to verify your email or phone number, if needed.
- Complete additional verification (if required): Depending on your chosen e-wallet provider and local regulations, additional verification steps may be necessary. This could include providing identification documents, such as a driver’s license or passport, to confirm your identity.
- Success! Your e-wallet account is now created: Once you have completed the registration process and any necessary verifications, your e-wallet account will be successfully created. You are now ready to start using your e-wallet and set up your pin code.
Remember to keep your login credentials and personal information secure to protect your e-wallet account from unauthorized access. Consider enabling additional security features like two-factor authentication for added protection.
Now that you have successfully registered for an e-wallet account, let’s move on to the next step: completing the KYC process.
Complete the KYC process
Once you have registered for an e-wallet account, the next step in obtaining your e-wallet pin is completing the Know Your Customer (KYC) process. This process is a standard industry requirement designed to verify your identity and prevent fraudulent activities.
Here’s how you can complete the KYC process:
- Access the KYC section: Launch the e-wallet app and navigate to the settings or profile section. Look for an option related to KYC verification or identity verification.
- Provide personal information: Enter the necessary personal details as requested by the e-wallet provider. This typically includes your full name, date of birth, residential address, and sometimes your social security number or national identification number.
- Upload identification documents: Prepare scanned or digital copies of identification documents required for KYC verification. These may include your passport, driver’s license, or national identification card. Follow the instructions provided in the app to upload these documents securely.
- Submit the information: Double-check that all the provided information and uploaded documents are accurate. Once you are confident that everything is correct, submit the information for review.
- Wait for verification: The e-wallet provider will review the information and documents you submitted for verification. This process may take a few hours to several days, depending on the provider and their verification procedures.
- Receive verification confirmation: Once your KYC verification is approved, you will receive a notification or email confirming that your identity has been verified successfully.
- Proceed to set up your pin code: With your KYC process completed and verified, you can now proceed to set up your e-wallet pin. This step provides an additional layer of security to your e-wallet account.
It’s important to note that the KYC requirements may vary based on your location and the e-wallet provider’s policies. Some providers may have additional steps or documents required for enhanced verification.
Completing the KYC process ensures that your e-wallet account is secure and compliant with regulations. It also helps protect you from identity theft and fraudulent activities.
Now that you have successfully completed the KYC process, let’s move on to the next step: navigating to the security settings to set up your e-wallet pin.
Navigate to the security settings
Once you have completed the KYC process for your e-wallet account, the next step in getting your e-wallet pin is to navigate to the security settings within the e-wallet app. This will allow you to access the necessary options to set or change your pin code.
Follow these steps to navigate to the security settings:
- Open the e-wallet app: Launch the e-wallet app on your smartphone or device. Locate the app icon on your home screen or app drawer, and tap to open it.
- Access the settings menu: Look for a menu icon or a profile icon within the app. It is often represented by three horizontal lines, three dots, or a gear icon. Tap on this icon to access the app’s settings.
- Find the security settings: Once in the settings menu, scroll or navigate to find the section related to security settings. This section may be labeled as “Security,” “Account Security,” or something similar.
- Tap on the security settings: Tap on the security settings section to enter it. This is where you can access various security-related options and features for your e-wallet account.
- Familiarize yourself with the available options: Once you’re in the security settings, take a moment to familiarize yourself with the available options. This may include options for changing your pin code, enabling two-factor authentication, setting up biometric authentication, and managing app permissions.
- Select the option to change your pin code: Look for an option specifically related to changing your pin code. This may be labeled as “Change Pin,” “Reset Pin,” or similar. Tap on this option to proceed.
Note that the steps provided may vary slightly depending on the e-wallet app and its user interface. If you have trouble finding the security settings, refer to the app’s documentation or contact their customer support for assistance.
Now that you’ve navigated to the security settings, you’re ready to set or change your e-wallet pin. In the next step, we’ll guide you through the process of selecting a new pin code.
Select ‘Change PIN’ option
After navigating to the security settings within your e-wallet app, the next step in obtaining your e-wallet pin is to select the ‘Change PIN’ option. This will allow you to proceed with the process of setting or updating your pin code.
Follow these steps to select the ‘Change PIN’ option:
- In the security settings, look for the option: Once you are in the security settings screen of your e-wallet app, scan through the available options. Look for an option specifically related to changing your pin code. It may be labeled as ‘Change PIN’, ‘Reset PIN’, or something similar.
- Tap on the ‘Change PIN’ option: Once you have located the ‘Change PIN’ option, tap on it to proceed. This will initiate the process of updating your pin code.
- Read any instructions or prompts: Depending on the e-wallet app, you may be presented with additional instructions or prompts before proceeding with the pin code change. Take a moment to read through these instructions or prompts carefully to ensure that you follow the correct steps.
- Confirm your intention to change the pin code: Some e-wallet apps may ask you to confirm that you want to change your pin code. This is an extra level of security to prevent accidental changes. Review the confirmation message and tap on the appropriate button to confirm your intention.
The process of selecting the ‘Change PIN’ option may vary slightly depending on the e-wallet app you are using. If you have trouble finding the option or encounter any difficulties, refer to the app’s documentation or reach out to their customer support for assistance.
Now that you have successfully selected the ‘Change PIN’ option, you are ready to proceed with the next step: verifying your identity. We will walk you through this step in the following section.
Verify your identity
Once you have selected the ‘Change PIN’ option in your e-wallet app, the next step in obtaining your e-wallet pin is to verify your identity. This step adds an extra layer of security to ensure that only authorized individuals can change the pin code associated with your e-wallet account.
Follow these steps to verify your identity:
- Follow the provided instructions: After selecting the ‘Change PIN’ option, carefully read and follow the instructions provided by the e-wallet app. These instructions may vary depending on the specific app and its security measures.
- Enter your current password: As part of the verification process, you may be required to enter your current password. This step ensures that only the account holder can make changes to the pin code.
- Answer security questions: In some cases, instead of entering your password, the app may present you with a series of security questions. Answer these questions accurately to verify your identity. These questions are typically ones you set up during the e-wallet account registration process.
- Use biometric authentication: Depending on the capabilities of your device and the e-wallet app you’re using, you may have the option to use biometric authentication, such as fingerprint or facial recognition, to verify your identity. Follow the prompts provided to complete this step.
- Verify through email or SMS: In certain situations, the e-wallet app may send a verification code to your registered email address or phone number. Enter the code to confirm your identity.
- Complete any additional required steps: Depending on the e-wallet app and its security measures, you may need to complete additional steps to further verify your identity. Follow the prompts and instructions provided to successfully complete these steps.
Verifying your identity is an essential step in ensuring the security and integrity of your e-wallet account. It helps protect your account from unauthorized access and prevents potential fraudulent activities.
If you encounter any issues or have difficulty verifying your identity, consult the app’s documentation or reach out to their customer support for assistance. They will be able to guide you through the verification process and address any concerns you may have.
Now that you have successfully verified your identity, you are ready to proceed to the next step: setting a new e-wallet pin. We will walk you through this process in the following section.
Set a new e-wallet pin
After successfully verifying your identity, the next step in obtaining your e-wallet pin is to set a new pin code. This pin code will serve as the password to access your e-wallet account and ensure the security of your financial transactions.
Follow these steps to set a new e-wallet pin:
- Enter your desired pin: In the e-wallet app, you will be prompted to enter a new pin code. Choose a pin code that is secure, unique, and easy for you to remember. Avoid using common combinations like 1234 or repeating numbers.
- Consider using a strong pin: To enhance the security of your e-wallet account, consider using a strong pin code that is difficult to guess. Use a combination of numbers, lower and uppercase letters, and special characters if allowed by the app.
- Avoid predictable patterns: It is recommended to avoid using predictable patterns or sequences, such as ascending or descending numbers, or repeating patterns on the keypad.
- Follow any additional requirements: Some e-wallet apps may have specific requirements for pin codes, such as minimum length or inclusion of certain characters. Make sure to adhere to these requirements to ensure that your pin code meets the necessary criteria.
- Double-check your pin code: Before proceeding, double-check that you have entered your desired pin code correctly. This will prevent any potential errors or confusion in the future when you try to access your e-wallet account.
- Confirm the new pin: Once you have entered your desired pin code, you will typically be asked to confirm it by entering it again. This verification step ensures that you have entered and remember your pin code correctly.
- Save the new pin code: After confirming your new pin code, save the changes. The e-wallet app will usually prompt you to confirm that you want to save the new pin code as your account’s pin.
By setting a new e-wallet pin, you are taking steps to enhance the security of your e-wallet account. Make sure to remember your pin code or securely store it in a location separate from your device to avoid unauthorized access.
If you ever need to change your pin code in the future, you can follow similar steps within the security settings of your e-wallet app.
Now that you have successfully set a new e-wallet pin, you are ready to proceed to the final step: confirming and saving your new pin. We will guide you through this process in the following section.
Confirm and save your new pin
Congratulations! You are now in the final step of obtaining your e-wallet pin. After setting your new pin, it’s crucial to confirm it and save the changes. This will ensure that your e-wallet account is protected with the pin code you have chosen.
Follow these steps to confirm and save your new pin:
- Enter your new pin code: In the e-wallet app, you will be prompted to enter your new pin code again. This step helps to confirm that you have remembered and entered your pin code correctly.
- Double-check your new pin code: Before proceeding, double-check that you have entered your new pin code accurately to avoid any potential errors.
- Confirm your selection: Once you have entered your new pin code, the app will typically ask for confirmation. This step ensures that you intended to set the new pin code as your account’s pin.
- Save the changes: After confirming your new pin code, save the changes within the e-wallet app. The app may display a confirmation message or prompt asking if you want to save the new pin code. Tap on the appropriate button to save the changes.
- Test your new pin code: After saving the changes, test your new pin code by logging out of your e-wallet account and then logging back in. This will help ensure that your pin code is functioning correctly and that you can successfully access your account using the new pin.
It’s essential to remember your new pin code or securely store it in a safe location separate from your device. Avoid sharing your pin code with others and avoid using easily guessable combinations or patterns.
By confirming and saving your new pin code, you have successfully completed the process of obtaining your e-wallet pin. Your e-wallet account is now secured with your personalized pin code, providing an additional layer of protection.
Congratulations again on successfully setting your new e-wallet pin! Enjoy the convenience and peace of mind that your secure e-wallet account brings.
Conclusion
Congratulations on successfully obtaining your e-wallet pin! You have taken the necessary steps to secure your e-wallet account and protect your financial transactions. With your personalized pin code, you can now enjoy the convenience and peace of mind that e-wallets offer.
In this article, we discussed the importance of an e-wallet pin as an additional layer of security. We walked through the steps to register for an e-wallet account, complete the KYC process, navigate to the security settings, select the ‘Change PIN’ option, verify your identity, set a new pin code, and confirm and save your new pin.
It’s crucial to remember that your e-wallet pin should be kept confidential and not shared with anyone. Treat it as you would treat your ATM pin or any other sensitive password. This will help ensure the security of your financial transactions and protect your personal information.
Additionally, consider enabling additional security features provided by your e-wallet app, such as two-factor authentication or biometric authentication, to further enhance the security of your account.
As e-wallets continue to gain popularity, it’s essential to stay vigilant and regularly update your pin code to maintain the security of your account. Set a reminder to change your pin periodically and choose a pin code that is unique, secure, and not easily guessable.
Remember to refer to the documentation and support resources provided by your e-wallet app if you encounter any issues or have further questions. The app’s customer support team is there to assist you in case you need additional guidance.
Now that you have successfully obtained your e-wallet pin, you can confidently make transactions, transfer funds, and manage your finances with ease. Enjoy the convenience and security of your e-wallet account!