Introduction
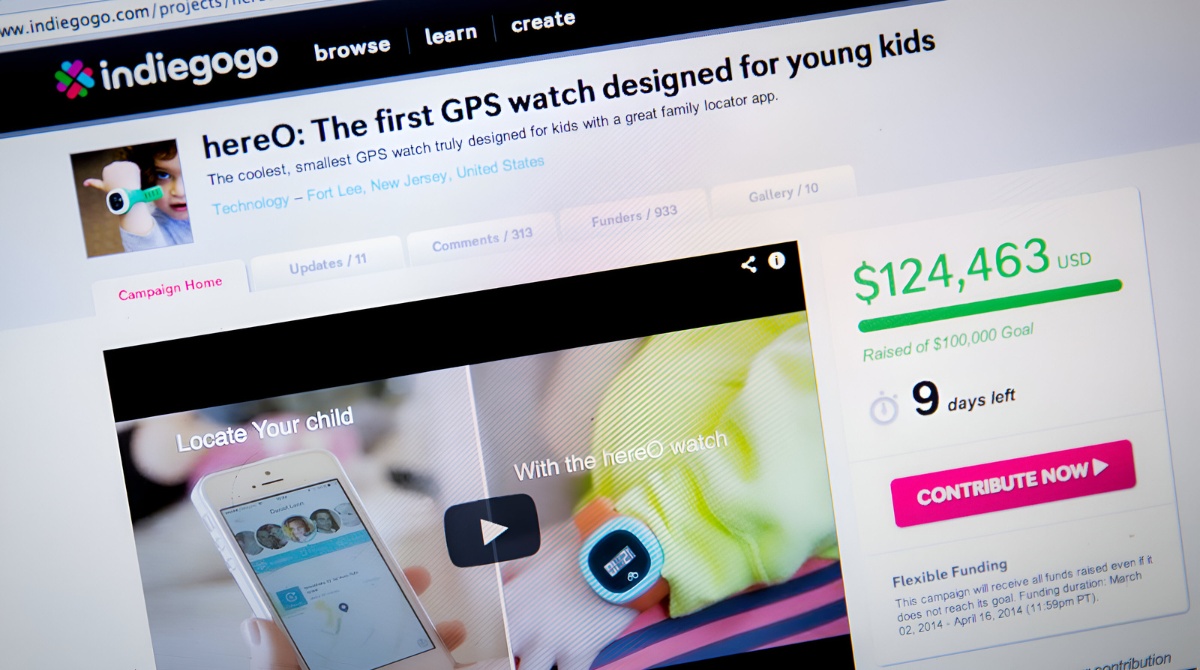
Welcome to Indiegogo, the popular crowdfunding platform where individuals and organizations can bring their innovative and creative projects to life. One of the unique features of Indiegogo is the flexible goal option, which allows campaigners to keep the funds raised even if they don’t reach their initial funding target. This flexibility is an enticing feature for many campaigners, as it provides the opportunity to still make progress on their projects, even if they fall short of their original goal.
In this article, we will guide you through the process of changing the flexible goal on Indiegogo. Whether you want to increase or decrease your goal amount, it’s essential to know how to make this adjustment to align with your campaign’s needs. By adjusting your flexible goal, you can better cater to the interests of your backers and maximize the potential for success.
So, if you’re ready to learn how to change the flexible goal for your Indiegogo campaign, let’s dive in and explore the step-by-step process!
What is a flexible goal on Indiegogo?
A flexible goal is a feature offered by Indiegogo that allows campaigners to keep the funds they’ve raised, even if they don’t reach their initial funding target. Unlike a fixed goal, where campaigns must meet or exceed the set goal to receive any funds, the flexible goal option provides more flexibility and encourages campaigners to pursue their projects even if they fall short of their original goal.
This feature provides several advantages for campaigners. Firstly, it allows them to access the funds they’ve raised and start working on their projects, even if they haven’t reached the full funding amount. This is particularly beneficial for campaign creators who rely on early-stage funding to get their projects off the ground. With a flexible goal, they can still make progress, attract more backers, and potentially reach their ultimate funding target.
Secondly, the flexible goal option helps to reduce the pressure and anxiety associated with traditional crowdfunding campaigns. By removing the “all or nothing” approach, campaigners are not faced with the risk of losing all the funds they’ve raised if they fail to reach their goal. This creates a more positive and supportive environment, allowing campaigners to focus on building a community of backers rather than worrying about meeting a specific target.
It’s important to note that while a flexible goal offers these advantages, it doesn’t guarantee success. Campaigners still need to put in the necessary effort to promote their campaign, engage with their backers, and market their projects effectively. However, the flexibility provided by the flexible goal option gives campaigners more control over their campaign’s funding process and increases the chances of a successful outcome.
Now that we have a better understanding of what a flexible goal is and its benefits, let’s explore why you might want to change the flexible goal amount for your Indiegogo campaign.
Why would you want to change the flexible goal?
There are several reasons why you might want to change the flexible goal for your Indiegogo campaign. Understanding the motivations behind this decision can help you make an informed choice that aligns with your campaign’s needs. Here are a few common scenarios where modifying the flexible goal can be beneficial:
1. Adjusting the funding target: As your campaign progresses, you may realize that your initial funding target was set either too high or too low. If you feel that your original goal is unattainable or too conservative, you may want to adjust it to a more realistic amount. By changing the flexible goal, you can better align your campaign with the expectations of your backers and increase your chances of reaching the desired funding.
2. Expanding the scope of your project: Sometimes, during the course of your campaign, you may come up with new ideas or opportunities to expand your project beyond its initial scope. By changing the flexible goal, you can accommodate these new developments and set a higher funding target to support the expanded vision. This allows you to bring more features, enhancements, or resources to your project, creating a more robust and exciting offering for your backers.
3. Responding to feedback and demand: As your campaign gains traction, you may receive feedback from your backers or potential backers indicating a desire for additional features, rewards, or improvements. By adjusting your flexible goal, you can incorporate these suggestions and use the increased funding target to deliver a more appealing campaign experience. This demonstrates your responsiveness to the community and enhances the chances of attracting more backers.
4. Strategic decision-making: Sometimes, the decision to change the flexible goal is driven by strategic considerations. You may want to increase or decrease the goal based on external factors such as competition, market trends, or the availability of additional funding sources. Evaluating the current landscape and making adjustments to your flexible goal can position your campaign more strategically and increase its overall chances of success.
These are just a few examples of why you might want to change the flexible goal for your Indiegogo campaign. Whatever the reason, it’s important to carefully assess your circumstances, engage with your community, and make an informed decision that aligns with your campaign’s objectives and requirements.
Steps to change the flexible goal on Indiegogo:
If you’ve decided to change the flexible goal for your Indiegogo campaign, here’s a step-by-step guide to help you make the necessary adjustments:
1. Log in to your Indiegogo account: Visit the Indiegogo website and log in to your account using your credentials. Ensure that you have access to the campaign you want to modify.
2. Go to your campaign page: Once logged in, navigate to your campaign page. You can find it by clicking on your username or profile picture and selecting “My Campaigns” from the dropdown menu.
3. Click on the “Edit Campaign” button: On your campaign page, locate the “Edit Campaign” button and click on it. This will take you to the campaign editor where you can make changes to various aspects of your campaign.
4. Navigate to the “Goal” section: In the campaign editor, find the section labeled “Goal.” This is where you can modify your campaign’s funding target, including the flexible goal amount.
5. Click on the “Edit” button next to the current goal amount: Within the “Goal” section, you will see the current goal amount displayed. Click on the “Edit” button located next to it to modify the flexible goal.
6. Enter the new flexible goal amount: A popup or input field will appear, allowing you to enter the new flexible goal amount. Type in the desired value and double-check for accuracy. Remember to consider your campaign’s needs, market conditions, and community feedback when setting the new goal.
7. Save the changes: Once you’ve entered the new flexible goal amount, click on the “Save” or “Update” button to apply the changes to your campaign. The updated goal will be reflected on your campaign page for potential backers to see.
That’s it! You have successfully changed the flexible goal for your Indiegogo campaign. It’s important to note that any changes you make to the goal should be communicated clearly to your backers through campaign updates, email notifications, or social media posts. Keeping your backers informed helps maintain transparency and fosters trust within your campaign community.
Remember, adjusting the flexible goal can have implications for your campaign’s progress, so it’s crucial to reassess your marketing strategy and engagement efforts accordingly. Adapt your messaging, promotion, and outreach to align with the new goal and continue working towards the success of your campaign.
# 1. Log in to your Indiegogo account
The first step to changing the flexible goal on Indiegogo is to log in to your Indiegogo account. Follow these simple steps to access your campaign and make the necessary modifications:
a. Visit the Indiegogo website: Open your preferred web browser and go to the official Indiegogo website (www.indiegogo.com).
b. Sign in to your account: Locate the “Sign In” button on the top right corner of the homepage and click on it. Enter your registered email address and password to access your Indiegogo account. If you don’t have an account yet, you’ll need to create one by clicking on “Sign Up”.
c. Go to your campaign page: After logging in, you will be directed to your Indiegogo dashboard. Look for the campaign you want to modify and click on its title or image to access the campaign page.
d. Navigate to the campaign editor: Once you’re on your campaign page, locate the “Edit Campaign” button. This button is usually positioned near the top of the page and can be found next to other options like “Share” or “Manage”. Click on the “Edit Campaign” button to enter the campaign editor.
e. Start making changes: After entering the campaign editor, you will have access to various sections and settings related to your campaign. This is where you can edit different aspects of your campaign, including the flexible goal.
It’s important to note that these instructions are for the desktop version of Indiegogo. If you’re accessing Indiegogo from a mobile device, the interface may look slightly different, but the general process of logging in and accessing the campaign editor remains the same.
By logging in to your Indiegogo account, you have taken the first step towards changing the flexible goal for your campaign. The next step is to navigate to the campaign editor, which we will cover in the next section.
# 2. Go to your campaign page
Once you’ve logged in to your Indiegogo account, the next step in changing the flexible goal is to navigate to your campaign page. Here’s a guide on how to find your campaign and access its dedicated page:
a. Access your Indiegogo dashboard: After logging in, you will be redirected to your Indiegogo dashboard. This is your central hub for managing your campaigns and accessing important information. Look for the “My Campaigns” tab or a similar option on the navigation menu and click on it.
b. Locate your campaign: On the “My Campaigns” page, you will see a list of all the campaigns associated with your Indiegogo account. Scroll through the list or use the search function to find the campaign you want to modify. Click on the campaign’s title or image to access its dedicated page.
c. Check the campaign preview: Once you’re on your campaign page, take a moment to review the campaign preview. This allows you to see how your campaign appears to potential backers and assess its current status. It also provides you with an insight into how any changes you make to the flexible goal will be displayed to visitors.
d. Review campaign details: Take the time to navigate through the campaign page and familiarize yourself with the various sections, including the description, media, updates, and rewards. This ensures that you have a clear understanding of your campaign’s current state and can make informed decisions when modifying the flexible goal.
By accessing your campaign page, you’re now one step closer to changing the flexible goal on Indiegogo. The next step is to enter the campaign editor, where you can make the necessary modifications. We’ll guide you through the process in the following section.
# 3. Click on the “Edit Campaign” button
Once you’re on your campaign page, the next step in changing the flexible goal on Indiegogo is to click on the “Edit Campaign” button. Follow these simple instructions to access the campaign editor:
a. Locate the “Edit Campaign” button: On your campaign page, look for the “Edit Campaign” button. This button is typically positioned towards the top of the page and may be located near other options such as “Share,” “Manage,” or “View Perks.” Take a moment to locate the button before proceeding.
b. Click on the “Edit Campaign” button: After finding the “Edit Campaign” button, click on it to enter the campaign editor. This action will redirect you to a new page or section, where you can make changes to various elements of your campaign.
c. Wait for the editor to load: Depending on your internet connection and the complexity of your campaign, it may take a few moments for the campaign editor to load. Be patient and allow the editor to fully load before proceeding with your modifications.
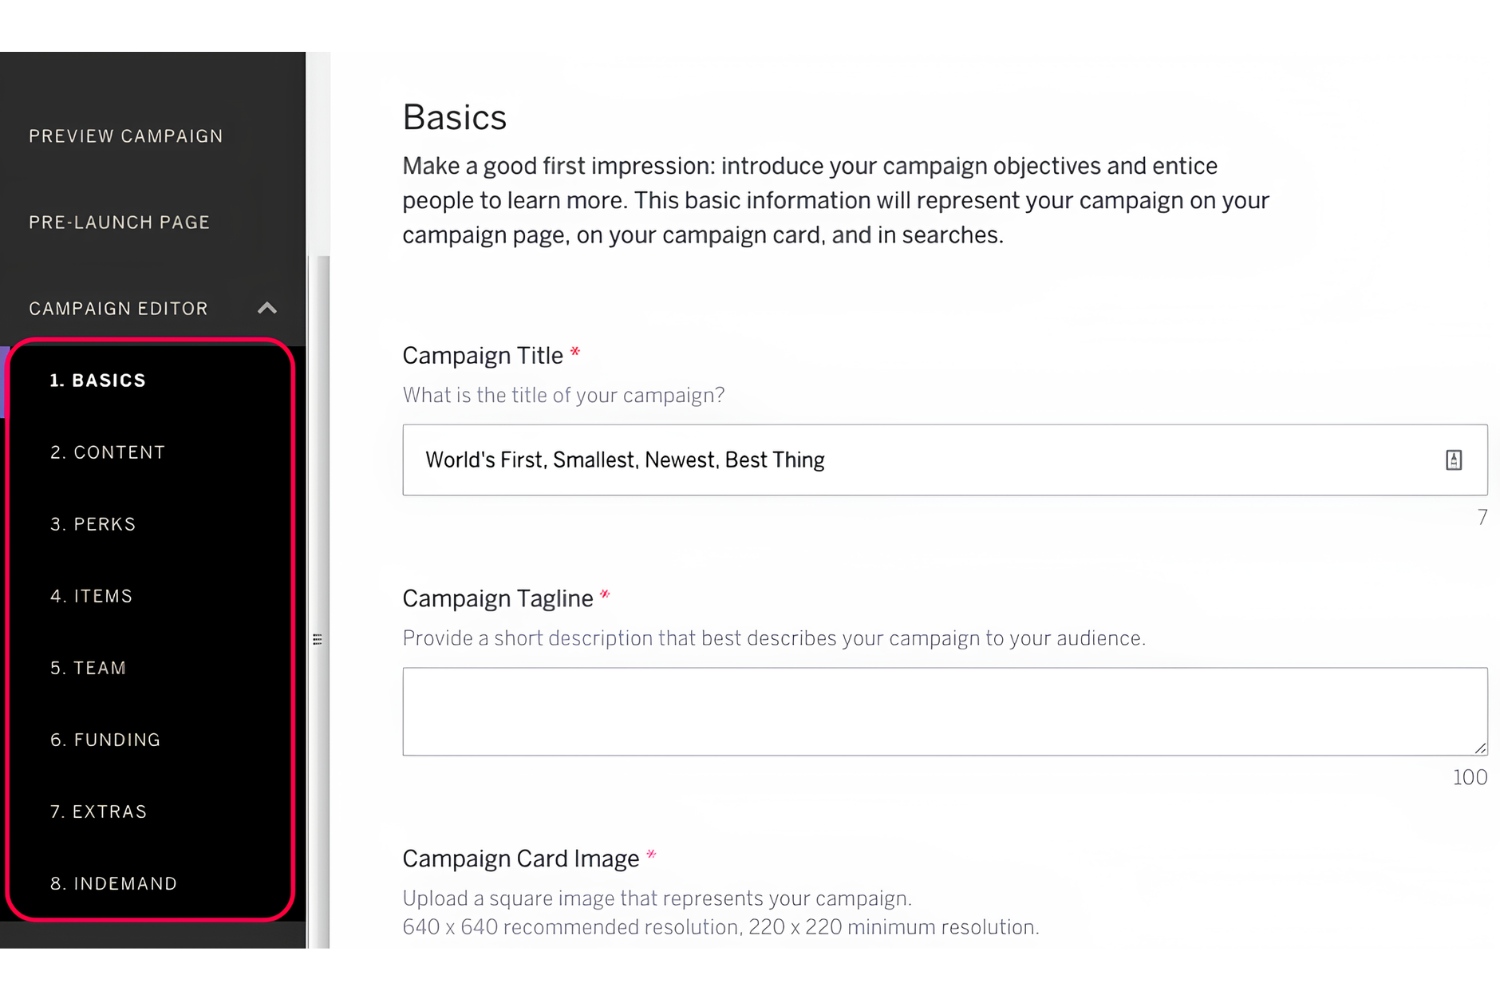
d. Review the campaign editor interface: Once the campaign editor is loaded, take a moment to familiarize yourself with the interface. You will see different sections and settings related to your campaign, allowing you to make adjustments and updates to various aspects of your campaign’s content and settings.
e. Start modifying your campaign: Now that you’re in the campaign editor, you can begin making changes to your campaign, including the flexible goal. Explore the different sections, such as “Goal,” “Story,” “Perks,” and others, to tailor your campaign to your desired specifications.
By clicking on the “Edit Campaign” button, you’ve entered the campaign editor and gained access to the tools necessary for modifying your flexible goal on Indiegogo. In the next section, we’ll guide you on how to navigate to the “Goal” section, where you can make the necessary adjustments to the campaign’s funding target.
# 4. Navigate to the “Goal” section
Once you’re in the campaign editor, the next step in changing the flexible goal on Indiegogo is to navigate to the “Goal” section. Follow these steps to find and access the necessary section:
a. Review the campaign editor interface: Take a moment to familiarize yourself with the campaign editor interface. Look for the different sections and settings available for modifying your campaign. This will help you locate the “Goal” section more easily.
b. Locate the “Goal” section: In the campaign editor, you will find a list of sections or tabs representing different aspects of your campaign. Look for the section labeled “Goal” or a similar term. The “Goal” section is where you can make adjustments to your campaign’s funding target and the flexible goal.
c. Click on the “Goal” section: Once you’ve located the “Goal” section, click on it to access the settings related to your campaign’s funding target. This action will redirect you to a page or panel dedicated to modifying the goal.
d. Wait for the section to load: Depending on your internet connection and the complexity of your campaign, it may take a moment for the “Goal” section to load. Be patient and allow the section to fully load before proceeding with your modifications.
e. Review and prepare for the adjustments: Once you’re in the “Goal” section, review the current funding target and familiarize yourself with the options and fields available for modifying the flexible goal. Take note of the current goal amount so that you can compare it with the new goal you intend to set.
By navigating to the “Goal” section in the campaign editor, you have accessed the settings related to your campaign’s funding target. In the next section, we’ll guide you on how to edit the goal amount and make the necessary adjustments to your campaign’s flexible goal on Indiegogo.
# 5. Click on the “Edit” button next to the current goal amount
Now that you’ve accessed the “Goal” section in the campaign editor, the next step in changing the flexible goal on Indiegogo is to click on the “Edit” button next to the current goal amount. Follow these steps to make the necessary adjustments:
a. Locate the current goal amount: In the “Goal” section, you will see the current funding target displayed. This is the amount that is currently set as the goal for your Indiegogo campaign. Take a moment to locate this value before proceeding.
b. Find the “Edit” button: Next to the current goal amount, you will see an “Edit” button or a similar link. This button allows you to modify the goal and set a new flexible goal amount for your campaign. It is usually positioned right next to the current goal value.
c. Click on the “Edit” button: Once you’ve located the “Edit” button, click on it to start the process of changing the flexible goal. This action will prompt a popup or a field where you can enter the new goal amount.
d. Wait for the popup or input field: Depending on the Indiegogo interface, clicking on the “Edit” button may trigger a popup window or an input field directly below the current goal amount. Wait for the popup or input field to appear, as this is where you will enter the new flexible goal amount.
e. Prepare the new goal amount: In preparation for entering the new flexible goal amount, consider your campaign’s needs, market conditions, and community feedback. Determine the appropriate amount that will align with your campaign’s objectives and motivate potential backers to contribute.
By clicking on the “Edit” button next to the current goal amount, you’re on the verge of setting a new flexible goal for your Indiegogo campaign. In the next section, we’ll guide you on how to enter the new goal amount and proceed with saving the changes.
# 6. Enter the new flexible goal amount
After clicking on the “Edit” button next to the current goal amount, it’s time to enter the new flexible goal amount for your Indiegogo campaign. Follow these steps to input the updated goal:
a. Locate the input field or popup: After clicking on the “Edit” button, a popup or an input field should appear where you can enter the new flexible goal amount. It may be a small window that appears on top of the campaign editor page or a textbox directly below the current goal amount.
b. Type in the new flexible goal: Click inside the input field or popup and start typing the desired goal amount. Ensure the value you enter aligns with your campaign’s needs and takes into account factors such as expenses, rewards, and stretch goals. Double-check the entered amount for accuracy.
c. Consider campaign strategy and feedback: Before finalizing the new goal amount, consider your campaign strategy and any feedback you have received from your backers or potential backers. Evaluating market conditions and taking into account the level of support your campaign has garnered can help you set a realistic and achievable goal.
d. Balance ambition and feasibility: Strike a balance between setting an ambitious goal that challenges you and your team, while still ensuring it is attainable. A stretch goal can motivate backers, but setting an unrealistic target may discourage potential supporters. Find a goal that is challenging yet feasible for your campaign.
e. Save the changes: Once you have entered the new flexible goal amount, look for a “Save” or “Update” button near the input field or popup. Click on the button to save the changes you made to the goal. The updated goal amount will now be applied to your Indiegogo campaign.
By entering the new flexible goal amount, you are one step closer to finalizing the changes to your Indiegogo campaign. In the next section, we’ll guide you on how to save the changes and ensure that your new goal is officially set.
# 7. Save the changes
After entering the new flexible goal amount for your Indiegogo campaign, the final step is to save the changes you’ve made. Follow these steps to ensure that your updated goal is officially set:
a. Locate the “Save” or “Update” button: Look for a button with a label such as “Save,” “Update,” or a similar term. This button is typically located near the input field or popup where you entered the new flexible goal amount.
b. Click on the “Save” or “Update” button: Once you’ve located the appropriate button, click on it to save the changes you made to the goal. This action confirms your new flexible goal amount and updates it for your Indiegogo campaign.
c. Wait for the changes to be applied: After clicking the “Save” or “Update” button, wait for a moment as the system applies the changes to your campaign. Depending on your internet connection and the complexity of your campaign, this may take a few moments. Be patient and allow the changes to be implemented.
d. Review the updated goal: Once the changes are successfully saved, review your campaign page to ensure that the new flexible goal amount is displayed correctly. Double-check that the value matches the goal you intended to set.
e. Communicate the changes to your backers: After making changes to your campaign’s flexible goal, it is important to communicate these updates to your backers. Use campaign updates, social media posts, or email communications to inform your supporters about the new goal. This maintains transparency and keeps your backers engaged and informed.
By saving the changes, you have officially set the new flexible goal for your Indiegogo campaign. It’s time to refocus your efforts, update your campaign messaging, and continue promoting and engaging with your backers to achieve your funding objectives.
Conclusion
Changing the flexible goal on Indiegogo is a crucial step in adapting your campaign to the evolving needs and circumstances. It offers you the opportunity to adjust your funding target, respond to feedback, and strategically position your project for success.
In this article, we have walked through the process of changing the flexible goal on Indiegogo. We began by logging in to your Indiegogo account and navigating to your campaign page. Then, we clicked on the “Edit Campaign” button, which allowed us to access the campaign editor. From there, we located the “Goal” section and clicked on the “Edit” button next to the current goal amount. We then entered the new flexible goal amount, saved the changes, and ensured the modifications were applied.
Remember, adjusting your flexible goal should be a well-thought-out decision, considering your campaign’s progress, market conditions, and feedback from your supporters. Regular communication with your backers about any changes made to the flexible goal is essential to foster trust and maintain transparency.
Now that you have the knowledge and steps to change the flexible goal on Indiegogo, go ahead and apply these instructions to align your campaign with your goals and aspirations. Keep hustling, engaging with your community, and promoting your campaign to maximize your chances of success.
Good luck with your Indiegogo campaign, and may your project reach new heights!


