Introduction
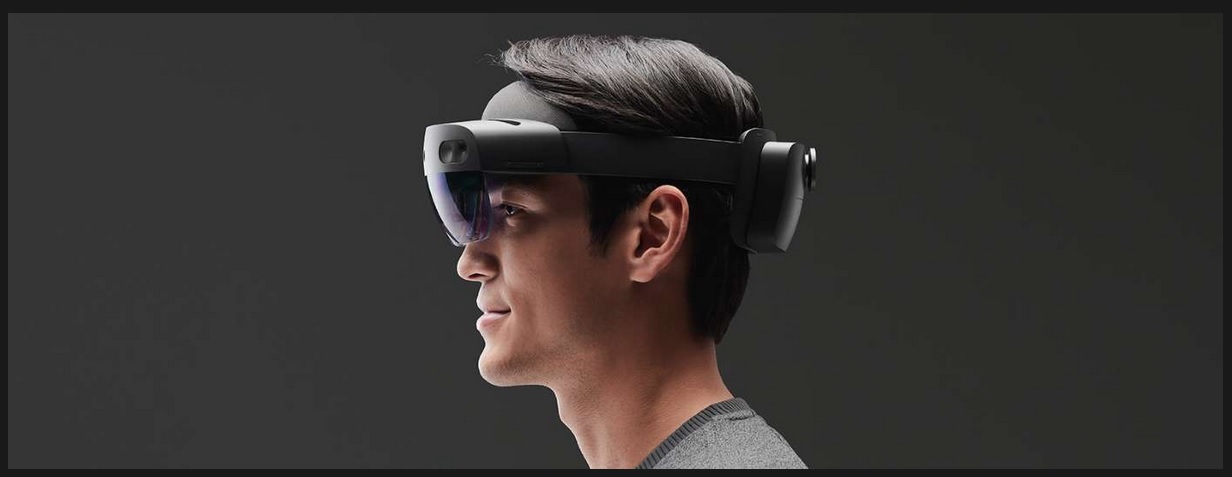
Welcome to the exciting world of HoloLens, where holograms become a part of your reality. As an augmented reality (AR) device developed by Microsoft, HoloLens allows you to interact with digital content and virtual objects in a whole new way. One of the key elements that make this interaction possible is the use of gestures.
Gestures on HoloLens enable you to navigate the interface, control holographic objects, and perform various actions without the need for physical controllers or buttons. By simply using your hands and body movements, you can manipulate the holographic content and have a truly immersive experience.
In this article, we will delve into the world of HoloLens gestures and explore how to effectively use them. Whether you are a developer, designer, or simply an enthusiast eager to explore the capabilities of HoloLens, this guide will provide you with the essential knowledge to make the most out of the gesture-based interaction.
From the air tap gesture to the bloom gesture and more, we will cover the fundamental gestures used on HoloLens and how they allow you to navigate the interface and control holographic objects. Additionally, we will explore additional gestures and shortcuts that can enhance your overall experience with the device.
So, grab your HoloLens and get ready to dive into the world of gestures. Let’s unlock the full potential of this groundbreaking AR device together!
Understanding Gestures on HoloLens
Before we dive into the specific gestures used on HoloLens, it’s important to understand the core concept behind using gestures on this AR device. The main premise is to provide a natural and intuitive way of interacting with holographic content, eliminating the need for external controllers or buttons.
HoloLens utilizes a combination of hand movements, finger gestures, and body positioning to recognize and interpret user input. This allows for a seamless and immersive experience, where users can interact with holographic elements as if they were manipulating real objects in their physical environment.
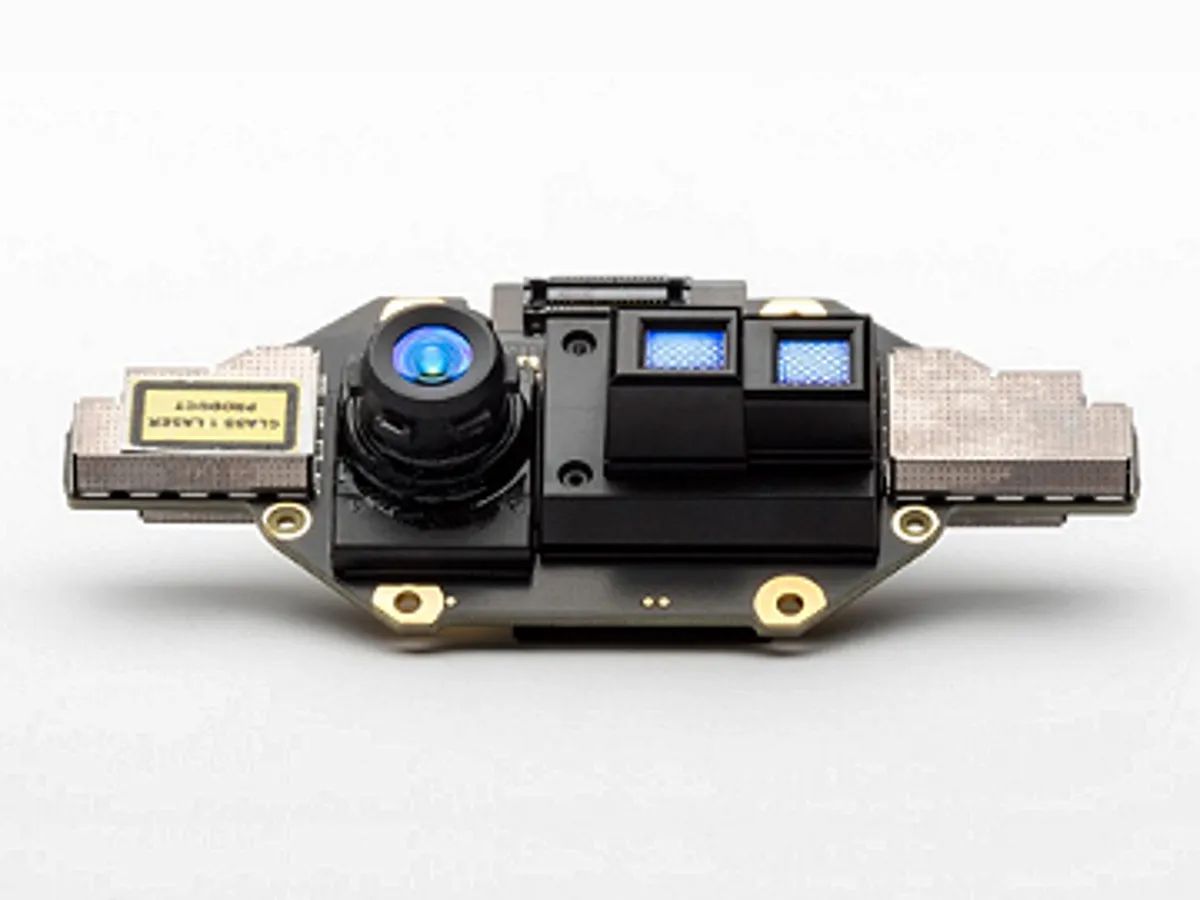
The device’s array of sensors, including cameras, depth sensors, and motion sensors, work together to detect and track your movements in real-time. This tracking technology enables HoloLens to accurately interpret your gestures and translate them into meaningful actions within the AR environment.
It’s worth noting that HoloLens also supports voice commands, which complement the gesture-based interaction. By combining both gestures and voice commands, users have a wide range of ways to interact with holograms and navigate the device’s interface.
Overall, gestures on HoloLens aim to create a natural and intuitive user experience, blurring the lines between the physical and virtual worlds. Now that we have a basic understanding of how gestures work on HoloLens, let’s explore the specific gestures and how to use them effectively.
Navigating the HoloLens Interface with Gestures
Navigating the HoloLens interface using gestures is a fundamental aspect of the device’s interaction model. It allows you to seamlessly move through menus, select options, and access various features without the need for physical buttons or controllers.
The primary gesture for navigation on HoloLens is the air tap gesture. To perform the air tap gesture, simply extend your index finger and use it to tap on virtual buttons, icons, or holographic elements in front of you. This gesture is similar to a mouse click, and it is used to select, confirm, or activate items.
In addition to the air tap gesture, HoloLens also supports the bloom gesture for accessing the Start menu. To perform the bloom gesture, hold your hand with an open palm in front of you and then open your fingers wide. This gesture will bring up the Start menu, where you can access various applications and features.
To go back or close an app, you can use the swipe gesture. Swipe your hand from left to right or right to left in front of you to navigate through menus or dismiss holograms. This gesture allows you to quickly move between different apps or close them when you’re done.
By mastering these basic gestures, you can effortlessly navigate the HoloLens interface and access the various apps and features available. It’s important to practice and familiarize yourself with these gestures to enhance your overall user experience with HoloLens.
Now that we’ve covered navigation gestures, let’s explore how you can use gestures to interact with holographic objects and control them in the AR environment.
Using Air Tap Gesture
The air tap gesture is a fundamental gesture on HoloLens that allows you to interact with holographic elements and perform actions within the augmented reality environment. It serves as the primary method for selecting, confirming, and activating items by mimicking the functionality of a traditional mouse click.
To perform the air tap gesture, extend your index finger and use it to tap on virtual buttons, icons, or holographic objects in front of you. Keep your finger straight and firm, making a deliberate tapping motion to initiate the action.
When using the air tap gesture, it’s essential to ensure that your finger is in the field of view of the HoloLens sensors. This ensures accurate detection and registration of the gesture, allowing for precise interaction with holographic content.
The air tap gesture can be used in various scenarios. For instance, in the HoloLens interface, you can use the air tap gesture to select options, navigate menus, launch applications, and interact with UI elements. When interacting with holographic objects, the air tap gesture can be used to grab, move, or manipulate the objects based on the application or experience you are in.
It’s important to note that the air tap gesture is not limited to a single finger. You can perform the air tap gesture with multiple fingers or even with your whole hand, depending on the application or context. Some apps may also utilize different variations of the air tap gesture, such as double-tap or press and hold, to trigger specific actions or functions.
Remember to practice the air tap gesture to develop precision and accuracy. The more comfortable you become with this gesture, the more fluid and efficient your interaction with HoloLens will be.
Now that you know how to use the air tap gesture, let’s explore another essential gesture, the bloom gesture, and its role in accessing the Start menu on HoloLens.
Using Bloom Gesture
The bloom gesture is a key gesture on HoloLens that allows you to access the Start menu and control various features and applications. It serves as a convenient way to navigate the device’s interface and is performed by holding your hand with an open palm in front of you and then opening your fingers wide.
To perform the bloom gesture, start by raising your hand and positioning it in front of you, palm facing inward. Then, spread your fingers apart, fully extending them to create an open palm gesture. This motion triggers the device to recognize the bloom gesture and activate the Start menu.
The Start menu is a central hub on HoloLens where you can access a range of applications, settings, and features. It allows for easy navigation and offers a starting point to launch various experiences or tasks. Once the Start menu is open, you can use gestures like the air tap or swipe gesture to interact with the menu and select different options.
The bloom gesture is designed to provide quick access to the Start menu, allowing you to effortlessly switch between different applications or access specific features. It serves as an alternative to using voice commands or physical buttons, providing a more natural and intuitive way to navigate the HoloLens interface.
In addition to accessing the Start menu, the bloom gesture can also be used as an overall system gesture to perform actions such as turning off the device. By performing the bloom gesture and holding it for a few seconds, you can initiate the device power-down process.
Practicing the bloom gesture is essential to ensure smooth and accurate recognition by the device. Find a comfortable hand position and practice opening your fingers wide to execute the gesture in a fluid and deliberate manner.
Now that you’re familiar with the bloom gesture, let’s move on to exploring the click and hold gesture and its functions on HoloLens.
Performing the Click and Hold Gesture
The click and hold gesture is a useful gesture on HoloLens that allows you to perform actions by holding the air tap gesture for an extended period. This gesture is similar to a long press on a touchscreen device and is used to trigger specialized functions within applications or interact with specific holographic objects.
To perform the click and hold gesture, begin by extending your index finger and initiating the air tap gesture by tapping on the desired holographic element or UI element. Instead of quickly releasing your finger, keep it in contact with the element and hold it for a few seconds, maintaining a steady pressure. This will trigger the click and hold action.
The click and hold gesture is commonly used in various scenarios. For example, within a specific application, performing a click and hold gesture on a holographic object can activate additional options or open a context menu related to that object. This gesture can also be used in conjunction with other gestures, such as moving or rotating an object while maintaining the click and hold gesture to modify its properties or behavior.
Furthermore, the click and hold gesture can be used within the HoloLens interface to access advanced settings, configure preferences, or initiate specialized actions. It provides a way to perform secondary actions or reveal hidden features that may not be immediately apparent.
While performing the click and hold gesture, it’s essential to maintain a steady and consistent pressure to ensure the device recognizes the gesture accurately. Avoid applying excessive force or accidentally moving your finger, as this may interfere with the intended action or disrupt the interaction.
Keep in mind that the click and hold gesture may vary depending on the application or experience you are using. Some apps may have specific interactions associated with the click and hold gesture, while others may not utilize it at all. It’s always recommended to refer to the documentation or instructions of the specific application to understand how the click and hold gesture is utilized within that context.
Now that we understand the click and hold gesture, let’s explore how gestures can be used to control holographic objects in the AR environment.
Controlling Holographic Objects with Gestures
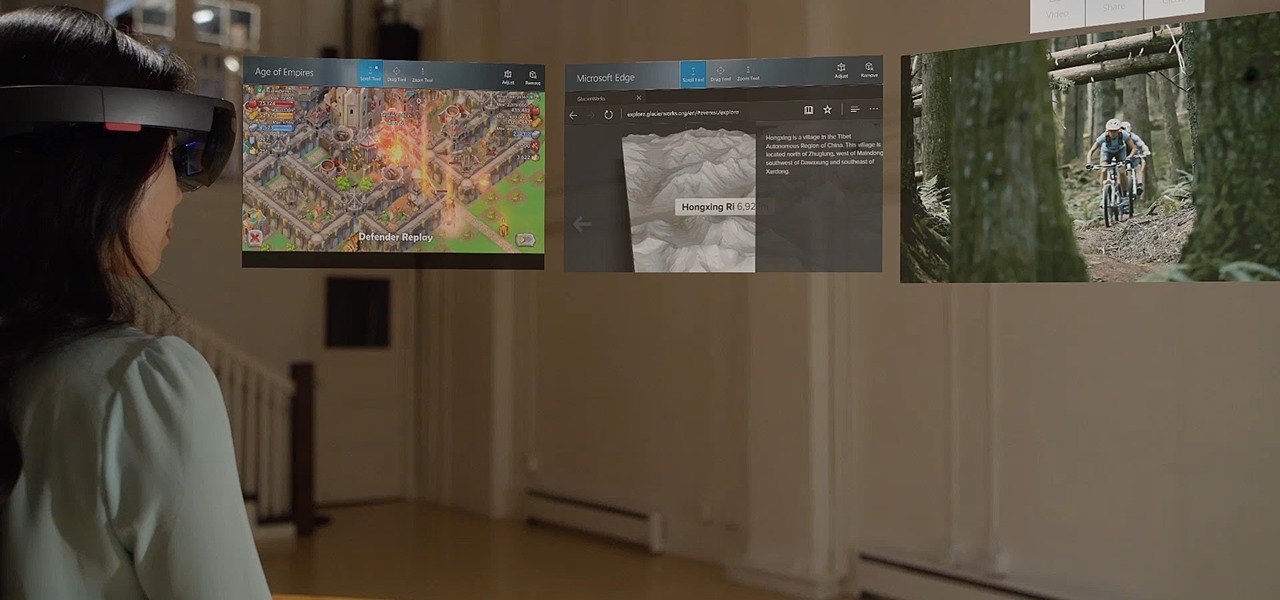
One of the most exciting aspects of HoloLens is the ability to interact with and manipulate holographic objects in the augmented reality environment. Gestures play a vital role in controlling and manipulating these objects, allowing for a truly immersive and interactive experience.
HoloLens offers several gestures specifically designed for controlling holographic objects. These gestures enable you to grab, move, rotate, resize, and perform various actions on the virtual objects within your field of view.
The two-handed zoom gesture is commonly used to resize holographic objects. To perform this gesture, extend both of your hands towards the object you want to resize, as if you were grasping the object from both sides. Then, move your hands closer together or farther apart to shrink or enlarge the object, respectively.
In addition to resizing, you can also rotate holographic objects using the two-handed rotate gesture. Place both hands on the object, one on each side, and then pivot your hands in a circular motion to rotate the object along its axis. This gesture allows you to view the object from different angles and perspectives.
Another useful gesture is the two-handed push gesture, which allows you to reset the position of an object within the augmented reality environment. To perform this gesture, position both hands on the object and push them away from your body in a synchronized motion. This gesture helps reposition an object back to its original location or reset its position within the scene.
Aside from these specific gestures, HoloLens also offers various other gestures and interactions that can be used to control holographic objects. For example, the air tap gesture can be used to select and grab objects, allowing you to move them around or interact with their specific functions or features.
It’s essential to practice and familiarize yourself with these gestures to fully utilize the capabilities of HoloLens when interacting with holographic objects. As you gain experience, you’ll become more proficient in manipulating and controlling the virtual objects in your AR environment.
Now that we’ve explored the gestures for controlling holographic objects, let’s delve into some additional gestures and shortcuts you can try on HoloLens.
Manipulating Objects with the Two-Handed Zoom Gesture
The two-handed zoom gesture is a powerful and intuitive gesture that allows you to resize holographic objects and control their size within the augmented reality environment. This gesture provides a natural and immersive way to manipulate the scale of virtual objects, enhancing your ability to interact with the holograms.
To perform the two-handed zoom gesture, start by extending both of your hands towards the holographic object you wish to resize. Imagine that you are holding the object with both hands and move your hands closer together or farther apart to shrink or enlarge the object’s size, respectively.
As you bring your hands closer together, the holographic object will appear smaller in size, creating a zoom-in effect. Conversely, moving your hands apart will cause the object to grow larger, resulting in a zoom-out effect.
It’s important to maintain a consistent distance between your hands while performing the two-handed zoom gesture to ensure a smooth and controlled resizing experience. Be mindful of your hand movements and avoid sudden jerks or erratic motions, as this can affect the precision and accuracy of the resizing action.
The two-handed zoom gesture offers flexibility and precision when adjusting the size of holographic objects. Whether you want to visualize an object up close or create a more distant view, this gesture allows you to scale the objects to your desired proportions, making your AR experience more immersive and customizable.
Additionally, the two-handed zoom gesture can be combined with other gestures to perform more advanced interactions. For example, you can use this gesture along with the two-handed rotate gesture to not only resize an object but also change its orientation simultaneously.
Practice and experimentation with the two-handed zoom gesture will help you become more adept at manipulating holographic objects. By mastering this gesture, you can create dynamic and interactive scenes within your augmented reality environment.
Now that you’re familiar with manipulating objects using the two-handed zoom gesture, let’s explore another essential gesture, the two-handed rotate gesture, which allows you to rotate holographic objects in the AR environment.
Rotating Objects with Two-Handed Rotate Gesture
The two-handed rotate gesture is a versatile gesture that allows you to dynamically rotate holographic objects within the augmented reality environment. This gesture provides an intuitive way to change the orientation of virtual objects, giving you more control over their positioning and alignment.
To perform the two-handed rotate gesture, start by positioning both hands on either side of the holographic object you wish to rotate. Imagine that you are grasping the object with both hands. Once your hands are in position, smoothly and synchronously rotate your hands in a circular motion, either in the same direction or in opposite directions, depending on the desired rotation effect.
As you rotate your hands, the holographic object will follow the rotational movement, allowing you to change its orientation within the AR environment. By adjusting the speed and direction of your hand rotation, you can control the degree and velocity of the object’s rotation.
The two-handed rotate gesture offers precise control over the rotation of holographic objects, allowing you to view them from different angles and perspectives. This gesture is particularly useful when exploring intricate details of an object, aligning objects in a specific orientation, or creating dynamic visual effects in your AR experience.
Additionally, the two-handed rotate gesture can be combined with other gestures to perform more advanced interactions. For example, you can use this gesture along with the two-handed zoom gesture to not only rotate an object but also resize it simultaneously.
As with any gesture, it is important to practice and refine your technique when performing the two-handed rotate gesture. Keep your hand movements fluid and controlled, ensuring a seamless and precise rotation of holographic objects.
By mastering the two-handed rotate gesture, you can unlock a whole new level of interactivity and creativity within your augmented reality environment. Whether you’re designing 3D models, exploring architectural mockups, or simply enjoying holographic content, this gesture empowers you to fully manipulate and customize your virtual objects.
Now that we’ve covered the two-handed rotate gesture, let’s discover how the two-handed push gesture can be used to reset the position of holographic objects.
Resetting Object Position with the Two-Handed Push Gesture
The two-handed push gesture on HoloLens allows you to reset the position of holographic objects within the augmented reality environment. This gesture provides a convenient way to quickly realign objects that may have been moved or misplaced, allowing you to restore their original position with ease.
To perform the two-handed push gesture, start by placing both of your hands on the sides of the holographic object you wish to reset. Maintain a firm grip on the object with your hands, and then push them away from your body in a synchronized motion. This pushing motion triggers the two-handed push gesture and repositions the object to its original location.
The two-handed push gesture is particularly useful when you’re working with multiple objects or arranging elements within a scene. It allows you to quickly correct any accidental movement or misalignment, ensuring that your holographic objects are precisely positioned as intended.
It’s important to note that the two-handed push gesture resets the position of the object, but it does not affect its size, rotation, or any other properties. The gesture solely focuses on readjusting the object’s spatial position within the AR environment.
By mastering the two-handed push gesture, you can maintain organization and order within your augmented reality projects. Whether you’re designing a virtual space, creating a 3D presentation, or simply arranging holographic content, this gesture provides an efficient way to restore objects to their original positions.
Remember to practice the two-handed push gesture to develop accuracy and consistency in your movement. With time and experience, you will become more proficient in utilizing this gesture to reposition holographic objects.
Now that we’ve explored the two-handed push gesture, let’s move on to discovering additional gestures and shortcuts that you can try on HoloLens.
Additional Gestures and Shortcuts to Try
While we have covered some of the fundamental gestures on HoloLens, there are several additional gestures and shortcuts that can further enhance your experience with the device. These gestures provide further functionality and allow for more advanced interactions within the augmented reality environment.
1. Gesture to Activate Voice Commands: To activate voice commands on HoloLens, simply say “Hey Cortana” or “Hey HoloLens” followed by your command. This allows for hands-free control and provides a seamless way to interact with the device without relying solely on gestures or physical inputs.
2. Swipe Gesture: In addition to the air tap gesture, you can use the swipe gesture to navigate through menus or dismiss holographic elements. Simply swipe your hand from left to right or right to left in front of you to move between different apps or dismiss elements from the screen.
3. Gesture to Activate Cursor: To activate the cursor, hold your hand up with your palm facing down, and then raise your index finger. This gesture triggers the cursor mode, allowing for a more precise and controlled selection of holographic elements and user interface elements.
4. Gesture for Scrolling: When interacting with long lists, web pages, or documents, you can use a two-finger scroll gesture. Simply place two fingers on the screen or air in front of you and move them up or down to scroll through the content.
5. Gesture for Spatial Anchoring: To anchor holographic objects in a specific location, you can use a two-handed tap and hold gesture. Place both hands on the desired position, then tap and hold with both hands to create a stable anchor point for the object.
These are just a few examples of the additional gestures and shortcuts that you can try on HoloLens. Experimenting with these gestures will unlock new possibilities and allow for more efficient and intuitive interactions within the augmented reality environment.
Remember to refer to the HoloLens documentation or specific application instructions to explore additional gestures and shortcuts that may be unique to certain experiences or apps.
Now that you’re equipped with a repertoire of gestures and shortcuts, you can take your HoloLens experience to the next level by incorporating these gestures into your daily usage and exploration of holographic content.
Conclusion
Gestures play a crucial role in the HoloLens experience, enabling you to interact with holographic content and control the device’s interface in a natural and intuitive way. From the air tap gesture for selecting and activating items to the bloom gesture for accessing the Start menu, each gesture enhances your ability to navigate the augmented reality environment.
Controlling holographic objects becomes seamless with gestures like the two-handed zoom, rotate, and push gestures, allowing for precise manipulation and customization. These gestures empower you to resize, rotate, and reset object positions, providing a truly immersive and interactive AR experience.
In addition to the core gestures, there are additional shortcuts and gestures to explore, such as voice commands, swiping, cursor activation, and scrolling. Experimenting with these gestures expands your interactive capabilities and gives you greater control over the HoloLens interface.
To make the most out of gestures on HoloLens, it’s essential to practice and familiarize yourself with their execution and application. As you become more comfortable and proficient with these gestures, you’ll unlock the full potential of HoloLens, creating captivating holographic experiences and engaging with digital content in new and exciting ways.
So, whether you’re a developer, designer, or an avid HoloLens user, embrace the power of gestures and unleash your creativity on this groundbreaking AR device. Let your hands guide you through the augmented reality realm, making every interaction with holograms a truly immersive and intuitive experience.