Introduction
When it comes to capturing stunning visuals with a camcorder, understanding the technical aspects of photography and videography is crucial. One such technical element is ISO, which plays a significant role in determining the exposure of your footage. ISO, which stands for International Organization for Standardization, is a key setting in a camcorder that directly impacts the camera sensor’s sensitivity to light. This fundamental component not only influences the brightness of your videos but also affects the overall quality of the footage.
Exploring the realm of ISO in a camcorder opens up a world of possibilities for videographers, allowing them to adapt to various lighting conditions and achieve the desired visual effects. By comprehending the intricacies of ISO and its manipulation, videographers can elevate the quality of their recordings and unleash their creativity in diverse shooting environments.
In this comprehensive guide, we will delve into the significance of ISO in camcorders, elucidate the principles behind ISO settings, and provide valuable insights into adjusting ISO to optimize video quality. Additionally, we will offer practical tips for leveraging ISO effectively to capture remarkable footage in different lighting scenarios. Whether you are an aspiring videographer or a seasoned professional, mastering the art of ISO in camcorders is essential for producing captivating visual content.
Understanding ISO in a Camcorder
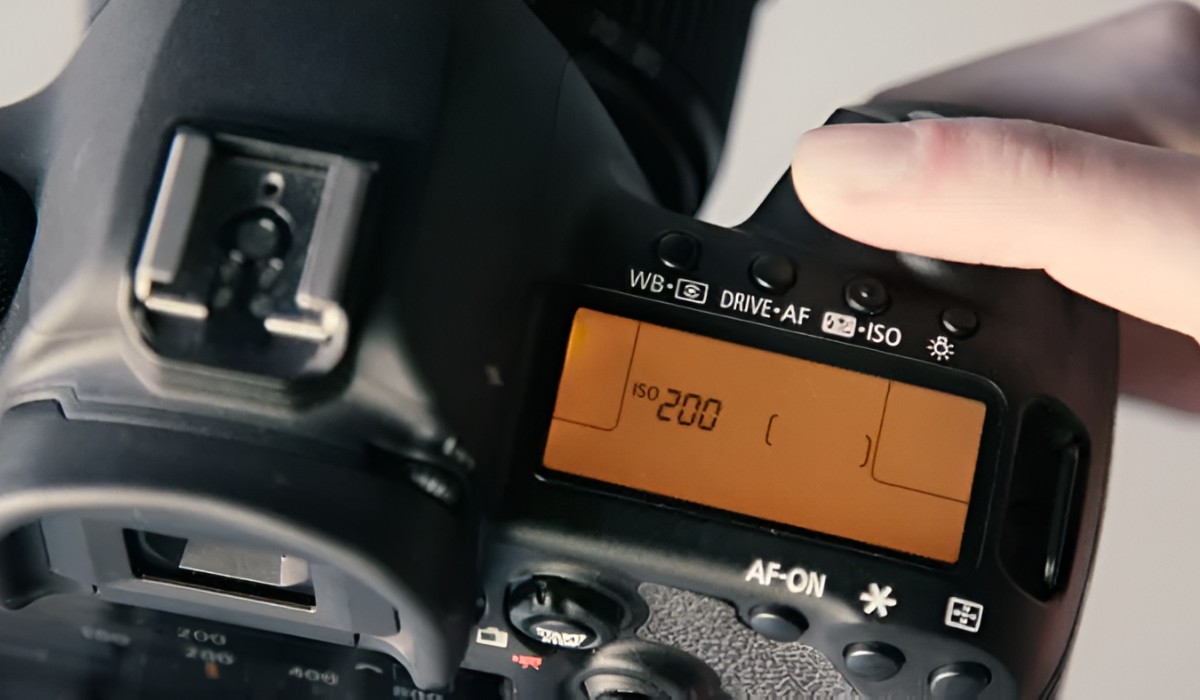
ISO, in the context of a camcorder, refers to the sensitivity of the camera sensor to light. The acronym “ISO” originates from the International Organization for Standardization, which sets the standard sensitivity values for film. In the digital realm, ISO represents the sensor’s sensitivity to light, affecting the brightness and exposure of the captured footage.
Camcorders feature a range of ISO settings, typically starting from a lower value, such as ISO 100 or 200, and extending to higher values, such as ISO 1600 or 3200. Lower ISO settings make the sensor less sensitive to light, resulting in darker footage, while higher ISO settings increase the sensor’s sensitivity, producing brighter footage, especially in low-light conditions. However, it’s important to note that higher ISO settings can introduce digital noise, which may degrade the overall quality of the video.
Understanding the impact of ISO on camcorder footage is essential for achieving the desired visual results. Low ISO settings are ideal for well-lit environments, such as outdoor settings with ample natural light, as they produce crisp and clear footage with minimal noise. On the other hand, high ISO settings are valuable in low-light situations, such as indoor or nighttime shooting, where the increased sensitivity compensates for the lack of natural light, albeit with the potential trade-off of increased noise.
Moreover, videographers should consider the specific capabilities of their camcorders when manipulating ISO settings. Some camcorders exhibit better noise performance at higher ISO values, while others may maintain superior image quality at lower ISO settings. Familiarizing oneself with the ISO capabilities of a particular camcorder is essential for making informed decisions when adjusting ISO settings to achieve optimal video quality.
Importance of ISO in Camcorders
The significance of ISO in camcorders extends beyond mere adjustments to brightness and exposure. Understanding and effectively utilizing ISO settings can profoundly impact the visual quality and artistic expression in videography.
First and foremost, ISO plays a pivotal role in adapting to diverse lighting conditions. Whether shooting outdoors in bright sunlight or indoors in low-light environments, the ability to adjust ISO empowers videographers to maintain optimal exposure and capture compelling footage. By leveraging ISO settings, videographers can confidently navigate challenging lighting scenarios, ensuring that their videos maintain the desired level of brightness and clarity.
Furthermore, ISO directly influences the overall quality of the captured footage. When utilized judiciously, ISO settings can enhance the richness of colors, improve the sharpness of details, and elevate the visual depth of the video. Conversely, improper ISO adjustments can introduce digital noise, compromising the clarity and smoothness of the footage. Therefore, mastering the art of ISO in camcorders is essential for achieving professional-grade video quality.
Besides technical considerations, ISO also serves as a creative tool for videographers. By intelligently manipulating ISO settings, videographers can evoke specific moods and atmospheres in their videos. Lower ISO values can impart a serene and natural ambiance, ideal for capturing landscapes and scenic shots, while higher ISO settings can infuse a sense of drama and intensity, particularly in low-light settings. This creative flexibility empowers videographers to imbue their videos with distinct visual narratives, amplifying the emotional impact of their content.
Moreover, understanding the importance of ISO in camcorders enables videographers to optimize the performance of their equipment. By tailoring ISO settings to match the lighting conditions and desired visual outcomes, videographers can maximize the capabilities of their camcorders, ensuring that each recording reflects their artistic vision with precision and clarity.
How to Adjust ISO in a Camcorder
Adjusting ISO in a camcorder involves navigating the camera’s settings to modify the sensor’s sensitivity to light. This process empowers videographers to adapt to varying lighting conditions and achieve optimal exposure for their footage. While the specific steps for adjusting ISO may vary depending on the camcorder model, the fundamental principles remain consistent across most devices.
1. Accessing the Menu: To adjust the ISO settings, navigate to the camcorder’s menu using the designated control buttons or touchscreen interface. The menu typically provides access to a range of camera settings, including ISO, allowing users to customize the sensor’s sensitivity according to their shooting requirements.
2. Selecting the ISO Setting: Once in the menu, locate the ISO setting among the available options. Depending on the camcorder, ISO settings may be displayed as a numerical scale or preset values, such as “Auto,” “Low,” “Medium,” and “High.” Select the ISO setting that aligns with the desired level of sensitivity based on the prevailing lighting conditions and the visual outcome sought.
3. Adjusting the ISO Value: After selecting the ISO setting, users can typically modify the ISO value within the chosen range. This adjustment allows videographers to fine-tune the sensor’s sensitivity, ensuring that the footage maintains the desired brightness and exposure. Lower ISO values are suitable for well-lit environments, while higher ISO values are beneficial in low-light settings.
4. Previewing the Changes: Upon adjusting the ISO values, it is advisable to preview the changes through the camcorder’s viewfinder or display screen. This step enables videographers to assess the impact of the modified ISO settings on the footage, ensuring that the exposure aligns with their creative vision and the specific requirements of the shooting environment.
5. Refining the Settings: Depending on the visual feedback from the preview, videographers can further refine the ISO settings to achieve the desired balance between brightness, clarity, and noise levels. Iterative adjustments may be necessary to optimize the ISO settings for each shooting scenario, ultimately enhancing the overall quality of the captured footage.
By mastering the process of adjusting ISO in a camcorder, videographers can effectively harness the power of ISO to adapt to diverse lighting conditions and elevate the visual impact of their videos.
Tips for Using ISO in Camcorders
Optimizing ISO settings in camcorders requires a nuanced approach that considers both technical considerations and creative objectives. By implementing the following tips, videographers can leverage ISO effectively to capture exceptional footage in various lighting scenarios while maintaining the desired visual quality.
- Understanding Your Camcorder’s ISO Capabilities: Familiarize yourself with the ISO performance of your specific camcorder. Some devices excel at higher ISO values, exhibiting minimal noise, while others maintain superior image quality at lower ISO settings. Understanding these nuances empowers you to make informed decisions when adjusting ISO to achieve optimal results.
- Utilize Low ISO in Well-Lit Environments: In brightly lit settings, such as outdoor scenes with ample natural light, opt for lower ISO values to capture crisp and clear footage while minimizing digital noise. This approach preserves the richness of colors and details, contributing to high-quality visuals.
- Gradually Increase ISO in Dim Lighting: When transitioning to low-light environments, such as indoor settings or evening shoots, gradually increase the ISO settings to compensate for reduced ambient light. By incrementally adjusting the ISO, you can maintain optimal exposure without introducing excessive noise, thereby preserving the visual integrity of the footage.
- Balancing Exposure and Noise: Strive to strike a balance between achieving the desired exposure and managing digital noise. Higher ISO settings can brighten the footage in low-light conditions but may introduce noise. Experiment with different ISO values to find the optimal compromise between exposure and noise levels, ensuring visually pleasing results.
- Consider Creative Implications: Recognize the creative potential of ISO settings in shaping the mood and ambiance of your videos. Lower ISO values can convey a tranquil, natural feel, ideal for serene landscapes, while higher ISO settings can infuse scenes with drama and intensity, enhancing the emotional impact of the footage.
- Monitor Footage Quality: Regularly review the footage while adjusting ISO settings to gauge the impact on visual quality. Pay attention to details, color accuracy, and the presence of digital noise. This iterative approach allows you to fine-tune the ISO settings to achieve optimal results for each shooting scenario.
By implementing these tips, videographers can harness the potential of ISO in camcorders to adapt to diverse lighting conditions, maintain exceptional visual quality, and infuse their videos with compelling artistic expression.
Conclusion
Mastering the intricacies of ISO in camcorders is paramount for videographers seeking to elevate the quality and visual impact of their footage. The ability to manipulate ISO settings empowers videographers to adapt to varying lighting conditions, maintain optimal exposure, and unleash their creative vision in diverse shooting environments.
By comprehending the fundamental principles of ISO and its impact on footage, videographers can navigate the nuances of ISO settings with confidence and precision. From capturing vibrant outdoor scenes with low ISO values to infusing low-light environments with the right balance of exposure and noise using higher ISO settings, the versatility of ISO enables videographers to achieve remarkable visual results.
Furthermore, the creative potential of ISO extends beyond technical adjustments, offering videographers a tool to evoke specific moods and atmospheres in their videos. Whether aiming for serene natural landscapes or intense, dramatic compositions, ISO settings play a pivotal role in shaping the visual narrative and emotional resonance of the footage.
Ultimately, the effective utilization of ISO in camcorders hinges on a harmonious blend of technical proficiency, creative insight, and a thorough understanding of the specific capabilities of the equipment. By implementing best practices, such as optimizing ISO settings for different lighting scenarios, monitoring footage quality, and balancing exposure and noise, videographers can harness the full potential of ISO to capture compelling, high-quality videos that resonate with viewers.
As videographers continue to explore the dynamic interplay between ISO and visual storytelling, the mastery of ISO settings becomes an indispensable skill, enabling them to produce captivating videos that transcend technical excellence and resonate on an emotional level. Embracing the art of ISO in camcorders is not merely a technical endeavor; it is a journey of creative exploration, where each adjustment of ISO settings contributes to the seamless fusion of technical precision and artistic expression in visual storytelling.


