Introduction
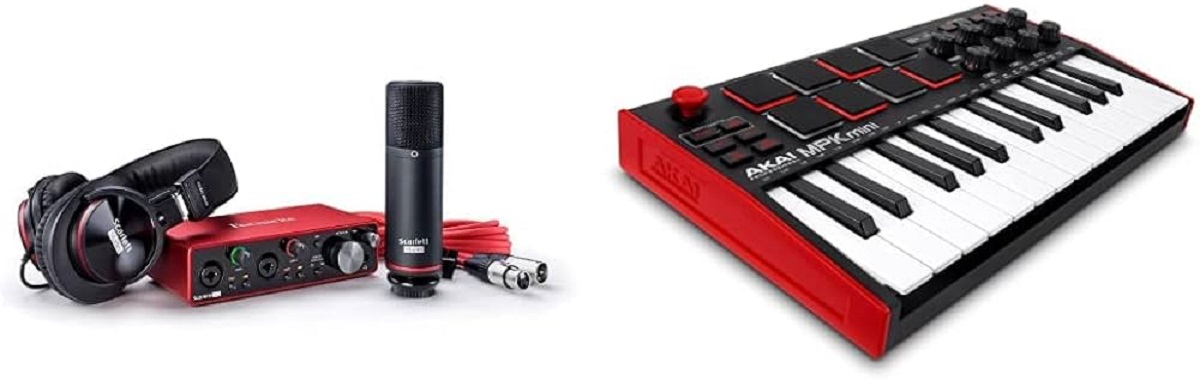
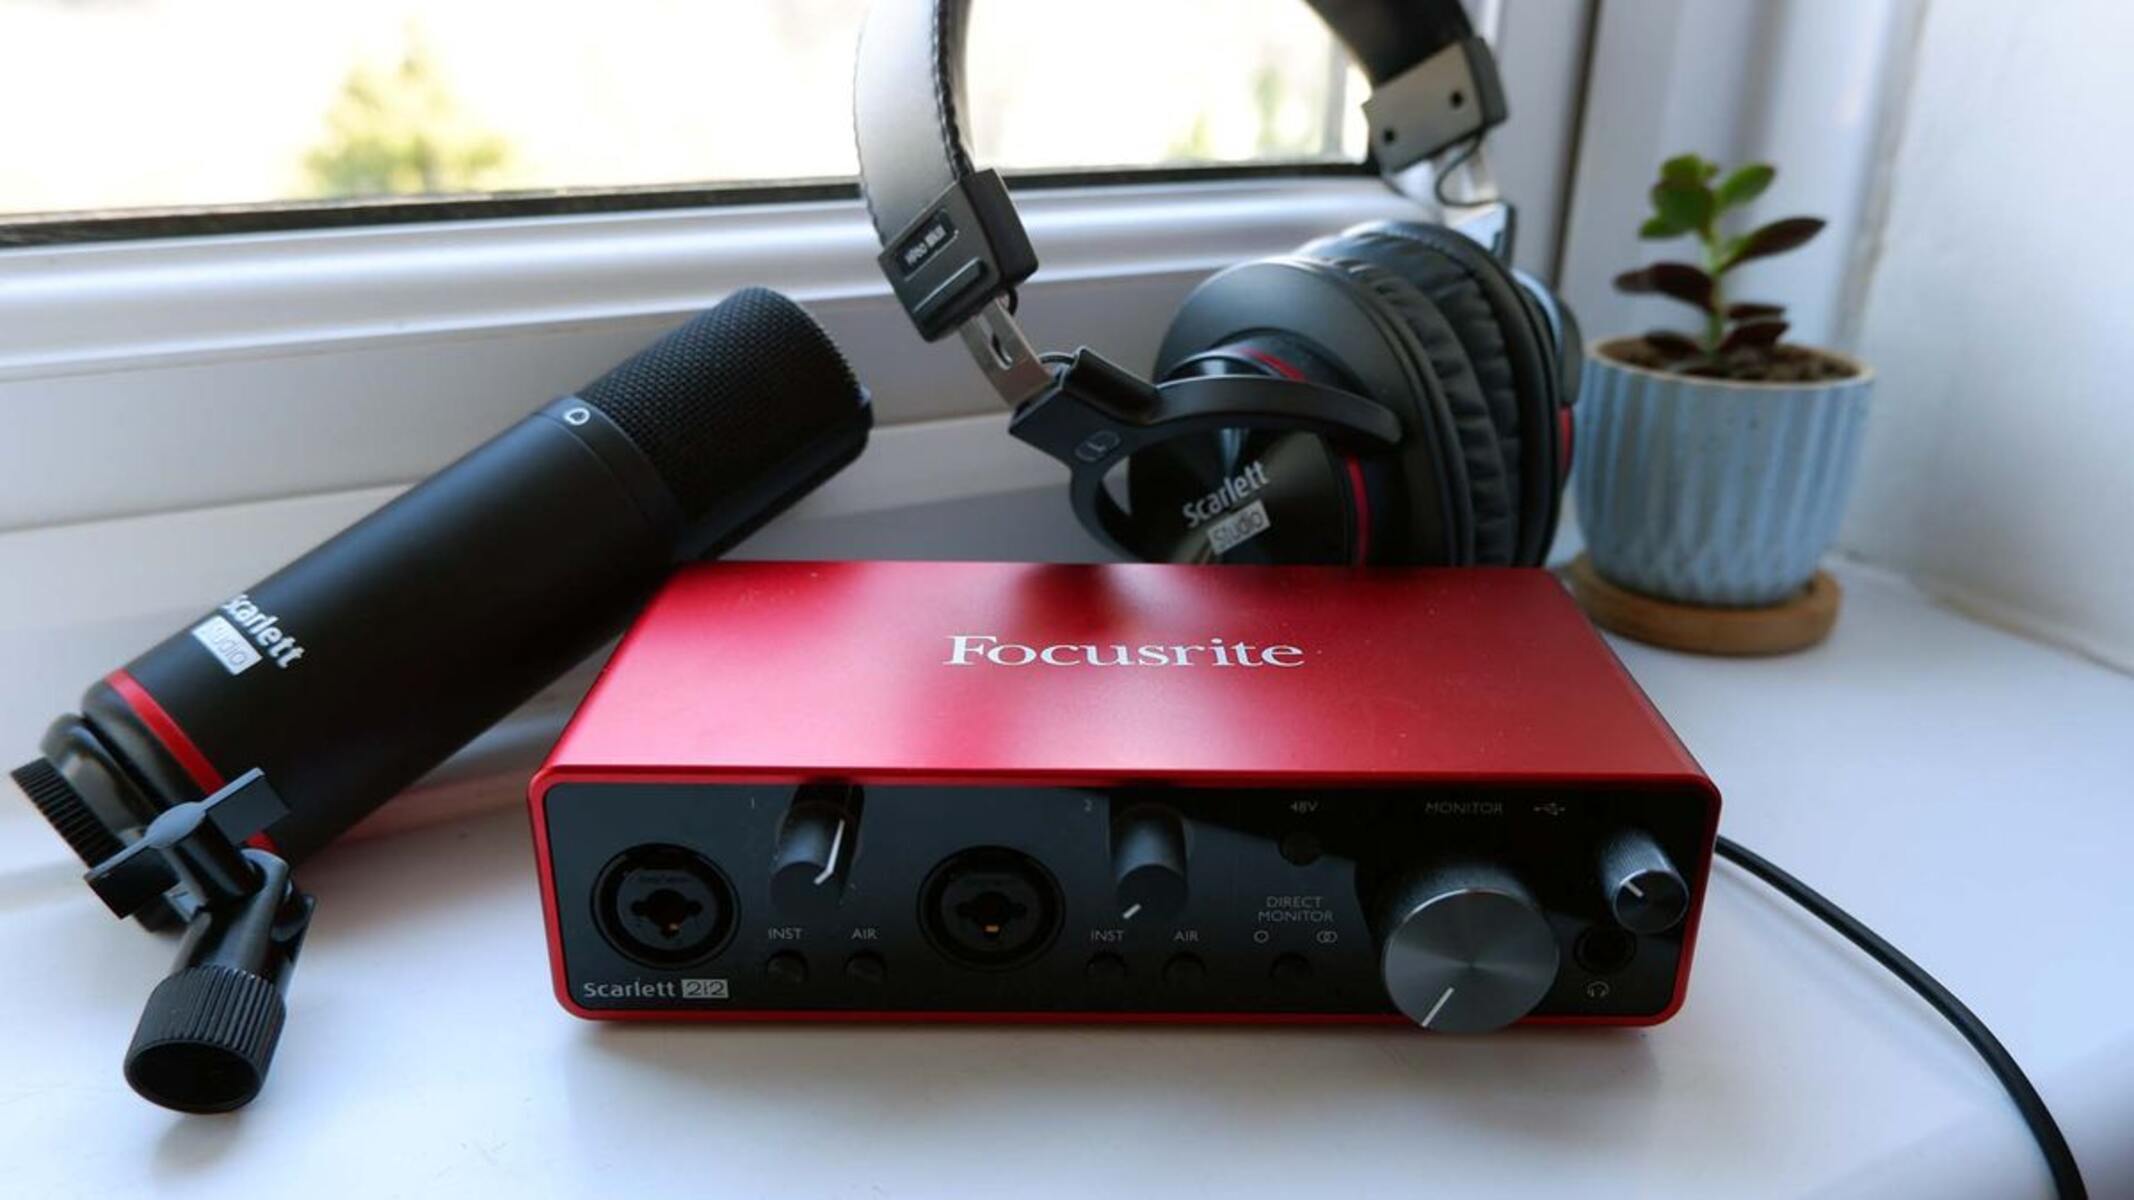
Are you looking to elevate the audio quality of your video recordings? Incorporating a camcorder with a Focusrite audio interface can significantly enhance the sound production of your videos. By leveraging the advanced features of the Focusrite, you can capture crisp, clear audio that complements the high-definition visuals captured by your camcorder. This guide will walk you through the seamless integration of these two devices, ensuring that you achieve the best possible audio-visual results.
When using a camcorder with a Focusrite audio interface, you can expect professional-grade audio recording capabilities that will elevate the overall quality of your video content. The Focusrite audio interface provides a range of advanced features, including high-quality preamps, versatile connectivity options, and intuitive controls, all of which contribute to a superior audio recording experience. By combining the capabilities of the camcorder with the precision of the Focusrite audio interface, you can achieve a seamless fusion of exceptional visuals and pristine sound.
In the following sections, we will delve into the step-by-step process of connecting your camcorder to the Focusrite, setting up the audio interface for recording, adjusting audio levels for optimal performance, monitoring the audio output, and executing the recording process. Additionally, we will provide valuable tips to help you attain the best possible audio quality when using these devices in tandem.
With the guidance provided in this comprehensive tutorial, you will be well-equipped to harness the full potential of your camcorder and Focusrite audio interface, resulting in professional-grade video content with superior audio quality. Let's embark on this journey to seamlessly integrate these devices and unlock their combined potential for capturing captivating visuals and pristine sound.
Connecting the Camcorder to the Focusrite
Before delving into the recording process, it is essential to establish a seamless connection between your camcorder and the Focusrite audio interface. This pivotal step ensures that the audio signals from the camcorder are effectively channeled through the audio interface, allowing for high-quality audio capture. Follow these steps to connect your camcorder to the Focusrite:
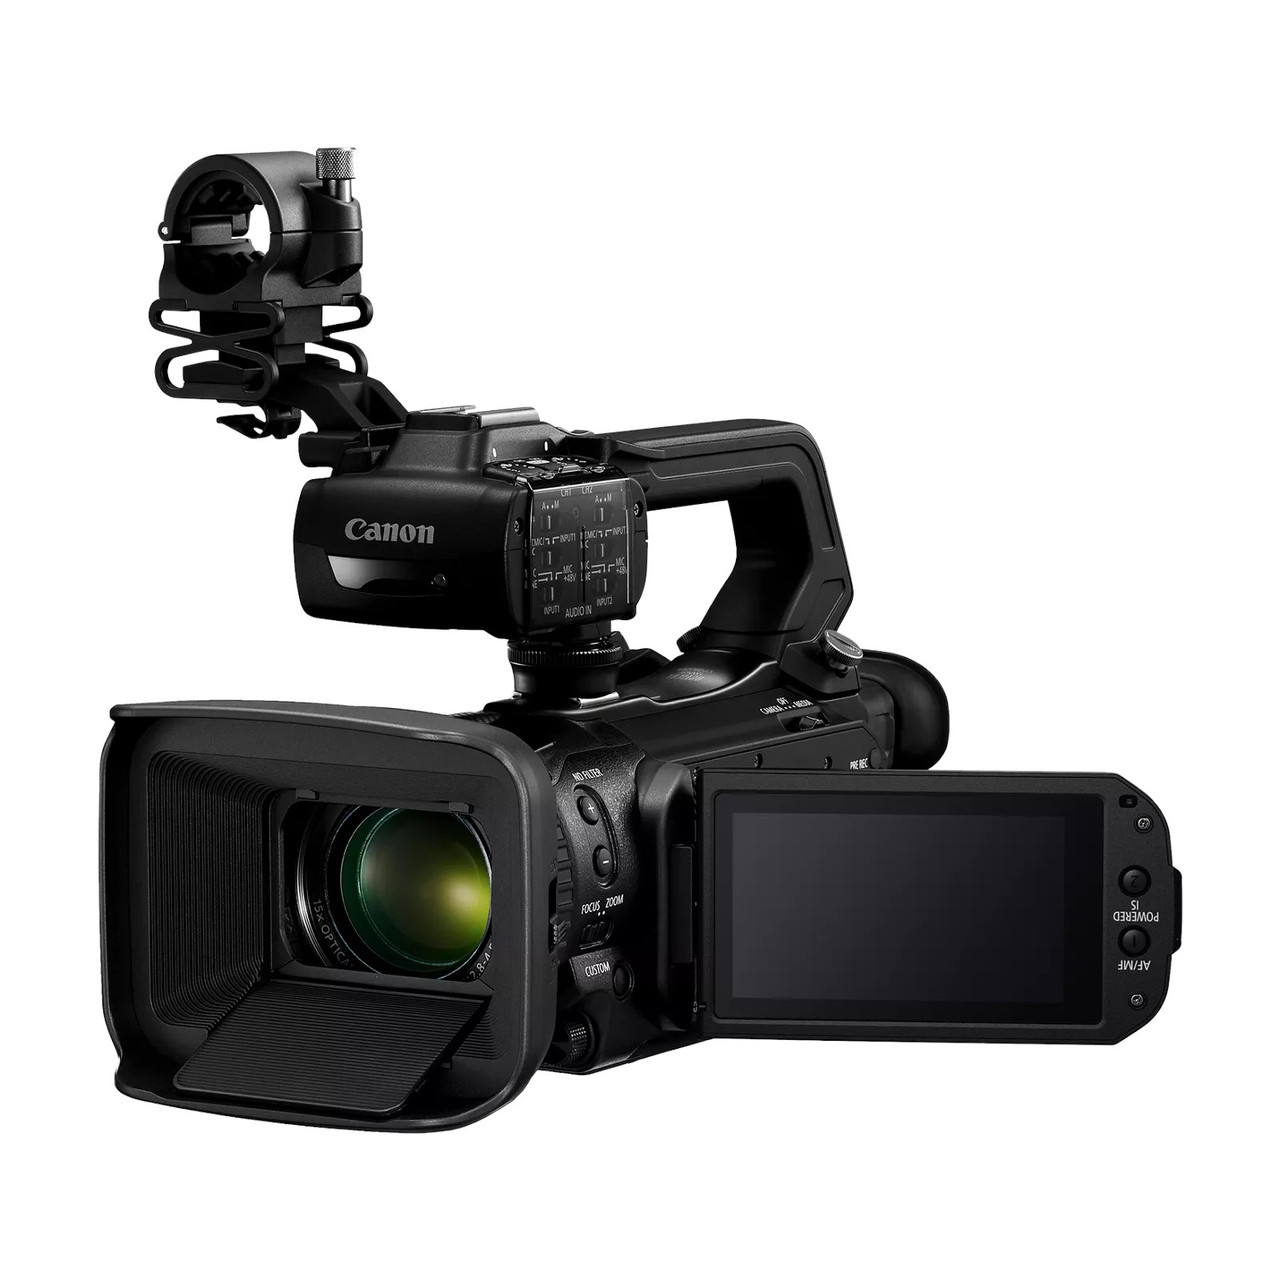
- Identify the Audio Output on the Camcorder: Locate the audio output port on your camcorder. This port is typically a 3.5mm headphone jack or a dedicated audio output port, depending on the model of the camcorder.
- Choose the Correct Cable: Select an appropriate cable that matches the output port of your camcorder. For a 3.5mm headphone jack, a standard 3.5mm audio cable will suffice. If your camcorder has dedicated audio output ports, ensure that you have the corresponding cables, such as RCA or 1/4-inch TRS cables.
- Connect the Camcorder to the Focusrite: Using the selected cable, connect the audio output of the camcorder to an available input on the Focusrite audio interface. Depending on the model of the Focusrite, you may have multiple input options, such as XLR, 1/4-inch TRS, or RCA inputs. Choose the input that best suits your camcorder’s output cable.
- Ensure Secure Connections: Once the cable is connected to both the camcorder and the Focusrite, ensure that the connections are secure to prevent any audio signal loss or interference during recording.
By following these straightforward steps, you can establish a direct audio connection between your camcorder and the Focusrite audio interface, laying the foundation for seamless audio transmission and recording. With the physical connection in place, you are now ready to proceed to the next steps of setting up the Focusrite for recording and optimizing the audio levels for superior sound capture.
Setting up the Focusrite for Recording
Once the camcorder is successfully connected to the Focusrite audio interface, the next crucial step is to configure the audio interface for recording. The Focusrite offers a range of settings and controls that allow for precise adjustments to optimize the audio input and ensure high-quality recording. Follow these steps to set up the Focusrite for recording with your camcorder:
- Access the Focusrite Control Panel: Depending on the model of your Focusrite audio interface, you may have a dedicated control panel software that enables you to adjust various settings. Install the necessary drivers and software on your computer to access the control panel.
- Select the Input Source: Within the control panel, designate the input source for recording. Since the camcorder is connected to the Focusrite, ensure that the corresponding input channel is selected to receive the audio signal from the camcorder.
- Adjust Input Gain: The Focusrite audio interface features input gain controls that allow you to adjust the strength of the incoming audio signal. Set the input gain at an optimal level to prevent audio distortion while capturing sufficient audio amplitude for clear recordings.
- Enable Phantom Power (if applicable): If you are using a microphone that requires phantom power, such as a condenser microphone, ensure that the phantom power option is activated on the Focusrite audio interface to supply the necessary power to the microphone.
- Configure Sample Rate and Bit Depth: Set the appropriate sample rate and bit depth for your recording. Higher sample rates and bit depths can capture more detailed audio information, but may result in larger file sizes. Choose the settings that align with your recording requirements.
- Save and Apply Settings: Once you have adjusted the necessary settings, save the configurations within the control panel and apply the changes to ensure that the Focusrite is optimized for recording with the connected camcorder.
By meticulously configuring the Focusrite audio interface for recording, you can harness the full potential of the device to capture pristine audio from your camcorder. With the settings in place, you are now prepared to fine-tune the audio levels and monitor the audio output to ensure a seamless recording process.
Adjusting Audio Levels
Optimizing the audio levels is a critical aspect of the recording process when using a camcorder with a Focusrite audio interface. Properly adjusting the audio levels ensures that the incoming audio signals are neither too faint nor distorted, resulting in clear and balanced recordings. Follow these steps to effectively adjust the audio levels for your recording setup:
- Utilize the Gain Controls: The Focusrite audio interface is equipped with gain controls that allow you to adjust the input levels for each channel. Gradually increase the gain while monitoring the audio input levels to achieve an optimal balance. Avoid setting the gain too high, as it can lead to clipping and distortion.
- Monitor Input Levels: Utilize the visual indicators or level meters available on the Focusrite audio interface or the associated control panel software to monitor the input levels. Aim to maintain a healthy signal level without reaching the peak, indicated by the red zone on the level meters.
- Utilize Headphone Monitoring: If your Focusrite audio interface offers headphone monitoring capabilities, use this feature to listen to the audio input in real-time. This allows you to gauge the audio quality and make immediate adjustments to the input levels as needed.
- Perform Sound Checks: Before initiating the recording, conduct sound checks by capturing test audio clips with varying input levels. Listen to the playback and assess the quality to determine the ideal input levels for your specific recording environment and audio sources.
- Adjust Individual Channel Levels: If you are recording with multiple audio sources or microphones connected to the Focusrite, ensure that the input levels for each channel are balanced to achieve a cohesive audio mix. Make precise adjustments to individual channel levels to maintain uniformity across the audio inputs.
By meticulously adjusting the audio levels on the Focusrite audio interface, you can fine-tune the input signals from your camcorder to achieve optimal audio quality. The precise control offered by the Focusrite allows you to tailor the audio levels to suit the recording environment and the characteristics of the audio sources, resulting in professional-grade recordings with exceptional clarity and balance.
Monitoring the Audio
Effective monitoring of the audio output is crucial when utilizing a camcorder in conjunction with a Focusrite audio interface. Monitoring allows you to assess the quality of the audio signal, identify potential issues, and make real-time adjustments to ensure optimal recording results. Here are essential steps for monitoring the audio effectively:
- Utilize Headphone Output: The Focusrite audio interface often features a dedicated headphone output that allows for direct monitoring of the audio signal. Connect a pair of high-quality headphones to the interface to accurately assess the audio quality during recording.
- Check for Latency: Latency, the delay between the audio input and its playback through the monitoring system, can impact the recording process. Use the monitoring system to detect any latency issues and adjust the settings within the Focusrite control panel to minimize latency for real-time monitoring.
- Listen for Artifacts: While monitoring the audio, pay close attention to any unwanted artifacts, such as distortion, noise, or interference. Identify the source of these artifacts and make the necessary adjustments to the input levels, gain settings, or audio sources to mitigate these issues.
- Assess Stereo Imaging: If your recording setup involves stereo audio sources, use the monitoring system to evaluate the stereo imaging and spatial characteristics of the audio. Ensure that the stereo balance is maintained, and the audio elements are appropriately positioned within the stereo field for a cohesive soundstage.
- Monitor Consistently: Continuously monitor the audio output throughout the recording session, especially during dynamic segments or changes in audio intensity. This proactive approach allows you to address any fluctuations in audio quality promptly, ensuring a consistent and high-quality recording.
By actively monitoring the audio output using the monitoring capabilities of the Focusrite audio interface, you can maintain precise control over the recording process and address any audio-related issues in real time. This meticulous approach to monitoring ensures that the recorded audio aligns with your quality expectations, resulting in professional-grade recordings that elevate the overall audio-visual experience.
Recording with the Camcorder and Focusrite
Once the camcorder is seamlessly integrated with the Focusrite audio interface and all necessary settings are configured, you are ready to initiate the recording process. The combined capabilities of these devices allow for the capture of high-quality audio to complement the visual content captured by the camcorder. Follow these steps to execute a successful recording using the camcorder and Focusrite:
- Initiate Recording Software: Open the recording software on your computer that is compatible with the Focusrite audio interface. Ensure that the software recognizes the audio inputs from the camcorder connected to the Focusrite.
- Set Recording Parameters: Configure the recording parameters within the software, including the audio input sources, sample rate, bit depth, and file format. Verify that the settings align with your recording requirements and the capabilities of the Focusrite audio interface.
- Commence Audio Check: Before initiating the actual recording, conduct an audio check to verify that the audio input levels, gain settings, and monitoring systems are functioning optimally. Make any necessary adjustments based on the audio check results.
- Initiate the Recording: Once all preparatory steps are completed, commence the recording process. Ensure that the audio levels are consistently monitored throughout the recording session to address any unforeseen changes or issues promptly.
- Monitor in Real Time: Utilize the headphone monitoring system or the visual indicators on the Focusrite audio interface to monitor the audio output in real time. This active monitoring allows you to maintain control over the recording quality and make immediate adjustments if required.
- Conclude the Recording: Upon completing the recording session, review the captured audio to ensure that it meets your quality standards. Save the recorded audio files in the designated format for further post-production or integration with the accompanying video footage.
By following these systematic steps, you can effectively record high-quality audio using the camcorder and Focusrite audio interface in tandem. The seamless integration of these devices, coupled with attentive monitoring and precise adjustments, ensures that the recorded audio complements the visual content captured by the camcorder, resulting in a cohesive and professional audio-visual production.
Tips for Getting the Best Audio Quality
When utilizing a camcorder with a Focusrite audio interface, achieving the best possible audio quality is paramount to enhancing the overall production value of your video content. Implementing the following tips will help you optimize the audio recording process and elevate the quality of the captured audio:
- Use High-Quality Microphones: Invest in high-quality microphones that are well-suited for your specific recording needs. Whether capturing vocals, ambient sound, or musical performances, the use of premium microphones significantly contributes to superior audio quality.
- Employ Proper Mic Placement: Pay attention to the placement of microphones to capture the desired audio characteristics effectively. Experiment with microphone positioning to achieve optimal sound capture, taking into account factors such as proximity, angle, and environmental acoustics.
- Utilize Pop Filters and Windscreens: When recording vocals or dialogue, use pop filters to mitigate plosive sounds and windscreens to reduce unwanted wind noise. These accessories help maintain clear and unblemished audio recordings.
- Optimize Room Acoustics: If recording in a controlled environment, consider acoustically treating the space to minimize reflections and reverberations. This enhances the clarity and fidelity of the recorded audio.
- Perform Sound Checks and Test Recordings: Prior to formal recording sessions, conduct comprehensive sound checks and test recordings to assess the audio quality. Address any issues related to input levels, microphone placement, or environmental noise during these preliminary tests.
- Implement Dynamic Range Compression: Utilize dynamic range compression to regulate the audio levels and ensure that quieter passages are adequately captured without being overshadowed by louder segments. This technique results in a more balanced and polished audio output.
- Engage in Post-Recording Processing: After capturing the audio, engage in post-recording processing to refine the sound further. This may involve equalization, noise reduction, and other corrective measures to enhance the overall audio quality.
- Seek Professional Mixing and Mastering: For critical audio projects, consider engaging the services of professional audio engineers for meticulous mixing and mastering. Their expertise can elevate the audio quality to professional standards.
By implementing these tips, you can significantly enhance the audio quality of your recordings when utilizing a camcorder with a Focusrite audio interface. These best practices, when combined with the advanced capabilities of the Focusrite and attention to detail during the recording process, contribute to the creation of compelling video content with exceptional audio fidelity.