Introduction
Welcome to the comprehensive guide on how to clean camcorder heads. If you're an avid videographer or someone who relies on a camcorder to capture life's precious moments, you understand the importance of maintaining optimal recording quality. Over time, camcorder heads can accumulate dust, dirt, and debris, leading to diminished video and audio quality. Fortunately, with the right knowledge and tools, cleaning camcorder heads can be a straightforward process that significantly enhances the performance of your device.
In this guide, we will delve into the intricacies of camcorder heads, explore the telltale signs of dirty heads, identify the essential tools and supplies needed for cleaning, and provide a step-by-step walkthrough to ensure you can effectively and safely clean your camcorder heads. Additionally, we'll share valuable tips for maintaining clean camcorder heads, prolonging the lifespan of your equipment, and consistently producing high-quality recordings.
Whether you're a seasoned videographer or a novice enthusiast, this guide is designed to equip you with the knowledge and confidence to maintain your camcorder in optimal condition. By following the advice outlined here, you can ensure that your recordings remain crisp, clear, and free from the distortions caused by dirty camcorder heads.
Now, let's embark on this journey to uncover the secrets of camcorder maintenance and discover the steps to achieve pristine recording quality.
Understanding Camcorder Heads
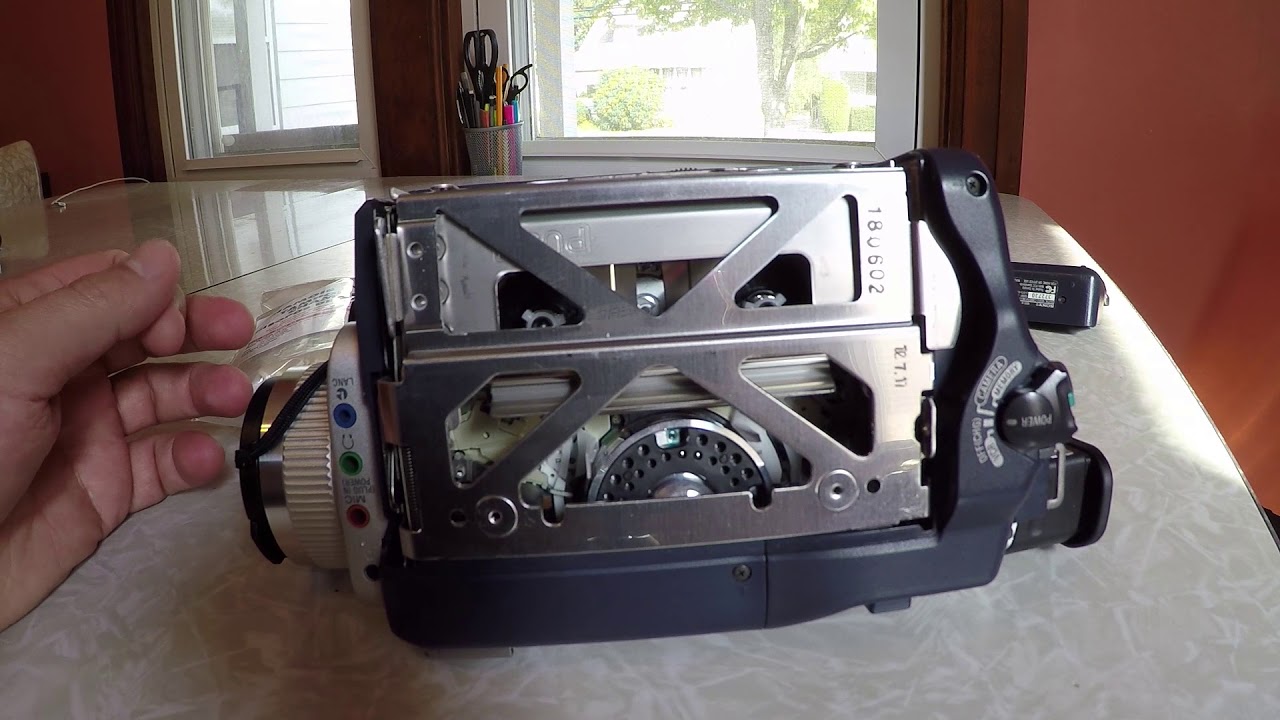
Before delving into the cleaning process, it’s essential to grasp the significance of camcorder heads in the recording mechanism. Camcorder heads, also known as video heads, are pivotal components responsible for translating audio and video signals onto the recording medium, typically magnetic tape or digital storage media. These heads come into direct contact with the recording medium, playing a crucial role in capturing and reproducing the audiovisual content.
Camcorders typically feature two types of heads: the video head, which handles the visual component of the recording, and the audio head, responsible for the sound. The video head, in particular, is subjected to wear and tear due to its direct contact with the tape or storage medium during recording and playback. Over time, debris, dust, and magnetic particles can accumulate on the heads, leading to a degradation in recording quality.
Understanding the anatomy of camcorder heads and their intricate function is fundamental in recognizing the impact of dirt and debris accumulation. The accumulation of contaminants on the heads can result in a range of issues, including distorted video playback, poor audio quality, and even the complete loss of recorded data. Therefore, regular maintenance, including cleaning the camcorder heads, is essential to preserve the integrity of the recording process and ensure consistently high-quality results.
By comprehending the critical role played by camcorder heads and the potential consequences of neglecting their maintenance, you can appreciate the significance of regular cleaning. As we proceed, we will explore the indicators of dirty camcorder heads and equip you with the knowledge and techniques to effectively clean and maintain these vital components of your recording equipment.
Signs of Dirty Camcorder Heads
Recognizing the signs of dirty camcorder heads is crucial for maintaining the quality of your recordings. Over time, debris, dust, and magnetic particles can accumulate on the camcorder heads, leading to a range of noticeable issues. By being attentive to these signs, you can take timely action to clean the heads and restore optimal recording performance.
- Distorted Playback: One of the primary indicators of dirty camcorder heads is distorted playback. When you notice visual anomalies such as pixelation, streaks, or random color changes during video playback, it may indicate that the heads are dirty and in need of cleaning.
- Poor Audio Quality: Dirty camcorder heads can also affect the audio component of recordings. If you observe crackling sounds, muffled audio, or inconsistent volume levels during playback, it could be a sign that the audio heads are contaminated and require cleaning.
- Drop in Recording Quality: Another telltale sign of dirty camcorder heads is a noticeable drop in recording quality. If your recordings appear less sharp, exhibit visual artifacts, or lack the clarity they once had, it’s likely that the heads need to be cleaned to restore optimal performance.
- Intermittent Loss of Signal: Dirty camcorder heads may lead to intermittent loss of signal during playback or recording. If you experience sudden signal dropouts or erratic behavior in the video or audio output, it could be attributed to the contamination on the heads.
By being vigilant for these signs, you can proactively address any issues related to dirty camcorder heads. Regularly inspecting your recordings for these anomalies and taking prompt action to clean the heads will help you maintain the integrity of your recordings and ensure consistent, high-quality results.
Tools and Supplies Needed
Before embarking on the process of cleaning your camcorder heads, it’s essential to gather the necessary tools and supplies to ensure a thorough and effective cleaning. Here’s a list of items you’ll need:
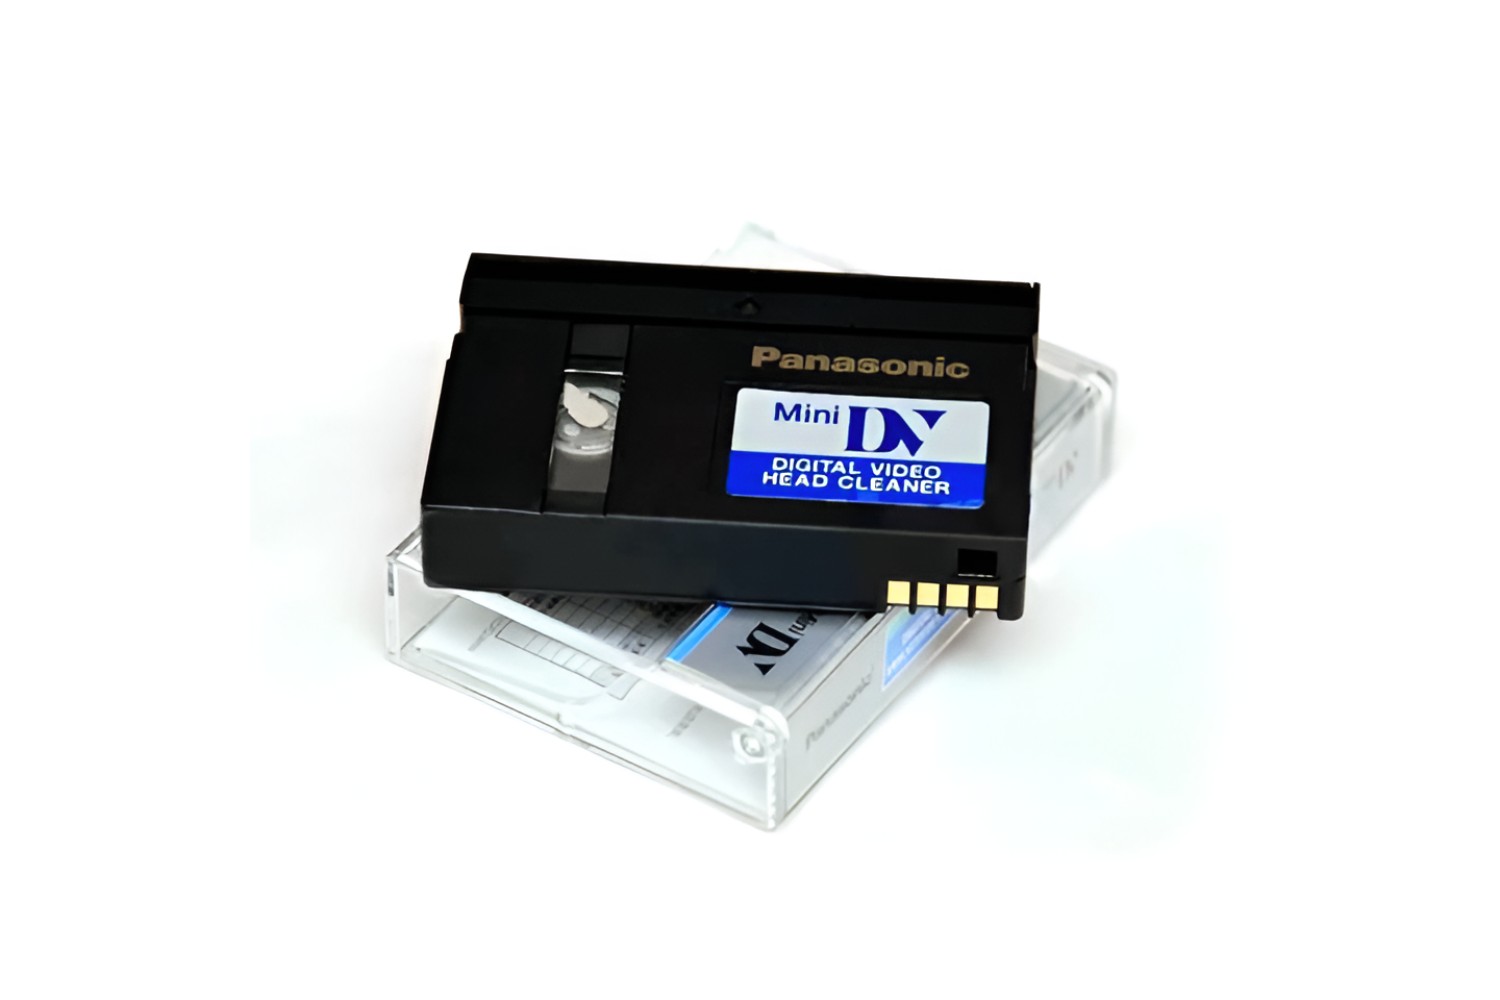
- Cleaning Cassette: A cleaning cassette specifically designed for camcorder heads is a convenient and effective tool for removing debris and contaminants from the heads. These cassettes are equipped with cleaning materials that safely scrub the heads during playback, effectively removing dirt and particles.
- Isopropyl Alcohol: Isopropyl alcohol, commonly known as rubbing alcohol, is an essential cleaning agent for camcorder heads. It effectively dissolves and removes stubborn contaminants from the heads without leaving any residue. Ensure that the alcohol concentration is at least 90% for optimal cleaning results.
- Cotton Swabs: High-quality, lint-free cotton swabs are indispensable for precision cleaning of the camcorder heads. They allow you to target specific areas and remove any residual dirt or debris that the cleaning cassette may not have addressed.
- Lint-Free Cloth: A soft, lint-free cloth is useful for wiping the exterior surfaces of the camcorder and removing any remaining particles or cleaning residue. It’s important to use a gentle, non-abrasive cloth to avoid scratching or damaging the device.
- Canned Air: Canned air or compressed air dusters can be used to gently blow away loose dust and debris from the exterior and interior components of the camcorder. This helps prepare the device for more targeted cleaning and ensures that no additional contaminants are introduced during the process.
By ensuring that you have these tools and supplies at your disposal, you can proceed with confidence, knowing that you have everything needed to effectively clean your camcorder heads. Additionally, it’s important to work in a clean and well-ventilated environment to minimize the risk of introducing new contaminants during the cleaning process.
Step-by-Step Guide to Cleaning Camcorder Heads
Now that you’re equipped with the necessary tools and supplies, it’s time to embark on the step-by-step process of cleaning your camcorder heads. Follow these instructions carefully to ensure a thorough and effective cleaning:
- Prepare the Camcorder: Start by removing any tape or digital media from the camcorder and ensuring that the device is powered off. This prevents accidental damage to the recording medium and ensures your safety during the cleaning process.
- Use Canned Air: Gently use canned air to blow away any loose dust and debris from the exterior and interior components of the camcorder. Pay special attention to the area around the camcorder heads to minimize the risk of introducing additional contaminants during cleaning.
- Insert the Cleaning Cassette: Insert the cleaning cassette into the camcorder as you would with a regular tape. Ensure that the cleaning cassette is compatible with your camcorder model and follow any specific instructions provided with the cleaning product.
- Engage Playback Mode: Set the camcorder to playback mode to activate the cleaning process. The cleaning cassette will gently scrub the camcorder heads, removing dirt and debris during the playback cycle. Allow the cleaning cassette to run for the recommended duration specified by the manufacturer.
- Remove the Cleaning Cassette: Once the cleaning cycle is complete, carefully remove the cleaning cassette from the camcorder. Avoid touching the exposed tape or cleaning surfaces to prevent contamination.
- Apply Isopropyl Alcohol: Moisten a cotton swab with isopropyl alcohol and gently swab the camcorder heads to remove any remaining stubborn contaminants. Use a fresh swab for each head to avoid spreading debris.
- Final Inspection: After cleaning the heads, visually inspect the recording and playback surfaces to ensure that they are free from dirt and residue. Use a lint-free cloth to gently wipe the exterior surfaces of the camcorder to remove any remaining particles or cleaning residue.
Following these steps diligently will help you effectively clean your camcorder heads, ensuring that your device is free from contaminants and capable of delivering optimal recording quality. By incorporating these maintenance practices into your routine, you can prolong the lifespan of your camcorder and continue capturing memorable moments with clarity and precision.
Tips for Maintaining Clean Camcorder Heads
Maintaining clean camcorder heads is essential for preserving the quality and longevity of your recording equipment. To ensure that your camcorder heads remain free from contaminants and consistently deliver high-quality recordings, consider the following tips:
- Regular Cleaning Schedule: Establish a regular cleaning schedule for your camcorder heads, especially if you frequently use the device in dusty or challenging environments. Routine maintenance can prevent the buildup of dirt and debris, preserving the integrity of the heads and ensuring optimal recording quality.
- Store Your Camcorder Properly: When not in use, store your camcorder in a clean and protective case to shield it from dust, moisture, and other potential contaminants. Proper storage can minimize the accumulation of debris on the heads and extend the intervals between cleaning sessions.
- Avoid Exposure to Extreme Conditions: Protect your camcorder from extreme temperatures, humidity, and direct sunlight, as these conditions can adversely affect the performance of the heads and contribute to the accumulation of contaminants. Store and operate your device in environments conducive to its longevity.
- Use High-Quality Recording Media: Opt for reputable and high-quality recording media to minimize the risk of shedding particles and debris that can compromise the cleanliness of the camcorder heads. Inferior tapes or storage media may introduce contaminants and contribute to head contamination.
- Professional Maintenance: Consider periodic professional maintenance for your camcorder, especially if you rely on the device for critical recordings. Professional technicians can conduct thorough inspections, cleaning, and adjustments to ensure the optimal performance of your equipment.
- Monitor Playback Quality: Regularly monitor the playback quality of your recordings to detect any signs of deteriorating performance. If you notice anomalies such as distorted playback or audio artifacts, it may indicate the need for immediate cleaning or professional assessment.
By incorporating these tips into your camcorder maintenance routine, you can safeguard the cleanliness and functionality of the heads, prolonging the lifespan of your device and consistently producing high-quality recordings. Remember that proactive care and attention to maintenance can make a significant difference in the performance and longevity of your camcorder.