Introduction
Welcome to the exciting world of action camera videography! Whether you're an adrenaline junkie capturing extreme sports or a filmmaker documenting breathtaking landscapes, having stable and smooth footage is essential. This is where a stabilization gimbal comes into play. In this comprehensive guide, we will delve into the process of building a stabilization gimbal specifically tailored for action cameras. By the end of this tutorial, you'll have the knowledge and skills to create your very own stabilization gimbal, providing you with professional-grade stabilization for your action camera footage.
Stabilization gimbals are ingenious devices designed to keep your camera steady and level, even when you're in motion. They utilize advanced technology to counteract the effects of movement, resulting in silky-smooth and professional-looking footage. While there are numerous commercial stabilization gimbals available on the market, building your own offers a cost-effective and customizable alternative. This DIY approach not only allows you to tailor the gimbal to your specific camera and shooting style but also provides a rewarding hands-on experience.
Throughout this guide, we will explore the fundamental principles of stabilization gimbals, the essential components required for building one, and a detailed step-by-step construction process. Additionally, we'll cover the crucial steps of testing and calibrating your homemade stabilization gimbal to ensure optimal performance. Lastly, we'll provide valuable tips for effectively using the stabilization gimbal with your action camera, enabling you to capture stunning, shake-free footage in a variety of dynamic environments.
So, whether you're a hobbyist looking to elevate your filmmaking capabilities or a professional seeking a budget-friendly stabilization solution, this guide is your gateway to unlocking the full potential of your action camera. Get ready to embark on an exhilarating journey of creativity and innovation as we dive into the world of DIY stabilization gimbals for action cameras.
Understanding Stabilization Gimbals
Before delving into the construction process, it's essential to grasp the underlying principles of stabilization gimbals. At its core, a stabilization gimbal is a sophisticated device designed to maintain the stability and levelness of a camera, particularly in dynamic or challenging shooting environments. It achieves this by utilizing a combination of motors, sensors, and advanced algorithms to counteract unwanted movements and vibrations, resulting in smooth and professional-looking footage.
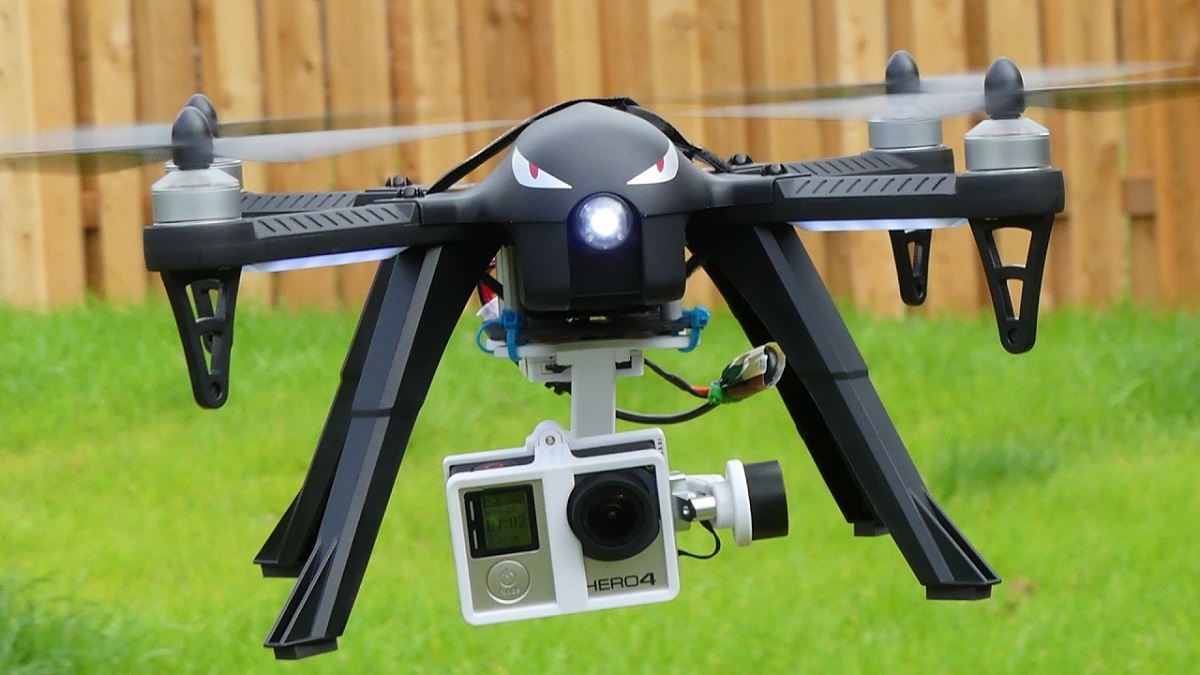
One of the key components of a stabilization gimbal is its motorized axis system, typically consisting of three motors that correspond to the pitch, roll, and yaw axes. These motors work in tandem to stabilize the camera along these three axes, effectively compensating for movements in all directions. By actively adjusting the camera's position in real time, the gimbal ensures that the captured footage remains steady and free from the jarring effects of motion.
Furthermore, stabilization gimbals incorporate advanced sensor technology to detect and interpret the camera's orientation and movement. These sensors, which may include gyroscopes and accelerometers, continuously monitor the camera's position and make rapid adjustments to maintain stability. This seamless integration of motorized control and sensor feedback allows the gimbal to adapt instantaneously to changes in motion, resulting in fluid and stable footage.
Another crucial aspect of stabilization gimbals is the incorporation of intelligent algorithms that govern the gimbal's behavior. These algorithms process the data from the onboard sensors and translate it into precise motor movements, effectively predicting and counteracting potential instabilities. By leveraging these algorithms, stabilization gimbals can anticipate and neutralize unwanted movements, ensuring that the camera remains level and steady throughout the filming process.
Understanding the inner workings of stabilization gimbals is pivotal to the construction and operation of a DIY gimbal for an action camera. By comprehending the role of motors, sensors, and algorithms, you'll gain valuable insights into the principles that underpin stable and captivating videography. With this foundational knowledge in hand, you're well-equipped to embark on the exciting journey of building and utilizing your very own stabilization gimbal for action-packed filming adventures.
Components Needed for Building a Stabilization Gimbal
Building a stabilization gimbal for an action camera requires a selection of essential components that form the backbone of this innovative device. Each component plays a vital role in ensuring the stability and smooth operation of the gimbal, ultimately contributing to the seamless capture of professional-quality footage. Let’s explore the key components needed to construct a stabilization gimbal tailored for action cameras:
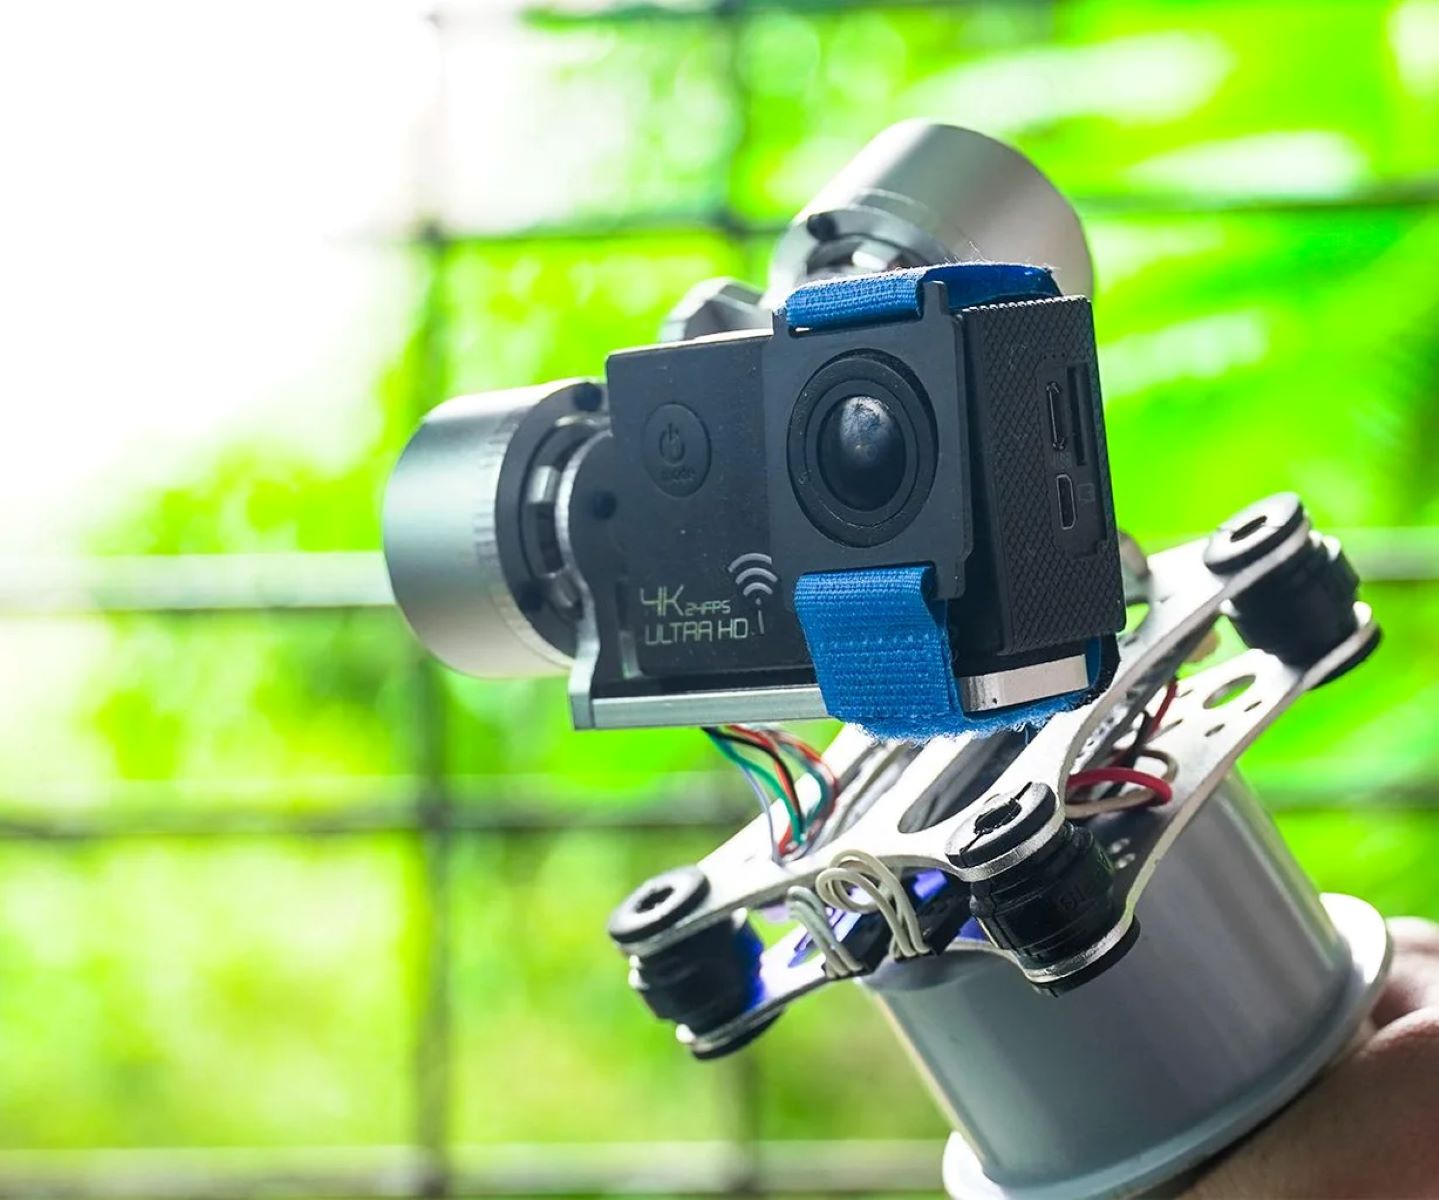
- Brushless Motors: The heart of the stabilization gimbal, brushless motors provide the necessary torque and precision to stabilize the camera along its pitch, roll, and yaw axes. These motors are responsible for making rapid adjustments to counteract movements and vibrations, resulting in steady and level footage.
- IMU (Inertial Measurement Unit): The IMU serves as the sensory system of the gimbal, comprising gyroscopes and accelerometers that detect the camera’s orientation and movement. This critical component provides real-time data to the control system, enabling the gimbal to react swiftly to changes in position and maintain stability.
- Controller Board: The controller board acts as the brain of the stabilization gimbal, processing data from the IMU and issuing commands to the brushless motors. It governs the gimbal’s operation, ensuring precise adjustments and smooth stabilization during filming.
- Frame and Mounting Plate: The frame serves as the structural framework of the gimbal, providing a stable platform for mounting the action camera and housing the motorized components. The mounting plate securely holds the camera in place, allowing for seamless integration with the gimbal’s stabilization system.
- Battery: A reliable power source is essential for the continuous operation of the stabilization gimbal. Selecting a lightweight and high-capacity battery ensures extended filming sessions without compromising on stability and performance.
- Cables and Connectors: High-quality cables and connectors facilitate the seamless integration of the various components, ensuring reliable communication and power distribution within the gimbal assembly.
By assembling these fundamental components, you’ll lay the groundwork for a robust and efficient stabilization gimbal tailored to the unique requirements of action camera videography. The careful selection and integration of these components are pivotal in creating a reliable and high-performance gimbal that elevates the quality of your footage, providing smooth, professional-looking results in a variety of dynamic filming scenarios.
Step-by-Step Guide to Building the Stabilization Gimbal
Embarking on the construction of a stabilization gimbal for an action camera is an exciting endeavor that requires careful planning and meticulous assembly. Follow this comprehensive step-by-step guide to bring your DIY stabilization gimbal to life:
- Prepare the Frame and Mounting Plate: Begin by assembling the frame and mounting plate, ensuring a secure and stable foundation for the gimbal assembly. Mount the action camera onto the designated plate, ensuring a snug and balanced fit.
- Install the Brushless Motors: Affix the brushless motors to the frame, aligning them with the pitch, roll, and yaw axes of the camera. Secure the motors in place, taking care to maintain precise positioning for optimal stabilization performance.
- Integrate the IMU and Controller Board: Connect the IMU, comprising gyroscopes and accelerometers, to the controller board. Ensure proper alignment and secure mounting to enable seamless communication and data processing between the sensory system and the control unit.
- Wire the Components: Carefully route and connect the necessary cables and wires between the brushless motors, IMU, controller board, and power source. Verify the integrity of the connections and ensure proper insulation to prevent interference and electrical issues.
- Calibrate the Gimbal: Initiate the calibration process to synchronize the IMU and controller board, allowing the gimbal to accurately interpret sensor data and execute precise stabilization adjustments. Follow the manufacturer’s guidelines for calibration procedures to achieve optimal performance.
- Test the Stabilization Gimbal: Power up the gimbal and conduct thorough testing to evaluate its stabilization capabilities. Capture sample footage in various motion scenarios and assess the smoothness and stability of the resulting footage. Make any necessary adjustments to fine-tune the gimbal’s performance.
- Secure the Power Source: Ensure the integration of a reliable and long-lasting power source, such as a high-capacity battery, to sustain extended filming sessions. Securely mount the battery within the gimbal assembly, taking care to balance weight distribution.
By meticulously following these step-by-step instructions, you’ll successfully construct a fully functional stabilization gimbal tailored to the specific requirements of your action camera. This hands-on approach not only provides a deeper understanding of gimbal technology but also empowers you to customize and optimize the gimbal for seamless and professional-grade stabilization during your filming endeavors.
Testing and Calibrating the Stabilization Gimbal
Once the construction of your DIY stabilization gimbal is complete, it’s essential to undertake rigorous testing and calibration procedures to ensure optimal performance and stability. The following steps outline the crucial process of testing and calibrating your homemade stabilization gimbal:
- Power-Up and Initialization: Power up the stabilization gimbal and allow it to initialize, ensuring that all components are functioning correctly and the system is ready for calibration.
- Static Testing: Conduct static testing by observing the gimbal’s behavior when the action camera is stationary. Verify that the gimbal maintains a level and stable position without any erratic movements or vibrations.
- Motion Testing: Introduce controlled movements to the gimbal and observe its response. Gradually pan, tilt, and rotate the gimbal to assess its ability to stabilize the camera during dynamic motion scenarios.
- Stability Assessment: Capture sample footage with the action camera mounted on the gimbal and evaluate the stability and smoothness of the resulting video. Pay close attention to any signs of instability or jittering that may indicate the need for calibration adjustments.
- Calibration Process: Initiate the calibration process as per the manufacturer’s guidelines, ensuring that the IMU and controller board are synchronized and accurately interpreting sensor data. Follow the recommended calibration procedures to fine-tune the gimbal’s performance.
- Dynamic Testing: Engage in dynamic testing by filming in real-world environments with varying levels of motion and vibration. Assess the gimbal’s ability to counteract external disturbances and maintain stable footage during active filming scenarios.
- Real-Time Adjustments: Make real-time adjustments to the gimbal’s settings and parameters based on the feedback gathered during testing. Fine-tune the motor control and stabilization parameters to achieve the desired level of stability and smoothness in the captured footage.
Thorough testing and calibration are essential steps in the development of a reliable and high-performance stabilization gimbal for your action camera. By meticulously evaluating the gimbal’s behavior in static and dynamic conditions and fine-tuning its calibration settings, you’ll ensure that it delivers consistent and professional-grade stabilization, empowering you to capture stunning, shake-free footage in a diverse range of filming environments.
Tips for Using the Stabilization Gimbal with an Action Camera
Effectively utilizing a stabilization gimbal with your action camera can significantly enhance the quality and visual appeal of your footage. Here are valuable tips to maximize the performance and creative potential of your stabilization gimbal:
- Balance and Centering: Ensure that your action camera is properly balanced and centered within the gimbal. Proper balance contributes to optimal stabilization performance and prevents unnecessary strain on the gimbal’s motors.
- Smooth Movements: Embrace smooth and deliberate movements when operating the gimbal. Avoid abrupt and jerky motions, as they can detract from the seamless stabilization achieved by the gimbal, resulting in a more polished and professional-looking final product.
- Dynamic Shooting Techniques: Explore dynamic shooting techniques such as panning, tilting, and tracking to leverage the full range of motion offered by the stabilization gimbal. Experiment with creative camera movements to add depth and visual interest to your footage.
- Environmental Awareness: Be mindful of your filming environment and anticipate potential obstacles or disturbances. By staying attuned to your surroundings, you can proactively adapt your shooting style to maximize the gimbal’s stability in challenging conditions.
- Battery Management: Prioritize battery management to ensure uninterrupted filming sessions. Carry spare batteries or a portable charger to mitigate any disruptions due to power depletion, allowing you to capture footage without compromise.
- Post-Processing Considerations: While the stabilization gimbal mitigates most unwanted movements during filming, consider additional post-processing techniques to further enhance the visual quality of your footage. Software-based stabilization and color grading can elevate the final output to professional standards.
- Practice and Experimentation: Dedicate time to practice using the stabilization gimbal in various shooting scenarios. Experiment with different movements and filming techniques to familiarize yourself with the gimbal’s capabilities and unleash your creativity.
By incorporating these tips into your filming approach, you’ll harness the full potential of your stabilization gimbal, elevating your action camera footage to new heights of stability and visual impact. Embrace the versatility and precision offered by the gimbal to capture compelling and immersive content across a wide spectrum of filming environments and subjects.
Conclusion
Congratulations on completing this comprehensive guide to building and utilizing a stabilization gimbal for your action camera. Through the exploration of stabilization gimbal principles, essential components, construction steps, testing and calibration procedures, and practical tips, you’ve gained valuable insights into the world of DIY stabilization technology. By leveraging this knowledge, you’re well-equipped to embark on an exciting journey of capturing smooth, professional-grade footage in a variety of dynamic filming environments.
The process of constructing a stabilization gimbal offers a rewarding blend of technical expertise, creativity, and hands-on innovation. By carefully assembling the essential components and fine-tuning the gimbal’s performance through rigorous testing and calibration, you’ve taken a significant step towards enhancing the visual quality and impact of your action camera footage.
As you venture into the realm of action camera videography with your newly constructed stabilization gimbal, remember to embrace smooth and deliberate movements, explore dynamic shooting techniques, and prioritize environmental awareness to maximize the gimbal’s stability. Additionally, maintaining battery management and considering post-processing enhancements can further elevate the visual appeal of your footage, ensuring a professional and polished final product.
Ultimately, the DIY approach to building and utilizing a stabilization gimbal empowers you to customize and optimize the device to suit your specific filming style and creative vision. Embrace the versatility and precision offered by the gimbal to capture compelling and immersive content, elevating your action camera footage to new heights of stability and visual impact.
With the knowledge and skills acquired from this guide, you’re poised to unleash the full potential of your action camera and embark on captivating filming adventures, capturing smooth and professional-looking footage that captivates audiences and brings your creative vision to life.


