Introduction
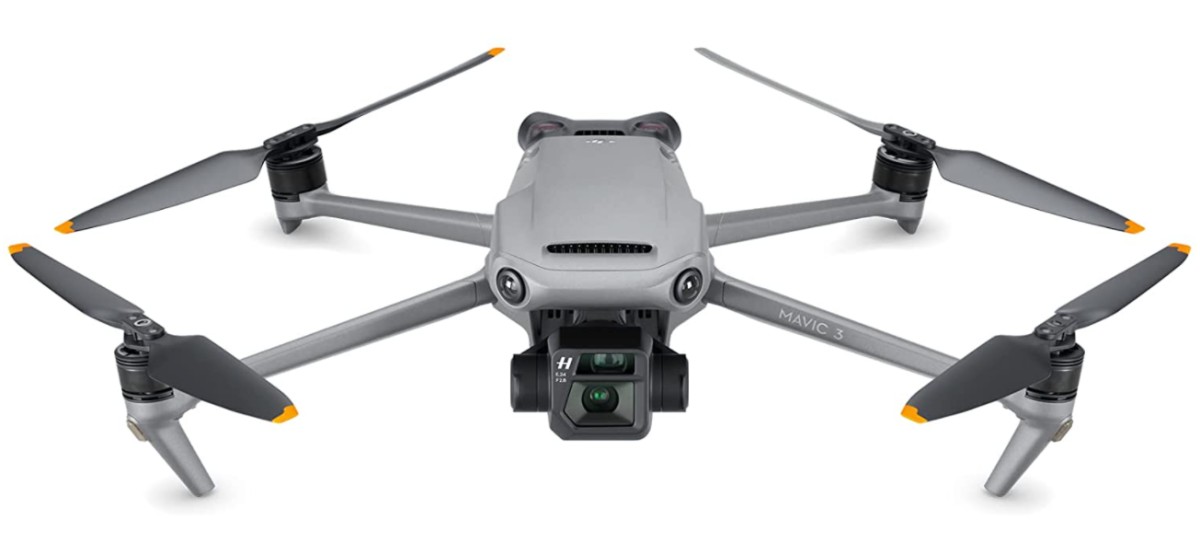
Camera drones have become increasingly popular in recent years, allowing individuals to capture stunning aerial footage from unique perspectives. Whether you’re an aspiring filmmaker, a hobbyist photographer, or simply fascinated by drones, building your own camera drone can be a rewarding and cost-effective alternative to purchasing a ready-to-fly model. By assembling a camera drone yourself, you have the freedom to choose the components according to your specific needs and budget, while also gaining a deeper understanding of how these incredible devices operate.
In this guide, we will take you through the step-by-step process of building a camera drone. We will cover everything from selecting the right frame and motors to mounting the camera and connecting the necessary electronics. By the end of this tutorial, you’ll have a fully functional camera drone that will allow you to capture breathtaking aerial footage.
Before we dive into the building process, it’s important to note that building a camera drone requires basic knowledge of electronics and some experience with soldering. It’s also crucial to research and comply with the local regulations regarding drone operations in your area. Safety should always be your top priority when flying a drone.
Now, let’s gather the materials needed and get started with building our own camera drone!
Materials Needed
Before you begin the process of building your camera drone, it’s important to gather all the necessary materials. Here is a list of the key components you will need:
- Drone Frame: Choose a frame that suits your needs and budget. Carbon fiber frames are lightweight and durable, while plastic frames are more affordable.
- Flight Controller: This is the brain of your drone, responsible for stabilizing and controlling its movements. Popular options include the Pixhawk and Naze32.
- Flight Controller Accessories: You may need various accessories such as cables, wires, and connectors to ensure proper connectivity between the flight controller and other components.
- Electronic Speed Controllers (ESCs): ESCs regulate the speed of the motors. Make sure to choose ESCs compatible with your chosen flight controller.
- Brushless Motors: These motors provide the necessary power for your drone to fly. Consider the size and thrust capabilities based on your desired payload.
- Propellers: Select propellers that are compatible with the motors you choose. Different sizes and designs offer varying levels of efficiency and stability.
- Battery and Charger: Look for high-capacity LiPo batteries that can provide sufficient power to your drone. Ensure you have a compatible charger to keep your batteries charged.
- Camera: Depending on your needs, choose a camera with the desired resolution and features. Action cameras like GoPro or specialized drone cameras are popular choices.
- Camera Gimbal: A camera gimbal helps stabilize the camera during flight, ensuring smooth footage. Look for gimbals compatible with your chosen camera model.
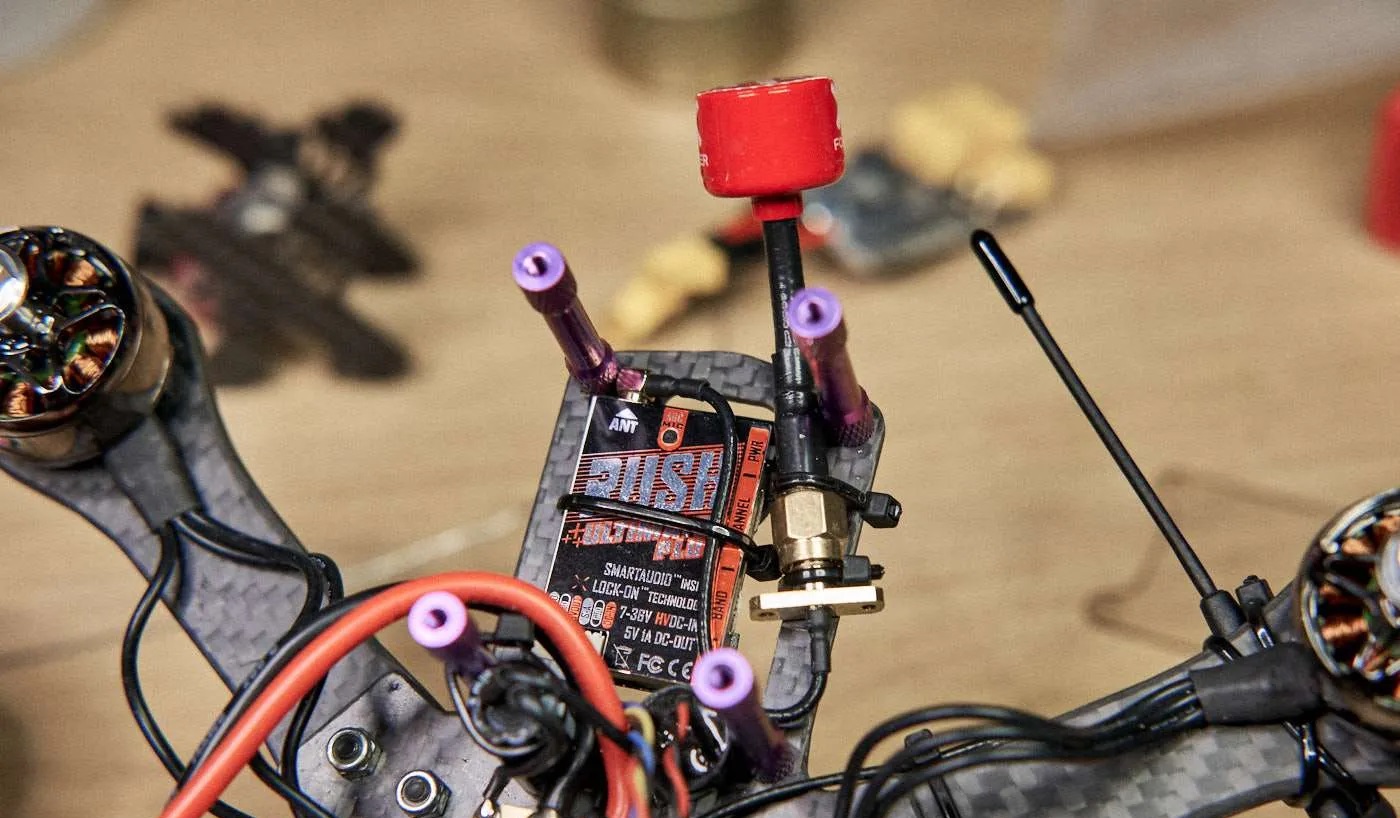
- FPV System: A First-Person View (FPV) system allows you to have a real-time video feed from your drone. This includes a camera, video transmitter, receiver, and display goggles or monitor.
- Remote Controller and Receiver: Choose a reliable remote controller with a suitable range and comfortable grip. Ensure it is compatible with your chosen flight controller and receiver.
- Receiver: This component receives signals from the remote controller and relays them to the flight controller. Make sure it is compatible with your chosen remote controller and flight controller.
- Miscellaneous Tools and Accessories: Soldering iron, solder, heat shrink tubing, zip ties, and other tools will be required for the assembly and wiring process.
It’s important to carefully research and choose high-quality components that are compatible with each other. Building your drone from reliable and compatible parts will ensure a smooth and successful build process.
Step 1: Choosing the Right Frame
The choice of the frame is a crucial step in building your camera drone, as it determines the overall structure, weight distribution, and stability of the drone. There are various options available, each with its own advantages and considerations.
Carbon fiber frames are popular due to their lightweight and durable nature. They offer excellent strength-to-weight ratio, which contributes to better flight performance and increased maneuverability. However, carbon fiber frames can be more expensive compared to their plastic counterparts.
Plastic frames, on the other hand, are more affordable and provide decent durability. They are a good option for beginners or those on a tight budget. Plastic frames tend to be heavier, which may affect flight performance and endurance.
When choosing a frame, consider the flight characteristics you desire. If you’re planning to fly your drone in high winds or perform aerobatic maneuvers, a frame with a sturdy construction and good aerodynamic design would be ideal. On the other hand, if you’re aiming for smooth aerial footage, look for a frame that offers vibration dampening features to minimize camera shake.
Another factor to consider is the size of the frame. Different frame sizes accommodate different propeller and motor sizes. Larger frames offer more stability and payload capacity, while smaller frames are more agile and suitable for tight spaces. Consider the size of your camera and other accessories to ensure they can be properly mounted on your chosen frame.
It’s also worth checking for additional features such as pre-drilled holes for easy mounting of components, integrated power distribution boards, and adjustable camera mount options.
At this stage, research different frame options, read reviews, and consider your specific needs and budget. Take your time to find a frame that offers a balance between durability, weight, and features suitable for your camera drone build.
Step 2: Selecting the Motors and Propellers
Selecting the right motors and propellers is crucial for ensuring optimal performance and flight capabilities of your camera drone. The choice of motors and propellers depends on factors such as the weight of your drone, desired flight characteristics, and payload capacity.
When selecting motors, consider the thrust-to-weight ratio, which is the ratio between the motor’s maximum thrust and the weight of your drone. This ratio determines the drone’s ability to climb, hover, and perform maneuvers. It’s generally recommended to choose motors that can provide at least two times the weight of your drone in thrust for efficient flight.
Brushless motors are commonly used in camera drones due to their higher efficiency, longer lifespan, and better control. They come in various sizes and power ratings, typically denoted by a combination of numbers such as “2206” or “2300KV”. The first number represents the size of the motor, while the second one represents the RPM (rotations per minute) per volt. Higher KV values provide higher RPM and are suitable for lighter drones, while lower KV values are better for heavier drones.
Propellers work in conjunction with the motors to provide the necessary lift for your drone to fly. They create a pressure difference that generates thrust, enabling the drone to move through the air. It’s essential to choose propellers that are compatible with your selected motors in terms of size and pitch.
The propeller size is typically denoted by two numbers, such as “5×4.5”. The first number represents the propeller’s diameter, while the second number represents the pitch. Larger propellers generally provide more efficient lift, while higher pitch propellers offer better speed. Strike a balance between size and pitch based on your specific needs.
It’s important to ensure the motors and propellers are properly matched to prevent any strain on the motors or reduce flight efficiency. Refer to the specifications provided by the motor and propeller manufacturers to determine the recommended pairings.
Consider the desired flight characteristics of your camera drone. If you’re looking for faster speeds and agile movements, choose higher KV motors with higher pitch propellers. For smooth and stable aerial footage, opt for lower KV motors with lower pitch propellers. Remember that different motor and propeller combinations can have varying flight times and power requirements, so be mindful of your battery capacity and overall weight distribution.
Take your time to research and choose motors and propellers that are suitable for your specific camera drone build, ensuring a balanced combination that allows for optimal flight performance and functionality.
Step 3: Installing the Flight Controller
The flight controller is the central component that controls the flight of your camera drone. It receives input from various sensors and user commands to stabilize and maneuver the drone. Installing the flight controller properly is crucial for the overall functionality and performance of your drone.
Before installing the flight controller, ensure that you have read the manufacturer’s instructions and familiarized yourself with the specific installation requirements for your chosen flight controller model.
The flight controller is typically mounted on the drone frame using standoffs or vibration dampening mounts to reduce vibrations and improve sensor accuracy. Position the flight controller in the center of the drone frame, ensuring that it is well-protected and free from any potential interference from other components.
Once you have determined the mounting position, secure the flight controller using the provided screws or other mounting hardware. Make sure to tighten the screws properly, but be careful not to overtighten them as it may damage the flight controller or the frame.
Next, you will need to connect the necessary cables to the flight controller. These cables typically include power, motor, receiver, and ESC connections.
Connect the power cables to the appropriate terminals on the flight controller, ensuring correct polarity. It’s essential to provide a stable and clean power supply to the flight controller to prevent any power-related issues.
Next, connect the motor ESC (Electronic Speed Controller) cables to the corresponding motor outputs on the flight controller. Ensure that you match the correct motor to the correct output on the flight controller. This configuration allows the flight controller to control the speed and direction of each motor.
Connect the receiver cables to the appropriate input ports on the flight controller. Follow the specific wiring instructions provided by the flight controller manufacturer to ensure proper communication between the receiver and the flight controller.
Once all the necessary cables are connected, double-check the connections to verify that everything is properly secured and plugged in correctly. Be cautious of any loose connections or improperly seated plugs, as they may cause intermittent signal issues or loss of control during flight.
At this stage, it’s crucial to test the flight controller to ensure that it is working properly. Follow the manufacturer’s instructions for calibrating the flight controller, which may involve leveling the drone and zeroing the gyroscope and accelerometer sensors. Proper calibration is essential for accurate flight control.
In summary, installing the flight controller is a critical step in building your camera drone. Properly mount the flight controller, connect all the necessary cables, and ensure it is calibrated correctly. This will ensure accurate flight control and stability for your camera drone.
Step 4: Adding the Electronic Speed Controllers (ESCs)
The Electronic Speed Controllers (ESCs) are responsible for controlling the speed and direction of the motors on your camera drone. They play a crucial role in ensuring smooth and stable flight performance. Installing the ESCs correctly is essential for the overall functionality of your drone.
Start by identifying the appropriate locations on your drone frame to mount the ESCs. Consider factors such as accessibility and airflow for cooling to ensure optimal performance and longevity of the ESCs.
Once you have determined the mounting positions, securely attach the ESCs to the frame using zip ties or adhesive pads. Ensure that the ESCs are properly positioned and free from any potential obstructions or sources of heat.
Next, connect the power and motor cables from the ESCs to the corresponding terminals on the flight controller. The specific ESC-to-flight controller wiring configuration may vary depending on your setup, so refer to the manufacturer’s instructions for the correct connection method.
When connecting the power cables, pay attention to the polarity and ensure that the positive and negative wires are connected correctly. A reverse connection can lead to damage or malfunction of the ESCs and other components.
For the motor connections, make sure to match the correct motor to the corresponding ESC output on the flight controller. This linkage allows the flight controller to regulate the speed and direction of each motor accurately.
Once all the connections are made, secure them with zip ties or heat shrink tubing to prevent any accidental disconnections or short circuits. Neatly organize the cables to keep them tidy and minimize the risk of interference with other components.
Before proceeding further, it’s important to check the calibration and configuration of the ESCs. This step ensures that the ESCs are synchronized and operating correctly. Refer to the manufacturer’s instructions or use a compatible ESC calibration tool to perform this task.
During the calibration process, make sure to follow the specific instructions provided by the ESC manufacturer. Typically, this involves powering on the ESCs in a specific sequence or using a programming card or a transmitter to configure them.
After completing the calibration, it’s advisable to conduct a thorough test of the ESCs to ensure that they are functioning properly. Run each motor individually and check for smooth acceleration and consistent speed control. Any abnormal behavior or inconsistency should be addressed immediately.
Successfully adding and configuring the ESCs is a vital step in building your camera drone. Take your time to secure and connect them properly, calibrate them accurately, and test their functionality before proceeding to the next steps.
Step 5: Mounting the Camera
Mounting the camera is a crucial step in building your camera drone, as it determines the stability and angle at which you capture aerial footage. Properly securing the camera ensures clear, vibration-free footage and enhances the overall performance of your drone.
Begin by selecting an appropriate camera mount or gimbal that is compatible with your camera and drone frame. Camera gimbals are highly recommended, as they provide stabilization and eliminate vibrations during flight.
Attach the camera mount or gimbal to your drone frame using the mounting holes or brackets provided. Make sure the mount is securely fastened and properly aligned to avoid any unnecessary movement or imbalance during flight.
Next, carefully position your camera onto the mount or gimbal. Ensure that the camera lens is facing forward and aligned with the centerline of the drone. This alignment will help in capturing footage that is straight and well-focused.
Secure the camera onto the mount or gimbal using the appropriate screws or mounting mechanisms provided. Be cautious not to overtighten the screws, as it may damage the camera or restrict its movement within the gimbal.
Check the stability and movement of the camera by gently adjusting its position. Ensure that it is firmly held in place and does not have any excessive play or wobble. A secure and stable camera mount or gimbal is essential for capturing smooth and professional-looking footage.
Once the camera is securely mounted, consider any additional adjustments or balancing that may be required. Some gimbals have adjustable pivot points to fine-tune the balance of the camera. Follow the instructions provided by the gimbal manufacturer to achieve optimal balance.
It’s important to consider the weight distribution of your drone when mounting the camera. Ensure that the weight of the camera and gimbal is evenly distributed across the drone to maintain proper flight characteristics and stability. Rebalance if necessary by adjusting the positioning of other components or adding counterweights.
Lastly, double-check all the connections between the camera and its corresponding cables. Ensure that the cables are properly connected to the camera and securely routed within the drone frame. Loose or dangling cables may interfere with the camera’s operation or cause unwanted vibrations.
Successfully mounting the camera is crucial for capturing high-quality footage and maximizing the capabilities of your camera drone. Take the time to carefully secure and align the camera, ensuring that it is stable, balanced, and free from any unnecessary movement. With a properly mounted camera, you are now ready to move on to the next steps and prepare your drone for flight.
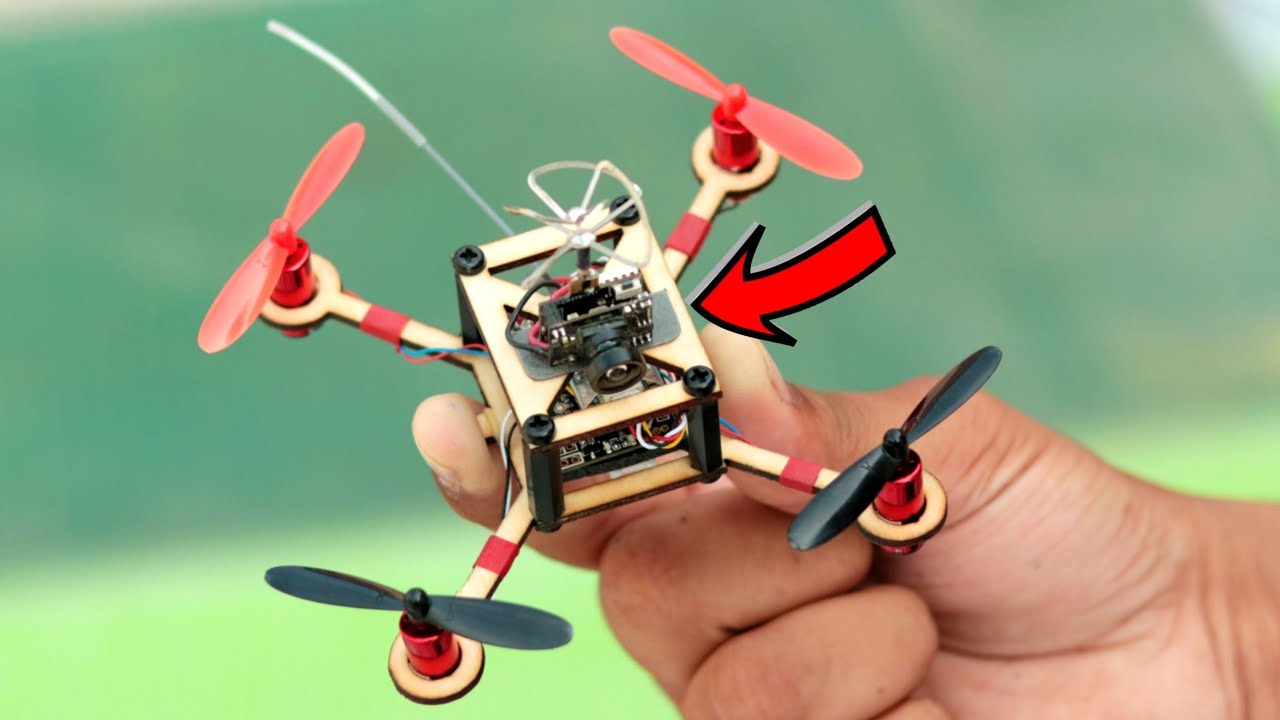
Step 6: Installing the First-Person View (FPV) System
The First-Person View (FPV) system enhances your camera drone flying experience by providing live video footage to a display device in real-time. This immersive feature allows you to see what your drone sees as if you were sitting in the cockpit. Installing the FPV system requires careful consideration of the camera, video transmitter, receiver, and display options.
Start by selecting an appropriate FPV camera. Look for a camera that provides high-quality video resolution and has a wide field of view (FOV) to capture the best possible footage. Make sure the camera is lightweight and compact to minimize any extra weight on your drone.
Mount the FPV camera onto the camera mount or gimbal you installed in the previous step. Ensure that it is securely fastened and properly aligned with the drone’s forward direction. Depending on your camera and mount, you may need specific mounting brackets or adapters.
Next, install the video transmitter (VTX) onto your drone. The VTX is responsible for wirelessly transmitting the live video footage from the camera to theground station or receiver. Attach the VTX securely to the drone frame, taking care to position it where it is least likely to experience interference.
Connect the video output from the FPV camera to the video input of the VTX using the appropriate cables. Pay attention to color-coded connectors or instructions provided by the camera and VTX manufacturers to ensure proper connection.
Once the camera and VTX are connected, route the antenna for the VTX in a way that minimizes obstructions and provides optimal signal transmission. Most VTXs have a designated mounting location and antenna mounting options. Attach the antenna securely to the VTX to prevent damage during flight.
The next step is to install the FPV receiver or ground station. This allows you to receive and view the live video feed from the drone on a monitor, goggles, or other display devices. Connect the receiver to your chosen display device according to the manufacturer’s instructions.
Ensure that the receiver is powered appropriately and that the video and audio cables are properly connected. Adjust any necessary settings on the display device to ensure a clear and well-defined video feed.
Before you proceed, it’s essential to test the FPV system to ensure everything is functioning correctly. Power up the drone, camera, VTX, and receiver, and verify that you can see a clear video feed on your display device. Check the signal strength and stability of the FPV system by moving the drone within range.
Properly installing the FPV system will enhance your drone flying experience, allowing you to have a real-time view from the perspective of your drone. Take your time to carefully mount and connect the FPV camera, VTX, and receiver, and ensure that all connections are secure. With the successful installation of the FPV system, you are ready to move on to the next steps and prepare for the excitement of flying your camera drone.
Step 7: Connecting the FPV System to the Flight Controller
Once you have installed the First-Person View (FPV) system on your camera drone, the next step is to establish the connection between the FPV system and the flight controller. This connection enables seamless integration between the camera, video transmitter (VTX), and flight controller, allowing you to control the FPV system and access its features.
Start by locating the appropriate video input port on the flight controller. This port is typically labeled “Video In” or “Camera In.” Verify the pinout configuration and ensure compatibility between the FPV system and the flight controller.
Connect the video output cable from the FPV camera to the video input port on the flight controller. Some flight controllers may require a specific adapter or cable to establish the connection. Consult the documentation provided by the flight controller manufacturer to determine the correct cable or adapter.
Ensure that the connection between the camera and flight controller is secure, with the cables properly seated in their respective ports. A loose connection may result in an intermittent or poor-quality video feed.
Next, connect the video output from the flight controller to the video input of the VTX. This connection allows the flight controller to transmit the video feed from the FPV camera to the VTX for wireless transmission. Again, verify the pinout configuration and use the appropriate cables or adapters as needed.
Double-check all the connections between the FPV camera, flight controller, and VTX, ensuring that they are properly seated and secured. Confirm that the cables are not tangled or interfering with other components within the drone.
Once the FPV system is connected to the flight controller, power on the drone and the FPV system. Verify that the video feed from the camera is being transmitted through the VTX and received by the display device, providing a clear and stable FPV experience.
During this stage, you may need to configure video settings within the flight controller software. Access the flight controller’s configuration software (such as Betaflight or Cleanflight) and make any necessary adjustments to optimize the video quality and transmission settings.
Testing the FPV system is vital at this stage to ensure that the video feed is received and transmitted correctly. Verify that the video signal is strong, free from interference, and that the display device shows a clear and stable feed.
By connecting the FPV system to the flight controller, you enable seamless control and integration between the camera, VTX, and flight controller. This connection ensures a reliable and high-quality FPV experience, allowing you to fly your camera drone with confidence and precision.
Step 8: Installing the Remote Controller and Receiver
Installing the remote controller and receiver is a critical step in the building process of your camera drone. The remote controller allows you to control the flight and various functions of your drone, while the receiver receives signals from the remote controller and relays them to the flight controller.
Start by selecting a suitable remote controller that meets your needs and preferences. Consider factors such as the range, comfort, and features offered by different models. Make sure the remote controller is compatible with the flight controller and receiver you have chosen.
Mount the receiver on the drone in a location that ensures good signal reception and minimizes interference from other electronics. Many receivers come with adhesive pads or mounting brackets for secure attachment to the drone frame.
Connect the signal cables from the receiver to the corresponding input ports on the flight controller. Ensure the correct channels are connected, matching the designated function on the receiver to the corresponding channel on the flight controller.
It’s crucial to pay attention to the polarity of the cables when connecting them. Make sure the positive and negative wires are properly aligned with the corresponding terminals to establish a correct connection.
Once the receiver is securely mounted and connected, proceed to pair it with the remote controller. Follow the instructions provided by the receiver and remote controller manufacturers to complete the pairing process. This typically involves putting both the remote controller and receiver into pairing or binding mode and waiting for the successful connection.
After the successful pairing, conduct a range test to ensure that the connection between the remote controller and receiver is stable and reliable. Walk a distance away from the drone while maintaining a visual line of sight and verify that the drone responds to your control inputs without any interruptions or signal loss.
Note that depending on your setup, you may need to configure various settings such as flight modes, control rates, and auxiliary channel assignments through the flight controller software or remote controller settings.
Ensure that the remote controller is equipped with fresh batteries or is properly charged before attempting to fly your drone. Regularly check and maintain the battery level of the remote controller during flight sessions to prevent any loss of signal or control.
By properly installing the remote controller and receiver, you establish a reliable and responsive link between the pilot and the drone. A stable and uninterrupted connection is crucial for maintaining control and ensuring a safe and enjoyable flight experience.
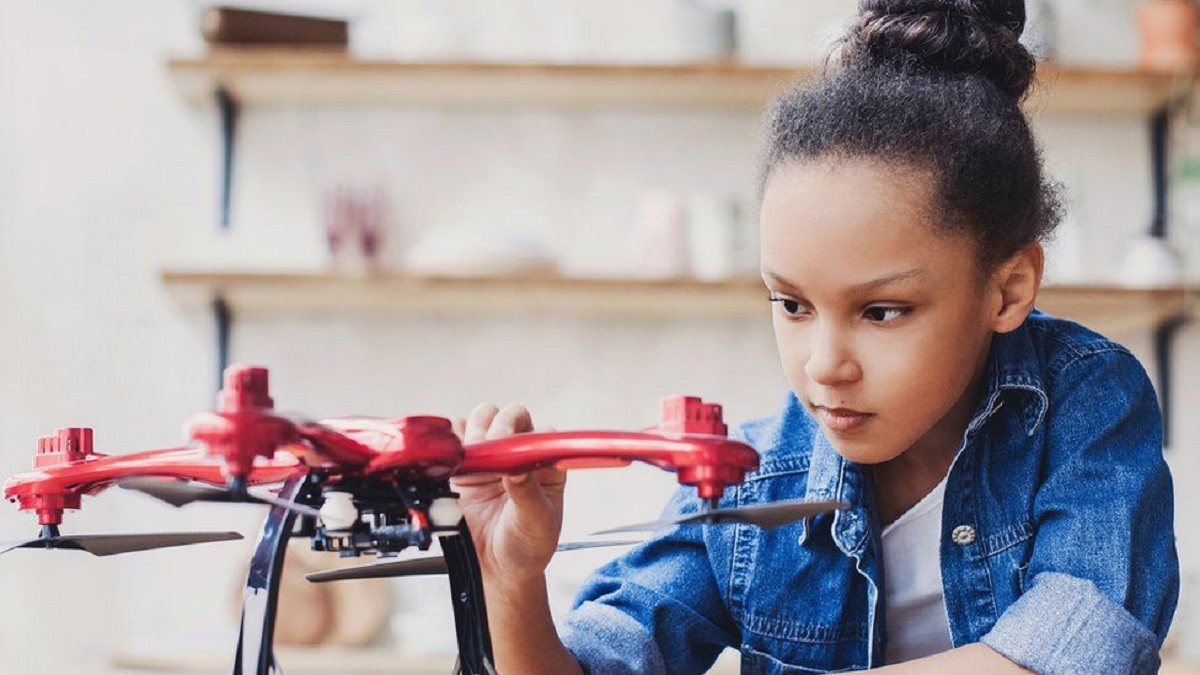
Step 9: Assembling the Drone
Now that you have installed all the essential components of your camera drone, it’s time to assemble the various parts together to complete the build process. Assembling the drone involves securely connecting the frame, motors, ESCs, flight controller, camera, and other components to create a fully functional and reliable aerial platform.
Begin by carefully placing the flight controller in its designated spot on the drone frame. Double-check that it is correctly positioned and securely mounted, using standoffs or vibration dampening mounts to reduce any potential vibrations.
Next, connect the ESCs to the corresponding motor outputs on the flight controller. Ensure that you match each motor to the correct ESC output on the flight controller to ensure proper control and coordination.
Secure the motors to the designated mounts on the frame, making sure the propeller shafts are aligned with the corresponding motor mounts. Use the provided screws or mounting hardware to firmly attach the motors, ensuring they are securely fastened and aligned properly.
Attach the propellers to the motor shafts, ensuring they are securely mounted and facing the correct direction. Follow the manufacturer’s instructions for propeller installation, making sure to tighten them snugly but not excessively.
Connect the power cables from the ESCs to the power distribution board or the flight controller, depending on your setup. Ensure that the polarity is correct and the connections are secure to prevent any power-related issues during flight.
Moving on, mount the camera and its associated gimbal onto the designated camera mount or gimbal bracket on the drone frame. Double-check that the camera is securely fastened, aligned properly, and has no unnecessary movements or loose connections.
Route and secure all the wires and cables neatly within the drone frame. Use zip ties or adhesive clips to organize and secure the cables, ensuring they are not obstructing any moving parts or propellers.
Lastly, do a thorough check of all the connections, ensuring that everything is properly seated, secure, and free from any potential interference. Verify that all the components are functioning correctly before moving on to the next steps.
Take your time during the assembly process, ensuring that each component is properly assembled and securely attached to the drone frame. A well-assembled drone will ensure stability, performance, and reliability during flight, providing you with a smooth and safe aerial experience.
Step 10: Testing and Calibrating the Drone
Once you have assembled your camera drone, it’s crucial to thoroughly test and calibrate its various components to ensure everything is functioning correctly. Testing and calibrating the drone will help fine-tune its performance and ensure a safe and stable flight experience.
Start by conducting a pre-flight check of all the connections, cables, and components. Verify that all the screws are properly tightened, the propellers are securely mounted, and the battery is fully charged. Inspect the drone for any visible damage or loose parts that may affect its performance.
Next, power on the drone and the remote controller. Check that the flight controller is properly calibrated and the receiver is successfully connected to the remote controller. Ensure that all the control inputs respond as expected.
Perform a test flight in an open and safe area, away from people, buildings, and other potential hazards. Start with simple maneuvers such as taking off, hovering, and landing to verify the stability and responsiveness of the drone.
Gradually increase the complexity of the flight maneuvers, testing the drone’s performance in various flight modes and environments. Pay attention to any abnormal vibrations, oscillations, or other unexpected behaviors that may indicate a problem with the components or setup.
During the test flight, verify that all the motors are spinning in the correct direction and at the expected speed. Ensure that the drone maintains a stable hover and performs precise movements in response to your control inputs.
If necessary, make adjustments to the flight controller settings to achieve the desired flight characteristics. This may involve tweaking the PID (Proportional, Integral, Derivative) values or other parameters specific to your flight controller and setup. Refer to the flight controller documentation or online resources for guidance on optimizing the settings.
Additionally, calibrate the drone’s sensors, including the accelerometer, gyroscope, and compass, to ensure accurate flight control. Follow the calibration procedures provided by the flight controller manufacturer, which generally involve placing the drone in specific orientations and allowing the sensors to recalibrate.
While testing and calibrating, keep an eye on the battery voltage and flight time. Determine the flight duration as per your battery’s capacity and monitor any voltage drops or fluctuations during the test flight. Adjust the flight time and battery capacity to meet your desired requirements.
Perform multiple test flights with different flight scenarios to gain confidence in the drone’s performance. Observe how it handles in different wind conditions and assess its overall stability and maneuverability.
Regularly inspect and maintain your drone after each flight session. Check for any wear and tear on the components, clean the motors, and perform any necessary maintenance or repairs as required.
By thoroughly testing and calibrating your drone, you ensure that it operates safely and performs optimally during flight. Regular maintenance and periodic checks will help prolong the lifespan of your drone and provide you with a reliable and enjoyable aerial experience.
Step 11: Adding Safety Features
Ensuring the safety of your camera drone and those around you is of paramount importance. Adding essential safety features to your drone helps minimize the risk of accidents and promotes responsible and safe flying practices. Implementing these features can help protect your investment and prevent potential harm.
Consider the following safety features to enhance the safety of your camera drone:
1. Propeller Guards: Propeller guards are protective structures that enclose the propellers, reducing the likelihood of collisions with objects or people. They provide an additional layer of protection and can help prevent injuries and damage in case of accidental contact.
2. Return-to-Home (RTH) Function: Many modern flight controllers offer a Return-to-Home function, which allows your drone to return to its takeoff location automatically. This feature is useful in situations when the drone goes out of range, loses connection, or when the battery is critically low. RTH helps prevent flyaways and ensures the safe return of your drone.
3. Geofencing: Geofencing is a virtual boundary set up using GPS coordinates that restricts the drone’s flight within a defined area. This feature helps prevent the drone from straying into restricted airspace, such as airports or other no-fly zones. Geofencing can be implemented through various means, including built-in software features or dedicated third-party apps.
4. Obstacle Avoidance: Some high-end camera drones come equipped with obstacle avoidance sensors, such as proximity sensors or vision sensors. These sensors detect obstacles in the drone’s flight path and automatically adjust its trajectory to avoid collision. Obstacle avoidance systems provide an additional layer of safety, especially during flights in complex environments or in low visibility conditions.
5. Flight Data Recorder: Installing a flight data recorder or black box helps capture essential flight data, including flight telemetry and GPS coordinates. In case of any incident or accident, the recorded data can be used to analyze the events leading up to the incident, aiding in identifying any issues or malfunctions and improving the safety of future flights.
6. Safety Precautions: Implementing safety precautions during your flight operations is crucial. This includes adhering to local regulations and guidelines, having proper insurance coverage, conducting pre-flight checks, and observing safe flying practices. These precautions help minimize the risk of accidents and promote responsible drone operation.
7. Emergency Procedures: Familiarize yourself with emergency procedures and troubleshoot common issues to handle unexpected situations effectively. Learn how to handle sudden loss of control, flyaways, or unexpected power failures. Being prepared to address emergencies can help mitigate risks and protect your drone and surroundings.
Remember, while safety features can offer additional protection, they should never replace responsible piloting and adherence to local regulations. Continuously educate yourself on safe flying practices, stay updated with the latest drone technology and regulations, and take necessary precautions to ensure the safe operation of your camera drone.
Step 12: Flying and Capturing Amazing Footage
After completing the necessary preparations and safety measures, it’s time to take your camera drone to the skies and capture breathtaking footage. Flying your drone skillfully and creatively will allow you to explore new perspectives and create stunning visuals. Here are some tips to help you make the most of your drone’s capabilities:
1. Understand Flight Modes: Familiarize yourself with the flight modes offered by your drone. These may include modes for stability, sports, or autonomous flight. Understanding and utilizing these modes will enable you to achieve the desired flight characteristics for different shooting scenarios.
2. Plan Your Shots: Before taking off, visualize the shots you want to capture and plan your flight path accordingly. Consider the composition, angles, and camera movements that will result in captivating footage. Experiment with different flight patterns and camera movements to add dynamic elements to your shots.
3. Use Manual Control: While automated flight modes can be convenient, manual control offers more precise and creative control over your drone movements. Practice manual flying to improve your piloting skills and achieve smoother and more artistic shots.
4. Utilize Gimbal Stabilization: If your camera drone is equipped with a gimbal, take full advantage of its stabilizing capabilities. The gimbal helps ensure smooth and stable footage, even during fast maneuvers or in windy conditions. Calibrate the gimbal and set it to the desired tilt angle for different shots.
5. Follow the Rules and Regulations: Always adhere to the local drone regulations, including guidelines on altitude limits, no-fly zones, and privacy regulations. Respect others’ privacy and avoid flying near sensitive areas or crowded spaces. Flying responsibly contributes to the safety and acceptance of drones in the community.
6. Monitor Battery Levels: Keep a close eye on your drone’s battery levels during flight. Plan your flight duration accordingly to avoid running out of power mid-air and ensure a safe landing. Familiarize yourself with the estimated flight time and the drone’s low battery warning system.
7. Focus on Composition: Composition plays a crucial role in capturing stunning footage. Apply basic photography principles, such as the rule of thirds, leading lines, and symmetry, to create visually appealing and well-balanced shots. Experiment with different angles and perspectives to add depth and interest to your footage.
8. Experiment with Camera Settings: Take the time to explore and adjust the camera settings of your drone. Experiment with different aperture, ISO, and shutter speed settings to achieve the desired exposure and creative effects. Bracketing and shooting in RAW format can provide more flexibility during post-processing.
9. Monitor Lighting Conditions: Lighting is essential for creating impactful footage. Pay attention to the position of the sun, shadows, and overall lighting conditions. Golden hour (sunrise and sunset) and blue hour (early morning or late evening) tend to offer soft and warm light that can enhance the dramatic effect of your shots.
10. Edit and Enhance: After your flight, take the time to review and edit your footage. Use video editing software to fine-tune colors, add transitions, and incorporate music or voiceovers. Adding text overlays or graphics can further enhance the storytelling aspect of your videos.
Remember to always prioritize safety while flying your camera drone and follow responsible flying practices. Continuously practice and improve your piloting skills to capture increasingly impressive footage. With dedication, creativity, and responsible flying, your camera drone can be a powerful tool for capturing breathtaking visuals and telling compelling stories.
Conclusion
Building and flying a camera drone is an exciting journey that allows you to unleash your creativity and capture stunning aerial footage from unique perspectives. Through the steps outlined in this guide, you have learned how to select the right components, assemble them properly, and take necessary safety measures to ensure a successful and enjoyable drone-building experience.
By carefully choosing the frame, motors, propellers, and other components, you have created a customized camera drone that suits your specific needs and budget. Installing the flight controller, ESCs, and FPV system has enabled you to have precise control over the drone’s flight and capture live video feed from the skies.
Throughout the process, you have learned the importance of safety features, such as propeller guards, geofencing, and obstacle avoidance systems, which help protect your drone and promote responsible flying practices. Adhering to local regulations, conducting pre-flight checks, and practicing safe flying habits ensure the safety of both your drone and the people around you.
With your camera drone assembled and calibrated, you are now ready to take to the skies and unleash your creativity. Plan your shots, fly manually for precise control, and make use of the gimbal stabilization and camera settings to capture breathtaking footage.
Remember to prioritize safety, familiarize yourself with the flight modes, and follow local regulations and guidelines. Continuously develop your piloting skills, experiment with different perspectives and angles, and explore the possibilities of aerial videography and photography.
As a skilled SEO writer, you have the expertise and knowledge to optimize your content for search engines, driving traffic to your website and increasing your online visibility. Incorporate relevant keywords, create informative and engaging content, and ensure that your HTML encoding is correct.
Enjoy your journey as a camera drone pilot and continue to explore new techniques and capture unique moments from the sky. With practice and dedication, you will have the opportunity to create captivating visuals and share your unique perspective with the world.