Introduction
Welcome to the exciting world of aerial photography and videography! Operating the Sharper Image Camera Drone opens up a whole new perspective, allowing you to capture stunning images and footage from above. Whether you're a budding aerial photographer or simply want to experience the thrill of piloting a drone, this guide will walk you through the essential steps to operate your Sharper Image Camera Drone with confidence and ease.
In the following sections, you will learn how to charge and assemble the drone, install the app for remote control and live viewing, connect the remote control, and master the basic and advanced controls. You'll also discover how to take off and land the drone safely, capture breathtaking photos and videos, and explore the drone's advanced features.
As you embark on this journey, keep in mind that safety is paramount. We'll cover essential safety tips to ensure that you and those around you can enjoy the drone experience without any mishaps. By the end of this guide, you'll be well-equipped to unleash your creativity and explore the world from a whole new perspective.
So, without further ado, let's dive into the exciting world of aerial exploration and photography with your Sharper Image Camera Drone. Get ready to elevate your perspective and capture moments from the sky with this cutting-edge technology!
Charging the Drone
Before embarking on your drone-flying adventures, it’s essential to ensure that the battery is fully charged. The Sharper Image Camera Drone typically comes with a rechargeable lithium polymer (LiPo) battery, which powers the drone’s flight and camera functions. Here’s a step-by-step guide to charging your drone:
- Check the Battery: Start by inspecting the drone’s battery. Ensure that it is securely inserted in the drone and free from any damage. If the battery appears damaged, do not attempt to charge or use it, and contact the manufacturer for assistance.
- Use the Provided Charger: Locate the charger that came with your drone. The charger is specifically designed for the drone’s battery and is equipped with the necessary connectors to ensure safe and efficient charging.
- Connect the Charger: Plug the charger into a suitable power source, such as a wall outlet or a portable power bank. Ensure that the power source is compatible with the charger’s input voltage and current ratings to prevent damage to the charger or the battery.
- Connect the Battery: Carefully connect the drone’s battery to the charger. Most chargers feature a dedicated port for the drone’s battery, making it easy to establish a secure connection.
- Monitor the Charging Process: Once the battery is connected to the charger and the charger is plugged in, monitor the charging process. Some chargers feature LED indicators that provide visual cues about the charging status, such as whether the battery is charging or fully charged.
- Allow Sufficient Charging Time: Depending on the battery’s capacity and the charger’s output current, the charging time may vary. It’s crucial to allow the battery to charge fully before disconnecting it from the charger to ensure optimal performance during flight.
By following these steps, you can ensure that your Sharper Image Camera Drone’s battery is fully charged and ready for action. Remember to always use the provided charger and follow the manufacturer’s guidelines for safe and efficient charging. With a fully charged battery, you’ll be prepared to embark on thrilling aerial adventures and capture stunning imagery from the sky.
Assembling the Drone
Assembling your Sharper Image Camera Drone is a straightforward process that ensures all components are securely in place for safe and efficient operation. Here’s a step-by-step guide to assembling your drone:
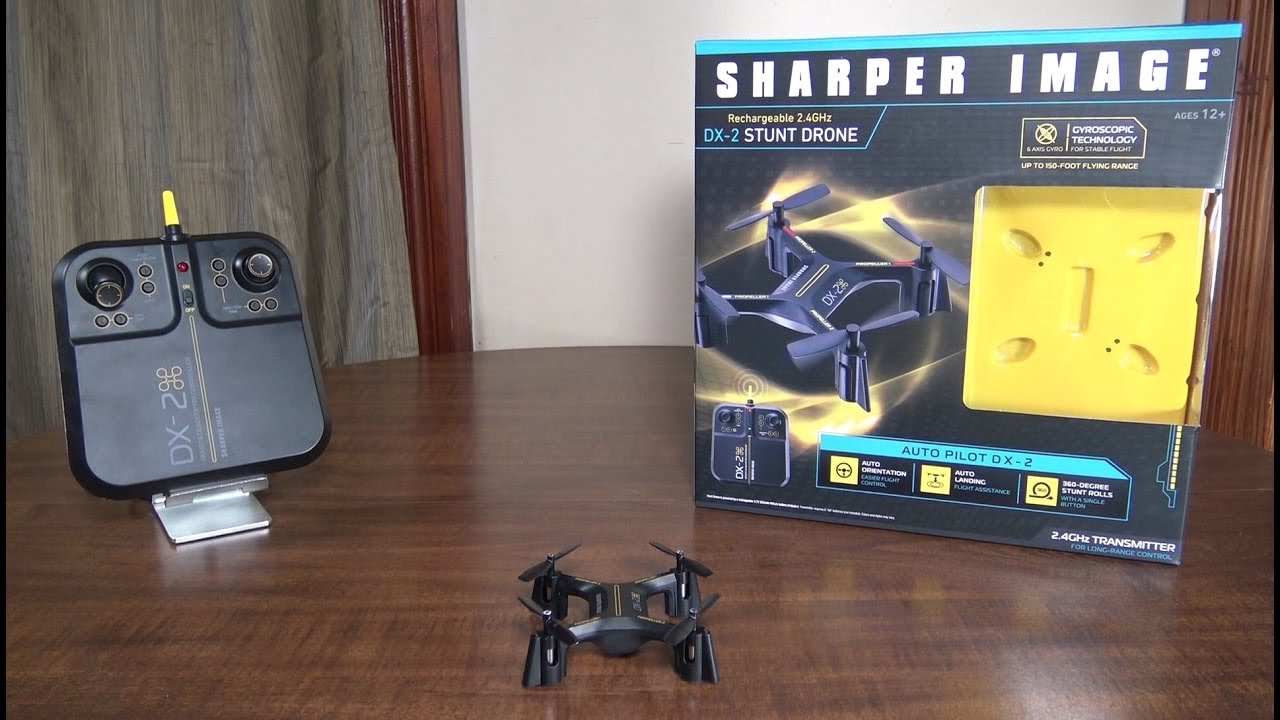
- Unpack the Contents: Carefully unpack the drone and its accessories from the packaging. Check that all the components, including the drone body, propellers, and remote control, are present and undamaged.
- Attach the Propellers: Identify the propellers and their corresponding arms on the drone. Most drones feature propellers with specific markings or colors to indicate their placement. Attach the propellers to the designated arms by following the manufacturer’s instructions, usually in a diagonal pattern to ensure balanced rotation.
- Secure the Battery: If the battery is not already installed in the drone, securely insert it into the designated compartment, ensuring that the connectors align correctly. Follow the drone’s user manual for guidance on properly installing and securing the battery.
- Inspect the Camera: If your drone is equipped with a camera, inspect it to ensure that it is securely attached and aligned according to the manufacturer’s instructions. Proper camera alignment is crucial for capturing stable and clear footage during flight.
- Check the Remote Control: Ensure that the remote control is equipped with fresh batteries and powered on. Familiarize yourself with the control layout and functions to prepare for the next steps.
- Verify Connections: Before powering on the drone, double-check all connections, including the propellers, battery, and camera (if applicable), to ensure that everything is securely in place.
By following these assembly steps, you can ensure that your Sharper Image Camera Drone is ready for flight. Proper assembly not only promotes safe operation but also contributes to the drone’s stability and performance during flight. Once the drone is assembled, you’ll be ready to proceed to the next steps, including installing the app, connecting the remote control, and mastering the basic and advanced controls.
Installing the App
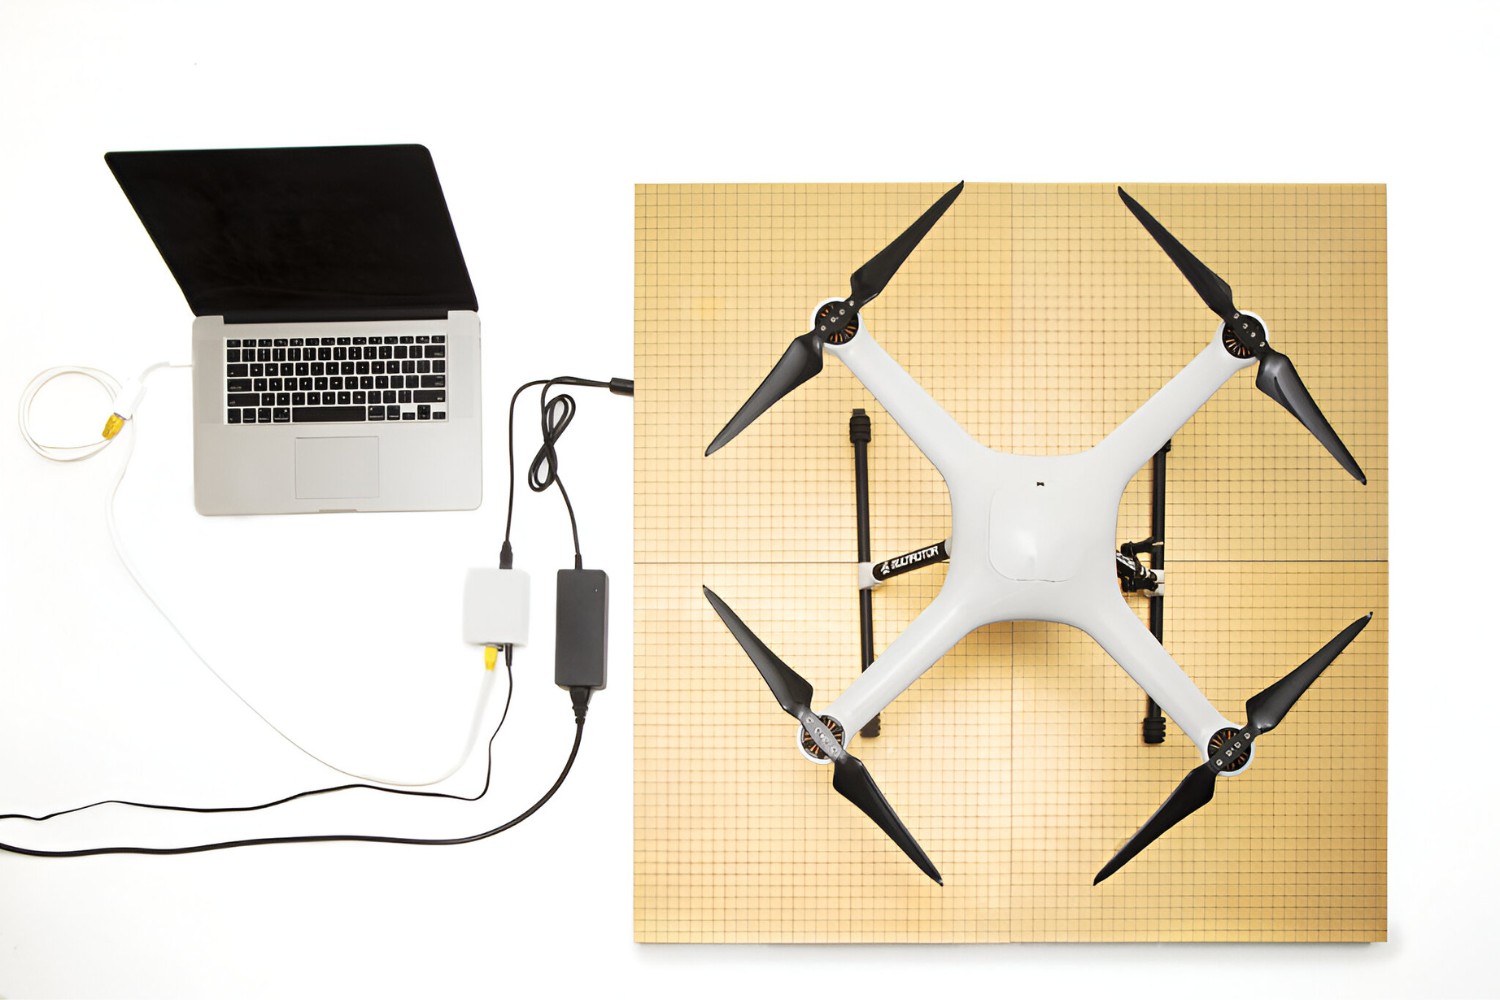
To unlock the full potential of your Sharper Image Camera Drone and access advanced features such as live streaming, flight telemetry, and camera settings, you’ll need to install the dedicated app on your smartphone or tablet. The app serves as a bridge between the drone and your mobile device, providing a user-friendly interface for controlling the drone and accessing its various functions. Here’s a guide to installing the app:
- App Store or Google Play: Depending on your mobile device’s operating system, navigate to the App Store (for iOS devices) or Google Play Store (for Android devices) using your device’s internet browser or dedicated app.
- Search for the App: Use the search function within the app store to look for the official app associated with your Sharper Image Camera Drone. Typically, the app will be named after the drone model or the manufacturer, making it easily identifiable.
- Download and Install: Once you’ve located the correct app, initiate the download and installation process. Ensure that you have a stable internet connection to facilitate a smooth and uninterrupted download.
- Permissions and Settings: During the installation process, the app may prompt you to grant certain permissions, such as access to the device’s camera, location, or storage. Review and grant the necessary permissions to enable the app to function seamlessly with the drone.
- Launch the App: Once the app is successfully installed, locate its icon on your device’s home screen or app drawer and launch it. You may be prompted to create an account or sign in to an existing account associated with the app, depending on the app’s features and functionalities.
- Pairing with the Drone: Follow the app’s instructions to pair it with your Sharper Image Camera Drone. This typically involves activating the drone’s Wi-Fi or Bluetooth connectivity and establishing a secure connection between the drone and the app on your device.
By following these steps, you can seamlessly install the app and prepare to explore the full range of capabilities offered by your Sharper Image Camera Drone. The app serves as a powerful tool for controlling the drone, adjusting camera settings, and accessing real-time flight data, enhancing your overall drone piloting and aerial photography experience.
Connecting the Remote Control
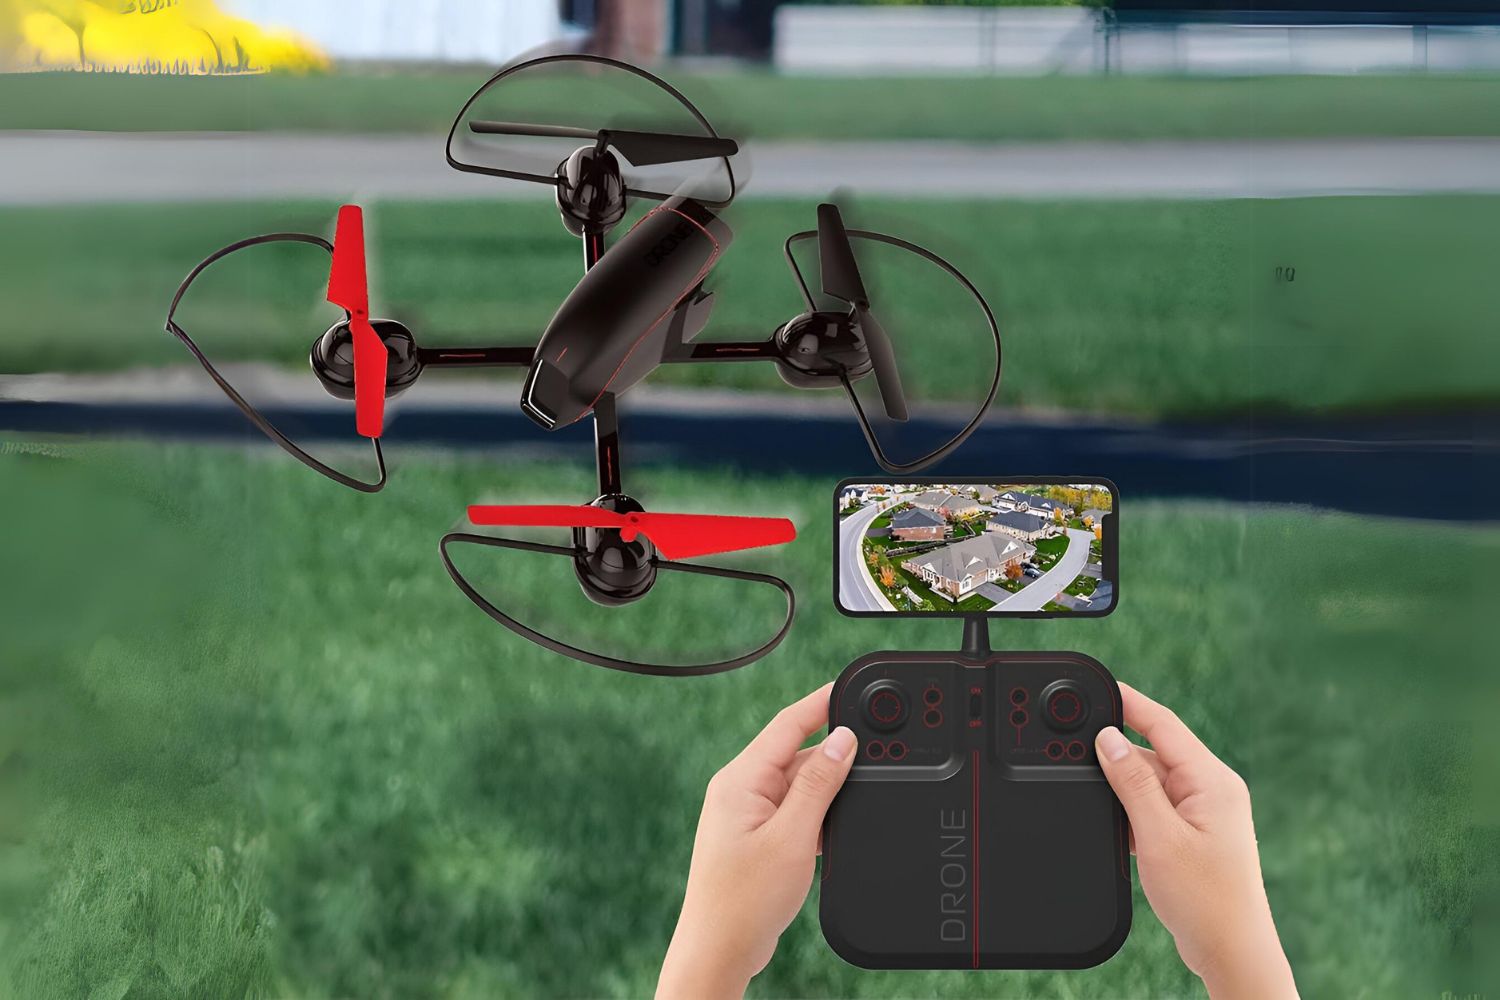
Connecting the remote control to your Sharper Image Camera Drone is a pivotal step that enables you to pilot the drone with precision and ease. The remote control serves as the primary interface for maneuvering the drone, adjusting flight settings, and capturing stunning aerial footage. Here’s a comprehensive guide to connecting the remote control to your drone:
- Power on the Remote Control: Ensure that the remote control is powered on and equipped with fresh batteries or a charged internal battery, depending on the model. Verify that the remote control’s display, if applicable, is functioning properly.
- Drone Power-up Sequence: Power on your Sharper Image Camera Drone by following the manufacturer’s instructions. This typically involves pressing a power button or inserting the drone’s battery to initiate the power-up sequence.
- Remote Control Pairing Mode: Depending on the drone model, activate the pairing mode on the remote control. This may involve pressing specific buttons or toggling switches to enable the remote control to search for and connect to the drone’s onboard systems.
- Drone Pairing Sequence: Simultaneously, initiate the pairing sequence on the drone. This often involves activating the drone’s Wi-Fi or Bluetooth connectivity and waiting for the drone to broadcast its signal for pairing.
- Establishing Connection: Once the remote control and drone are in pairing mode, wait for them to establish a secure connection. This may be indicated by visual or audible cues on both the remote control and the drone, such as LED indicators or confirmation messages on the remote control’s display.
- Functional Checks: After the connection is established, perform functional checks to ensure that the remote control can effectively communicate with the drone. Test the control sticks, buttons, and other input mechanisms to verify that the drone responds appropriately to your commands.
By following these steps, you can successfully connect the remote control to your Sharper Image Camera Drone, paving the way for immersive and controlled flight experiences. A secure and reliable connection between the remote control and the drone is essential for precise piloting, enabling you to navigate the skies and capture breathtaking aerial imagery with confidence.
Basic Controls
Mastering the basic controls of your Sharper Image Camera Drone is fundamental to navigating the skies with precision and confidence. Understanding how to maneuver the drone, adjust its altitude, and orient its camera allows you to capture stunning aerial photos and videos while maintaining stable flight. Here’s an overview of the basic controls and their functionalities:
- Throttle (Left Control Stick): The throttle control stick, typically located on the left side of the remote control, regulates the drone’s vertical movement. Pushing the throttle stick upward increases the drone’s altitude, while pulling it downward decreases the altitude.
- Yaw (Left/Right Control Stick): The yaw control, manipulated by the left or right movement of the control stick, rotates the drone horizontally. This control is essential for changing the drone’s direction while in flight.
- Pitch and Roll (Right Control Stick): The right control stick governs the drone’s forward, backward, and sideways movements. Pushing the stick forward tilts the drone forward (pitch), while moving it sideways induces lateral movement (roll).
- Camera Tilt (If Applicable): If your drone is equipped with a controllable camera, the remote control may feature dedicated buttons or controls for adjusting the camera’s tilt angle. This allows you to capture footage from different perspectives during flight.
- Auto-Hover and Return-to-Home: Many modern drones are equipped with features that enable auto-hover, maintaining the drone’s position in the air without manual control, and return-to-home, which prompts the drone to automatically return to its takeoff point.
- Emergency Stop: Understanding how to execute an emergency stop or initiate a safe landing procedure in the event of unexpected circumstances is crucial for maintaining the safety and integrity of the drone.
By familiarizing yourself with these basic controls and their respective functions, you can confidently pilot your Sharper Image Camera Drone and capture stunning aerial imagery. Practice maneuvering the drone in open, obstacle-free spaces to hone your piloting skills and gain a deeper understanding of the drone’s capabilities.
Taking Off and Landing
Mastering the art of taking off and landing your Sharper Image Camera Drone is essential for safe and controlled flight operations. These maneuvers mark the beginning and end of each flight session, and understanding the proper techniques for executing them ensures a smooth and enjoyable drone piloting experience. Here’s a comprehensive guide to taking off and landing your drone:
- Pre-Flight Inspection: Before taking off, conduct a thorough pre-flight inspection of the drone and its surroundings. Ensure that the drone’s battery is fully charged, the propellers are securely attached, and the flight area is free from obstacles or hazards.
- Powering On: Power on the drone by following the manufacturer’s instructions. This may involve pressing a power button or inserting the drone’s battery to initiate the power-up sequence. Ensure that the remote control is also powered on and connected to the drone.
- Takeoff Preparation: Position the drone on a flat, stable surface, such as a landing pad or open ground. Verify that the drone’s camera, if equipped, is properly oriented and that the remote control is responsive to your commands.
- Throttle Control: Gradually push the throttle control stick upward to increase the drone’s altitude. Avoid abrupt or jerky movements to ensure a smooth takeoff. Monitor the drone’s ascent and make any necessary adjustments to maintain a stable flight path.
- Hovering: Once the drone has reached a suitable altitude, release the throttle stick to stabilize the drone in a hovering position. Take a moment to assess the drone’s position and responsiveness before proceeding with flight maneuvers.
- Flight Maneuvers: With the drone airborne, practice basic flight maneuvers, such as forward and backward movement, yaw rotation, and altitude adjustments, to familiarize yourself with the drone’s handling and responsiveness.
- Landing Approach: When ready to land, initiate a gradual descent by gently pulling the throttle stick downward. Aim to bring the drone to a controlled and steady descent, maintaining a clear line of sight and monitoring its proximity to the landing area.
- Touchdown: As the drone nears the ground, continue to reduce the throttle to guide it into a smooth and gentle landing. Avoid abrupt or hard landings to prevent damage to the drone’s components and ensure a safe and controlled touchdown.
- Post-Flight Procedures: After landing, power off the drone and remote control, and conduct a post-flight inspection to ensure that the drone is in good condition and ready for future flights.
By following these guidelines, you can confidently execute takeoffs and landings with your Sharper Image Camera Drone, setting the stage for enjoyable and controlled flight experiences. Practice these maneuvers in open, unobstructed areas to refine your piloting skills and enhance your overall drone operation proficiency.
Capturing Photos and Videos
The ability to capture stunning photos and videos from the sky is one of the most compelling features of the Sharper Image Camera Drone. Whether you’re documenting scenic landscapes, recording memorable events, or exploring creative perspectives, understanding how to optimize the drone’s camera capabilities is essential. Here’s a comprehensive guide to capturing photos and videos with your drone:
- Camera Orientation: Before initiating a photo or video capture, ensure that the drone’s camera is properly oriented to capture the desired subject or scenery. Use the remote control’s camera tilt controls, if available, to adjust the camera angle to your preference.
- Photo Capture: To take a photo, use the designated photo capture button on the remote control or within the drone’s app interface. Ensure that the drone is stable and properly positioned before capturing the photo to achieve sharp and clear imagery.
- Video Recording: Initiate video recording by pressing the designated video capture button on the remote control or within the drone’s app interface. Maintain a steady flight path and smooth movements to record high-quality, stable footage.
- Camera Settings: Familiarize yourself with the drone’s camera settings, such as resolution, exposure, and white balance, to optimize the visual quality of your photos and videos. Adjust these settings based on the lighting conditions and the desired aesthetic of your captures.
- Composition and Framing: Practice framing your shots and videos to capture compelling compositions. Consider the rule of thirds, leading lines, and perspective to create visually engaging imagery that draws the viewer’s attention.
- Flight Stability: Maintain stable flight maneuvers and minimize sudden movements when capturing photos and videos to achieve smooth and professional-looking results. Utilize the drone’s stabilization features to enhance the visual quality of your aerial captures.
- Real-Time Monitoring: If your drone supports live video streaming to the app on your mobile device, utilize this feature to monitor the camera’s perspective in real time. This allows you to adjust the camera angle and framing while in flight, ensuring optimal composition and subject capture.
- Post-Processing and Editing: After capturing photos and videos, consider post-processing and editing techniques to enhance the visual impact of your aerial imagery. Utilize editing software to adjust colors, contrast, and other visual elements to achieve your desired aesthetic.
By mastering these techniques, you can unleash the full creative potential of your Sharper Image Camera Drone and capture breathtaking aerial photos and videos. Experiment with different camera settings and compositions to expand your artistic horizons and create captivating visual narratives from the sky.
Advanced Features
Unlocking the advanced features of your Sharper Image Camera Drone elevates your aerial photography and piloting experience, offering enhanced capabilities and creative possibilities. These features often encompass advanced flight modes, intelligent flight controls, and specialized camera functions that empower you to capture unique perspectives and execute complex maneuvers. Here’s an exploration of the advanced features and functionalities available with your drone:
- Follow Me Mode: Some drones offer a Follow Me mode, where the drone autonomously tracks and follows a designated subject, such as the remote control or a GPS-enabled device. This feature is ideal for capturing dynamic, on-the-go footage.
- Waypoint Navigation: Waypoint navigation enables you to pre-program a flight path for the drone, specifying specific points of interest and flight trajectories. The drone autonomously follows the designated waypoints, allowing you to focus on capturing aerial imagery.
- Intelligent Flight Modes: Modern drones often feature intelligent flight modes, such as orbit, point of interest, and panoramic modes, which automate specific flight patterns and camera movements to achieve cinematic and visually striking results.
- Obstacle Avoidance Systems: Some advanced drones are equipped with obstacle avoidance sensors and systems that enhance flight safety by detecting and avoiding potential collisions with obstacles in the drone’s flight path.
- Automated Camera Functions: Advanced drones may offer automated camera functions, such as gesture control, subject tracking, and automated camera movements, allowing you to capture professional-quality footage with minimal manual input.
- Telemetry and Flight Data: Access real-time telemetry data, including altitude, speed, and GPS coordinates, through the drone’s app interface, empowering you to monitor and analyze the drone’s flight performance and environmental conditions.
- Advanced Camera Settings: Explore advanced camera settings, such as HDR (High Dynamic Range), RAW image capture, and manual exposure controls, to achieve precise and visually stunning aerial photography results.
- Flight Performance Optimization: Fine-tune the drone’s flight characteristics, such as agility, responsiveness, and flight stability, through advanced settings and calibration procedures to tailor the drone’s performance to your specific preferences and shooting scenarios.
By delving into these advanced features, you can expand your creative horizons and leverage the full potential of your Sharper Image Camera Drone. Experiment with these functionalities in diverse shooting environments and scenarios to elevate your aerial photography and videography to new heights.
Safety Tips
Ensuring the safe and responsible operation of your Sharper Image Camera Drone is paramount to protect both the drone and the surrounding environment. By adhering to essential safety guidelines, you can mitigate potential risks and enjoy the thrill of aerial exploration with peace of mind. Here are crucial safety tips to consider when operating your drone:
- Read the User Manual: Familiarize yourself with the drone’s user manual, including safety instructions, operational guidelines, and maintenance procedures. Understanding the manufacturer’s recommendations is essential for safe and effective drone operation.
- Respect Airspace Regulations: Adhere to local airspace regulations and flight restrictions when operating your drone. Be aware of no-fly zones, restricted areas, and altitude limitations to avoid infringing on airspace regulations and ensure safe and compliant flight operations.
- Pre-Flight Inspections: Before each flight, conduct thorough pre-flight inspections of the drone, including the battery, propellers, and control systems. Ensure that all components are in good condition and free from damage or wear that could compromise flight safety.
- Weather Considerations: Assess weather conditions, including wind speed, precipitation, and visibility, before initiating a flight. Avoid flying in adverse weather conditions that could affect the drone’s stability and performance, posing potential safety hazards.
- Maintain Visual Line of Sight: Always maintain a clear visual line of sight with the drone during flight to monitor its position, surroundings, and potential obstacles. Maintaining visual contact with the drone enhances situational awareness and promotes safe flight maneuvers.
- Avoid Crowded Areas: Refrain from flying the drone over crowded or densely populated areas to minimize the risk of accidental contact with people, property, or other aircraft. Opt for open, unpopulated spaces for safe and uninterrupted flight operations.
- Battery Safety: Handle and store the drone’s batteries in accordance with the manufacturer’s recommendations to prevent overheating, short circuits, or other battery-related safety hazards. Avoid overcharging or exposing the batteries to extreme temperatures.
- Emergency Procedures: Familiarize yourself with emergency procedures, including initiating a safe landing, executing an emergency stop, and responding to unexpected flight behavior. Be prepared to react swiftly to mitigate potential safety risks during flight.
- Respect Privacy: Exercise discretion and respect privacy considerations when capturing photos and videos with your drone. Avoid infringing on individuals’ privacy or capturing sensitive or restricted areas without proper authorization.
- Continuous Learning: Stay informed about evolving drone regulations, safety best practices, and technological advancements in drone operation. Continuously educate yourself to adapt to changing safety standards and industry developments.
By prioritizing safety and adhering to these essential guidelines, you can enjoy the exhilarating experience of operating your Sharper Image Camera Drone while promoting responsible and safe drone piloting practices.
Conclusion
Congratulations on completing this comprehensive guide to operating the Sharper Image Camera Drone! By following the step-by-step instructions and insights provided in this guide, you’ve gained valuable knowledge and skills to confidently pilot your drone, capture stunning aerial imagery, and leverage advanced features for creative exploration. From charging the drone’s battery to mastering advanced flight modes and camera functionalities, you’ve embarked on a journey to unlock the full potential of your drone.
As you venture into the captivating world of aerial photography and videography, remember the importance of prioritizing safety at all times. Adhering to safety guidelines, respecting airspace regulations, and conducting thorough pre-flight inspections are essential practices that contribute to safe and responsible drone operation.
Whether you’re a hobbyist seeking to capture breathtaking landscapes from above or a professional looking to expand your creative horizons, the Sharper Image Camera Drone offers a versatile platform for aerial exploration. Embrace the opportunity to experiment with different flight maneuvers, camera settings, and advanced features to elevate your aerial photography and videography to new heights.
As technology continues to advance and the world of drone operation evolves, stay informed about emerging trends, regulatory updates, and best practices in drone piloting. Continuous learning and adaptation to industry developments will empower you to navigate the ever-changing landscape of drone technology and aviation regulations.
Above all, approach your drone piloting endeavors with enthusiasm, creativity, and a commitment to safety. Embrace the thrill of capturing unique perspectives from the sky and immerse yourself in the art of aerial storytelling. The possibilities are boundless, and with each flight, you have the opportunity to unveil new dimensions of creativity and visual expression.
So, as you prepare to embark on your next drone flight, remember the knowledge and skills you’ve acquired through this guide. Embrace the exhilarating experience of piloting the Sharper Image Camera Drone, and let your creativity soar as you capture the world from a whole new perspective.