Introduction
Understanding the Basics of an Electric Guitar Tuner
If you're new to playing the electric guitar, one of the most essential tools you'll need in your arsenal is an electric guitar tuner. Tuning your guitar is crucial for producing the right notes and ensuring that your music sounds harmonious and on point. While tuning by ear is a skill that many guitarists aspire to master, an electric guitar tuner provides a quick and accurate way to tune your instrument, especially for beginners.
An electric guitar tuner is a device that detects the pitch of each string on your guitar and indicates whether the string is tuned too high, too low, or just right. It's a valuable tool that helps you achieve the correct pitch for each string, ensuring that your guitar produces the desired sound when you play.
Whether you're a novice or an experienced guitarist, using an electric guitar tuner can significantly enhance the quality of your performance. By understanding the basics of how to use an electric guitar tuner, you can ensure that your instrument is always in tune, allowing you to focus on perfecting your skills and enjoying the music you create.
In this guide, we'll walk you through the step-by-step process of using an electric guitar tuner effectively, from preparing your guitar and tuner to fine-tuning and double-checking your instrument's pitch. By following these simple yet essential steps, you'll be well on your way to mastering the art of tuning your electric guitar with precision and confidence. Let's dive in and explore the world of electric guitar tuning!
Step 1: Understand the Basics of an Electric Guitar Tuner
Before diving into the practical aspects of using an electric guitar tuner, it’s essential to grasp the fundamental principles behind this indispensable tool. An electric guitar tuner operates by detecting the frequency or pitch of the strings on your guitar. When a string is plucked, the tuner analyzes the pitch and indicates whether the string is tuned too high (sharp), too low (flat), or perfectly in tune.
There are various types of electric guitar tuners available, including clip-on tuners, pedal tuners, and handheld tuners. Clip-on tuners attach directly to the headstock of the guitar, while pedal tuners are designed to be used with pedalboards, allowing for convenient tuning during live performances. Handheld tuners, on the other hand, are compact devices that can be easily carried in a gig bag or guitar case.
Additionally, electric guitar tuners come with different display types, such as needle-style meters, LED lights, or LCD screens. These displays provide visual feedback to guide you in adjusting the tuning pegs of your guitar until the strings reach the correct pitch. Understanding the specific features and functions of your electric guitar tuner will enable you to make the most of its capabilities and ensure accurate tuning results.
Furthermore, it’s important to familiarize yourself with the standard tuning of a six-string electric guitar, which is typically EADGBE, with the thickest string (low E) at the top and the thinnest string (high E) at the bottom. Each string corresponds to a specific musical note, and knowing the names of the strings and their respective pitches is essential for using the tuner effectively.
By gaining a solid understanding of how an electric guitar tuner operates and the different types available, you’ll be well-equipped to proceed with the practical steps of tuning your instrument. Let’s move on to the next stage and prepare your guitar and tuner for the tuning process.
Step 2: Prepare Your Guitar and Tuner
Before you begin tuning your electric guitar, it’s essential to ensure that both your instrument and the electric guitar tuner are ready for the tuning process. Here are the key steps to prepare your guitar and tuner:
- Inspect Your Guitar: Start by visually inspecting your guitar to check for any signs of damage or wear on the strings, tuning pegs, and fretboard. Ensure that the strings are properly installed and in good condition, as worn-out or damaged strings can affect the accuracy of the tuning process.
- Clean the Guitar and Strings: Use a soft cloth to wipe down the body, neck, and strings of your guitar, removing any dust, fingerprints, or residue that may have accumulated. Clean strings can produce clearer tones and facilitate more accurate tuning.
- Position the Tuner: If you’re using a clip-on tuner, securely attach it to the headstock of your guitar, ensuring that it is positioned in a way that allows for easy visibility of the tuner display while tuning. For pedal tuners or handheld tuners, place them within reach and in a stable position for convenient access during the tuning process.
- Power On the Tuner: If your tuner requires power, ensure that it is equipped with fresh batteries or connected to a power source, depending on its power supply specifications. A properly powered tuner is essential for accurate pitch detection and reliable performance.
- Adjust Tuner Settings: Take a moment to familiarize yourself with the settings and modes available on your electric guitar tuner. Some tuners offer different tuning modes, such as standard tuning, alternate tunings, or chromatic mode, which allows for tuning to any desired pitch. Select the appropriate mode based on your tuning requirements.
By following these preparatory steps, you’ll set the stage for a smooth and effective tuning process. Once your guitar and tuner are in optimal condition and properly set up, you’ll be ready to proceed with the next steps of using the electric guitar tuner to tune each string of your instrument.
Step 3: Turn on the Tuner and Select the Correct Mode
With your guitar prepared and your tuner in place, it’s time to power on the tuner and select the appropriate mode for the tuning process. Follow these steps to ensure that your tuner is ready to detect and analyze the pitch of each string accurately:
- Power On the Tuner: If your electric guitar tuner has a power button or switch, activate the tuner to turn it on. Some tuners may power on automatically when they detect vibrations from the guitar, while others require manual activation. Ensure that the tuner display is illuminated and ready for use.
- Select the Tuning Mode: Many electric guitar tuners offer different tuning modes to accommodate various tuning preferences. If you’re tuning to the standard EADGBE tuning, select the standard tuning mode on your tuner. Alternatively, if you’re using alternate tunings or need to tune to specific pitches, choose the appropriate mode that aligns with your tuning requirements.
- Chromatic Mode: Some tuners feature a chromatic mode, which allows for tuning to any pitch, not just standard guitar tuning. This mode is useful for adjusting individual strings to specific notes or for tuning instruments other than the guitar. If you need to tune to non-standard pitches or alternate tunings, the chromatic mode provides the flexibility to do so with precision.
- Display Calibration: Certain tuners offer the option to calibrate the display to a specific reference pitch, such as A440 (the standard pitch for tuning instruments). If calibration settings are available, ensure that the tuner is set to the appropriate reference pitch for accurate tuning results.
- Ensure Clear Visibility: Position the tuner display in a way that allows for clear visibility while tuning your guitar. Adequate lighting and a suitable viewing angle will facilitate easy monitoring of the tuner’s feedback as you adjust the pitch of each string.
By turning on the tuner and selecting the correct mode for your tuning requirements, you’ll establish the foundation for accurately tuning each string of your electric guitar. With the tuner primed and ready, you’re now prepared to move on to the crucial step of tuning each string to achieve precise and harmonious tones.
Step 4: Tune Each String
As you embark on the process of tuning your electric guitar, the methodical tuning of each string is essential for achieving accurate pitch and ensuring that your instrument produces harmonious tones. Follow these steps to tune each string effectively using your electric guitar tuner:
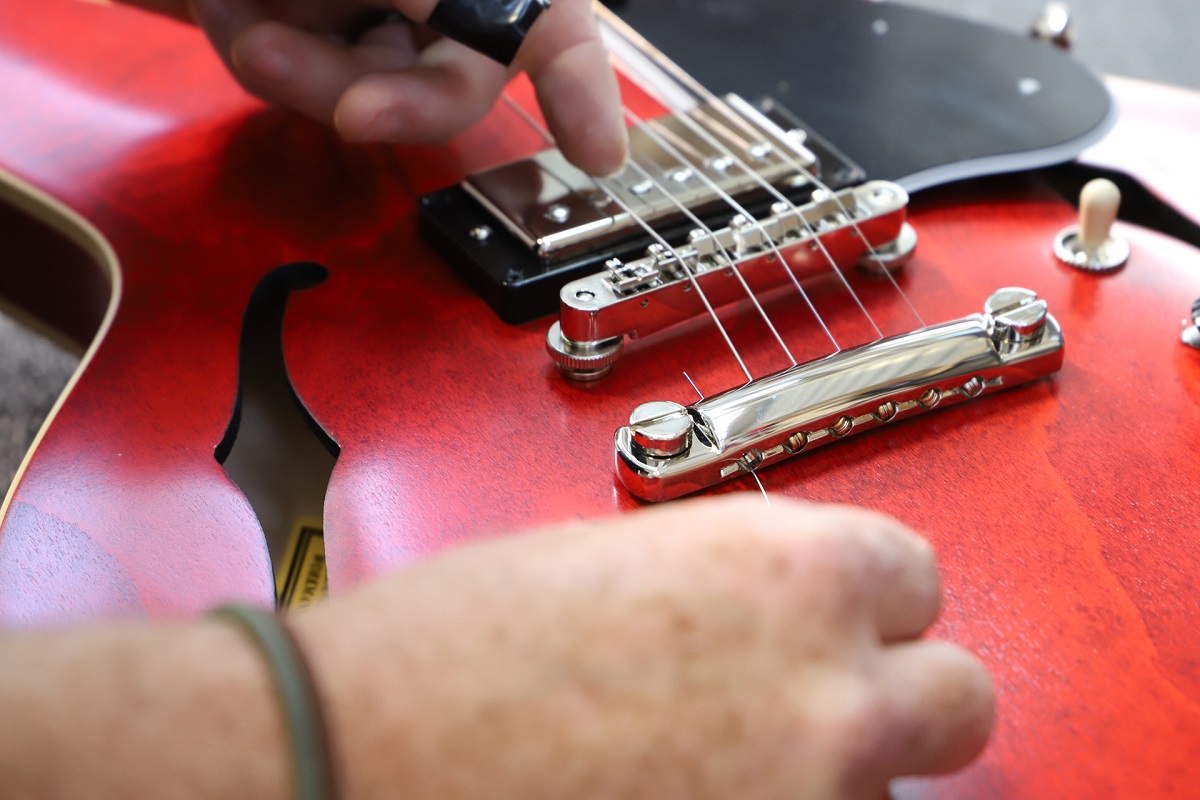
- Pluck the String: Begin by plucking the lowest (thickest) string of your guitar, which is the low E string. Allow the string to ring out clearly, ensuring that it vibrates freely to produce a distinct and sustained sound.
- Observe the Tuner Display: As the string resonates, observe the feedback on the tuner display. The tuner will indicate whether the pitch is too high (sharp), too low (flat), or in tune. Adjust the tuning peg for the low E string based on the tuner’s guidance to bring the string to the correct pitch.
- Tuning Direction: When using the tuner, turn the tuning peg in the appropriate direction to adjust the pitch of the string. If the tuner indicates that the pitch is flat, tighten the string by turning the tuning peg clockwise. Conversely, if the pitch is sharp, loosen the string by turning the tuning peg counterclockwise.
- Repeat for Each String: Proceed to tune each string in sequence, following the standard tuning pattern of EADGBE. After tuning the low E string, move on to the A string, D string, G string, B string, and finally, the high E string. Pluck each string individually and make the necessary adjustments to bring it to the correct pitch.
- Use Harmonics for Accuracy: For greater tuning precision, consider using harmonics when tuning the strings. Harmonics produce clear, bell-like tones and can aid in fine-tuning the pitch of each string to achieve optimal accuracy.
By methodically tuning each string of your electric guitar with the guidance of the electric guitar tuner, you’ll ensure that your instrument is in tune and ready to deliver the desired musical notes with precision. As you progress through this step, pay close attention to the feedback from the tuner and make gradual adjustments to achieve the perfect pitch for each string.
Step 5: Fine-Tune and Double-Check
After tuning each string of your electric guitar, the process of fine-tuning and double-checking the pitch of the strings is crucial for achieving optimal accuracy and ensuring that your instrument is perfectly in tune. Follow these steps to refine the tuning and verify the pitch of each string:
- Revisit Each String: Once you’ve tuned all six strings of your guitar, revisit each string in sequence to double-check the pitch. Pluck each string individually and observe the feedback from the tuner to verify that the strings are holding their tuned pitch consistently.
- Adjust as Needed: If you notice any slight deviations in pitch or if the strings have drifted slightly out of tune, make minor adjustments using the tuning pegs to bring the strings back to the correct pitch. Fine-tuning ensures that your guitar maintains precise tuning across all strings.
- Listen for Intonation: While the tuner provides visual feedback, it’s also beneficial to listen to the sound of each string after tuning. Pay attention to the intonation and resonance of the notes, ensuring that the strings produce clear and harmonious tones when played open or fretted at different positions on the fretboard.
- Utilize Chords and Scales: Play a few simple chords and scales on your guitar to assess the overall tonal quality and harmony. By strumming chords and running through scales, you can gauge the coherence of the notes and identify any discrepancies that may require further tuning adjustments.
- Check Across the Fretboard: Test the tuning of each string across different frets on the fretboard, listening for consistent pitch and resonance. Ensure that the strings maintain their tuned pitch and produce clear, accurate notes across the entire range of the guitar’s fretboard.
By fine-tuning and double-checking the tuning of your electric guitar, you’ll elevate the accuracy of the instrument’s pitch and ensure that it is primed for optimal performance. This meticulous approach to tuning enhances the overall playability and tonal integrity of your guitar, setting the stage for a rewarding and harmonious playing experience.
Step 6: Turn off the Tuner and Store it Properly
As you complete the tuning process for your electric guitar, it’s important to properly power down the electric guitar tuner and store it in a secure manner to maintain its functionality and prolong its lifespan. Follow these steps to ensure that the tuner is turned off and stored appropriately:
- Power Down the Tuner: If your tuner has a power button or switch, deactivate the tuner to power it down. Turning off the tuner conserves its battery life and prevents unnecessary power consumption when not in use. For tuners with automatic shutoff features, ensure that the device has powered down completely.
- Remove Clip-On Tuners: If you’re using a clip-on tuner, gently detach it from the headstock of your guitar, taking care not to apply excessive force that could potentially damage the tuner or the guitar’s finish. Store the clip-on tuner in a safe location, such as a dedicated compartment in your guitar case or accessory pouch.
- Secure Pedal Tuners: For pedal tuners integrated into a pedalboard setup, switch off the pedalboard power supply or disconnect the tuner from the pedalboard as per the manufacturer’s guidelines. Safely stow the pedal tuner along with the pedalboard to prevent any damage during transport or storage.
- Store Handheld Tuners: If you’re using a handheld tuner, place it in a protective case or pouch to shield it from dust, moisture, and potential impact. Storing the handheld tuner in a designated compartment within your guitar case or gear bag safeguards it from accidental damage while on the move.
- Maintain Battery Life: If your tuner operates on batteries, consider removing the batteries when the tuner will not be used for an extended period. This practice prevents battery leakage and preserves the integrity of the tuner’s internal components, ensuring that it remains ready for use when needed.
By conscientiously turning off the electric guitar tuner and storing it properly, you’ll safeguard the device from potential damage and prolong its operational lifespan. This attention to care and maintenance extends to the overall upkeep of your guitar accessories and contributes to the longevity and reliability of your musical equipment.
Conclusion
Congratulations! You’ve now mastered the essential steps for effectively using an electric guitar tuner to achieve precise tuning and ensure that your instrument produces harmonious and accurate tones. By understanding the basics of an electric guitar tuner, preparing your guitar and tuner, selecting the correct mode, tuning each string, fine-tuning and double-checking, and finally, turning off and storing the tuner properly, you’ve equipped yourself with the knowledge and skills to maintain your guitar in optimal playing condition.
Using an electric guitar tuner not only enhances the quality of your musical performance but also cultivates a deeper appreciation for the nuances of pitch and tonal accuracy. As you continue to practice and explore the world of guitar playing, the ability to tune your instrument with precision will undoubtedly elevate your musical expression and creativity.
Remember, consistent tuning is essential for preserving the integrity of your guitar’s sound and ensuring that your playing remains in tune across various musical contexts. Whether you’re practicing at home, recording in the studio, or performing live on stage, the reliability of your guitar’s tuning sets the stage for a captivating and immersive musical experience.
By incorporating the knowledge and techniques outlined in this guide, you’ve taken a significant step toward mastering the art of electric guitar tuning. Embrace the process of tuning as an integral part of your musical journey, and let the harmonious resonance of your well-tuned guitar inspire and uplift your musical endeavors.
Now, armed with the expertise to effectively use an electric guitar tuner, you’re poised to embark on your musical pursuits with confidence and precision. Keep strumming, keep tuning, and keep making beautiful music!