Introduction
Adjusting the bridge on an electric guitar is an essential skill for any guitarist. The bridge, also known as the tremolo system, plays a crucial role in determining the guitar's action, intonation, and overall playability. Whether you're a seasoned musician or a novice player, understanding how to adjust the bridge can significantly impact the sound and feel of your instrument.
By making precise adjustments to the bridge, you can customize the action and intonation to suit your playing style and preferences. This process can help eliminate fret buzz, improve tuning stability, and enhance the overall playability of your electric guitar. Additionally, knowing how to adjust the bridge can save you time and money by reducing the need for professional setups or repairs.
In this guide, we'll walk through the step-by-step process of adjusting the bridge on an electric guitar. From loosening the strings to fine-tuning the bridge height and re-tuning the instrument, you'll learn the essential techniques to optimize your guitar's performance. With the right tools and a bit of patience, you can master this fundamental aspect of guitar maintenance and customization.
Understanding how to adjust the bridge on your electric guitar empowers you to tailor the instrument to your unique playing style and sonic preferences. Whether you prefer a lower action for faster fretting or a higher action for increased resonance, the ability to adjust the bridge gives you greater control over your sound. By following the instructions in this guide, you'll gain the knowledge and confidence to make precise adjustments that enhance your playing experience and the overall performance of your electric guitar.
Tools Needed
Before you begin adjusting the bridge on your electric guitar, it’s essential to gather the necessary tools to ensure a smooth and successful process. Here are the tools you’ll need:
- Phillips Head Screwdriver: This tool is crucial for adjusting the height of the bridge saddles. Make sure to select a screwdriver that fits the saddle adjustment screws snugly to prevent slippage and potential damage to the screws.
- Allen Wrenches: Many electric guitars feature bridge systems that require Allen wrenches for height and intonation adjustments. Check your guitar’s specifications to determine the appropriate wrench sizes needed for your specific bridge.
- Guitar Tuner: Accurate tuning is vital when adjusting the bridge. A reliable guitar tuner will help you maintain proper pitch and ensure that the instrument is in tune throughout the adjustment process.
- String Winder: Loosening and tightening guitar strings can be time-consuming without a string winder. This tool makes the process more efficient and helps prevent hand fatigue during string adjustments.
- Clean Cloth: Keeping a clean cloth on hand allows you to wipe down the bridge, saddles, and strings as needed. Removing debris and residue from these areas can improve the guitar’s overall performance and longevity.
By having these essential tools at your disposal, you’ll be well-equipped to tackle the bridge adjustment process with confidence and precision. Ensuring that your tools are in good condition and appropriate for your guitar’s specific bridge system will contribute to a successful and satisfying adjustment experience.
Step 1: Loosen the Strings
Before making any adjustments to the bridge on your electric guitar, it’s crucial to start by loosening the strings. This step is essential to relieve tension on the bridge and allow for smooth and precise adjustments. Follow these steps to properly loosen the strings:
- Prepare Your Work Area: Find a comfortable and well-lit space to work on your guitar. Lay down a soft cloth or towel to protect the guitar’s finish during the adjustment process.
- Use a String Winder: Begin by using a string winder to loosen the tension on each string. Turn the tuning pegs counterclockwise to lower the pitch of the strings. Loosen the strings gradually to avoid sudden release of tension, which can cause damage to the guitar or potential injury.
- Remove the Strings: Once the strings are sufficiently loosened, carefully unwind them from the tuning pegs and remove them from the bridge and nut. Set the strings aside in a safe place to prevent tangling or damage.
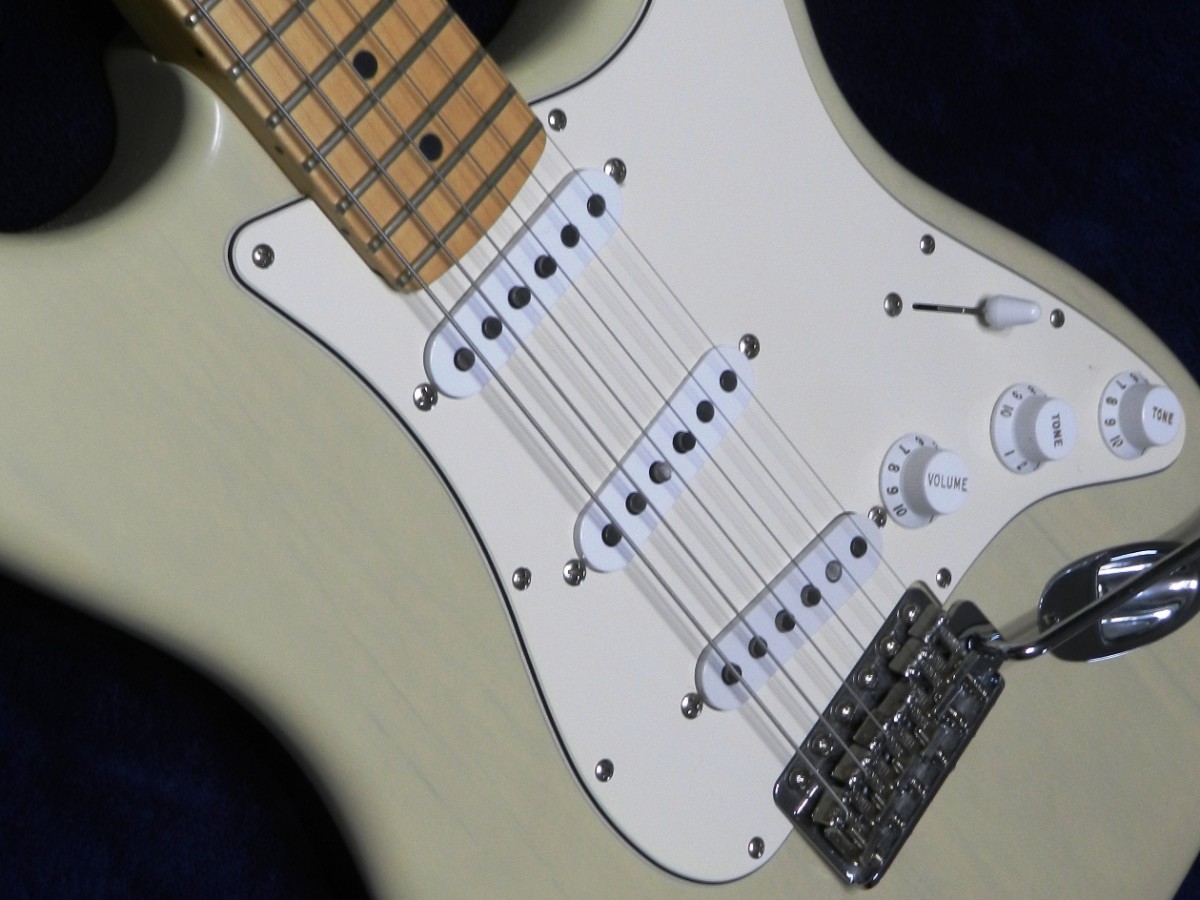
- Inspect the Bridge and Saddles: With the strings removed, take a moment to inspect the bridge and saddles for any debris, buildup, or signs of wear. Use a clean cloth to wipe down these areas and ensure that the bridge is free from any obstructions.
Loosening the strings is a critical first step that sets the stage for the subsequent adjustments to the bridge. By taking the time to perform this step carefully and methodically, you’ll create a safe and controlled environment for fine-tuning the bridge to your desired specifications. With the strings loosened and the bridge prepared, you’re ready to move on to the next step in the bridge adjustment process.
Step 2: Adjusting the Bridge Height
Once the strings are loosened and the guitar is prepared for adjustment, you can proceed with fine-tuning the bridge height to achieve your desired action and playability. Follow these steps to effectively adjust the bridge height on your electric guitar:
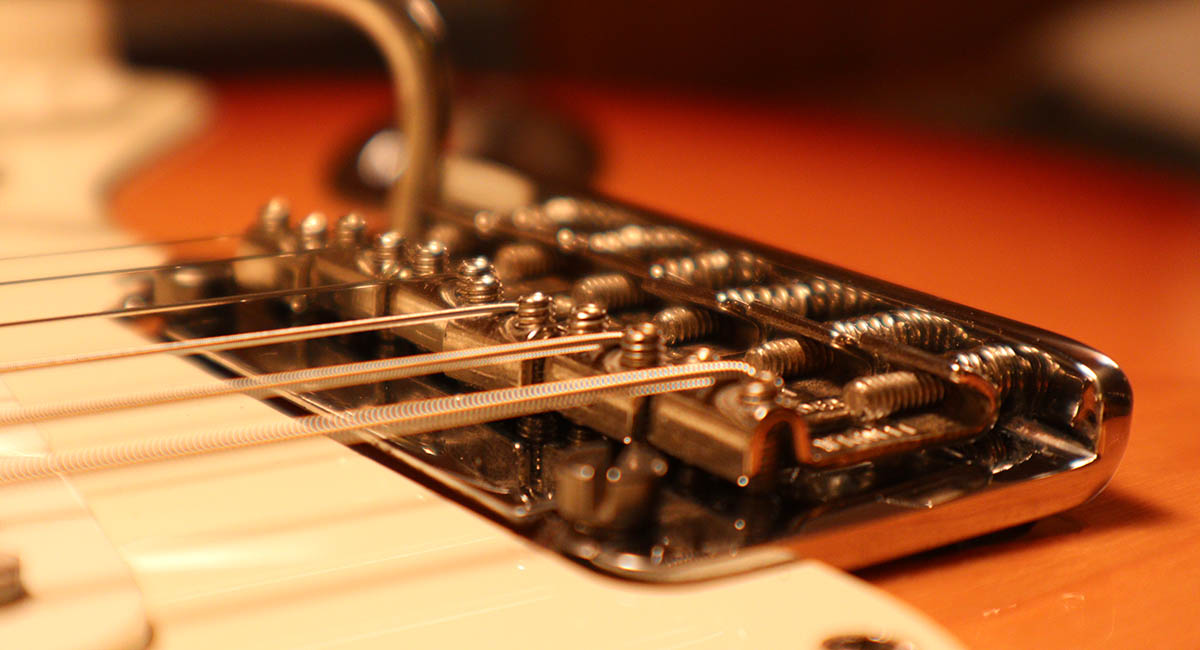
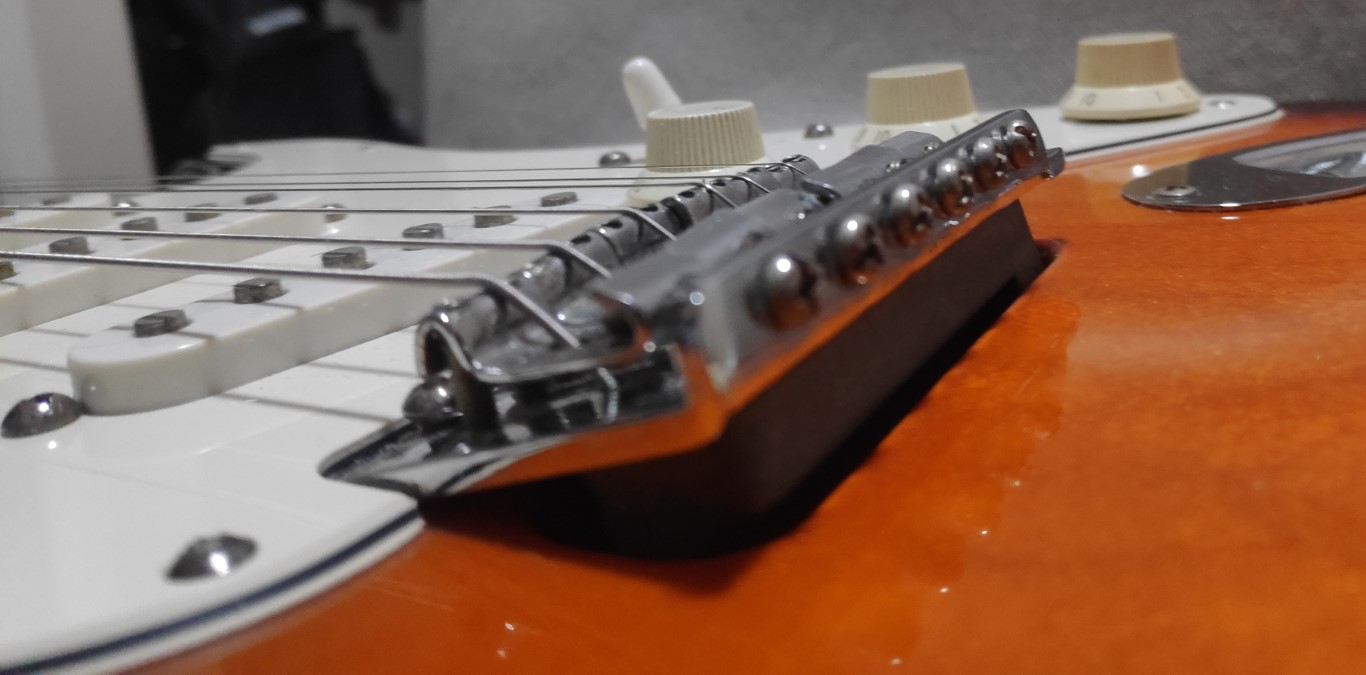
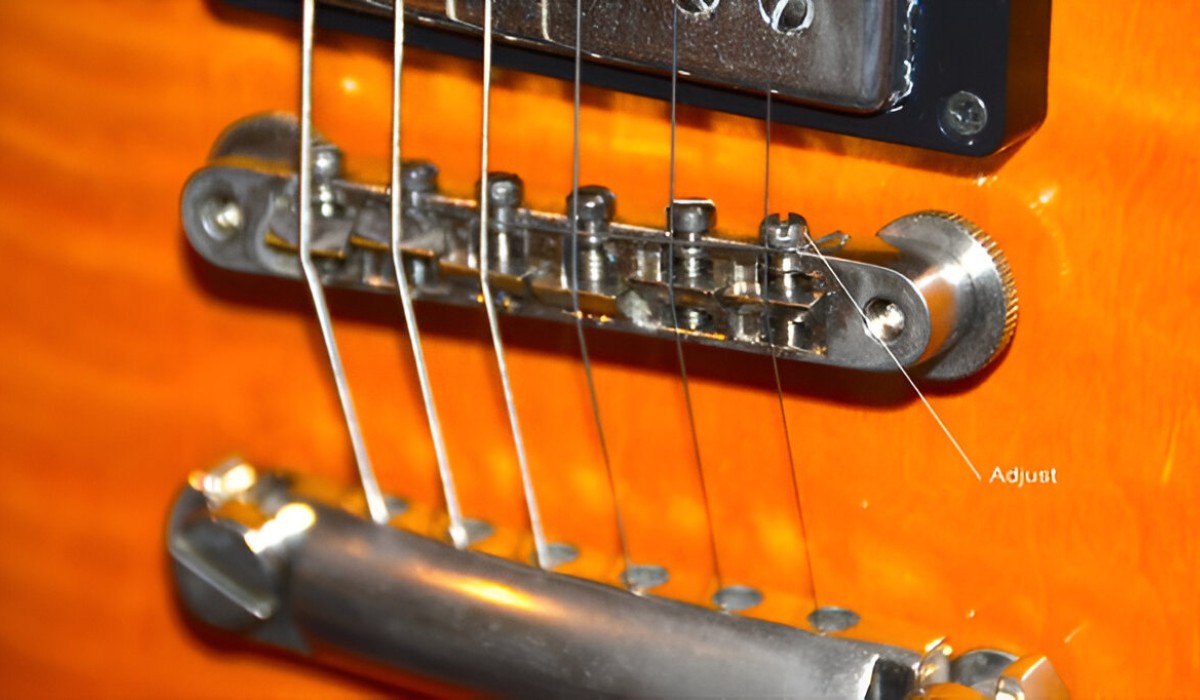
- Identify the Adjustment Screws: Locate the bridge saddles, which are typically equipped with height adjustment screws. Depending on your guitar’s bridge system, these screws may be located on the top or bottom of the saddles.
- Use the Phillips Head Screwdriver: Select the appropriate Phillips head screwdriver that fits the saddle adjustment screws snugly. Carefully insert the screwdriver into the screw slot, ensuring a secure fit to prevent slippage and potential damage to the screws.
- Adjust the Bridge Height: Turn the height adjustment screws clockwise to raise the bridge saddles or counterclockwise to lower them. Make incremental adjustments, and periodically check the action and playability of the guitar to gauge the impact of the height changes.
- Ensure Uniform Height: As you adjust the bridge height, maintain uniformity across all saddles to promote consistent action and intonation. Pay close attention to the relative height of each saddle to achieve a balanced and comfortable playing experience.
- Test the Action: After making adjustments, test the guitar’s action by playing various frets and chords. Assess the feel and responsiveness of the strings to determine if further adjustments are needed to achieve your desired playing comfort and performance.
Adjusting the bridge height allows you to tailor the guitar’s action to your specific preferences, whether you prefer a lower action for faster fretting or a slightly higher action for increased resonance and sustain. By following these steps and exercising patience and precision, you can achieve an optimal bridge height that enhances the overall playability and performance of your electric guitar.
Step 3: Re-tuning the Guitar
After adjusting the bridge height, the next crucial step is to re-tune the guitar to ensure that the strings are at the correct pitch and that the instrument is ready for play. Follow these steps to accurately re-tune your electric guitar:
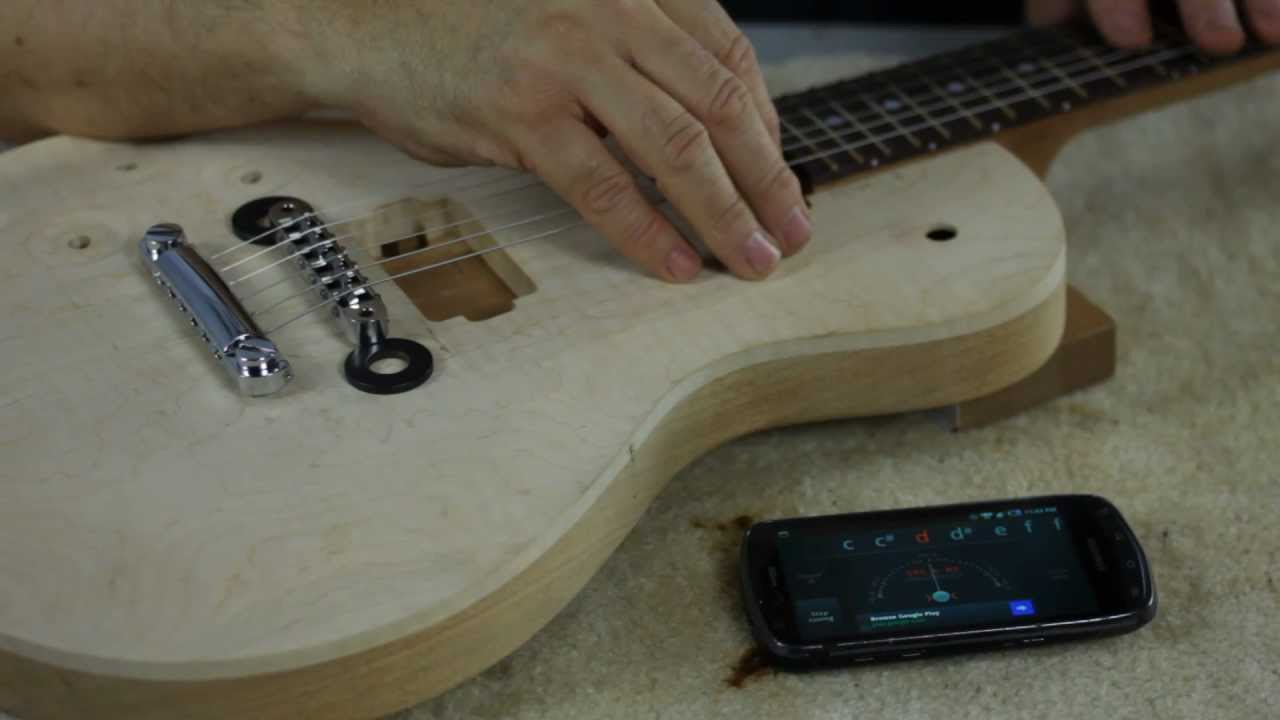
- Prepare Your Tuner: Turn on your guitar tuner and ensure that it is functioning properly. A reliable tuner is essential for achieving accurate pitch and maintaining proper tuning across all strings.
- Begin Tuning: Starting with the low E string, use the tuning peg to tighten the string and raise the pitch to the correct note. Gradually work through each string, tuning to the appropriate pitches (E, A, D, G, B, E) as you progress.
- Check Intonation: Once the strings are tuned to the correct pitches, check the intonation of each string by playing the 12th fret harmonic and comparing it to the fretted 12th fret note. Make any necessary adjustments to the bridge saddle positions to ensure accurate intonation across the fretboard.
- Re-tune as Needed: After adjusting the intonation, re-tune the guitar once again to confirm that all strings are accurately pitched and that the instrument is in tune across the entire fretboard.
Re-tuning the guitar is a critical final step in the bridge adjustment process, as it ensures that the instrument is ready for optimal playability and performance. By carefully following these steps and utilizing a reliable tuner, you can achieve accurate pitch and intonation, ultimately enhancing the overall sound and responsiveness of your electric guitar.
Conclusion
Adjusting the bridge on an electric guitar is a fundamental aspect of guitar maintenance and customization. By following the step-by-step process outlined in this guide, you have gained valuable insights into the essential techniques for optimizing your guitar’s performance. From loosening the strings and adjusting the bridge height to re-tuning the instrument, each step plays a crucial role in tailoring the guitar to your unique playing style and sonic preferences.
Understanding how to adjust the bridge empowers you to make precise modifications that can eliminate fret buzz, improve tuning stability, and enhance the overall playability of your electric guitar. By utilizing the necessary tools and exercising patience and precision, you can achieve an optimal bridge height that suits your specific preferences, ultimately enhancing your playing experience.
As you continue to explore the world of guitar maintenance and customization, remember that the bridge adjustment process is a skill that can be refined over time. Each adjustment provides an opportunity to fine-tune your instrument and gain a deeper understanding of its mechanics and performance. Whether you’re a seasoned guitarist or a novice player, mastering the art of bridge adjustment allows you to take control of your sound and unlock the full potential of your electric guitar.
By incorporating these techniques into your regular guitar maintenance routine, you can ensure that your instrument remains in top condition and continues to inspire your musical creativity. The knowledge and confidence you’ve gained from this guide will serve you well as you embark on your journey to optimize the performance and playability of your electric guitar.