Introduction
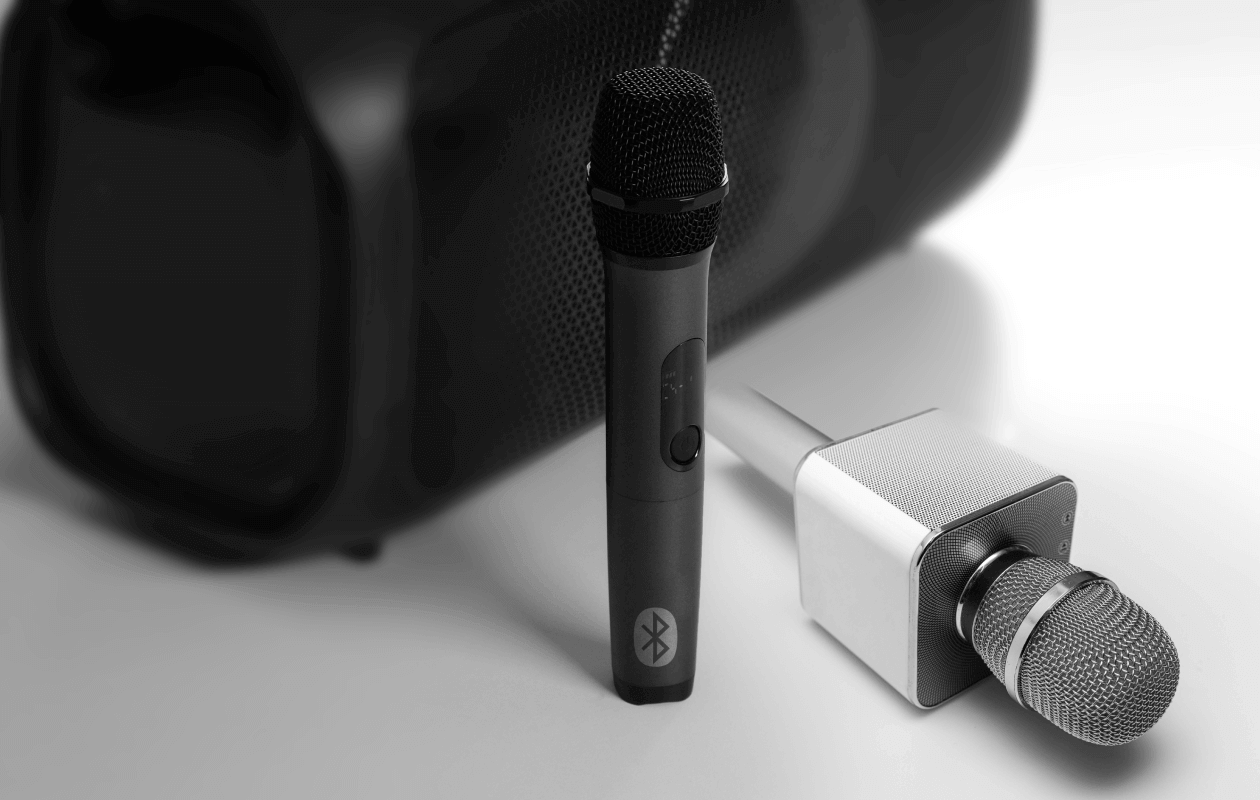
Welcome to the world of USB microphones and the convenience they bring to recording audio on your ASUS laptop. If you’re a content creator, podcaster, or simply someone who wants to improve the audio quality of their online meetings or video calls, using a USB microphone can make a significant difference.
USB microphones have become increasingly popular due to their ease of use and versatility. Unlike traditional microphones that require complex setups and additional equipment, USB microphones can be plugged directly into the USB ports of your ASUS laptop and can be used right away. This makes them an ideal choice for anyone who wants to record high-quality audio without investing in costly audio interfaces or mixers.
In this guide, we will walk you through the process of using a USB microphone on your ASUS laptop. We will discuss how to choose the right USB microphone, how to connect it to your laptop, and how to configure the microphone settings for optimal performance. Additionally, we will address some common troubleshooting issues that you may encounter.
Whether you’re a content creator, musician, or someone who wants to elevate their audio experience, this guide will provide you with the essential knowledge to make the most of your USB microphone on your ASUS laptop. Let’s dive in!
Why Use a USB Microphone on an ASUS Laptop
Using a USB microphone on your ASUS laptop offers a range of benefits that can significantly enhance your audio recording and communication experience. Let’s explore some of the key reasons why you should consider using a USB microphone:
- Improved Sound Quality: USB microphones are designed to deliver high-quality audio recordings. They are equipped with advanced features such as built-in analog-to-digital converters and high-quality condenser capsules, ensuring clear and professional-sounding audio.
- Easy Setup and Portability: USB microphones are incredibly user-friendly and convenient to set up. Simply plug the microphone into the USB port of your ASUS laptop, and you’re ready to start recording. They are also compact and lightweight, making them ideal for on-the-go use or travel.
- Plug-and-Play Compatibility: USB microphones are compatible with most operating systems, including Windows and macOS, without the need for additional drivers or software installation. This means you can start using your USB microphone immediately without any hassle.
- Versatility: USB microphones can be used for a wide range of applications. Whether you’re recording podcasts, voiceovers, music, conducting online meetings, or gaming, a USB microphone provides the versatility to cater to various audio recording needs.
- Zero-latency Monitoring: USB microphones often come with a headphone output that allows for direct monitoring of your voice in real-time. This feature eliminates any latency issues, ensuring accurate monitoring and control over your audio recordings or live streaming sessions.
- Affordability: USB microphones offer a cost-effective solution for those who want to achieve professional-sounding audio without breaking the bank. Compared to other audio recording setups that require additional equipment and software, USB microphones provide excellent value for money.
By utilizing a USB microphone on your ASUS laptop, you can elevate the quality of your audio recordings and communications, making them more engaging and professional-sounding. Whether you’re a content creator, musician, educator, or simply someone who wants to improve their audio experience, a USB microphone is a valuable tool to have in your arsenal.
Choosing the Right USB Microphone
When it comes to choosing a USB microphone for your ASUS laptop, there are a few key factors to consider to ensure you get the best fit for your needs. Here are some essential guidelines to help you make an informed decision:
- Recording Purpose: Determine the primary purpose of your microphone usage. Are you recording vocals, instruments, podcasts, or conducting online meetings? Different microphones are optimized for specific applications, so understanding your recording purpose is crucial.
- Microphone Type: USB microphones come in different types, including dynamic and condenser microphones. Dynamic microphones are more durable and better suited for live performances or environments with high sound pressure levels. Condenser microphones, on the other hand, provide superior sensitivity and detailed sound capturing, making them ideal for studio recordings or capturing vocals.
- Polar Pattern: Consider the polar pattern of the microphone, which determines the direction from which the microphone captures sound. Common polar patterns include cardioid (captures sound from the front), omnidirectional (captures sound from all directions), and bidirectional (captures sound from the front and back). Choose a polar pattern that suits your recording environment and minimizes unwanted background noise.
- Build and Durability: Look for a USB microphone that is well-built and sturdy, as it will ensure longevity and withstand regular use. Pay attention to the materials used, such as metal or high-quality plastic, and evaluate customer reviews regarding the microphone’s durability.
- Budget: Determine your budget range and search for USB microphones within that range. USB microphones are available at various price points, so finding one that fits your budget while still delivering good sound quality is possible.
- Reviews and Recommendations: Research and read user reviews, expert opinions, and recommendations to get a better understanding of the microphone’s performance, reliability, and overall quality. Consider reputable websites, forums, and audio communities to gather insights from experienced users.
By considering these factors, you will be able to narrow down your choices and find a USB microphone that meets your specific requirements. Remember, choosing the right USB microphone is essential for achieving optimal audio quality and ensuring a seamless recording experience on your ASUS laptop.
Connecting the USB Microphone to your ASUS Laptop
Connecting a USB microphone to your ASUS laptop is a straightforward process that requires minimal effort. Follow these steps to ensure a successful connection:
- Find an available USB port: Locate an available USB port on your ASUS laptop. USB ports are typically found on the sides or back of the laptop. Ensure that the port is not damaged and is in good working condition.
- Inspect the USB cable: Check the USB cable that came with your microphone for any visible damage or fraying. A damaged USB cable may cause connectivity issues or inconsistent audio performance. If the cable is damaged, consider contacting the manufacturer for a replacement.
- Connect the USB cable: Insert one end of the USB cable into the USB port on your laptop. The USB connector should fit snugly into the port without any excessive force. Avoid forcefully inserting or bending the USB connector, as it can damage the port or the cable.
- Power on your microphone: Some USB microphones have an on/off switch or button on the body of the microphone. Ensure that the microphone is powered on before proceeding.
- Check the connection: Once the USB cable is securely connected, your ASUS laptop should detect the USB microphone automatically. The operating system will install any necessary drivers or software needed to support the microphone. Wait for the installation process to complete.
- Verify the connection: Open your audio settings on your ASUS laptop. Depending on the operating system, you can access the audio settings by clicking on the volume icon in the system tray and selecting the appropriate option. Look for the USB microphone in the list of available audio input devices. Select it as your default recording device if it’s not already selected.
- Test the microphone: To ensure that the USB microphone is working correctly, open a recording application or use the default voice recorder on your ASUS laptop. Speak into the microphone and monitor the audio levels. If you see activity on the audio meters or hear your voice playback, the USB microphone is successfully connected and working.
Once you have successfully connected your USB microphone to your ASUS laptop, you can begin recording high-quality audio or use it for online meetings, video calls, and other audio-related tasks. Enjoy the convenience and enhanced audio experience that comes with using a USB microphone!
Configuring the USB Microphone Settings on your ASUS Laptop
After connecting your USB microphone to your ASUS laptop, it’s important to configure the microphone settings to ensure optimal performance and quality. Follow these steps to configure the settings:
- Access the audio settings: Open the audio settings on your ASUS laptop. On Windows, right-click on the volume icon in the system tray and select “Sounds” or “Recording devices.” On macOS, open the Apple menu, go to “System Preferences,” and select “Sound” or “Input.”
- Select the USB microphone as the default device: In the audio settings, locate the USB microphone device in the list of available recording devices. Right-click on it (Windows) or click on it (macOS) and select “Set as Default Device” or “Use this Device for Sound Input.” This ensures that your ASUS laptop uses the USB microphone as the primary audio input device.
- Adjust the microphone volume: In the audio settings, you will find a slider or level meter for controlling the microphone volume. Test your microphone by speaking into it and adjust the volume accordingly. Keep the volume at an appropriate level to avoid distortion or overly quiet recordings.
- Configure microphone enhancements (if available): Some ASUS laptops may have additional audio enhancement features that can improve the microphone’s performance. These features may include noise cancellation, echo reduction, or equalizer settings. Explore the audio settings and make adjustments based on your specific requirements and environment.
- Test the microphone settings: Open a recording application or use the default voice recorder on your ASUS laptop to test the microphone settings. Speak into the microphone and monitor the audio levels and quality. If necessary, make further adjustments to the volume or other settings to achieve the desired audio results.
Once you have configured the USB microphone settings on your ASUS laptop, you are ready to make the most of your microphone for recording, online meetings, or any other audio-related tasks. Remember to regularly check and fine-tune your settings based on your specific needs to ensure optimal performance and audio quality.
Adjusting the Volume and Gain Settings
When using a USB microphone on your ASUS laptop, it’s important to understand how to adjust the volume and gain settings to achieve the optimal audio levels and clarity. Here are the steps to adjust these settings:
- Volume Control: The volume control on your ASUS laptop adjusts the overall volume level of your system, including the output volume of your USB microphone. You can access the volume control by clicking on the volume icon in the system tray (Windows) or the menu bar (macOS). Adjust the volume to a comfortable level to ensure that your audio is neither too loud nor too quiet.
- Microphone Gain: The gain setting on your USB microphone controls the microphone’s sensitivity and the amplification of the input signal. Increasing the gain can make your voice or audio source louder, but it may also introduce more background noise. Decreasing the gain can reduce sensitivity but may result in a softer recording. Locate the gain control on your USB microphone, which is often a physical dial or button, and adjust it according to your specific recording needs.
- Monitor Input Levels: Monitoring the input levels of your USB microphone is essential to ensure that your audio is not distorting or clipping. In the audio settings on your ASUS laptop, you should see an input level meter or an indicator that shows the input signal strength. Speak into the microphone or make sound into it while monitoring the input levels. Adjust the gain or volume settings to ensure that the input levels stay within the acceptable range (usually indicated by a green zone) without hitting the red zone, which indicates clipping or distortion.
- Test and Adjust: After making any changes to the volume and gain settings, it’s important to test and listen to the recorded audio or perform a test recording to ensure that the levels are optimal. Listen for any distortions, clipping, or excessively low audio. Make further adjustments to the volume and gain settings if necessary until you achieve the desired audio quality.
- Consider Room Acoustics: Keep in mind that the acoustics of your recording environment can also affect the overall audio quality. If you’re in a room with echo or excessive background noise, adjusting the volume and gain settings alone may not completely resolve these issues. Consider using acoustic treatments, such as soundproofing or using a pop filter, to improve the recording conditions.
By mastering the art of adjusting the volume and gain settings on your USB microphone, you can ensure the best audio quality and clarity in your recordings or online communications. Take the time to experiment, test, and fine-tune these settings to achieve optimal results.
Troubleshooting Common Issues with USB Microphones on ASUS Laptops
While USB microphones offer convenience and high-quality audio recording, it’s not uncommon to encounter some common issues when using them on ASUS laptops. Here are some troubleshooting tips to help resolve these issues:
- Check USB Connection: Ensure that the USB microphone is securely connected to your ASUS laptop. If the connection is loose or unstable, try reconnecting to a different USB port or using a different USB cable to eliminate any connection-related issues.
- Restart your Laptop: Sometimes, a simple restart can resolve any temporary software or driver conflicts. Restart your ASUS laptop and check if the USB microphone is detected and functioning properly after rebooting.
- Update Audio Drivers: Outdated or incompatible audio drivers can cause issues with USB microphones. Visit the ASUS support website or use a driver update tool to check for and install the latest audio drivers for your laptop model.
- Adjust Privacy Settings: On Windows 10, ensure that the privacy settings allow apps and programs to access the microphone. Go to “Settings,” then “Privacy” and select “Microphone” to enable access for the applications you intend to use with your USB microphone.
- Test on Different Devices: To determine if the issue lies with the USB microphone or the laptop, try connecting the microphone to a different device, such as another computer or a smartphone. If the microphone works fine on other devices, the problem may be specific to your ASUS laptop.
- Check for Conflicting Programs: Some applications or programs may interfere with the proper functioning of the USB microphone. Close any unnecessary applications running in the background and temporarily disable any anti-virus, firewall, or audio-related software to see if they are causing conflicts.
- Reset Audio Settings: If you have made extensive changes to the audio settings on your ASUS laptop, try resetting them to their default configurations. Open the audio settings and look for a “Reset” or “Restore Defaults” option. Remember to reconfigure the microphone settings afterward.
- Verify USB Port Power: Some USB microphones may require more power than others. Check if the USB port you’re using provides sufficient power for the microphone to function reliably. If not, try using a powered USB hub or connecting the microphone to a different port that can supply the necessary power.
- Contact Manufacturer Support: If you have exhausted all troubleshooting options and are still experiencing issues, it’s advisable to contact the manufacturer’s customer support. They can provide further assistance, troubleshoot specific issues, or offer a repair or replacement if necessary.
By following these troubleshooting tips, you can overcome common issues and ensure that your USB microphone works seamlessly with your ASUS laptop. Remember to be patient and thorough in your troubleshooting process to identify and resolve any underlying problems.
Conclusion
Using a USB microphone on your ASUS laptop can greatly enhance your audio recording and communication experience. The convenience, ease of use, and high-quality audio make USB microphones a popular choice for content creators, podcasters, musicians, and those who want to improve their online meetings or video calls.
In this guide, we have covered several important aspects of using a USB microphone on an ASUS laptop. We discussed the benefits of using a USB microphone, how to choose the right one for your needs, and the step-by-step process of connecting and configuring the microphone settings.
We also explored troubleshooting common issues that may arise when using USB microphones on ASUS laptops, providing useful tips to overcome these challenges. By following these guidelines, you can ensure a seamless and optimal performance of your USB microphone.
Remember to adjust the volume and gain settings to achieve optimal audio levels, monitor input levels to avoid distortion, and consider room acoustics for the best recording environment. Additionally, be aware of common issues such as USB connectivity problems or outdated audio drivers, and implement the troubleshooting steps provided to resolve these issues.
By embracing the possibilities offered by USB microphones and optimizing their usage on your ASUS laptop, you can elevate the quality of your audio recordings, meetings, and content creation. Enjoy the convenience, versatility, and superior sound quality that USB microphones bring to your ASUS laptop, and unlock your creative potential.


