Introduction
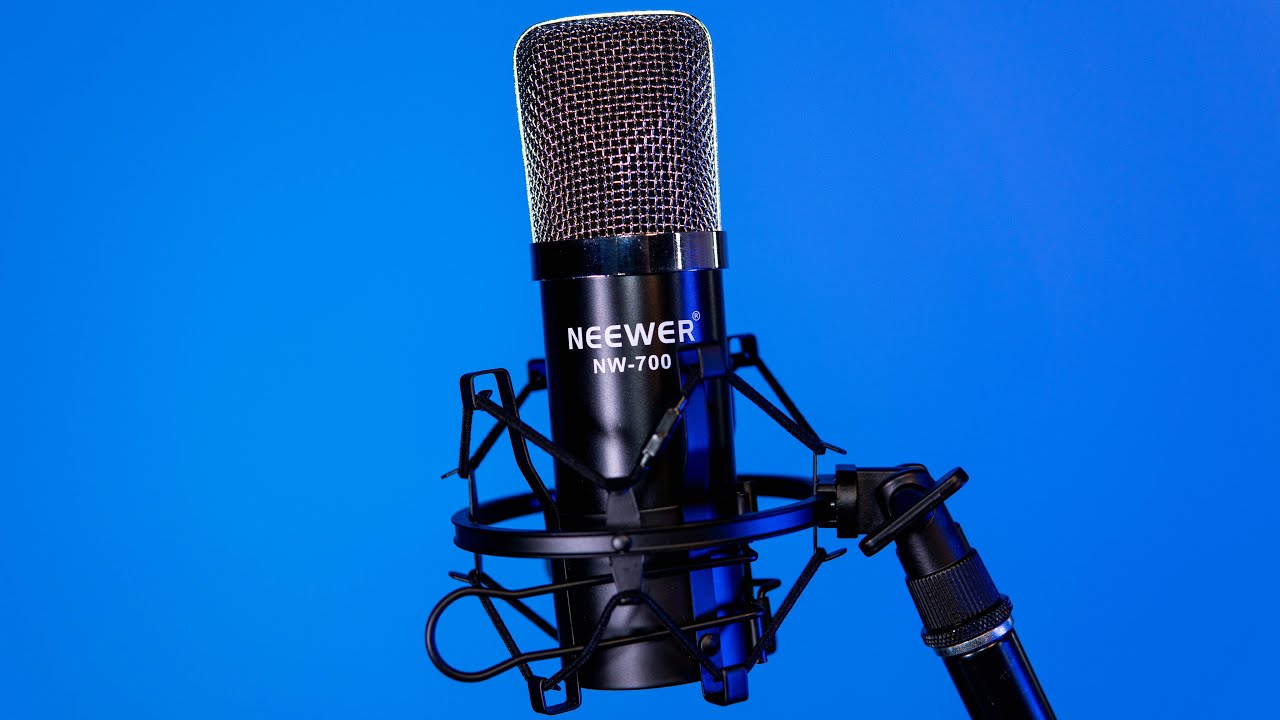
Welcome to the world of professional audio recording! The Neewer NW-700 Professional Studio Broadcasting Recording Condenser Microphone is a versatile and high-quality tool that can elevate your audio production to the next level. Whether you are a podcaster, musician, voice-over artist, or content creator, this microphone is designed to deliver exceptional sound clarity and precision.
With its cardioid polar pattern and wide frequency response, the NW-700 is ideal for capturing vocals and instruments with stunning detail. In this guide, we will walk you through the process of setting up and using the Neewer NW-700 microphone, from unboxing to testing. By following these steps, you will be well on your way to producing professional-grade audio recordings from the comfort of your own space.
This comprehensive guide will cover everything you need to know to get started with your Neewer NW-700 microphone. From unboxing the components to assembling the microphone stand and shock mount, connecting the microphone to a power source, setting up the microphone with a pop filter, and connecting it to a computer or audio interface, we have you covered. We will also explore how to test the microphone and make necessary adjustments to ensure optimal performance.
Whether you are a seasoned audio engineer or a beginner looking to enhance your recording setup, this guide will provide you with the essential knowledge to maximize the potential of your Neewer NW-700 microphone. So, let's dive in and explore the process of setting up and utilizing this professional studio condenser microphone to unleash your creativity and achieve pristine audio recordings.
Unboxing the Neewer NW-700 Professional Studio Broadcasting Recording Condenser Microphone
As you embark on your journey with the Neewer NW-700 microphone, the unboxing experience sets the stage for what’s to come. Upon receiving your package, you’ll find the components neatly nestled within. Carefully remove the items from the box and take inventory to ensure that everything is included.
The contents of the package typically include the NW-700 condenser microphone, a shock mount, an adjustable suspension scissor arm stand, a table mounting clamp, a metal microphone pop filter, a ball-type anti-wind foam cap, and an XLR male to female microphone cable. Each component is essential for assembling and utilizing the microphone effectively.
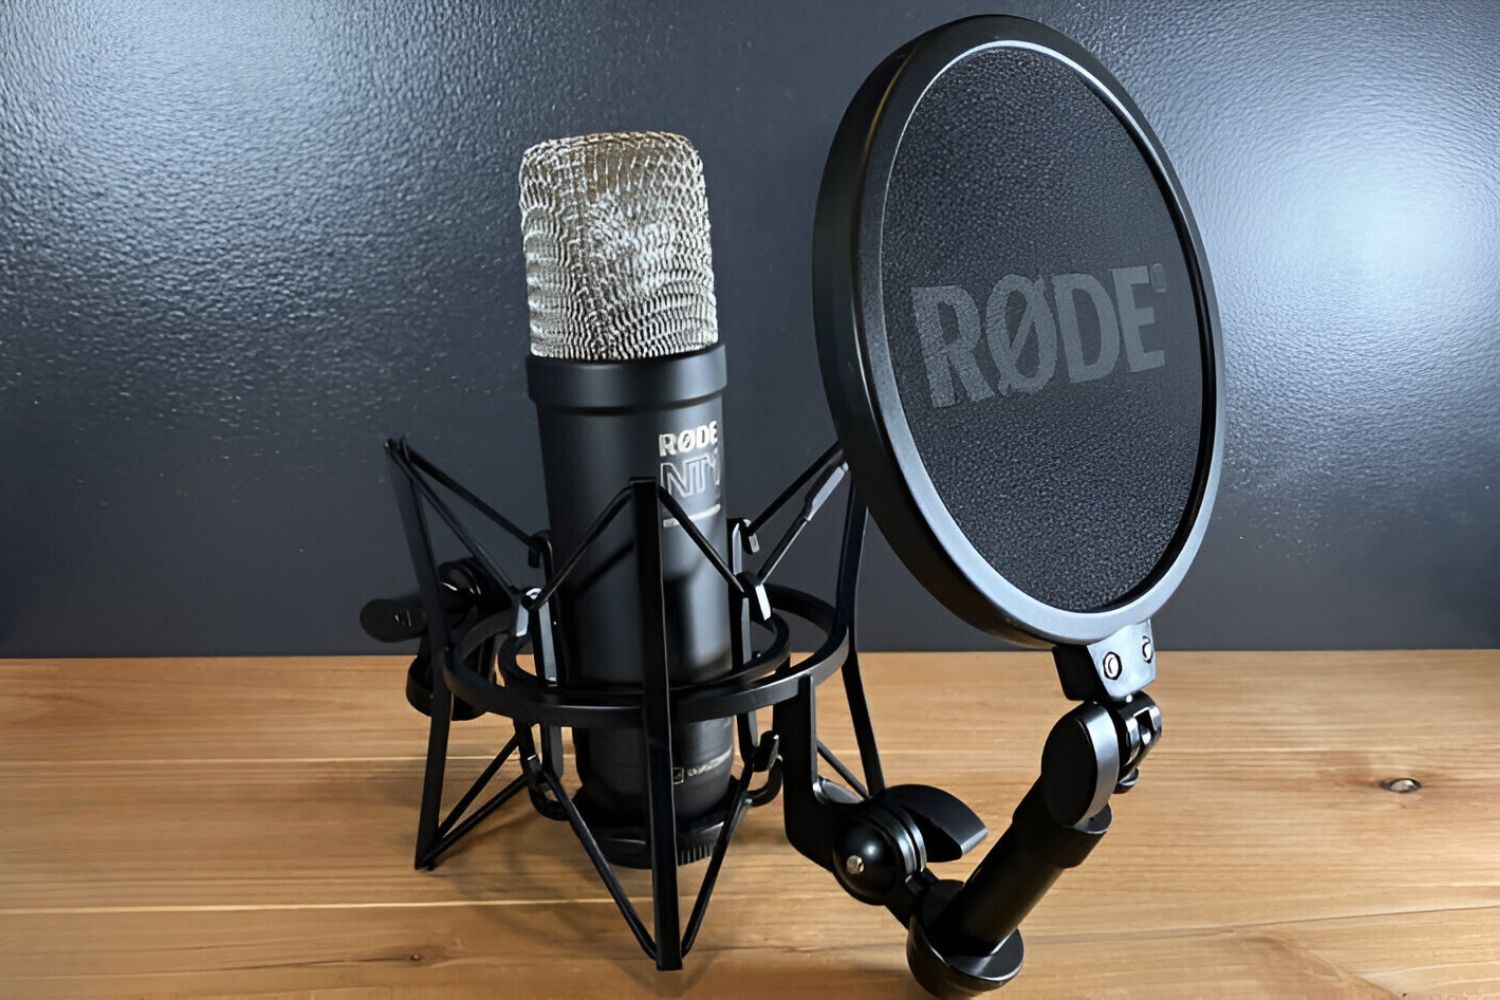
As you unbox the NW-700 microphone, take a moment to appreciate the build quality and attention to detail. The microphone itself exudes a professional aesthetic, with its sleek design and robust construction. The shock mount, designed to minimize vibrations and handling noise, showcases thoughtful engineering, while the suspension scissor arm stand and table mounting clamp provide versatile options for positioning the microphone.
Inspect each component carefully to ensure that there are no visible signs of damage or defects. It’s essential to handle the microphone and its accessories with care during the unboxing process to avoid any potential issues that may arise from mishandling.
By unboxing the Neewer NW-700 microphone, you are taking the first step towards harnessing its capabilities to capture pristine audio. The unboxing experience sets the tone for the exciting journey ahead, as you prepare to assemble the components and unleash the full potential of this professional-grade studio condenser microphone.
Assembling the Microphone Stand and Shock Mount
Once you have unboxed the Neewer NW-700 microphone and its accompanying accessories, the next step is to assemble the microphone stand and shock mount. Proper assembly is crucial for ensuring stability and optimal performance during recording sessions.
Begin by setting up the suspension scissor arm stand, which provides a flexible and convenient way to position the microphone. Attach the table mounting clamp to a sturdy surface, such as a desk or table, ensuring that it is securely fastened. The adjustable arm stand should be affixed to the clamp, allowing for smooth and precise positioning of the microphone.
Next, carefully mount the shock mount onto the adjustable arm stand. The shock mount serves as a crucial component for isolating the microphone from vibrations and handling noise, resulting in cleaner and more professional audio recordings. Gently place the NW-700 microphone into the shock mount, ensuring that it is securely held in place without any excessive force applied.
As you assemble the microphone stand and shock mount, take the time to adjust the positioning to suit your recording setup. The flexibility of the suspension scissor arm stand allows you to position the microphone at the optimal distance and angle for capturing your desired audio source, whether it’s vocals, instruments, or other sound sources.
It’s important to handle the components with care during the assembly process, as the delicate nature of the microphone and shock mount requires gentle and precise handling. By properly assembling the microphone stand and shock mount, you are setting the stage for seamless recording sessions and ensuring that the Neewer NW-700 microphone is ready to deliver exceptional audio quality.
Connecting the Microphone to a Power Source
As you progress with setting up your Neewer NW-700 microphone, the next vital step is to connect it to a power source. The NW-700 is a condenser microphone that requires power to operate, and understanding how to effectively power the microphone is essential for seamless functionality.
The Neewer NW-700 microphone utilizes 48V phantom power, which is commonly supplied by audio interfaces, mixers, or dedicated phantom power supplies. If you are using an audio interface, ensure that it provides phantom power and that the corresponding switch or setting is activated to supply power to the microphone. For standalone phantom power supplies, connect the microphone to the supply using an XLR cable, and ensure that the supply is powered on.
It’s crucial to exercise caution when handling phantom power, as the voltage involved can pose a risk if not managed properly. Always follow the manufacturer’s guidelines for your specific audio interface or phantom power supply to ensure safe and proper operation.
Upon connecting the NW-700 microphone to a power source, you are providing it with the necessary energy to capture audio signals with clarity and precision. The power source plays a fundamental role in enabling the microphone to function optimally, allowing you to unleash its full potential in recording vocals, instruments, and various sound sources.
By understanding how to connect the Neewer NW-700 microphone to a power source, you are taking a significant stride towards harnessing its capabilities and integrating it seamlessly into your recording setup. With the microphone powered and ready, you are now poised to explore the next steps in maximizing its performance and capturing exceptional audio recordings.
Setting up the Microphone with a Pop Filter
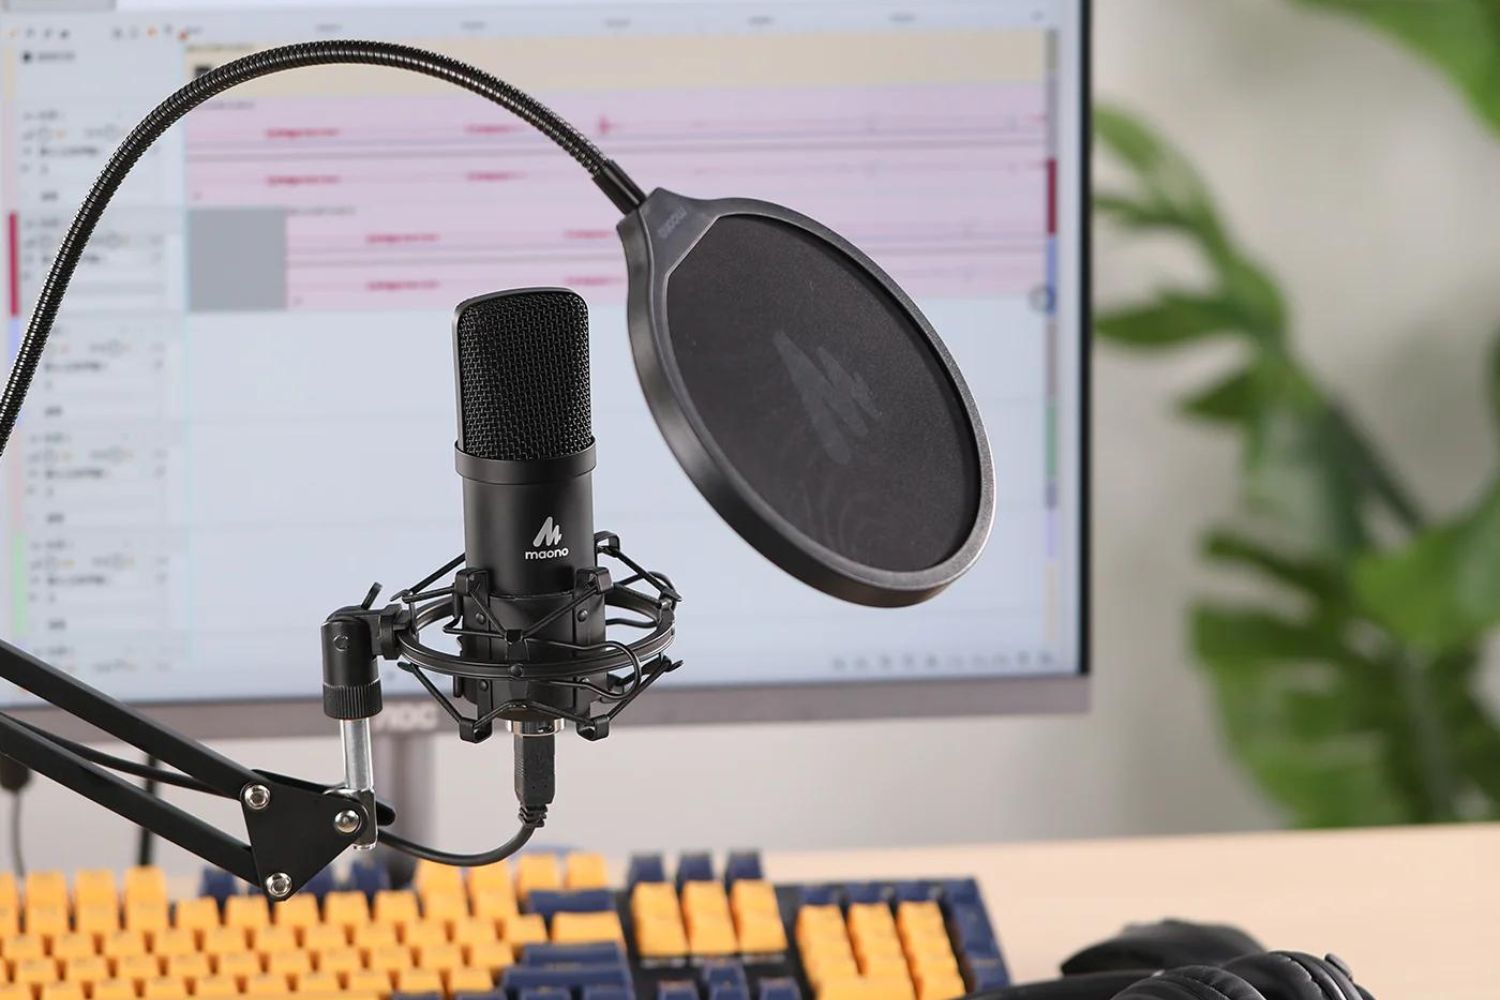
As you continue to configure your Neewer NW-700 microphone for optimal performance, incorporating a pop filter into your setup is a crucial step in ensuring professional-grade audio recordings. A pop filter, also known as a pop shield or windscreen, serves to mitigate plosive sounds and reduce the impact of breath and wind noise on the microphone, resulting in cleaner and more polished audio.
Begin by affixing the pop filter to the microphone stand, positioning it between the sound source and the microphone. The pop filter should be placed at a suitable distance from the microphone to effectively intercept plosive sounds without obstructing the audio capture. The flexible gooseneck or adjustable arm of the pop filter allows for precise positioning, enabling you to tailor its placement to your specific recording needs.
When positioning the pop filter, ensure that it forms a barrier between the vocalist or sound source and the microphone, intercepting bursts of air that may cause disruptive plosives. By strategically placing the pop filter, you can significantly enhance the clarity and intelligibility of vocal recordings while minimizing unwanted artifacts caused by air pressure variations.
It’s important to note that the pop filter not only serves to address plosive sounds but also acts as a protective barrier for the microphone, guarding against saliva and moisture that may inadvertently reach the sensitive components. This added layer of protection contributes to the longevity and reliability of the NW-700 microphone.
By incorporating a pop filter into your microphone setup, you are demonstrating a commitment to producing professional-quality audio recordings with attention to detail. The pop filter plays a pivotal role in refining the audio capture process, allowing you to achieve pristine vocal recordings and maintain a consistent level of audio quality across various recording sessions.
With the pop filter seamlessly integrated into your Neewer NW-700 microphone setup, you are poised to capture vocals and instruments with enhanced precision and clarity, setting the stage for exceptional audio production.
Connecting the Microphone to a Computer or Audio Interface
Once you have assembled and prepared your Neewer NW-700 microphone, the next step is to establish the connection between the microphone and your recording device, whether it’s a computer or an audio interface. This crucial step bridges the gap between the microphone and the recording platform, allowing you to capture and process audio signals with precision.
If you are connecting the NW-700 microphone to a computer, you will typically utilize an audio interface or an external sound card to facilitate the connection. Begin by identifying the appropriate input on the audio interface or sound card for the microphone. The NW-700 microphone utilizes an XLR connection, so ensure that the input on your recording device is compatible with XLR connections.
Using an XLR cable, connect the output of the NW-700 microphone to the designated input on the audio interface or sound card. Ensure that the connection is secure and that the cable is not subjected to excessive tension or strain, which could compromise the integrity of the connection.
If you are using an audio interface, configure the input settings to recognize the NW-700 microphone and adjust the input gain as needed to achieve an optimal recording level. This step is crucial for ensuring that the microphone signal is captured at an appropriate volume without introducing distortion or noise.
For a direct connection to a computer with a compatible XLR input, you may require an XLR to USB audio interface to facilitate the connection. These interfaces are designed to convert the analog signal from the microphone into a digital format that can be recognized by the computer, providing a seamless integration between the NW-700 microphone and your recording software.
By establishing a solid connection between the Neewer NW-700 microphone and your recording device, you are laying the foundation for capturing pristine audio with clarity and fidelity. The seamless integration of the microphone into your recording setup empowers you to explore the full potential of the NW-700 and unleash its capabilities in capturing vocals, instruments, and various sound sources with exceptional precision.
Testing the Microphone and Adjusting the Settings
With the Neewer NW-700 microphone connected to your recording device, it’s time to embark on the essential step of testing the microphone and fine-tuning the settings to ensure optimal performance. Testing the microphone allows you to evaluate its functionality, assess the audio quality, and make necessary adjustments to achieve the desired sound capture.
Begin by launching your preferred recording software or digital audio workstation (DAW) and selecting the input corresponding to the NW-700 microphone. Once the microphone input is selected, monitor the input levels to ensure that the signal is being received at an appropriate volume. Adjust the input gain on your audio interface or preamp to achieve a healthy signal level without clipping or distortion.
Once the input levels are set, perform a sound check by speaking into the microphone or playing an instrument to gauge the audio capture. Listen attentively to the playback and assess the clarity, tonal balance, and overall fidelity of the recorded sound. Pay close attention to any potential issues such as background noise, room reflections, or unwanted artifacts that may impact the audio quality.
During the testing phase, it’s beneficial to experiment with microphone positioning and orientation to determine the optimal placement for capturing your desired sound source. Adjust the angle and distance of the microphone to fine-tune the audio capture, taking note of any perceptible changes in tonal characteristics and clarity.
As you test the microphone, consider engaging in a variety of vocal and instrumental performances to evaluate its versatility and suitability for different recording scenarios. This comprehensive testing approach allows you to gain insight into the microphone’s capabilities across a range of applications, from capturing intimate vocal performances to recording dynamic instruments.
After conducting thorough testing, take note of any adjustments or enhancements that may be required to optimize the microphone’s performance. This may include refining the input gain, addressing environmental factors that impact sound quality, or implementing additional processing such as equalization or compression to further enhance the recorded audio.
By diligently testing the Neewer NW-700 microphone and meticulously adjusting the settings, you are actively refining the audio capture process to achieve exceptional results. This iterative approach to testing and adjustment empowers you to harness the full potential of the NW-700 microphone and elevate the quality of your audio recordings with precision and finesse.
Conclusion
Congratulations on successfully setting up and configuring your Neewer NW-700 Professional Studio Broadcasting Recording Condenser Microphone! By following the comprehensive guide provided, you have gained valuable insights into the process of unboxing, assembling, and optimizing the performance of this versatile microphone. As you embark on your journey of audio production and content creation, the NW-700 microphone stands ready to deliver exceptional sound quality and precision.
Throughout this guide, you have explored the essential steps of unboxing the microphone and its accompanying components, assembling the microphone stand and shock mount, connecting the microphone to a power source, and integrating a pop filter into your setup. Additionally, you have learned how to establish a seamless connection between the microphone and your recording device, as well as the crucial process of testing the microphone and fine-tuning the settings to achieve optimal audio capture.
By immersing yourself in the setup and utilization of the Neewer NW-700 microphone, you have demonstrated a commitment to producing professional-grade audio recordings with attention to detail and precision. The careful assembly and thoughtful integration of the microphone and its accessories lay the foundation for capturing pristine vocals, instruments, and various sound sources with exceptional clarity and fidelity.
As you continue to explore the capabilities of the NW-700 microphone, consider experimenting with different recording techniques, microphone placements, and processing methods to further enhance the versatility and sonic character of your audio productions. Embrace the opportunity to unleash your creativity and express your unique artistic vision through the captivating sound capture facilitated by the Neewer NW-700 microphone.
Moving forward, remember that the journey of audio production is a continuous evolution, and your experience with the Neewer NW-700 microphone will undoubtedly inspire new creative endeavors and innovative recording projects. Whether you are a podcaster, musician, voice-over artist, or content creator, the NW-700 microphone serves as a reliable and powerful tool to elevate your audio production endeavors to new heights.
As you embark on your recording endeavors with the Neewer NW-700 microphone, may your passion for sound capture be met with unparalleled inspiration and the fulfillment of your creative aspirations. Embrace the art of audio production, and let the NW-700 microphone be your steadfast companion in bringing your sonic visions to life with unparalleled clarity and artistry.