Introduction
Setting up a condenser microphone on a stand is a fundamental skill for anyone involved in audio recording, whether it's for podcasting, music production, voiceovers, or live streaming. A well-mounted microphone ensures optimal sound capture and allows for hands-free operation, providing a professional and convenient recording experience. In this comprehensive guide, we will walk you through the step-by-step process of setting up your condenser microphone on a stand, covering everything from choosing the right stand to connecting the microphone to an audio interface. By following these instructions, you can achieve an efficient and effective microphone setup that meets your specific recording needs.
A properly mounted condenser microphone not only enhances the quality of your recordings but also minimizes unwanted noise and vibrations. Whether you are a seasoned audio engineer or a beginner in the field of audio recording, understanding the nuances of setting up a condenser microphone is essential for achieving professional-grade sound. With the right equipment and techniques, you can elevate the quality of your recordings and create a seamless workflow that optimizes your recording experience.
Throughout this guide, we will provide detailed instructions on selecting the appropriate stand for your condenser microphone, attaching the shock mount to the microphone, mounting the microphone on the stand, adjusting the height and angle for optimal positioning, and connecting the microphone to an audio interface. Additionally, we will cover the crucial step of testing the setup to ensure that everything is functioning as intended. By the end of this tutorial, you will have the knowledge and confidence to set up your condenser microphone on a stand with precision and expertise, enabling you to embark on your recording journey with a solid foundation. Let's dive into the process of setting up your condenser microphone and unleash the full potential of your recording capabilities.
Choosing the Right Stand
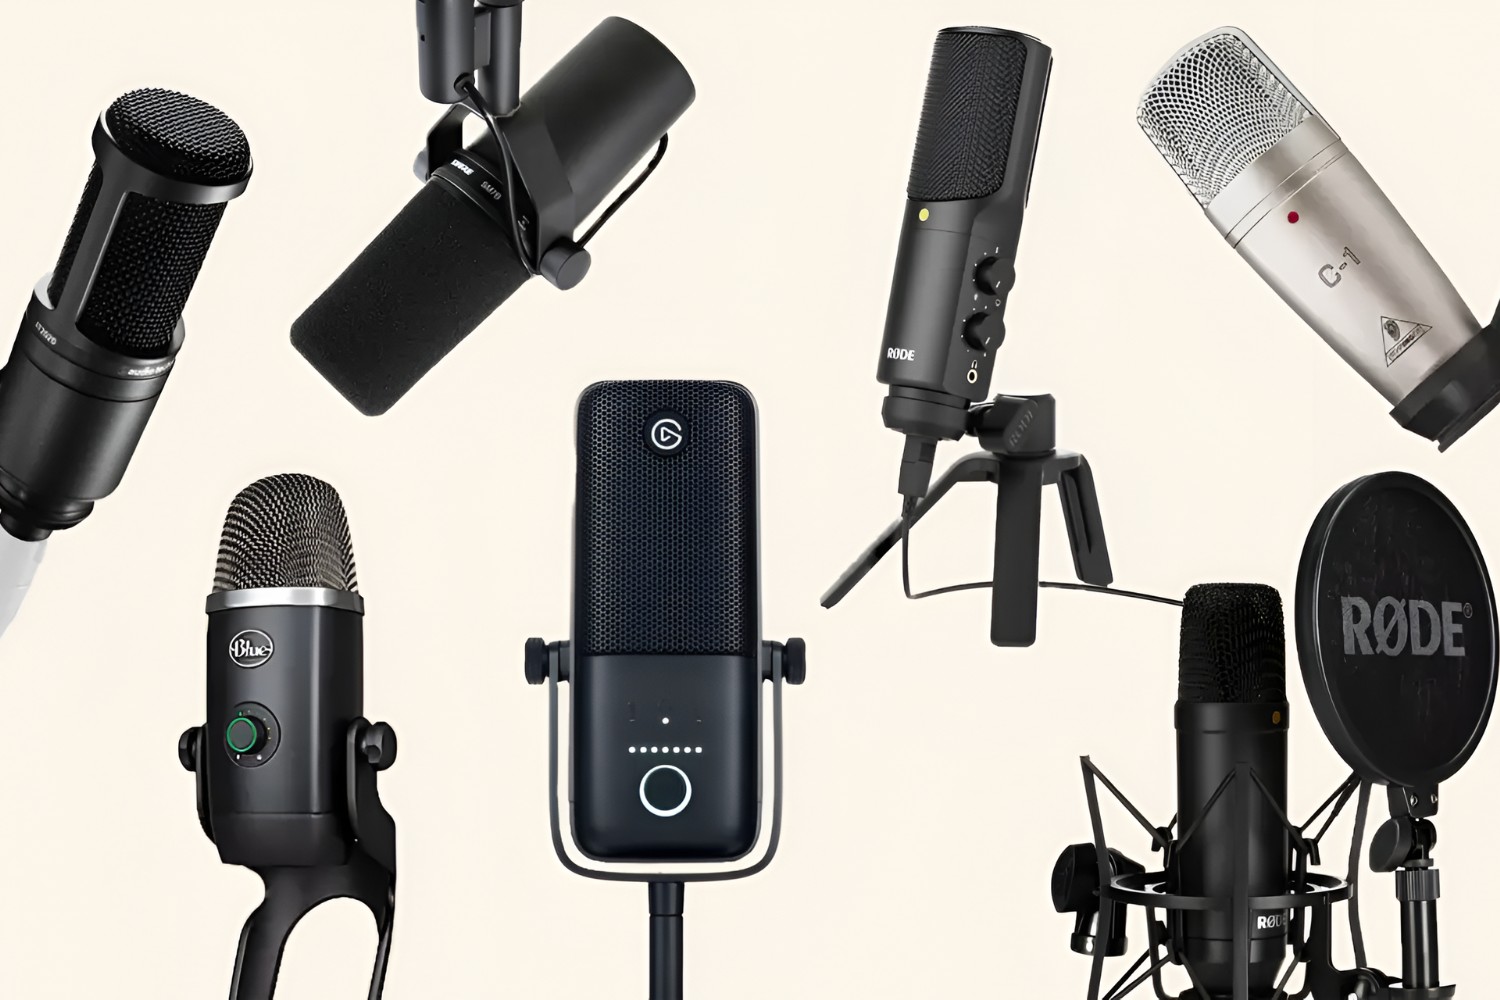
When it comes to setting up a condenser microphone, selecting the appropriate stand is the first crucial step in ensuring a stable and reliable setup. The stand serves as the foundation for your microphone, providing support and flexibility for positioning. There are several factors to consider when choosing the right stand for your condenser microphone, each of which contributes to the overall functionality and performance of the setup.
1. Stand Type: The type of stand you choose depends on the intended use of the microphone. For stationary recordings, such as in a studio setting, a tripod stand or a boom arm stand may be suitable. If you require mobility or plan to use the microphone for live performances, a floor stand with adjustable height and a sturdy base would be more practical.
2. Stability: Stability is paramount to prevent the microphone from tipping over or picking up unwanted vibrations. Look for stands with a solid and weighted base, especially if you anticipate any movement or foot traffic in the recording environment. A stable stand ensures that your microphone remains securely in place, contributing to the overall quality of your recordings.
3. Adjustability: The stand should offer a range of height and angle adjustments to accommodate various recording scenarios. This flexibility allows you to position the microphone precisely according to the sound source, whether it’s vocals, instruments, or ambient sounds. Additionally, consider stands with swivel mounts or articulating arms for further customization of the microphone’s placement.
4. Compatibility: Ensure that the stand is compatible with the shock mount or microphone clip designed for your specific condenser microphone model. Some stands come with universal mounting options, while others may require adapters to fit certain microphone attachments.
By carefully evaluating these factors, you can choose a stand that complements your condenser microphone and meets the demands of your recording setup. The right stand not only provides stability and adjustability but also contributes to the overall ergonomics of your recording environment, allowing for seamless and efficient operation.
Attaching the Shock Mount
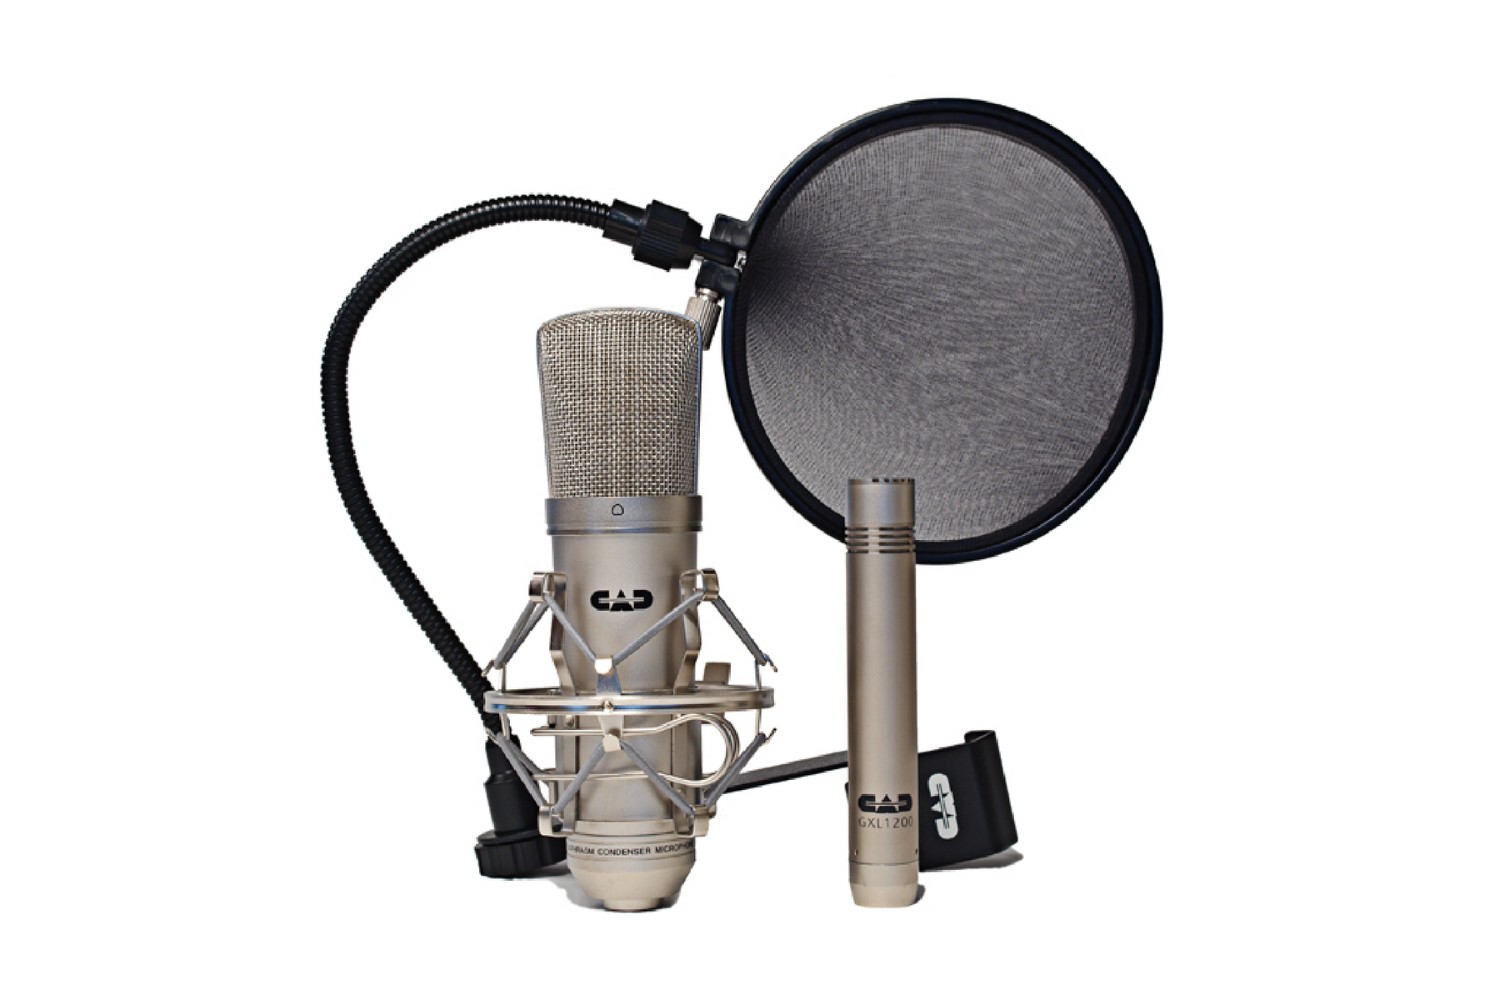
Attaching a shock mount to your condenser microphone is a critical step in the setup process, as it plays a key role in isolating the microphone from vibrations and handling noise. A shock mount consists of a suspension system that effectively absorbs and minimizes mechanical disturbances, ensuring that the microphone captures clean and undistorted audio. Follow these steps to properly attach the shock mount to your condenser microphone:
- Identify the Compatible Shock Mount: Ensure that the shock mount is designed to fit your specific condenser microphone model. Compatibility is essential to guarantee a secure and snug fit, preventing any potential slippage or instability.
- Prepare the Shock Mount: If the shock mount consists of multiple components, assemble it according to the manufacturer’s instructions. This may involve attaching the elastic bands or suspension system to the mount’s frame to create the necessary support for the microphone.
- Secure the Microphone: Gently place the condenser microphone into the shock mount, ensuring that it sits securely within the suspension system. The microphone should be centered and aligned to prevent any imbalance or tilting within the mount.
- Adjust the Mounting Angle: Depending on the design of the shock mount, you may have the option to adjust the angle of the microphone. Position the microphone at the desired angle, taking into account the sound source and the intended recording orientation.
- Secure the Mounting Screws: If the shock mount features locking screws or clamps, carefully tighten them to secure the microphone in place. Be cautious not to over-tighten, as this may exert unnecessary pressure on the microphone or the shock mount components.
By following these steps, you can effectively attach the shock mount to your condenser microphone, creating a stable and vibration-resistant mounting solution. The shock mount serves as a crucial accessory in the microphone setup, safeguarding the integrity of your recordings and ensuring consistent audio quality, particularly in environments prone to mechanical disturbances or handling noise.
Mounting the Microphone
Mounting the condenser microphone onto the stand is a pivotal step that directly impacts the microphone’s positioning and stability during recording sessions. Proper mounting ensures that the microphone remains securely in place, allowing for precise adjustments and optimal capture of sound. Follow these steps to effectively mount your condenser microphone on the stand:
- Prepare the Stand: If using a tripod stand, extend the legs and ensure that the stand is positioned on a level surface. For boom arm stands, adjust the arm’s length and angle according to your recording setup and the intended placement of the microphone.
- Attach the Shock Mount: If the condenser microphone is equipped with a shock mount, ensure that it is securely attached to the microphone before mounting it on the stand. The shock mount serves as a crucial component in isolating the microphone from vibrations, contributing to the overall stability of the setup.
- Position the Microphone: Carefully place the microphone, along with the attached shock mount, onto the stand’s mounting mechanism. Ensure that the microphone is centered and aligned within the mount, providing a balanced and stable configuration for recording.
- Secure the Microphone: Depending on the stand’s design, use the provided locking mechanism or tightening knobs to secure the microphone in place. Ensure that the microphone is firmly held by the stand, minimizing any potential movement or instability during recording sessions.
- Adjust the Angle and Height: Utilize the stand’s adjustable features to set the desired angle and height for the microphone. This step is crucial in positioning the microphone according to the sound source, whether it’s vocals, instruments, or ambient recordings. Aim for an optimal placement that captures the intended audio with precision.
By following these steps, you can effectively mount your condenser microphone on the stand, creating a stable and adjustable setup for your recording needs. The proper mounting of the microphone sets the stage for accurate sound capture and allows for seamless adjustments to accommodate various recording scenarios, ultimately contributing to the overall quality of your audio productions.
Adjusting the Height and Angle
Once the condenser microphone is securely mounted on the stand, the next crucial step is to adjust the height and angle to achieve optimal positioning for recording. Properly configuring the microphone’s height and angle is essential for capturing the desired sound source with precision and clarity. Follow these guidelines to effectively adjust the height and angle of your condenser microphone:
- Consider the Sound Source: Assess the location and nature of the sound source you intend to capture. Whether it’s vocals, instruments, or ambient sounds, understanding the direction and proximity of the sound is essential in determining the microphone’s positioning.
- Set the Height: Adjust the stand’s height to position the microphone at an appropriate distance from the sound source. For vocal recordings, the microphone should typically be positioned at mouth level, allowing for clear and direct capture of the vocals. When recording instruments, adjust the height to align the microphone with the instrument’s sound projection area.
- Angle the Microphone: Tilt the microphone to the desired angle based on the sound source and the recording environment. Angling the microphone ensures that it captures the sound with optimal sensitivity and rejects unwanted noise or reflections. Experiment with different angles to find the most favorable position for your specific recording scenario.
- Test for Positioning: Before finalizing the height and angle adjustments, conduct a brief test recording to evaluate the microphone’s positioning. Listen for the clarity, balance, and presence of the captured sound, making any necessary adjustments to refine the microphone’s orientation.
By carefully adjusting the height and angle of your condenser microphone, you can tailor its positioning to suit the unique characteristics of the sound source and the recording environment. This attention to detail ensures that the microphone captures the intended audio with accuracy and fidelity, laying the groundwork for high-quality recordings across various applications.
Connecting the Microphone to an Audio Interface
Once the condenser microphone is securely positioned on the stand, the next essential step is to connect it to an audio interface to facilitate the transfer of audio signals to a recording device or computer. The audio interface serves as the intermediary device that converts the analog signals from the microphone into digital data, enabling seamless integration with recording software and hardware. Follow these steps to effectively connect your condenser microphone to an audio interface:
- Select the Appropriate Cable: Choose a high-quality XLR cable to establish the connection between the condenser microphone and the audio interface. Ensure that the cable length is sufficient to reach from the microphone to the audio interface without causing tension or strain on the connectors.
- Locate the Microphone Input: Identify the microphone input on the audio interface, typically labeled as “Mic In” or “XLR In.” This input is designed to receive the balanced signal from the condenser microphone and is equipped with an XLR connector to establish a secure connection.
- Connect the XLR Cable: Plug one end of the XLR cable into the output of the condenser microphone, ensuring a snug and secure connection. Then, connect the other end of the XLR cable to the microphone input on the audio interface, firmly securing the connection to prevent any signal loss or interference.
- Set the Input Gain: Adjust the input gain or preamp level on the audio interface to optimize the signal strength from the condenser microphone. Carefully increase the gain while monitoring the signal level to prevent clipping or distortion, ensuring that the microphone’s output is appropriately amplified for recording.
- Monitor the Signal: Utilize the audio interface’s monitoring features to listen to the microphone’s signal in real time. This allows you to verify the connection and ensure that the microphone’s output is being accurately captured by the audio interface, providing the opportunity to make any additional adjustments as needed.
By following these steps, you can effectively connect your condenser microphone to an audio interface, establishing a direct and reliable pathway for capturing high-quality audio. The seamless integration between the microphone and the audio interface enables you to harness the full potential of the condenser microphone’s capabilities, laying the groundwork for professional-grade recordings and productions.
Testing the Setup
After completing the setup process for your condenser microphone, it is essential to conduct thorough testing to ensure that the entire configuration is functioning optimally and delivering the expected audio quality. Testing the setup allows you to identify and address any potential issues or discrepancies before engaging in critical recording sessions. Follow these steps to effectively test your condenser microphone setup:
- Check for Signal Integrity: Begin by verifying that the microphone is successfully sending a signal to the audio interface. Use the monitoring capabilities of the audio interface to confirm that the microphone’s output is being accurately received and processed.
- Assess Audio Quality: Speak into the microphone or produce sound from the intended source to evaluate the quality of the captured audio. Pay attention to the clarity, presence, and absence of unwanted noise or artifacts in the recorded signal.
- Test Different Recording Scenarios: Experiment with various sound sources and recording scenarios to assess the microphone’s performance across different applications. This may involve recording vocals, instruments, or ambient sounds to gauge the microphone’s versatility and fidelity in capturing diverse audio sources.
- Adjust Settings as Needed: If any issues or inconsistencies are identified during testing, make the necessary adjustments to the microphone’s positioning, audio interface settings, or recording environment to address the observed challenges. Continuously monitor the signal and audio quality as you refine the setup.
- Record and Playback: Record a brief sample of audio using the setup and play it back to evaluate the recorded material. Listen for any anomalies, distortions, or deficiencies in the audio, making note of any areas that require further refinement or troubleshooting.
By systematically testing the setup, you can gain confidence in the reliability and performance of your condenser microphone configuration. Thorough testing not only ensures that the setup meets your recording requirements but also provides valuable insights into optimizing the microphone’s capabilities for diverse recording scenarios.