Introduction
When it comes to audio recording or live performances, having a reliable and high-quality microphone is essential. With the rise of USB microphones, connecting them to a mixer has become a common requirement for many audio enthusiasts. Whether you’re a podcaster, musician, or content creator, understanding how to hook up a USB microphone to a mixer can greatly enhance your audio production capabilities.
In this guide, we’ll walk you through the process of connecting a USB microphone to a mixer step by step. We’ll cover everything from choosing the right microphone and gathering the necessary equipment to adjusting the levels and troubleshooting common issues. By the end, you’ll have the knowledge and confidence to connect your USB microphone to a mixer effortlessly.
Before we delve into the technical aspects, let’s first clarify the basics. A USB microphone is a microphone that connects directly to your computer via a USB cable. It bypasses the need for any additional audio interfaces or external devices, making it a convenient choice for amateurs and professionals alike. On the other hand, a mixer is a device that allows you to control and adjust the audio signals from various sources, such as microphones, instruments, and media players. It provides you with greater flexibility and control over your audio recordings or live performances.
Now that we have a clear understanding of what USB microphones and mixers are, let’s move on to the next section, where we’ll explore how to choose the right USB microphone for your specific needs.
Understanding the Basics
Before you dive into connecting a USB microphone to a mixer, it’s important to comprehend the basic concepts involved. This will help you make informed decisions and troubleshoot any issues that may arise along the way.
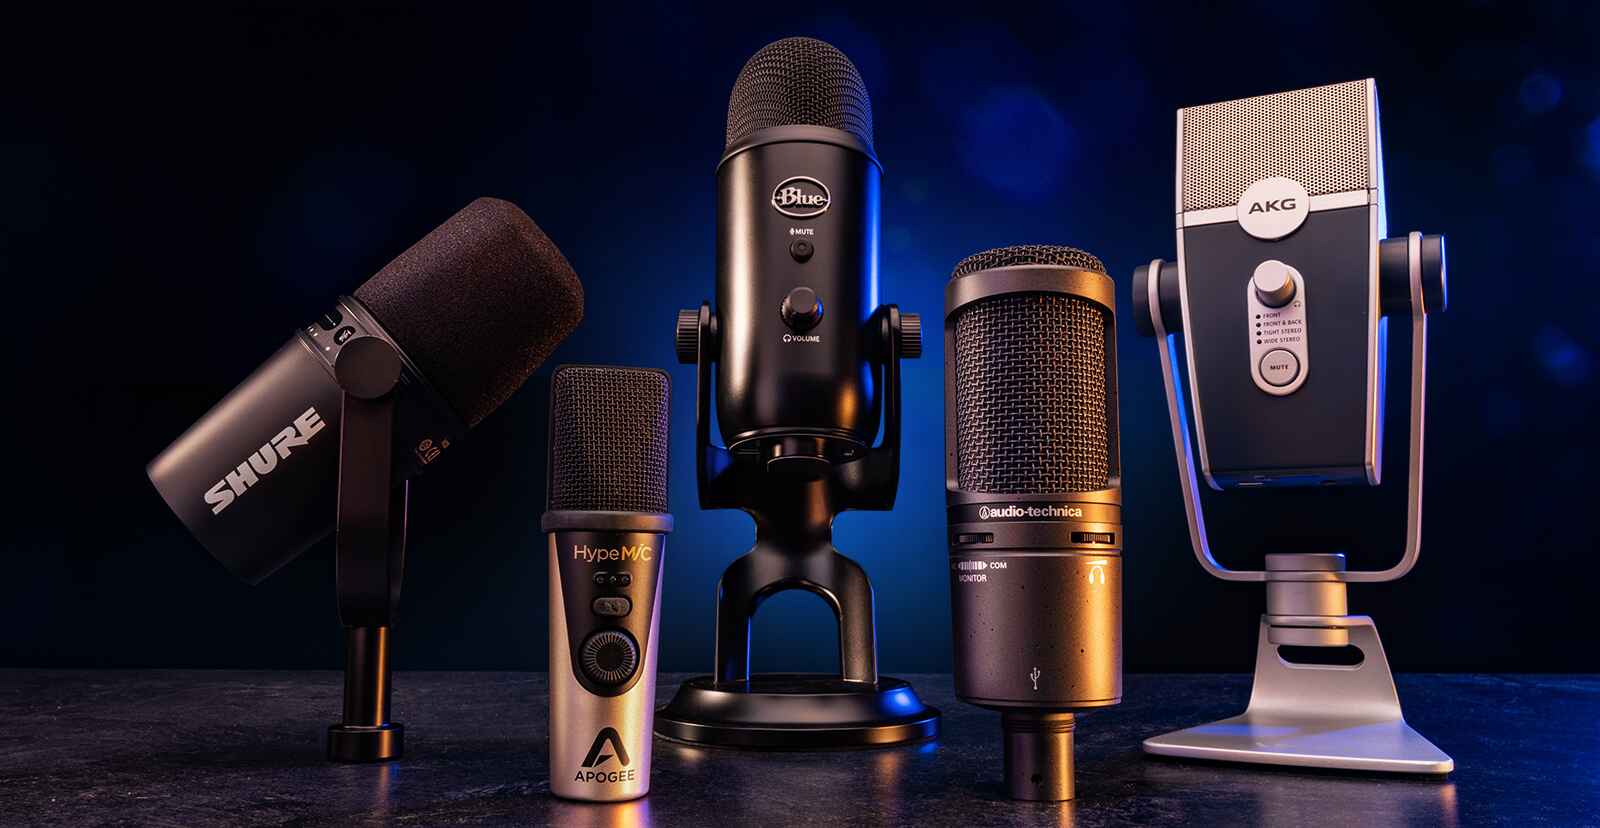
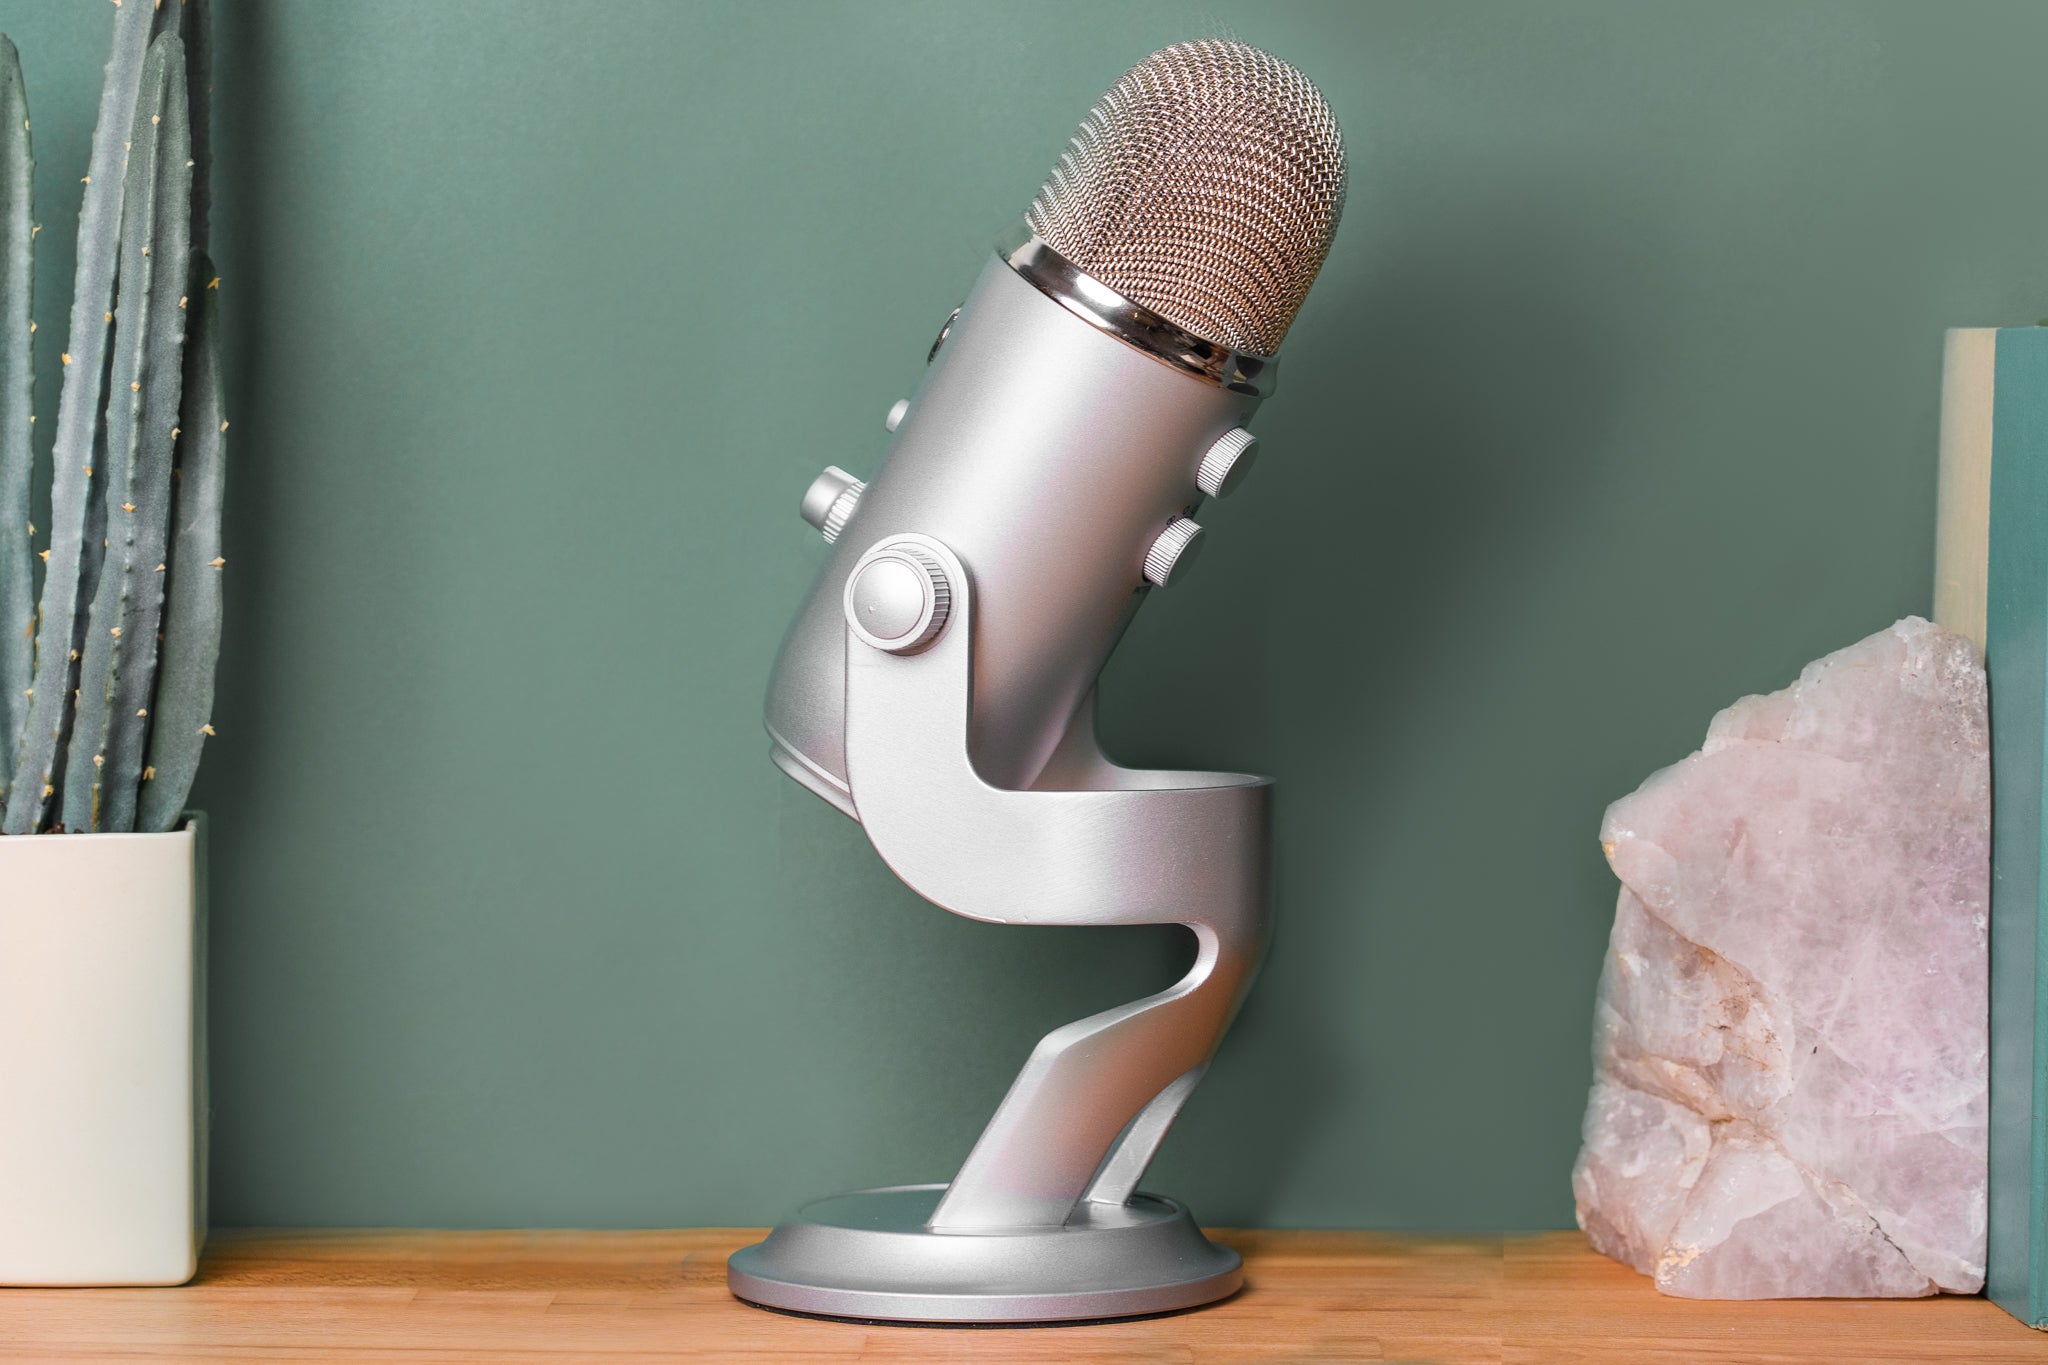
Firstly, let’s understand the different types of USB microphones available. There are two main categories: dynamic microphones and condenser microphones. Dynamic microphones are known for their durability and ability to handle high sound pressure levels, making them ideal for live performances or recording loud instruments. Condenser microphones, on the other hand, offer superior sensitivity and capture more detail, making them popular for studio recordings and vocal performances.
Each USB microphone has its own unique features and specifications. It’s crucial to assess your specific recording or performance needs before selecting a USB microphone. Consider factors such as frequency response, polar pattern, and sensitivity to ensure that the microphone you choose complements your voice or instrument and the environment in which you’ll be using it.
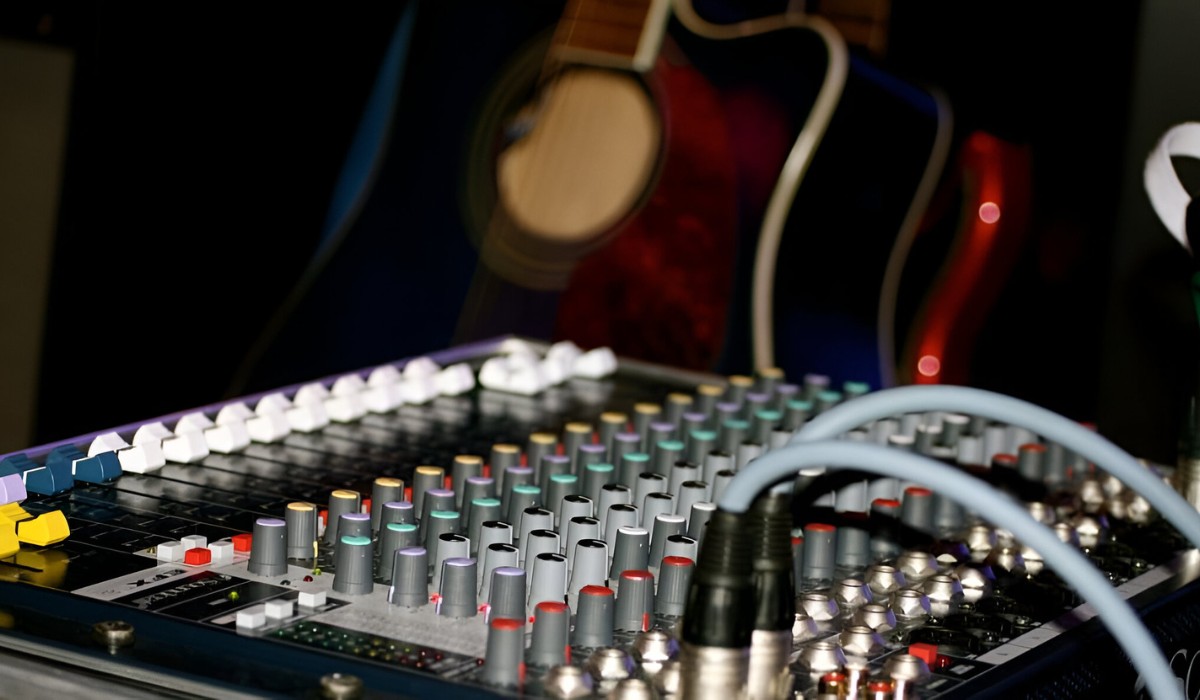
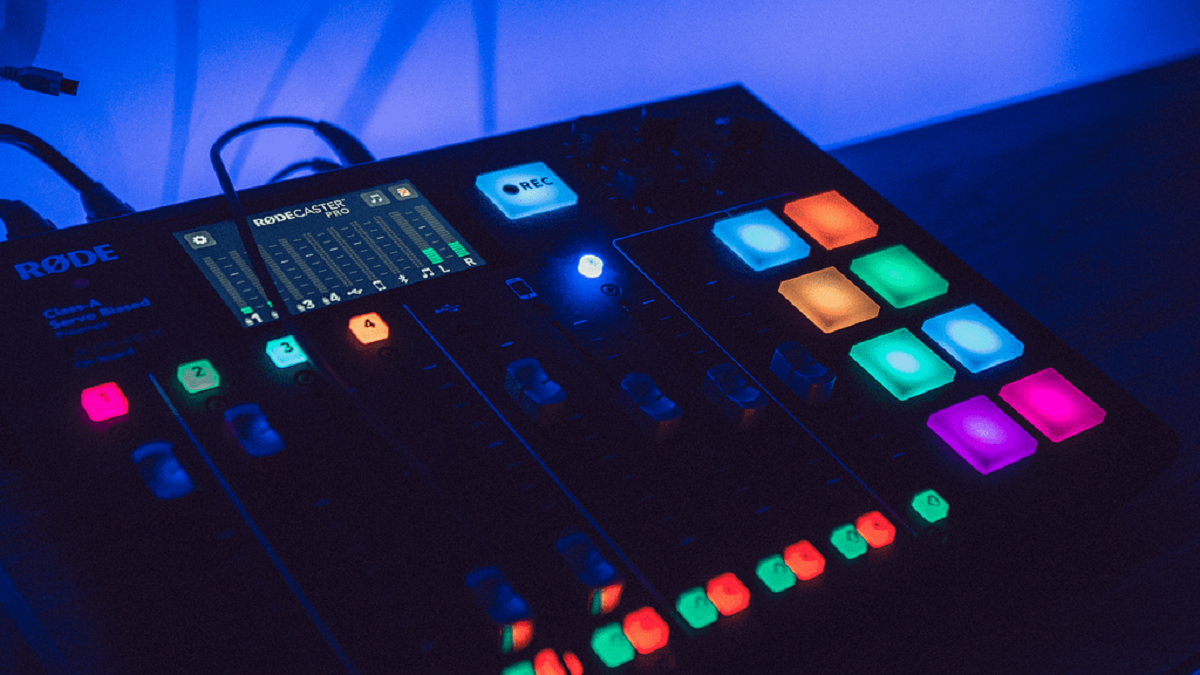
Next, let’s touch upon the purpose and functionality of a mixer. A mixer allows you to combine audio signals from multiple sources and adjust their levels, tone, and effects. It acts as a control center for your audio setup, giving you the ability to finely tune your sound. Mixers come in various sizes and configurations, ranging from compact portable mixers to larger studio-grade models. When choosing a mixer, consider the number of channels you’ll need, the types of inputs and outputs required, and any additional features like built-in effects or equalizers.
Now that you have a solid grasp of the basics, let’s move on to the next section, where we’ll discuss how to choose the right USB microphone for your needs.
Choosing the Right USB Microphone
Choosing the right USB microphone is crucial to ensure optimal sound quality and performance. With so many options available in the market, it can be overwhelming to make a decision. However, by considering a few key factors, you can narrow down your choices and find the perfect USB microphone for your needs.
The first consideration is the intended use of the microphone. Are you primarily using it for podcasting, vocal recordings, instruments, or live performances? The answer to this question will determine the type of microphone you should select. Dynamic microphones are well-suited for live performances and environments with high sound pressure levels. On the other hand, condenser microphones excel in capturing delicate nuances and are ideal for studio recordings and vocal performances.
Next, consider the polar pattern of the microphone. The polar pattern refers to the microphone’s sensitivity and directionality. The most common polar patterns are cardioid, omnidirectional, and bi-directional. Cardioid microphones are the most versatile, as they capture sound from the front and reject noise from the sides and rear. Omnidirectional microphones capture sound from all directions, making them suitable for group recordings or capturing ambient sound. Bi-directional microphones pick up sound from the front and back, making them ideal for interviews or duet performances.
Another crucial factor to consider is the frequency response of the microphone. The frequency response refers to the range of frequencies that the microphone can capture. It’s important to choose a USB microphone that can accurately reproduce the frequencies relevant to your recordings. For vocal recordings, a microphone with a frequency response of around 80 Hz to 15 kHz is generally sufficient. However, if you’re recording instruments or need a wider frequency range, you may want to consider a microphone with a broader frequency response.
Additionally, pay attention to the build quality and durability of the microphone. Look for sturdy construction and reliable components that can withstand regular use. Consider the size and weight of the microphone as well, particularly if you’ll be carrying it around or using it for mobile recordings.
Lastly, consider your budget and any additional features you may require. USB microphones come with a range of price points, and while budget options can still deliver decent sound quality, higher-end models may offer advanced features such as headphone monitoring, gain control, or built-in pop filters.
In summary, choosing the right USB microphone involves considering factors such as the intended use, polar pattern, frequency response, build quality, budget, and additional features. By carefully assessing your needs and doing some research, you can find a USB microphone that will elevate your recordings or performances to the next level.
Gathering the Necessary Equipment
Before you can start connecting your USB microphone to a mixer, you’ll need to gather the necessary equipment. Having everything prepared and readily available will ensure a smooth and efficient setup process. Here’s a list of the essential equipment you’ll need:
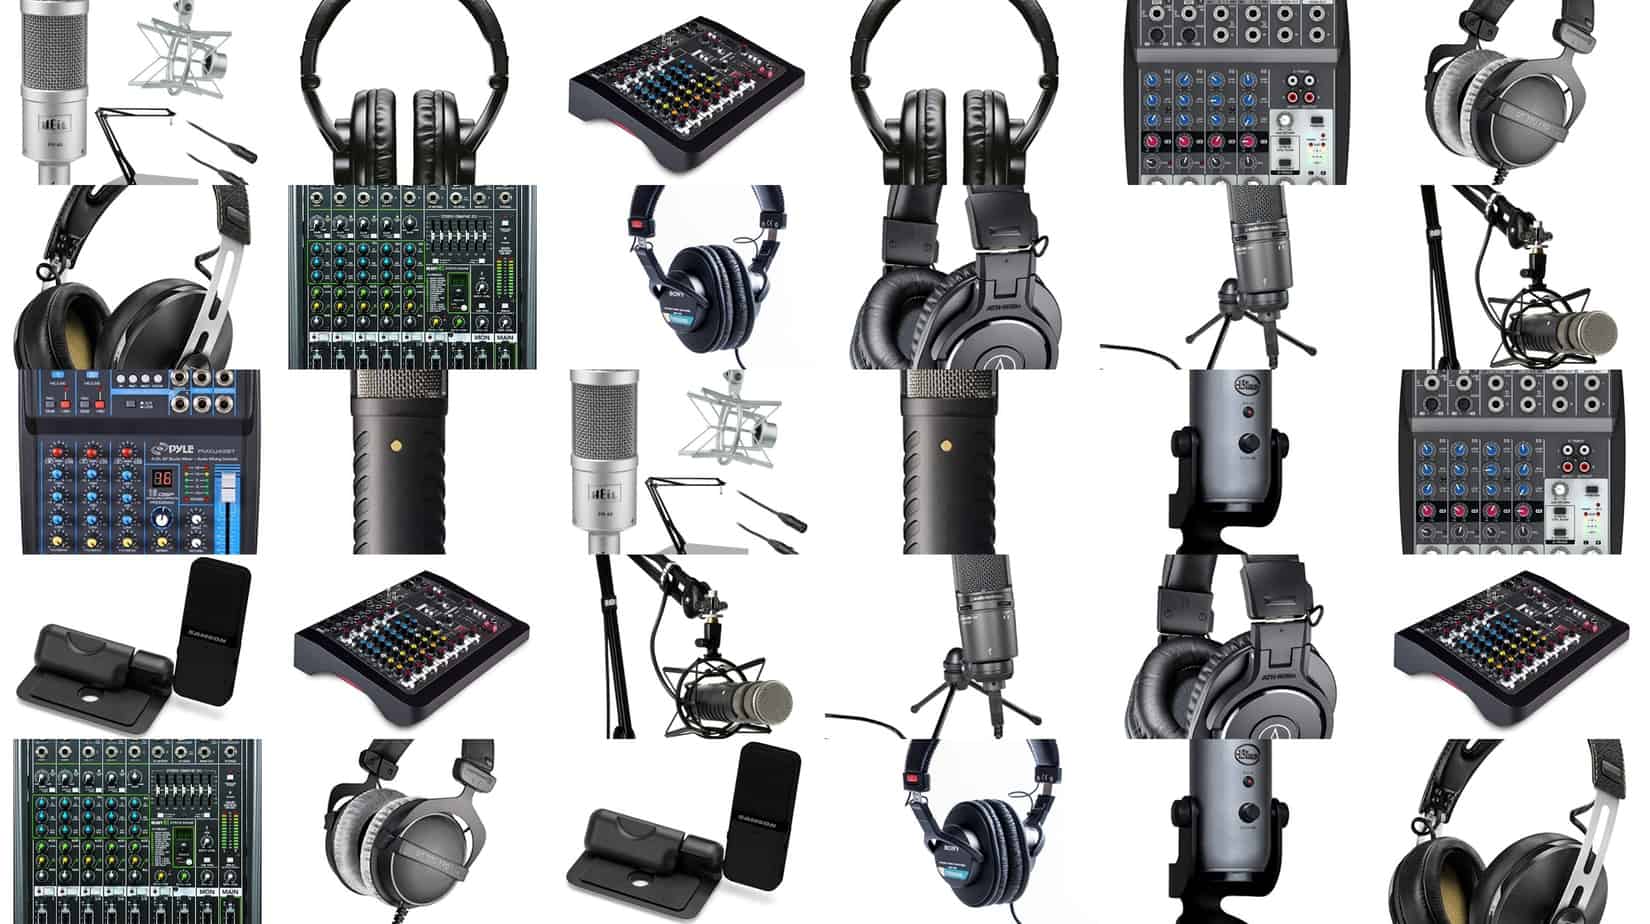
- USB Microphone: Of course, you’ll need a USB microphone that suits your recording needs. Make sure it’s compatible with your computer’s operating system and has the necessary features for your intended use.
- Mixer: Choose a mixer that meets your requirements in terms of channel count, inputs and outputs, and additional features. Consider your budget and the level of control you need over your audio signals.
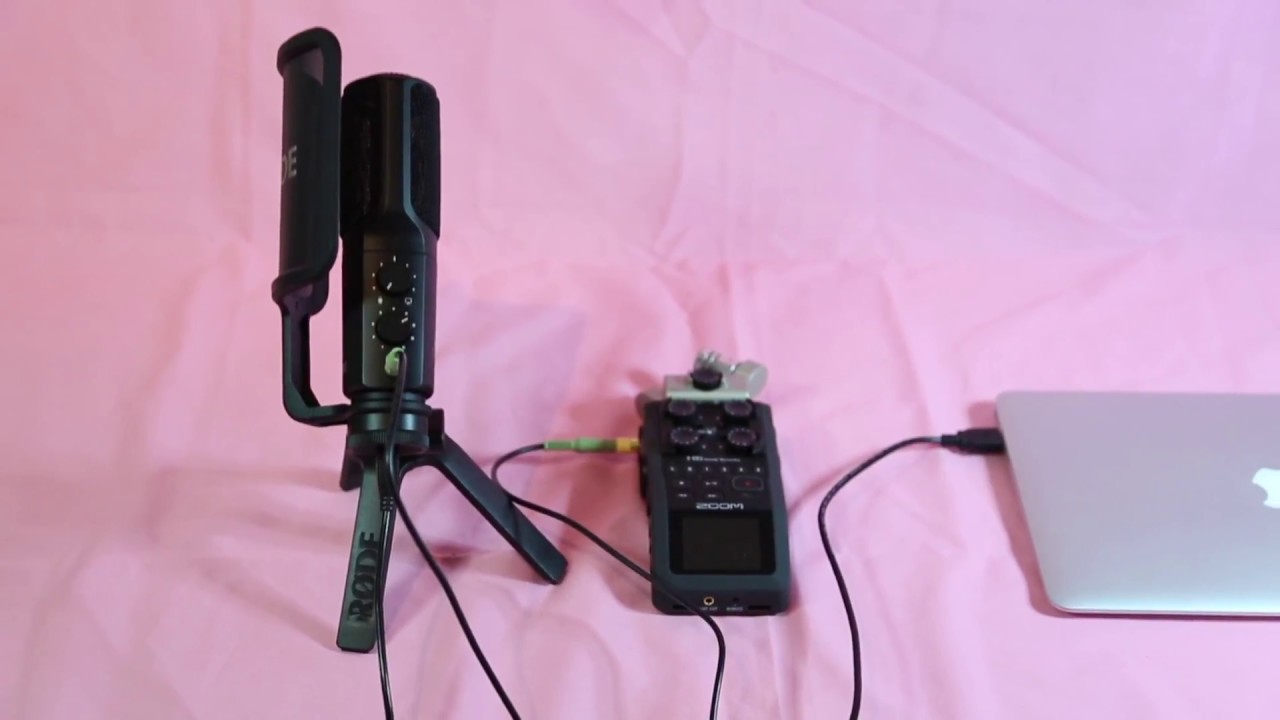
- USB Cable: Ensure you have a USB cable of sufficient length to connect your microphone to your computer or the mixer, depending on the setup you are aiming for.
- XLR Cable: If you plan to connect your USB microphone to a mixer using an XLR connection, you will need an XLR cable. Make sure it’s long enough to reach the mixer comfortably.
- Headphones: Having a good pair of headphones is crucial for monitoring your audio. Choose a pair with accurate sound reproduction to ensure you can hear any potential issues or unwanted noise during your recordings or performances.
- Pop Filter and Shock Mount: Depending on the microphone you have, you may want to consider using a pop filter to minimize plosive sounds and a shock mount to reduce handling noise or vibrations.
- Optional Accessories: Depending on your specific setup and requirements, you may also need additional accessories such as microphone stands, boom arms, or audio interfaces. These can offer greater flexibility and convenience during the recording or performance process.
Before making any purchases, double-check the compatibility of the equipment and ensure that it meets your specific needs. Take the time to research and read reviews to find reliable and high-quality equipment that fits within your budget.
Now that you have gathered all the necessary equipment, you are one step closer to connecting your USB microphone to a mixer. In the next section, we will guide you through the step-by-step process of making the physical connections and getting everything set up correctly.
Connecting the USB Microphone to the Mixer
Now that you have all the required equipment on hand, it’s time to connect your USB microphone to the mixer. The process might vary slightly depending on the specific models of your microphone and mixer, but here are the general steps to follow:
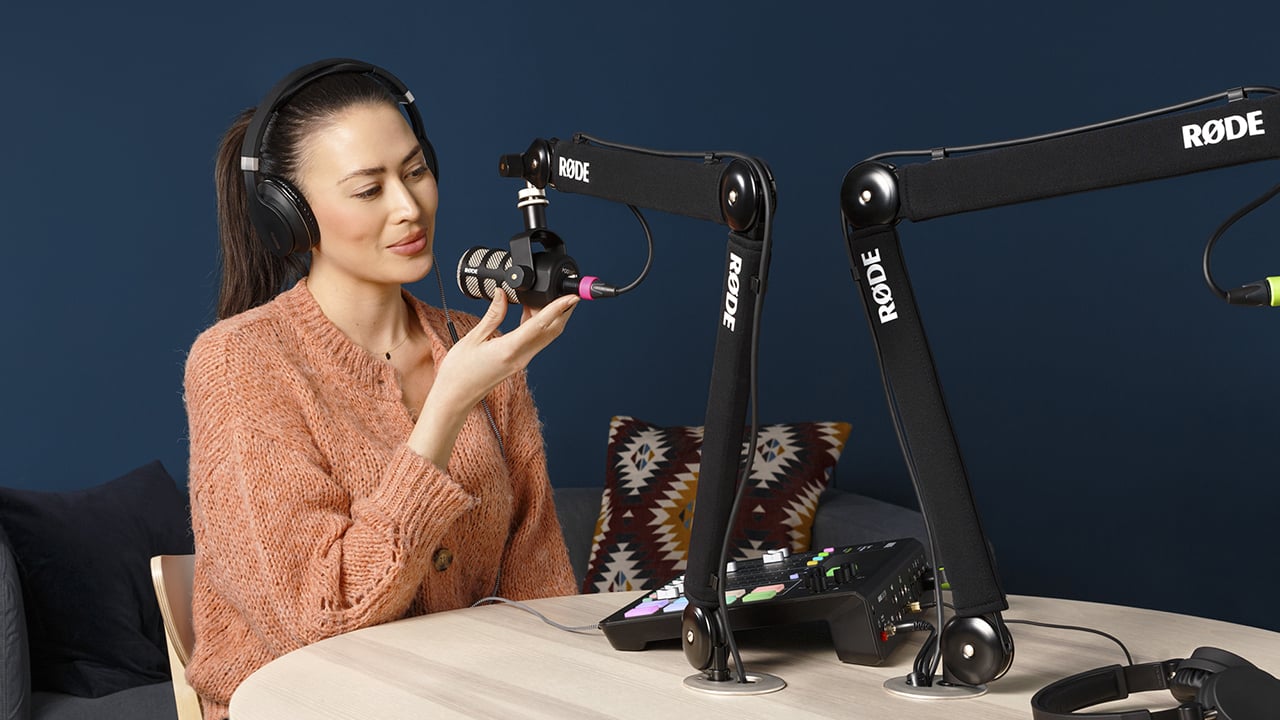
- Start by positioning your USB microphone in a suitable location, ensuring that it’s securely set up on a stand or boom arm. Adjust the microphone’s angle and height to achieve the desired sound capture.
- Next, identify the USB port on your microphone and the USB port on your mixer. Connect one end of the USB cable to the USB port on the microphone and the other end to the USB port on the mixer. Make sure the connections are secure.
- If your mixer supports XLR connections and you prefer to use XLR instead of USB, connect one end of the XLR cable to the XLR output on the microphone and the other end to an available XLR input on the mixer. Again, ensure the connections are firm.
- Power on both the USB microphone and the mixer. The USB microphone should be recognized by your computer’s operating system, and the mixer should receive the audio signal from the microphone.
- On the mixer, locate the input channel corresponding to the USB microphone. This might be labeled as “USB Mic” or something similar. Adjust the channel’s gain or trim control to set the appropriate input level for the microphone, keeping an eye on the mixer’s meter to avoid clipping or distortion.
- If your mixer has a headphone output, use your headphones to monitor the audio being captured by the USB microphone. Adjust the headphone volume to a comfortable level.
- Depending on your specific needs and the mixer’s features, you may also need to adjust other settings such as EQ (equalization), pan, or effects to fine-tune the sound as desired.
Remember to consult the user manuals for your specific USB microphone and mixer if you encounter any difficulties or if the connections and settings aren’t clear. These manuals will provide detailed instructions tailored to your equipment.
With the USB microphone successfully connected to the mixer, you’re ready to start utilizing the enhanced audio capabilities that this setup offers. Whether you’re recording podcasts, creating music, or performing live, the USB microphone and mixer combination will provide you with greater control and flexibility over your audio production process.
Adjusting the Levels and Settings
Once you have connected your USB microphone to the mixer, it’s important to adjust the levels and settings to achieve optimal sound quality. Properly setting the levels ensures that your audio is clean, balanced, and free from distortion. Here are the steps to follow:
- Start by selecting the input channel on the mixer that corresponds to your USB microphone. This typically involves pressing a button or turning a knob to activate that specific channel.
- Adjust the gain or trim control for the USB microphone input channel. This control sets the input sensitivity and determines how loud the signal is entering the mixer. Turn the control clockwise to increase the gain and counterclockwise to decrease it. Aim for a level that provides a strong and clear signal without peaking or distorting.
- Monitor the level meters on the mixer to ensure that the input signal is in the optimal range. Avoid the signal being too low, as it may be drowned out by noise, or too high, as it will cause distortion.
- Use headphones connected to the mixer’s headphone output to monitor the sound. This allows you to listen closely for any unwanted noise, distortion, or imbalance in the audio.
- Experiment with the other settings on the mixer to shape the audio to your liking. This may include adjusting the EQ (equalization) controls to enhance the frequencies that are most important in your recording or performance, as well as adding effects or applying dynamic processing to achieve the desired sound.
- Make sure to check the mixer’s output levels and adjust them accordingly to prevent clipping or distortion. The main output or master volume control on the mixer usually governs the overall level of your audio.
- Continuously monitor the sound while making adjustments to ensure that the levels and settings are working harmoniously. Make any necessary fine-tuning until you are satisfied with the resulting sound.
Take your time to experiment with different settings and gauge the impact they have on your audio. Remember that finding the balance between achieving optimal sound quality and personal preference is key.
By properly adjusting the levels and settings on the mixer, you will optimize the performance of your USB microphone and ensure that your recordings or live performances sound their best.
Troubleshooting Common Issues
While setting up your USB microphone and connecting it to a mixer, you may encounter some common issues. Don’t worry; troubleshooting these issues is often straightforward. Here are a few common problems you may face and how to resolve them:
- No sound or low sound: If you’re not getting any sound or the sound is too low, check the connections between the USB microphone and the mixer. Ensure that the cables are securely plugged in. Also, make sure the microphone is turned on and that the gain or trim control on the mixer is properly adjusted.
- Distorted or clipping sound: If your audio sounds distorted or clipped, it means the input levels are too high. Lower the gain or trim control on the mixer for the USB microphone, and adjust accordingly to avoid exceeding the maximum input level.
- Background noise or interference: If you’re experiencing unwanted background noise or interference, check that your cables are not picking up electromagnetic interference from other electronic devices. Additionally, try moving away from potential sources of interference such as Wi-Fi routers or electrical equipment.
- No recognition from the computer: If your USB microphone is not recognized by your computer, double-check that the USB cable is securely connected. Also, ensure that the necessary drivers or software for the microphone are installed on your computer. Try connecting to a different USB port or restart your computer if needed.
- Uneven or imbalanced sound: If the sound from your USB microphone is uneven or imbalanced, check if the microphone has any built-in settings or controls that may affect the audio output. Additionally, experiment with the positioning of the microphone and adjust the EQ controls on the mixer to achieve a balanced sound.
- Muffled or poor-quality sound: If the audio from your USB microphone sounds muffled or of poor quality, check if there is any debris or obstruction near the microphone’s capsule. Clean the microphone if necessary and ensure it is positioned correctly for capturing sound.
If you continue to experience issues after troubleshooting, refer to the user manuals for your specific USB microphone and mixer. They may provide additional troubleshooting steps or contact information for technical support.
Remember, patience and persistence are key when troubleshooting. Take the time to identify and address the root cause of any issues, and soon you’ll be enjoying crystal-clear audio from your USB microphone connected to the mixer.
Final Thoughts and Tips
Connecting a USB microphone to a mixer opens up a world of possibilities for audio recording and live performances. Before we wrap up, here are some final thoughts and tips to keep in mind:
1. Experiment and fine-tune: Every audio setup is unique, so don’t be afraid to experiment with different settings and adjustments. Take the time to fine-tune the levels, EQ, and effects to achieve the desired sound for your recordings or performances.
2. Read the manuals: User manuals provide valuable information and specific instructions for your USB microphone and mixer. Familiarize yourself with the features, recommended settings, and troubleshooting methods outlined in the manuals.
3. Keep cables organized: With multiple cables involved, it’s easy to get tangled up. Keep your cables organized to avoid signal interference or accidental disconnection. Consider using cable management solutions such as cable ties or Velcro straps.
4. Monitor your audio: Regularly listen to your recordings or live performances to identify any issues or areas for improvement. Use headphones to precisely monitor the sound and make adjustments accordingly.
5. Learn from others: Connect with fellow audio enthusiasts or professionals to learn from their experiences. Join online communities, forums, or attend workshops where you can exchange knowledge and gain valuable insights into optimizing your USB microphone and mixer setup.
6. Regular maintenance: Keep your USB microphone and mixer in good condition by cleaning them regularly and following the manufacturer’s maintenance guidelines. This ensures longevity and consistent performance.
7. Upgrade when necessary: As your skills and needs evolve, you may find that you require more advanced equipment or additional features. Be open to upgrading your USB microphone and mixer as necessary to keep up with your growing requirements.
8. Practice and improve: Your USB microphone and mixer are tools that enable your creativity and passion for audio production. Continuously practice and refine your skills to make the most of your equipment’s capabilities.
By applying these tips, you’ll be well on your way to making the most of your USB microphone and mixer setup. Embrace the exciting possibilities that await you as you embark on your audio recording and live performance journey.