Introduction
A USB microphone is a convenient and versatile tool for recording audio. Whether you’re a podcaster, streamer, musician, or content creator, having a high-quality microphone is essential for delivering professional-grade sound to your audience. While USB microphones offer convenience with their plug-and-play functionality, there are several enhancements you can make to further improve the sound quality and overall performance.
In this article, we will explore various techniques and accessories that can help you enhance your USB microphone setup. We will discuss ways to improve sound quality, reduce background noise, and optimize your recording space. Additionally, we will explore options for upgrading cables and connectors, as well as using external mixers or audio interfaces for more advanced setups. Finally, we will touch on some DIY enhancements that you can explore to further customize your USB microphone’s performance.
By implementing these enhancements, you can take your recordings to the next level, ensuring clear, professional-grade audio that captivates your audience. So let’s dive in and explore the various ways you can enhance your USB microphone!
Choosing a USB Microphone
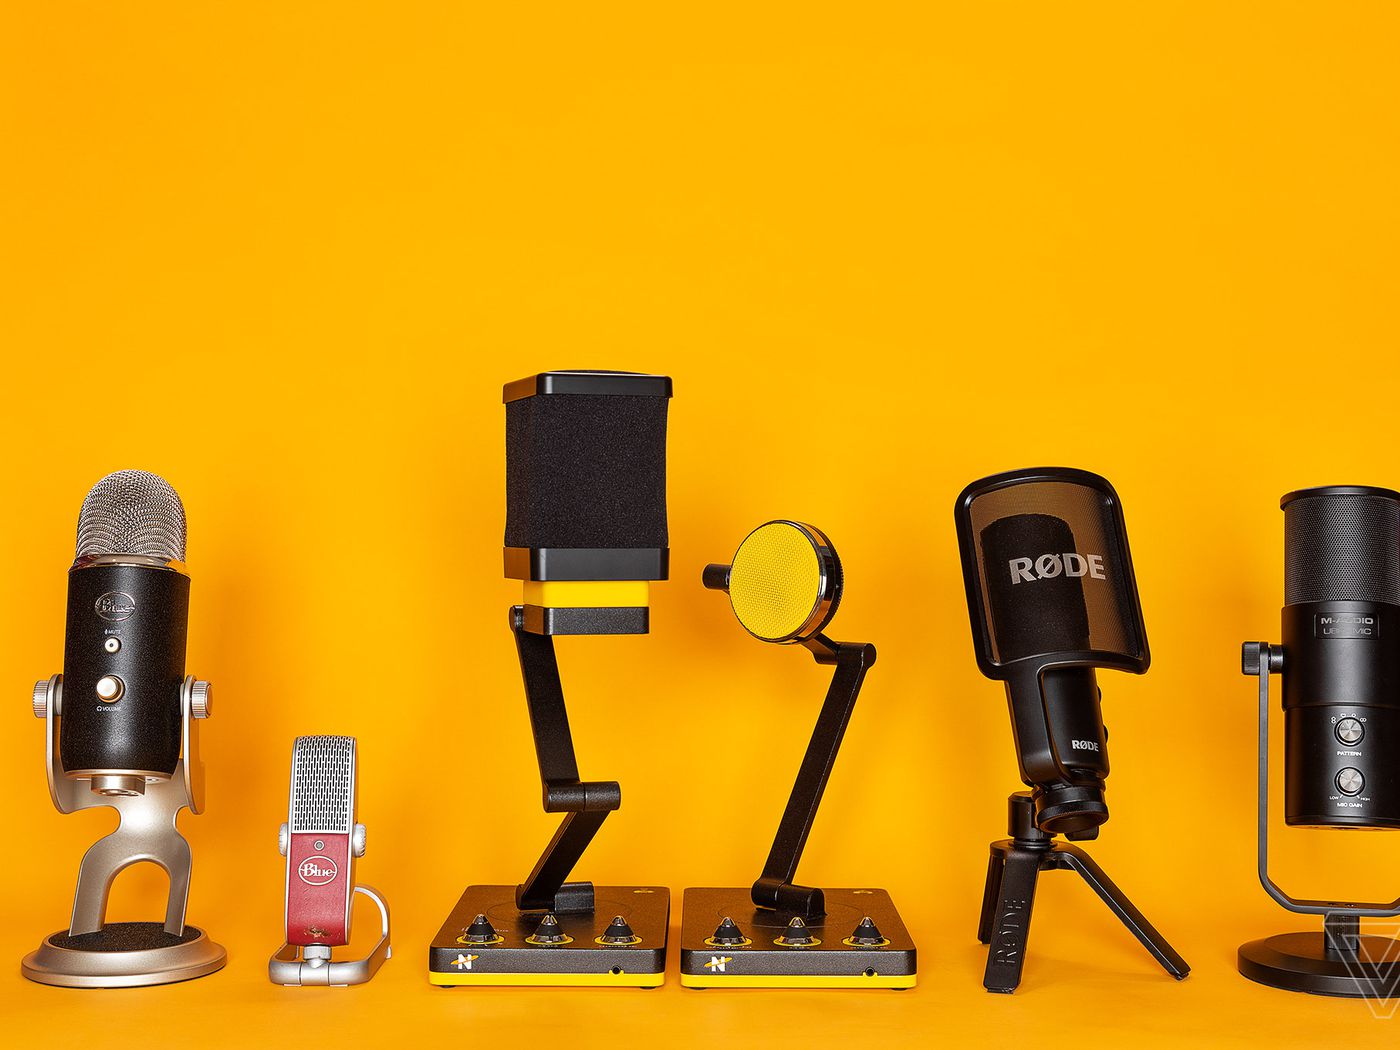
When it comes to choosing a USB microphone, there are several factors to consider. The right microphone will depend on your specific needs, budget, and the type of content you plan to create. Here are some key considerations:
1. Purpose: Determine the primary use of the microphone. Are you recording vocals, instruments, podcasts, or voice-overs? Different microphones are designed for specific purposes and may have different features to optimize the recording quality of each type of audio.
2. Budget: Define your budget range. USB microphones come in a wide price range, from budget-friendly options to high-end professional-grade models. While more expensive microphones generally offer better sound quality and additional features, there are affordable options available that still provide excellent performance.
3. Sound Quality: Consider the microphone’s frequency response, sensitivity, and signal-to-noise ratio. These factors will determine how accurately the microphone captures your voice or instrument. Look for microphones with a broad frequency response range for capturing a wide range of audio frequencies.
4. Connectivity and Compatibility: USB microphones are known for their easy plug-and-play connectivity. However, ensure that the microphone you choose is compatible with your computer’s operating system and has the necessary drivers or software support.
5. Features: Take into account the additional features you may require. Some microphones have built-in controls for volume, gain, and monitoring, while others may offer multiple polar patterns for versatile recording options. Determine which features are essential for your recording needs.
6. Reviews and Recommendations: Read reviews and seek recommendations from other content creators or audio professionals. Their firsthand experiences can provide valuable insights into the performance and reliability of different USB microphones.
Remember, choosing a USB microphone is a personal decision that depends on your unique requirements and preferences. Take your time to research and compare different models, and don’t hesitate to reach out for expert advice if necessary. By carefully considering these factors, you can find a USB microphone that meets your needs and sets the foundation for optimal sound quality and performance in your recordings.
Improving Sound Quality
Sound quality is paramount when it comes to recording audio. Even with a high-quality USB microphone, there are several techniques you can implement to further enhance the sound of your recordings. Here are some effective ways to improve sound quality:
1. Adjust Microphone Gain: Experiment with the microphone gain settings to find the optimal level. Adjusting the gain can ensure that your audio is neither too soft nor distorted, resulting in clear and balanced sound.
2. Use a Pop Filter: Pop filters are essential for minimizing plosive sounds (e.g., “p” and “b” sounds) that can cause unwanted distortion. These filters act as a barrier between your mouth and the microphone, reducing the impact of strong bursts of air.
3. Control Background Noise: Minimize ambient noise by recording in a quiet environment. Close windows, turn off fans or air conditioning, and be mindful of any other potential sources of noise. Noise-reducing software can also be employed during post-production to further enhance the sound quality.
4. Optimize Room Acoustics: The acoustic properties of your recording space can greatly affect the sound quality. To improve acoustics, use soft furnishings like curtains, carpets, or foam panels to minimize echo and reverberation.
5. Position the Microphone Correctly: Experiment with microphone placement to find the best position for capturing your voice or instrument. Consider the microphone’s polar pattern (e.g., cardioid, omnidirectional) and adjust its angle and distance accordingly to achieve optimal audio capture.
6. Upgrade Your Recording Software: Consider upgrading your recording software to a more advanced digital audio workstation (DAW). DAWs offer a range of features, such as EQ, compression, and reverb, that can enhance and fine-tune your audio recordings.
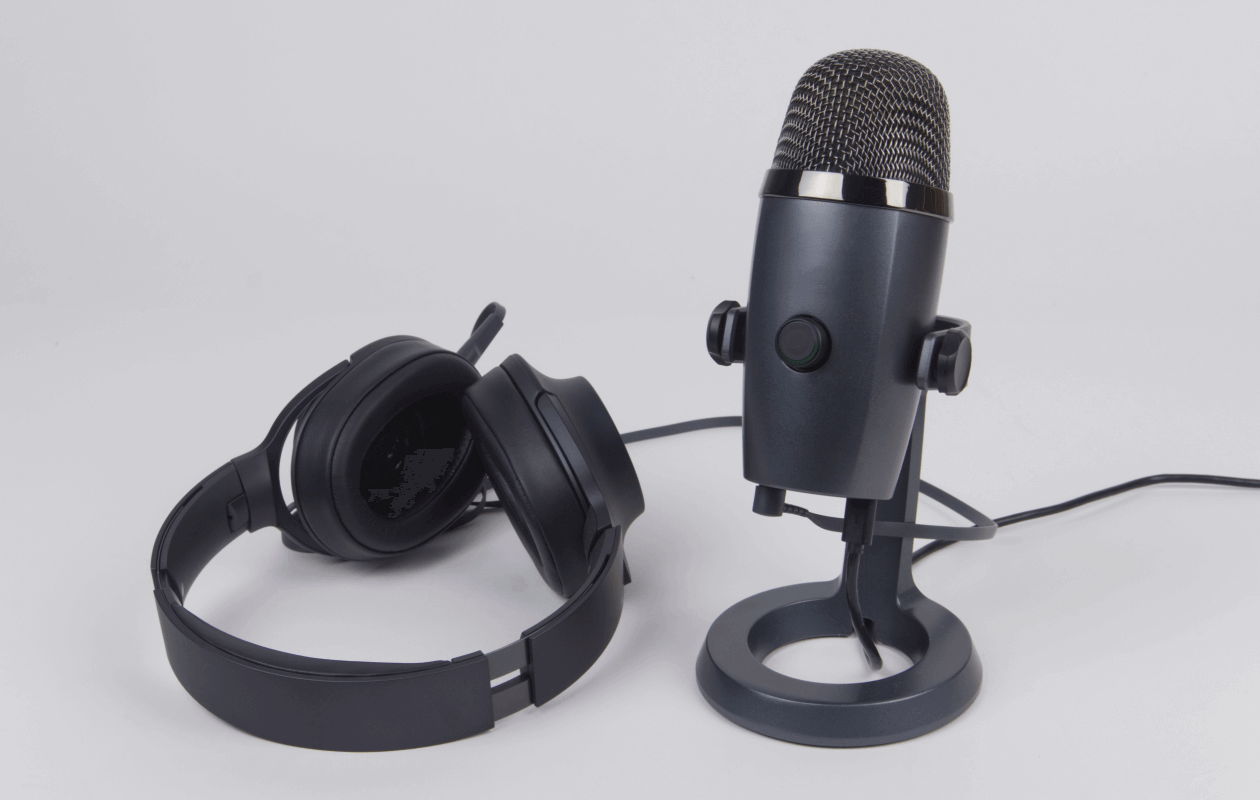
7. Monitor Your Audio: Use headphones or studio monitors to monitor your audio in real-time while recording or during playback. This allows you to catch any issues and make adjustments as necessary to ensure optimal sound quality.
By implementing these techniques, you can significantly improve the sound quality of your recordings. Experiment with different settings and positions to find the best configuration for your specific requirements. Remember, enhancing sound quality is an ongoing process, and with practice, you can continually refine and produce better audio results.
Noise Reduction Techniques
Noise can be a significant obstacle when it comes to recording high-quality audio. However, with the right techniques, you can effectively reduce background noise and capture cleaner sound. Here are some noise reduction techniques to consider:
1. Noise Gates: A noise gate is a tool that automatically mutes or reduces the audio signal when it falls below a certain threshold. This helps eliminate background noise during pauses or silent parts of the recording, resulting in a cleaner overall sound.
2. Noise Reduction Software: Utilize noise reduction software or plugins to remove unwanted background noise during post-production. These tools analyze the audio waveform and intelligently reduce or eliminate specific frequencies associated with noise.
3. Source Separation Techniques: If background noise is still present after recording, consider using source separation techniques to isolate and enhance the desired audio. This can involve using equalization tools to emphasize the frequencies of the main audio source and reduce those of the background noise.
4. Record in a Soundproof Environment: Whenever possible, try to record in a soundproofed room or studio. Soundproofing materials, such as acoustic panels or foam, can help minimize external noise and provide a more controlled recording environment.
5. Use Dynamic Microphones: Dynamic microphones are less sensitive to ambient noise compared to condenser microphones. If you frequently record in noisy environments, using a dynamic microphone can help minimize unwanted background noise.
6. Choose the Right Polar Pattern: Selecting the appropriate polar pattern for your microphone can also help reduce unwanted noise. For example, a cardioid polar pattern focuses on capturing sound from the front while minimizing sound from the sides and rear, resulting in reduced ambient noise pickup.
7. Edit and Clean Up Audio: During post-production, carefully edit and clean up your audio tracks. Remove any additional noise manually using audio editing software, apply filters or equalization to enhance sound quality, and ensure a noise-free final result.
Remember, the key to effective noise reduction is a combination of proper recording techniques and post-production adjustments. Experiment with different methods to find the most effective approach for your specific recording environment and equipment. With persistence and attention to detail, you can significantly minimize background noise and achieve cleaner audio recordings.
Pop Filter Usage
Pop filters are an invaluable tool for improving audio quality by reducing plosive sounds and unwanted noise caused by strong bursts of air hitting the microphone. These bursts often occur when pronouncing words with sounds such as “p,” “b,” or “t.” Using a pop filter can effectively minimize these disruptions and create a more pleasant listening experience. Here’s how you can make the most of a pop filter:
1. Positioning: Place the pop filter about two to three inches away from the microphone. Position it between your mouth and the microphone to intercept and diffuse any plosive sounds that may occur when speaking or singing.
2. Distance: Maintain a consistent distance between your mouth and the pop filter throughout the recording to ensure optimal performance. Being too close or too far away may compromise the filter’s effectiveness in reducing plosive sounds.
3. Proper Technique: Use proper microphone technique by speaking or singing directly into the pop filter instead of from the side. This ensures that the airflow generated by plosive sounds is directed straight at the filter, effectively minimizing their impact on the microphone.
4. Breath Control: Develop breath control techniques to minimize intense bursts of air during vocal performances. Being conscious of your breathing patterns and adjusting accordingly can help reduce the need for extensive pop filter usage.
5. Cleaning and Maintenance: Regularly clean your pop filter to remove any accumulated debris or moisture. This helps maintain its performance and prevents any loss in audio quality caused by clogged or obstructed filter material.
6. Choosing the Right Pop Filter: Consider the type of pop filter that best suits your needs. There are two common types: nylon mesh and metal. Nylon mesh filters are more common and affordable, offering adequate pop reduction. Metal pop filters provide slightly better durability and can be more effective at attenuating plosive sounds.
7. DIY Alternatives: In situations where a pop filter is not readily available, you can use alternatives like a foam windscreen or a sock placed over the microphone. While not as effective as a dedicated pop filter, these alternatives can still help reduce plosive sounds to some extent.
By utilizing a pop filter correctly, you can greatly improve audio quality and ensure a clean and professional sound. Incorporating a pop filter into your setup is a simple yet effective way to eliminate plosive sounds and create a more enjoyable listening experience for your audience.
Adding a Shock Mount
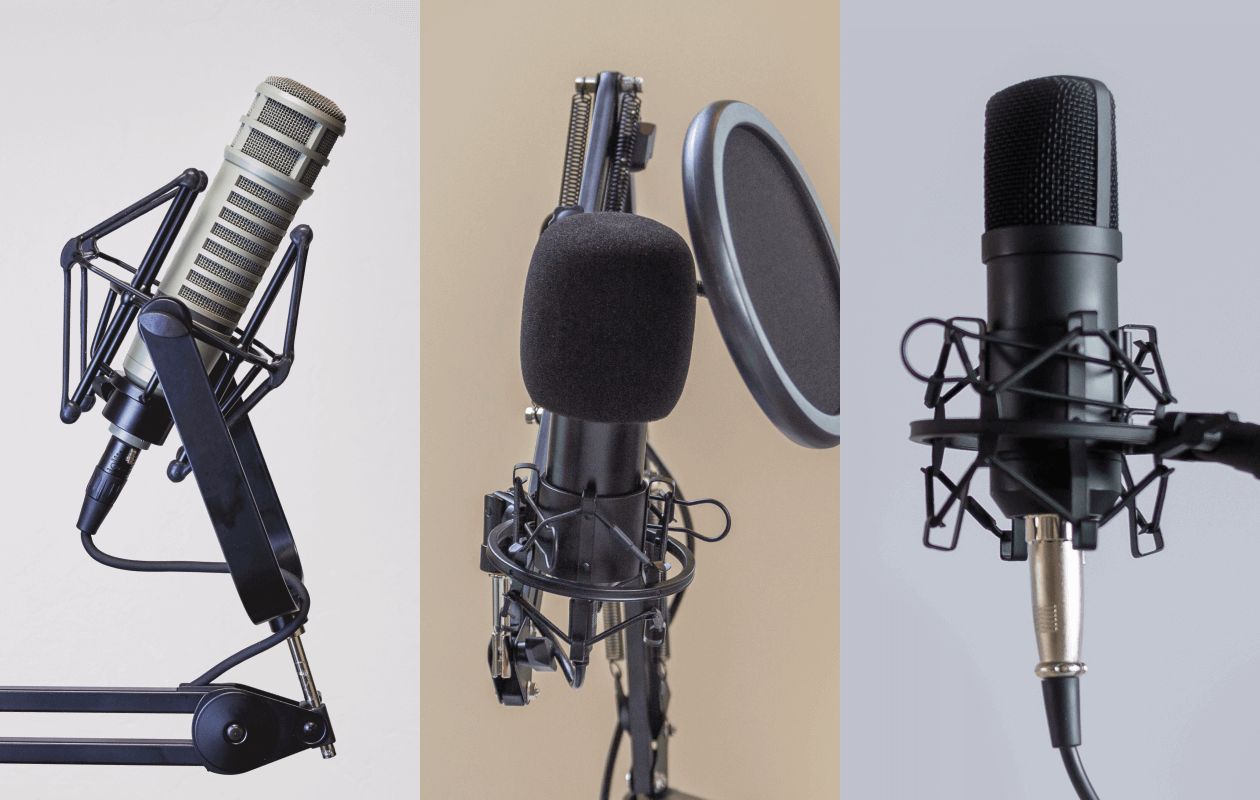
A shock mount is a valuable accessory for improving audio quality by reducing mechanical vibrations and handling noise that can be transmitted to the microphone. It effectively isolates the microphone from external disturbances, ensuring clear and pristine sound capture. Here’s how you can benefit from adding a shock mount to your USB microphone setup:
1. Vibration Isolation: A shock mount suspends the microphone using elastic bands or a suspension mechanism. This isolation prevents vibrations and shocks caused by table bumps, foot tapping, or accidental contact with the microphone stand from reaching the microphone capsule and affecting the audio quality.
2. Reduced Handling Noise: When gripping the microphone or making adjustments during a recording, hand movements can create unwanted handling noise. By using a shock mount, these handling sounds are attenuated, allowing for cleaner and more professional recordings.
3. Improved Clarity and Detail: With a shock mount, the microphone is less susceptible to mechanical vibrations that can obscure or distort the recorded sound. This results in enhanced clarity and detail, allowing your voice or instrument to shine through in the final recording.
4. Versatile Mounting Options: Shock mounts come in a variety of designs and sizes to accommodate different microphones. Most shock mounts feature adjustable angles, allowing for precise positioning of the microphone to achieve the desired sound capture.
5. Easy Installation: Mounting a shock mount is a simple process. Most shock mounts have universal screw threads that can be attached directly to a microphone stand or boom arm. The microphone then slots securely into the shock mount, ready for recording.
6. Compatibility: Ensure that the shock mount you choose is compatible with your specific microphone model. Some USB microphones come with their own proprietary shock mounts, while others may require a universal shock mount that fits various microphone sizes.
7. Budget Options: There are affordable shock mounts available on the market that offer excellent performance without breaking the bank. Consider your budget and research different options to find a shock mount that suits your needs and provides enhanced audio quality.
By adding a shock mount to your USB microphone setup, you can effectively isolate the microphone from vibrations and mechanical noise, resulting in improved audio clarity and a more professional sound. Invest in a shock mount that is compatible with your microphone model and enjoy the benefits of cleaner, high-quality recordings.
Using Foam Mic Windscreen
A foam mic windscreen is a simple yet effective accessory that can significantly improve your audio recordings by reducing unwanted wind and breath noise. It acts as a physical barrier around the microphone, dispersing and diffusing air pressure fluctuations, resulting in cleaner and clearer sound. Here’s how using a foam mic windscreen can enhance your USB microphone setup:
1. Wind Noise Reduction: Outdoor recordings or recordings in breezy environments can often be plagued by wind noise. The foam mic windscreen helps minimize the impact of wind by creating a buffer between the microphone capsule and the moving air, resulting in cleaner audio without the distraction of gusts.
2. Pop Reduction: In addition to reducing wind noise, a foam mic windscreen can also effectively attenuate plosive sounds (such as “p” and “b” sounds) that can cause unwanted distortion and clipping. The foam acts as a barrier, diffusing the impact of strong bursts of air, resulting in a smoother and more controlled vocal performance.
3. Breath Noise Suppression: When recording vocals, breath sounds can be picked up by the microphone, especially during close-mic recording situations. The foam mic windscreen helps mitigate this issue by absorbing and dispersing breath noise, resulting in cleaner recordings with reduced audible breaths.
4. Hygienic Protection: Foam mic windscreens also act as a protective layer, preventing dust, saliva, and other contaminants from directly reaching the microphone capsule. This helps maintain the hygiene of your microphone and prolong its lifespan.
5. Easy Installation and Compatibility: Foam mic windscreens are typically designed to fit snugly over the microphone’s head, regardless of its shape or size. They are lightweight, portable, and easy to install and remove, making them a practical accessory for any USB microphone setup.
6. Considerations for Multiple Users: If you are sharing a microphone among multiple users, using a foam mic windscreen is especially important. It helps maintain hygiene by preventing the spread of saliva, germs, and other particles between different users.
7. Versatile Applications: Foam mic windscreens are not limited to vocal recordings. They can also be used for instruments such as brass or woodwinds to reduce unwanted air noise and improve the overall sound quality.
By incorporating a foam mic windscreen into your USB microphone setup, you can significantly enhance the quality of your recordings by reducing wind noise, minimizing plosive sounds, and suppressing breath noise. It is a cost-effective and practical solution that can make a noticeable difference in the overall audio clarity and professionalism of your recordings.
Positioning the Microphone
The positioning of your USB microphone plays a crucial role in capturing high-quality audio. Proper microphone placement ensures optimal sound capture, minimizes unwanted noise, and enhances the overall clarity of your recordings. Here are some key considerations for positioning your microphone:
1. Distance: The distance between the microphone and the sound source greatly affects the audio quality. A general rule of thumb is to position the microphone about 6-12 inches away from the source for vocal recordings. Adjust the distance accordingly for different instruments or recording scenarios to achieve the desired sound.
2. Microphone Angle: The angle at which you position the microphone can impact the sound capture. For vocal recordings, it’s common to position the microphone slightly below the mouth, angling it upwards. Experiment with different angles to find the sweet spot that captures the best sound while minimizing unwanted noise.
3. Microphone Polar Pattern: Consider the polar pattern of your microphone when positioning it. Cardioid microphones capture sound mainly from the front and are less sensitive to sounds from the sides and rear. Position the front of the microphone towards the sound source for optimal pick-up and noise rejection.
4. Room Acoustics: The acoustic characteristics of your recording space can influence the sound quality. In a room with excessive reverb or echo, move the microphone closer to the sound source to minimize these unwanted reflections. Experiment with different locations within the room to find the best spot for capturing clean and clear audio.
5. Avoid Obstacles: Keep the microphone away from any potential obstacles that could cause additional noise or vibrations. Avoid placing it too close to walls, computer fans, or any other sound-producing devices that could interfere with the recording.
6. Monitoring: Use quality headphones or studio monitors to monitor your audio while positioning the microphone. This allows you to make real-time adjustments and fine-tune the placement based on what you hear, ensuring optimal sound capture.
7. Consider Microphone Stand or Mount: Depending on your recording setup, consider using a microphone stand or mount to position the microphone securely and precisely. This allows for more stability and flexibility in adjusting the microphone position to achieve the best sound capture.
Remember, finding the perfect microphone position may require some experimentation and adjustments based on the specific recording scenario. Take the time to listen carefully and make precise adjustments to ensure that your USB microphone captures the best possible sound and delivers exceptional audio quality in your recordings.
Improving Recording Space
The environment in which you record your audio can have a significant impact on the overall sound quality. By making improvements to your recording space, you can minimize unwanted background noise, reduce echo, and achieve cleaner and more professional recordings. Here are some effective ways to improve your recording space:
1. Select a Suitable Room: Choose a room for recording that is quiet and allows for good sound isolation. Ideally, select a smaller room with minimal reverberation to avoid excessive echo or unwanted reflections.
2. Background Noise Reduction: Identify and address sources of background noise in your recording space. Close windows to minimize outside noise, turn off fans or air conditioning units, and ensure that other electronic devices in the room are either turned off or located away from the recording area.
3. Soundproofing: Adding sound-absorbing materials to your recording space can greatly improve the sound quality. Hang thick curtains, use acoustic panels, or install foam tiles to reduce echo and reverberation. These materials help absorb sound waves and prevent them from bouncing off walls and creating unwanted reflections.
4. Proper Room Layout: Arrange your recording space in a way that minimizes potential acoustic issues. Position your microphone and recording equipment away from walls and corners to reduce the chances of sound reflections and resonance interfering with your recordings.
5. DIY Vocal Booth: If budget allows, consider creating a DIY vocal booth to further isolate your recordings from external noise. Build a small enclosure using portable partitions, thick blankets, or foam panels to surround the microphone and create a controlled recording environment.
6. Portable Isolation Shield: If a dedicated vocal booth is not feasible, consider using a portable isolation shield. These shields are designed to absorb and deflect sound, reducing interference from surrounding reflections and external noise sources.
7. Mic Stand Reflection Filter: Another option for improving your recording space is to use a mic stand reflection filter. These filters attach to your microphone stand and help isolate the microphone from room acoustics, reducing reflections and echoes.
By implementing these strategies, you can effectively improve the quality of your recordings by creating a more controlled and acoustically pleasing environment. A well-treated recording space allows your USB microphone to capture clean and accurate audio, ensuring that your message or music shines through without distracting background noise or unwanted reflections.
Upgrading Cables and Connectors
While a USB microphone offers convenient plug-and-play functionality, upgrading your cables and connectors can have a significant impact on the overall audio quality and reliability of your setup. Here’s why upgrading your cables and connectors is important and how it can enhance your USB microphone experience:
1. Signal Integrity: Higher-quality cables and connectors ensure better signal integrity, resulting in cleaner audio transmission from the microphone to your recording device. Upgrading to cables with better shielding can reduce interference and noise, resulting in improved audio quality and reduced signal degradation.
2. Durability and Reliability: Cheap or poorly made cables and connectors are more prone to damage, wear, and cable/connector failures. Upgrading to high-quality cables and connectors increases durability and ensures a reliable connection, reducing the risk of sudden audio dropouts or interruptions during recordings.
3. Length and Flexibility: Depending on your recording setup, you may require longer cables or connectors with more flexibility. Upgrading to cables with the appropriate length and flexibility allows for more freedom in positioning your USB microphone without compromising audio quality or risking cable strain.
4. Compatibility: Some USB microphones have proprietary connectors or require specific cable types. Upgrading cables and connectors ensures compatibility and minimizes any potential issues with connection stability or incompatibility between the microphone and your recording device.
5. Noise Reduction: Higher-quality cables and connectors with better shielding can reduce electromagnetic interference (EMI) and radio frequency interference (RFI) that might introduce unwanted noise or hum into your recordings. This results in cleaner audio signals and a higher signal-to-noise ratio.
6. Customization: Upgrading cables and connectors allows for greater customization options. You can choose cables of different lengths, connector types, and colors to match your aesthetic preferences or specific recording setup requirements.
7. Professional Image: Using high-quality cables and connectors not only enhances audio quality but also adds a professional touch to your USB microphone setup. It shows attention to detail and a commitment to delivering the best possible sound, which can positively impact how your recordings are perceived.
When upgrading, it’s important to ensure compatibility between the cables/connectors and your USB microphone. Check the specifications and requirements of your microphone to select cables and connectors that meet the recommended standards. Investing in quality cables and connectors is a worthwhile investment that can significantly improve the overall performance and reliability of your USB microphone setup.
Using an External Mixer or Audio Interface
While USB microphones offer convenient plug-and-play functionality, using an external mixer or audio interface can provide more control, flexibility, and improved audio quality in your recordings. Here’s why incorporating an external mixer or audio interface into your setup can enhance your USB microphone experience:
1. Enhanced Control: An external mixer or audio interface allows for more precise control over your microphone’s audio settings. You can adjust parameters like gain, EQ, and input/output levels to fine-tune the sound to your preferences, resulting in more professional and polished recordings.
2. Multiple Microphone Support: If you need to record with multiple microphones simultaneously, an external mixer or audio interface is essential. It provides the necessary inputs and outputs to accommodate multiple microphones, allowing you to capture different sources independently and mix them together seamlessly.
3. Lower Latency: USB microphones directly connected to a computer may have higher latency due to data processing. By using an external mixer or audio interface, you can achieve lower latency, ensuring real-time monitoring and reducing delays between audio input and output.
4. Higher-Quality Audio Conversion: External mixers and audio interfaces typically offer higher-quality analog-to-digital (ADC) and digital-to-analog (DAC) converters compared to those built into USB microphones. This results in improved audio fidelity, better dynamic range, and reduced signal noise for more accurate, detailed, and professional-sounding recordings.
5. Versatility: An external mixer or audio interface expands your recording capabilities beyond just using a USB microphone. You can connect other sound sources like instruments, audio playback devices, or additional microphones, giving you more creative options and allowing for more professional and versatile recordings.
6. Integration with Professional Software: Using an external mixer or audio interface often provides compatibility with professional-grade digital audio workstation (DAW) software. This enables you to take advantage of advanced features like multitrack recording, real-time effects processing, and more precise audio editing and mixing capabilities.
7. Upgradability: An external mixer or audio interface can be easily upgraded or expanded as your recording needs evolve. You can add more inputs or outputs, upgrade to higher-quality converters, or invest in specialized audio processing equipment to further enhance and customize your recording setup.
When considering an external mixer or audio interface, make sure to research and choose one that suits your specific needs, taking into account the number of inputs and outputs required, compatibility with your computer and software, and your desired budget. By incorporating an external mixer or audio interface into your USB microphone setup, you can elevate your recordings to a more professional level, offering greater control, flexibility, and improved audio quality.
DIY Enhancements
If you’re looking to add a personal touch and customize your USB microphone setup further, there are several DIY enhancements you can explore. These DIY solutions can help improve sound quality, enhance the aesthetics, and provide unique features tailored to your specific recording needs. Here are some popular DIY enhancements:
1. Custom Shock Mount: Instead of purchasing a pre-made shock mount, you can create your own using readily available materials. Utilize elastic bands, foam, and a sturdy frame to design a shock mount that fits your microphone perfectly. This DIY approach allows for more flexibility and customization options while reducing costs.
2. Acoustic Treatment: DIY acoustic treatment can be an effective way to improve the sound quality of your recording space. Building your own acoustic panels using insulation material and fabric, or constructing a portable vocal booth using PVC pipes and moving blankets, can help reduce echo, absorb unwanted reflections, and create a more controlled recording environment.
3. Homemade Pop Filter: Create your own pop filter using a clothes hanger, pantyhose, or a fine mesh screen. By attaching the material to a frame and positioning it in front of the microphone, you can effectively reduce plosive sounds and achieve cleaner recordings without spending a lot of money.
4. Cable Management: DIY cable management solutions can help keep your recording space organized and prevent cables from tangling or getting in the way. Using adhesive clips or cable ties, you can secure cables along the edges of your desk or wall, creating a clean and clutter-free environment.
5. Reflection Filter: Rather than purchasing a commercial reflection filter, you can make your own using materials like cardboard, foam panels, and acoustic insulation. Construct a shield that surrounds the back and sides of the microphone to reduce unwanted room reflections and improve audio isolation.
6. LED Lighting: Enhance the visual appeal of your recording setup by adding DIY LED lighting. Attach LED strips to the back of your desk or around your microphone stand to create adjustable and customizable lighting effects. This adds a professional and aesthetic touch to your recording space.
7. Microphone Modification: Advanced users who are comfortable with electronics may consider modifying their USB microphones for specific purposes. This may involve soldering components to improve audio quality, changing microphone capsules, or adding custom modifications to enhance performance.
When embarking on DIY enhancements, it’s important to research and understand the technical requirements and potential risks involved. Ensure that you have the necessary skills and tools to carry out the project safely and effectively. DIY enhancements not only allow for customization, but they can also be an enjoyable and creative way to tailor your USB microphone setup to meet your unique recording preferences.
Conclusion
Enhancing your USB microphone setup is a continuous process that allows you to maximize the quality and performance of your recordings. By implementing the various techniques and accessories discussed in this article, you can take your audio recordings to the next level and provide a more professional and enjoyable listening experience for your audience.
Choosing the right USB microphone that suits your specific needs and budget is the first step. Consider factors like purpose, sound quality, compatibility, and features to ensure you make an informed decision. Once you have your USB microphone, you can focus on enhancing sound quality by adjusting the microphone gain, using a pop filter to reduce plosive sounds, and controlling background noise through proper positioning and the use of noise reduction techniques.
Upgrading your cables and connectors can improve signal integrity and durability, while incorporating an external mixer or audio interface provides greater control, multiple microphone support, and compatibility with professional software. Additionally, DIY enhancements allow for personalized customization and offer cost-effective solutions to enhance your recording space, reduce unwanted noise, and improve overall aesthetics.
Remember, whether you are a podcaster, streamer, musician, or content creator, the goal is to capture clear and professional-grade audio that engages your audience. Continually experiment, fine-tune, and seek opportunities to upgrade your USB microphone setup as you progress on your recording journey. The dedication to improving your sound quality and equipment will undoubtedly result in remarkable recordings that leave a lasting impression.