Introduction
Welcome to our guide on how to add a USB microphone to Garageband! If you are an aspiring musician, podcaster, or content creator, having a high-quality microphone is essential for capturing clear and professional audio. Garageband, a popular digital audio workstation (DAW), offers a user-friendly interface and powerful recording features, making it a top choice for many beginners and experienced users alike.
By using a USB microphone with Garageband, you can bypass the need for additional audio interfaces or mixers, simplifying the recording process and allowing you to focus on creating great content. However, setting up a USB microphone in Garageband may require a few configuration steps to ensure optimal performance.
In this guide, we will walk you through each step of the process, from checking compatibility to fine-tuning the audio settings. Whether you have just purchased a USB microphone or want to optimize your existing setup, our instructions will help you seamlessly integrate your microphone into Garageband.
Before we dive into the step-by-step instructions, it’s important to note that different USB microphones may have slightly different setup processes. We will provide general guidelines applicable to most USB microphones, but for specific details, always refer to the manufacturer’s instructions.
Now that we have laid the groundwork, let’s get started on adding your USB microphone to Garageband and unlocking its full potential for your audio recordings!
Step 1: Check Compatibility
Before connecting your USB microphone to Garageband, it’s essential to ensure that it is compatible with your computer and operating system. Compatibility issues can prevent the microphone from being recognized or functioning properly in Garageband. Here are the steps to check compatibility:
- Review the system requirements: Visit the manufacturer’s website or refer to the microphone’s documentation to check the minimum system requirements. Ensure that your computer meets or exceeds these requirements, including the supported operating systems.
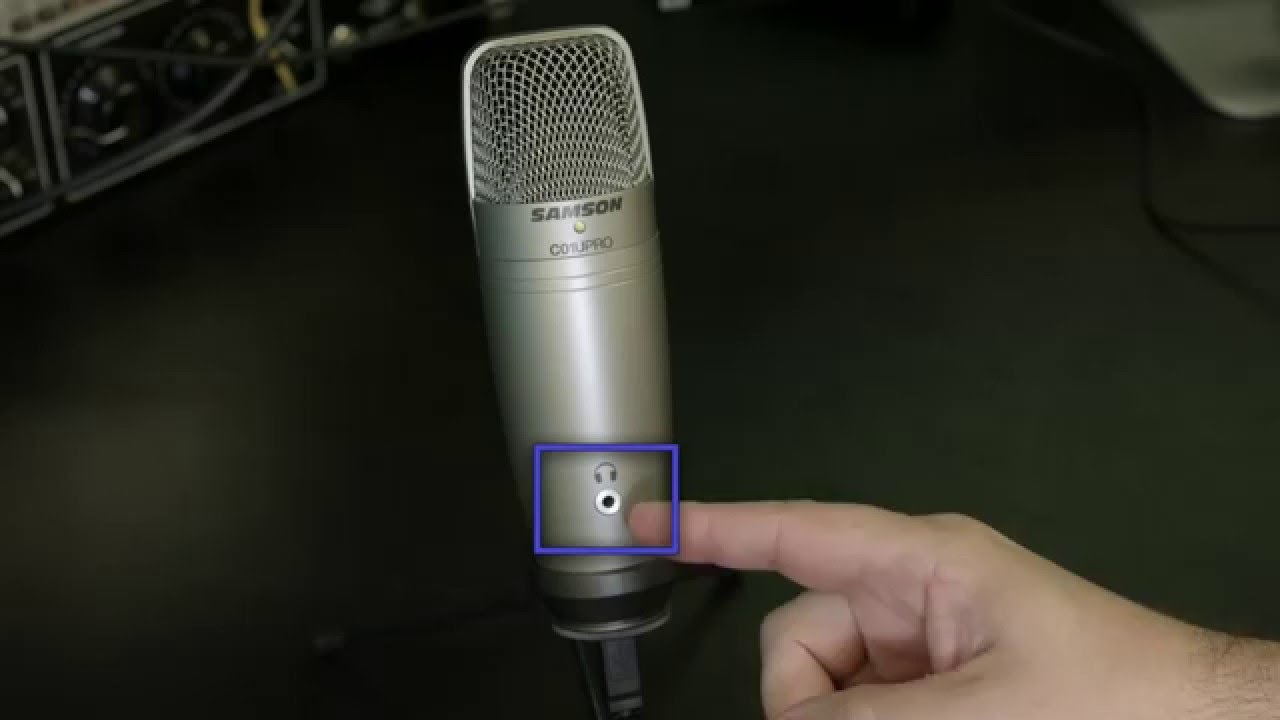
- Check the connection type: USB microphones typically use a standard USB connection. Ensure that your computer has an available USB port that matches the type of connection on your microphone (USB-A, USB-C, etc.). You may need an adapter if your computer doesn’t have a compatible USB port.
- Verify driver requirements: Some USB microphones require specific drivers to be installed on your computer. Check the manufacturer’s website or documentation for any required driver downloads. Ensure that you have the necessary driver software installed for your microphone model and update it if needed.
- Compatibility with Garageband: Garageband is compatible with a wide range of USB microphones. However, it’s always a good idea to verify specific compatibility with your microphone model. Check the manufacturer’s website or search online forums to see if there are any known compatibility issues or recommended settings for your microphone in Garageband.
Performing these compatibility checks ensures that your USB microphone and computer are ready to work together seamlessly. If you discover any compatibility issues, consult the manufacturer’s support or seek help from online resources to troubleshoot and find a solution.
Once you have confirmed compatibility, you are ready to move on to the next step: connecting your USB microphone to your computer.
Step 2: Connect the USB Microphone to Your Computer
Now that you have verified the compatibility of your USB microphone, it’s time to connect it to your computer. Follow these steps to ensure a successful connection:
- Locate an available USB port on your computer: Look for a USB port that matches the connection type of your microphone (USB-A, USB-C, etc.). If needed, use an adapter to connect a different USB type to your computer.
- Plug in the USB microphone: Insert the USB connector of your microphone into the USB port on your computer. The plug should fit securely into the port. Once connected, your computer should recognize the microphone and initiate the installation process if necessary.
- Monitor the device connection: Watch for any notifications or on-screen messages that indicate the successful connection of your USB microphone. Depending on your computer’s operating system, you may see a popup message or a new device icon appearing in the system tray.
- Allow necessary permissions: Some operating systems might prompt you to grant permissions for the microphone. If prompted, click “Allow” or “OK” to grant the necessary permissions, ensuring that your USB microphone can be accessed by Garageband.
- Verify microphone recognition: Open your computer’s system preferences or settings and navigate to the audio settings. Look for your USB microphone in the list of available input devices. If it is listed, you have successfully connected the microphone to your computer.
After following these steps, your USB microphone should be successfully connected to your computer and ready for configuration within Garageband. If you encounter any issues during the connection process, double-check the connections, consult the manufacturer’s documentation, or seek assistance from online resources or support forums.
Now that your USB microphone is connected, we can move on to configuring the system preferences to ensure optimal performance in Garageband.
Step 3: Configure System Preferences
Configuring the system preferences on your computer is an essential step to ensure that your USB microphone works seamlessly with Garageband. To configure the system preferences, follow these steps:
- Open the System Preferences: On a Mac, click on the Apple menu in the top-left corner of the screen and select “System Preferences.” On Windows, click on the Start menu and search for “Control Panel” and open it.
- Select “Sound” or “Sound Settings”: In the System Preferences or Control Panel, locate and click on the option related to sound or audio settings. The exact name may vary depending on your operating system.
- Navigate to the input settings: Within the sound settings, ensure you are in the input tab or section. This is where you can configure the settings for your USB microphone.
- Select your USB microphone: In the input settings, you should see a list of available audio input devices. Locate your USB microphone in the list and select it as the preferred input device.
- Adjust input volume and settings: Depending on your microphone and personal preferences, you may need to adjust the input volume or other settings. Experiment with different levels to find the optimal balance between capturing your audio clearly without distortion.
- Test your microphone: To ensure that your USB microphone is working correctly, speak or make some noise into the microphone. Observe the input level meter in the system preferences or control panel. It should respond to your voice or sound, indicating that your microphone is properly configured.
Configuring the system preferences correctly ensures that your computer recognizes and utilizes the USB microphone as the primary audio input device. This step is crucial for Garageband to accurately capture your recordings and provide high-quality audio.
Once you have completed the configuration of system preferences, you are now ready to open Garageband and start using your USB microphone for recording purposes. In the next step, we will guide you through the process of launching Garageband and selecting the USB microphone as the input device.
Step 4: Open Garageband
With your USB microphone connected and system preferences configured, it’s time to open Garageband, the digital audio workstation where you can record and edit your audio projects. Follow these steps to open Garageband:
- Locate the Garageband application: On a Mac, you can typically find Garageband in the Applications folder or by searching for it using Spotlight. On Windows, if you have installed Garageband using a third-party emulator, open the emulator and locate the Garageband app.
- Launch Garageband: Double-click on the Garageband icon or select it and press the “Open” button to launch the application. Garageband may take a few seconds to open, depending on your computer’s speed and performance.
- Wait for the welcome screen: After launching Garageband, you may see a welcome screen with various project templates to choose from. You can either select a template or create a new project from scratch. For the purpose of this tutorial, we will assume you are starting a new project.
- Choose “Empty Project” if necessary: If Garageband doesn’t automatically open a new project, navigate to the “File” menu at the top-left corner of the screen and select “New” followed by “Empty Project.”
- Prepare to configure the audio settings: Once you have a new empty project open in Garageband, get ready to set up the audio settings to ensure that your USB microphone is detected and correctly functioning within the software.
Opening Garageband is the first step towards recording and editing your audio with your USB microphone. Once you have the application open, you can proceed to the next step of selecting your USB microphone as the input device within Garageband.
Note: The specific steps for opening Garageband may vary slightly depending on the version of Garageband and your operating system. However, the general process remains the same for most versions.
Step 5: Select the USB Microphone as the Input Device
Once you have Garageband open and a new project created, it’s time to configure the audio settings and select your USB microphone as the input device. Follow these steps to choose your USB microphone within Garageband:
- Access the audio settings: At the top-right corner of the Garageband window, locate and click on the button that looks like a small volume icon. This will open the audio settings panel.
- Select your USB microphone: In the audio settings panel, you should see a dropdown menu or a list of available audio input devices. Locate your USB microphone in the list and select it as the input device.
- Check the input levels: Once you have selected your USB microphone, you will see input level meters in the audio settings panel. Test your microphone by speaking or making some noise into it and observe the meter to ensure that it responds to sound and indicates a proper input level. Adjust the volume or gain controls on your microphone if necessary.
- Configure additional settings if needed: Depending on your preferences and the specific features of your USB microphone, you may have additional settings available in the audio settings panel. Explore these settings to fine-tune your microphone’s performance within Garageband.
- Confirm the selection: Once you have selected your USB microphone and adjusted the necessary settings, close the audio settings panel. Garageband will now use your USB microphone as the primary input device for recording.
By selecting your USB microphone as the input device within Garageband, you have established the connection between the software and your microphone. This step is crucial for capturing high-quality audio and ensures that your recordings accurately reflect the sound captured by your USB microphone.
With the USB microphone now configured, you are ready to move on to the next step: adjusting the input levels to optimize the recording volume.
Step 6: Adjust the Input Levels
Once you have selected your USB microphone as the input device in Garageband, it’s important to adjust the input levels to ensure optimal recording quality. Follow these steps to adjust the input levels:
- Open the input level controls: In Garageband, locate the input level controls for your USB microphone. These controls can usually be found in the audio settings panel or on the track header of the recording track.
- Set an appropriate recording volume: Start by setting the input level to an appropriate volume. You want to ensure that the volume is not too low, which can result in faint recordings, or too high, which can cause distortion and clipping. Adjust the input level controls or the gain on your USB microphone to achieve a balanced recording volume.
- Monitor the input levels: As you speak or make noise into the USB microphone, monitor the input level meters in Garageband. These meters indicate the intensity of your audio input. Aim to keep the input level within a safe range, avoiding the extremes on either side of the meter.
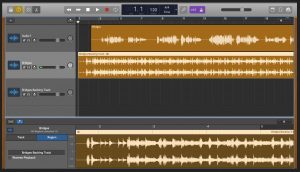
- Make test recordings: To ensure that the input levels are properly adjusted, make test recordings within Garageband. Speak or perform at the intended volume and check the resulting waveform. If the waveform appears too low or too high, adjust the input levels accordingly and repeat the test recordings until you achieve the desired volume.
- Consider dynamic range and headroom: Depending on your recording style and genre, you may want to allow for some dynamic range and headroom. This means leaving enough room between the loudest and softest parts of your recording to avoid clipping or distortion. Adjust the input levels to ensure you have enough headroom while still maintaining a solid recording volume.
Adjusting the input levels is crucial for achieving clean and professional-sounding recordings. It allows you to capture your voice or instrument accurately without the issues of being too soft or distorted. Take the time to experiment and make adjustments until you achieve the desired recording volume and clarity.
With the input levels properly adjusted, you are now ready to move on to the next step: starting your recording in Garageband.
Step 7: Start Recording
Now that you have your USB microphone configured and input levels adjusted, it’s time to start recording your audio in Garageband. Follow these steps to begin the recording process:
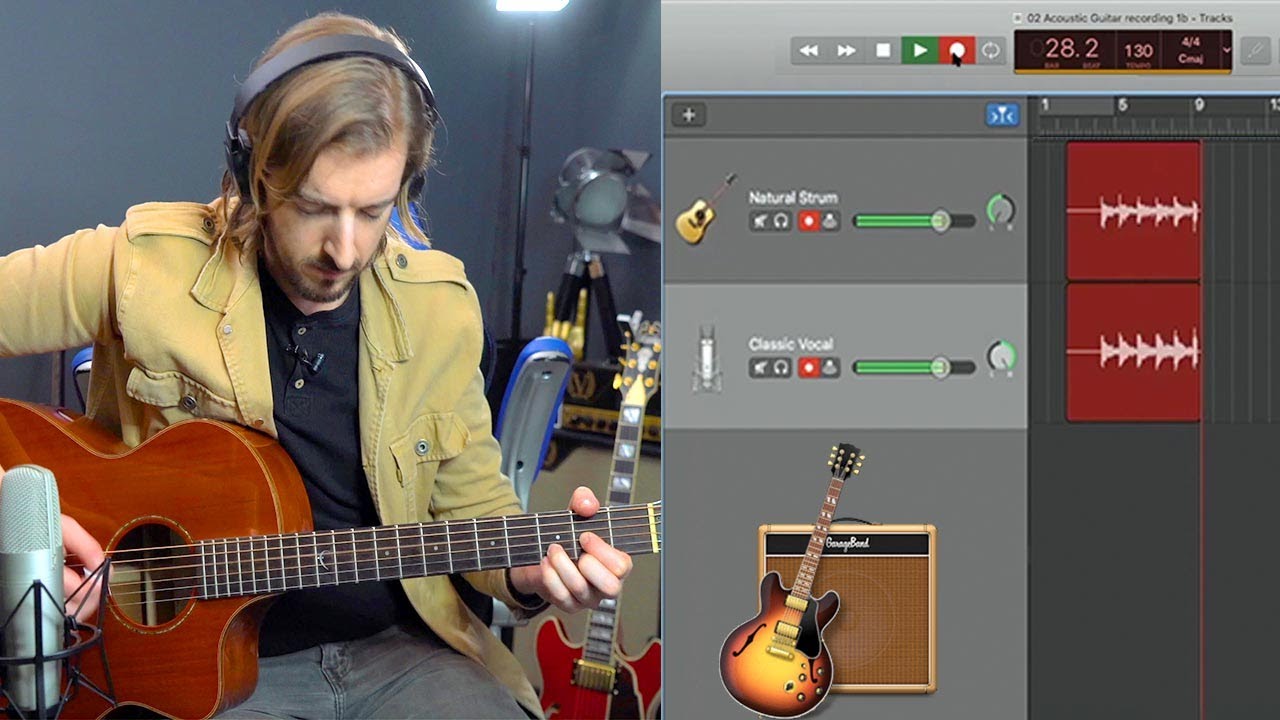
- Select a track: In Garageband, choose the track where you want to record your audio. You can create a new track specifically for your USB microphone or select an existing track if you want to add your microphone input to an existing project.
- Arm the track for recording: To prepare the track for recording with your USB microphone, locate and click on the small “Record” button or a red circle icon on the selected track. This signifies that the track is armed for recording.
- Set the recording options: Depending on your preferences, you may want to configure additional recording options such as the recording length, file format, and recording quality. Adjust these options in Garageband’s preferences or settings to best fit your needs.
- Position the playhead: Move the playhead, which indicates the current position in the timeline, to the starting point of your recording. You can manually position the playhead or use the transport controls in Garageband.
- Hit the record button: When you are ready to start recording, click the record button in Garageband. Alternatively, you can use a keyboard shortcut, such as the R key, to begin recording. Make sure to be prepared and start performing or speaking into your USB microphone once the recording starts.
- Monitor the recording: While you are recording, keep an eye on the audio input level meters in Garageband. This ensures that your audio remains within an appropriate range and helps you identify any issues during the recording process.
- Stop the recording: When you have finished recording, click the stop button in Garageband or use the designated keyboard shortcut (usually the spacebar) to stop the recording. The recorded audio will now be displayed as a separate audio region on the track.
Starting the recording process in Garageband allows you to capture your performance or audio input using your USB microphone. Make sure to remain focused and avoid any unnecessary background noise to ensure clean and professional recordings.
With your recording complete, you can proceed to the next step: fine-tuning the audio settings to enhance your recorded audio in Garageband.
Step 8: Fine-tune the Audio Settings
After recording your audio in Garageband using your USB microphone, it’s time to fine-tune the audio settings to enhance the quality of your recordings. Follow these steps to adjust the audio settings:
- Review the recorded audio: Take some time to listen to the recorded audio and identify any areas that may require adjustments or enhancements. Pay attention to the overall volume, clarity, and any unwanted background noise.
- Edit the audio regions: Garageband provides a range of editing tools to help refine your recorded audio. Trim any unnecessary sections, remove background noise, or correct any mistakes using the editing features available. This will help ensure a polished final result.
- Apply audio effects and plugins: Garageband offers a variety of audio effects and plugins that can enhance and modify your recorded audio. Experiment with different effects such as EQ (equalization), compression, reverb, or chorus to shape the sound according to your preferences or the requirements of your project.
- Adjust volume and panning: Fine-tune the volume levels of individual tracks to achieve a balanced mix. You can adjust the volume of specific regions or use automation to control the volume over time. Additionally, consider panning the tracks to distribute the sound across the stereo field, creating a wider and more immersive audio experience.
- Remove background noise: If you notice any unwanted background noise or hiss in your recording, Garageband provides noise reduction tools to minimize or eliminate these distractions. Use the noise gate or noise reduction features to clean up your audio and improve its clarity.
- Export and save your edited audio: Once you are satisfied with the adjustments and enhancements you have made, it’s time to export and save your edited audio. Choose the appropriate file format and quality settings that suit your intended use or distribution platform.
By fine-tuning the audio settings in Garageband, you can elevate the quality of your recorded audio and ensure that it sounds polished and professional. Remember to experiment with different settings and effects to achieve the desired sound for your specific project.
With your audio settings optimized and your recordings enhanced, you have successfully fine-tuned your audio in Garageband. You are now ready to move on to the final step: editing and enhancing your recording as needed.
Step 9: Edit and Enhance Your Recording
Once you have recorded and fine-tuned your audio in Garageband using your USB microphone, it’s time to dive into editing and enhancing your recording. Follow these steps to polish your recording and make it shine:
- Review your recording: Take the time to listen to your recording in its entirety and identify areas that may require editing or enhancement. Look out for any timing issues, mistakes, or sections that could benefit from adjustments.
- Edit the performance: Use Garageband’s editing tools to make precise edits to your recording. Cut out any unwanted sections, rearrange parts as needed, and fix any mistakes or inconsistencies. This will help ensure a cohesive and polished performance.
- Apply effects and plugins: Garageband offers a wide range of effects and plugins that can enhance your recording. Experiment with EQ (equalization), compression, delay, or any other effects that can bring out the best in your audio. Use these tools subtly to improve the overall balance and clarity of the recording.
- Add additional tracks: If desired, you can further enhance your recording by adding additional instrument tracks or vocal harmonies. Garageband allows you to easily create new tracks and layer different elements to create a richer and more dynamic sound.
- Mix and balance the tracks: Use the mixer in Garageband to adjust the volume levels of each track and find the right balance. Ensure that all the elements blend well together and nothing overpowers or gets lost in the mix. Pay attention to the stereo imaging and panning to create a sense of space and depth.
- Apply automation: Utilize automation features in Garageband to control the volume, panning, or other parameters over time. This allows you to create dynamic changes and add emphasis to certain parts of your recording. Automate effects or instrument parameters to add movement and interest to your audio.
- Finalize your project: Once you are satisfied with the edits and enhancements, it’s time to finalize your project. Fine-tune the arrangement, adjust any remaining audio settings, and ensure that the overall sound is cohesive and professional.
- Export your recording: When you’re ready to share or distribute your recording, export it from Garageband in your desired format and quality settings. This will create a standalone audio file that can be easily shared, uploaded, or incorporated into your other projects.
By editing and enhancing your recording in Garageband, you can take your initial raw recording and transform it into a polished and professional piece of audio. The editing process allows you to refine your performance, perfect the sound quality, and tailor the recording to your desired artistic vision.
With your recording now edited and enhanced, you have successfully completed the final step in the process. Congratulations! Your USB microphone is now integrated with Garageband, and you can create high-quality recordings and unleash your creativity.
Conclusion
Adding a USB microphone to Garageband opens up a world of possibilities for musicians, podcasters, and content creators. With its user-friendly interface and powerful recording features, Garageband serves as an ideal platform for capturing and editing high-quality audio. By following the steps outlined in this guide, you can seamlessly integrate your USB microphone and harness its full potential within Garageband.
We began by checking the compatibility of your USB microphone with your computer and ensuring that all necessary drivers and software were installed. Then, we moved on to connecting the microphone to your computer and configuring the system preferences to recognize it as the primary audio input device.
After opening Garageband, we learned how to select the USB microphone as the input device and adjust the input levels for optimal recording quality. We then dove into the recording process itself, exploring how to start and stop recordings and monitor the audio input levels.
Once the recording was complete, we discussed how to fine-tune the audio settings to enhance the quality of the recorded audio. We explored editing techniques, applying effects and plugins, and adjusting volume and panning to create a polished and professional sound.
In the final steps, we delved into editing and enhancing the recording, using Garageband’s tools to refine the performance, apply automation, and create a cohesive mix. Finally, we touched on the process of exporting the recording and the importance of choosing the appropriate file format and quality settings.
By following these steps, you are equipped with the knowledge and skills to unlock the full potential of your USB microphone in Garageband. As you continue to explore and experiment, the possibilities for creating incredible audio projects are endless.
Remember to always refer to the documentation and resources provided by your USB microphone’s manufacturer for any specific instructions or troubleshooting tips. Additionally, continue to practice and explore Garageband’s features to refine your recording and editing techniques.
Now, armed with your USB microphone and Garageband, it’s time to unleash your creativity and bring your audio projects to life. Happy recording!