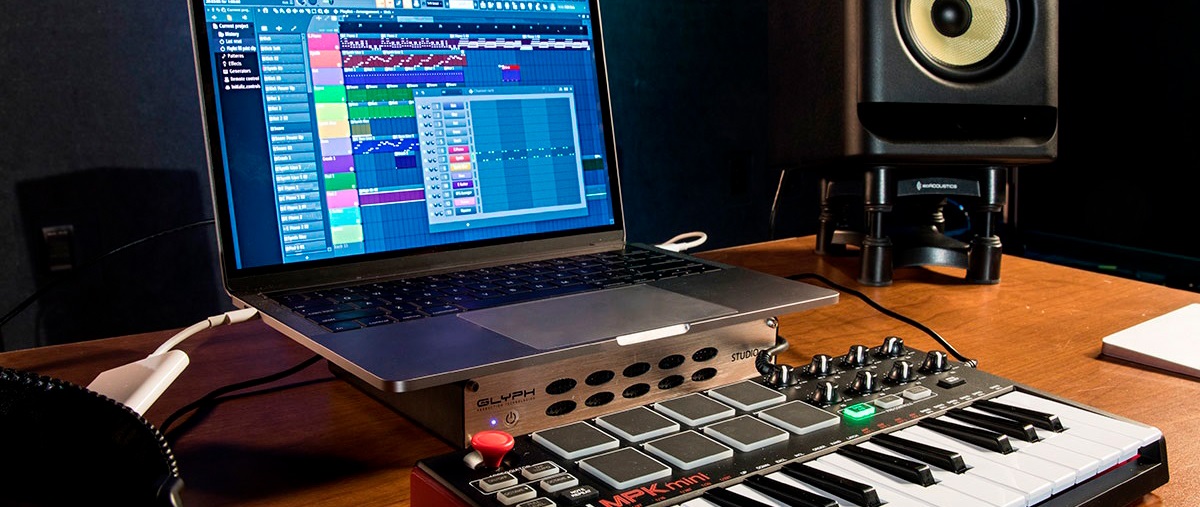
Introduction
If you're an avid musician or a budding producer, having a MIDI keyboard is a valuable tool for creating music. However, encountering issues with the keys can be frustrating and disrupt your creative flow. Whether it's unresponsive keys, a lack of sensitivity, or physical damage, these problems can hinder your ability to play and compose music effectively. Fortunately, many common keyboard issues can be resolved without the need for professional intervention. By understanding how to troubleshoot and fix your MIDI keyboard, you can save time and money while ensuring that your musical endeavors remain uninterrupted.
In this guide, we'll delve into the essential steps for fixing MIDI keyboard keys. We'll explore various methods to identify the issue, clean the keys, adjust the key sensors, and even replace broken keys. By following these practical solutions, you can restore your MIDI keyboard to its optimal functionality and get back to making music with ease.
Whether you're a seasoned musician or a newcomer to the world of MIDI keyboards, learning how to address key-related problems is a valuable skill. With a bit of patience and the right techniques, you can breathe new life into your instrument and continue pursuing your passion for music creation. So, let's dive into the process of troubleshooting and fixing MIDI keyboard keys, empowering you to overcome these challenges and unleash your musical potential.
Identifying the Issue
Before diving into the troubleshooting process, it’s crucial to identify the specific issues affecting your MIDI keyboard keys. By pinpointing the root cause of the problem, you can effectively determine the most appropriate course of action to rectify it. Here are some common issues you may encounter:
- Unresponsive Keys: If certain keys fail to produce any sound or exhibit inconsistent responsiveness, there may be underlying issues with the key sensors or connections.
- Lack of Sensitivity: Some keys may feel less responsive or require excessive force to trigger a sound, indicating a sensitivity problem that needs to be addressed.
- Physical Damage: Visible damage, such as broken or misaligned keys, can significantly impact the keyboard’s playability and may require immediate attention.
To identify the specific issue, start by testing each key individually. Press each key and take note of any irregularities in responsiveness, sound output, or physical condition. Additionally, inspect the keyboard for any visible signs of damage, such as cracks, chips, or misaligned keys. If the issue is intermittent or affects multiple keys, it may indicate a broader problem with the keyboard’s internal components or connections.
Furthermore, consider the circumstances surrounding the onset of the issue. Has the keyboard been subjected to physical trauma, exposure to moisture, or extreme temperature changes? Understanding the potential triggers for the problem can provide valuable insights into its underlying cause.
Once you’ve thoroughly assessed and documented the issues affecting your MIDI keyboard keys, you’ll be better equipped to proceed with the appropriate troubleshooting steps. Whether it’s addressing unresponsive keys, sensitivity issues, or physical damage, a clear understanding of the problem is the first step towards finding a solution.
Cleaning the Keys
Over time, MIDI keyboard keys can accumulate dust, debris, and other foreign particles, leading to diminished responsiveness and playability. Cleaning the keys is a fundamental maintenance task that can significantly improve the overall performance of your keyboard. Here’s a step-by-step guide to effectively clean the keys of your MIDI keyboard:
- Prepare the Necessary Tools: Before starting the cleaning process, gather the essential tools, including a soft microfiber cloth, compressed air canister, and a small amount of isopropyl alcohol.
- Power Off and Disconnect the Keyboard: To ensure safety and prevent accidental damage, power off the keyboard and disconnect it from any external devices or power sources.
- Remove the Key Cover: If your keyboard allows for key removal, carefully detach the key cover or individual keys following the manufacturer’s guidelines. This step may not be applicable to all MIDI keyboards.
- Dust and Debris Removal: Use the compressed air canister to blow away loose dust and debris from the keybed and surrounding areas. Pay special attention to the spaces between the keys where debris tends to accumulate.
- Cleaning the Keys: Dampen the microfiber cloth with a small amount of isopropyl alcohol and gently wipe the surface of each key. This will help remove stubborn grime and oils that may affect the keys’ responsiveness.
- Drying and Reassembly: Allow the keys to air dry completely before reassembling the keyboard. Ensure that no moisture remains trapped between the keys or on the keybed.
Regularly cleaning your MIDI keyboard keys can prevent performance issues and prolong the lifespan of the instrument. By maintaining clean and well-functioning keys, you’ll experience improved playability and a more satisfying musical experience. Incorporating this simple maintenance routine into your regular keyboard care regimen can go a long way in preserving the integrity of your instrument.
Adjusting the Key Sensors
Key sensors play a crucial role in translating the physical act of pressing a key into a digital signal that triggers a sound in a MIDI keyboard. When key sensors become misaligned or require calibration, it can result in unresponsiveness, inconsistent triggering, or a lack of sensitivity. Fortunately, many MIDI keyboards offer the flexibility to adjust key sensor settings, allowing users to fine-tune the keyboard’s responsiveness. Here’s a systematic approach to adjusting the key sensors:
- Accessing Sensor Adjustment Settings: Refer to your MIDI keyboard’s user manual to understand how to access the key sensor adjustment settings. This process may involve navigating through the keyboard’s internal settings using buttons, knobs, or a digital interface.
- Performing Sensor Calibration: Some keyboards feature a sensor calibration function that allows users to recalibrate the sensitivity and responsiveness of individual keys or the entire keybed. Follow the manufacturer’s instructions to initiate and complete the calibration process.
- Testing Key Responsiveness: After adjusting the key sensors, test the responsiveness of the keys by playing various notes and assessing their consistency and sensitivity. Make note of any keys that still exhibit issues and consider further adjustments if necessary.
- Fine-Tuning Individual Keys: For keyboards that allow granular adjustments, consider fine-tuning the sensitivity and responsiveness of individual keys to ensure uniform playability across the entire keybed.
By carefully adjusting the key sensors, you can optimize the playability and responsiveness of your MIDI keyboard, addressing issues such as unresponsive keys or inconsistent triggering. Regularly reviewing and fine-tuning the key sensor settings can help maintain the keyboard’s performance over time, ensuring a reliable and enjoyable playing experience.
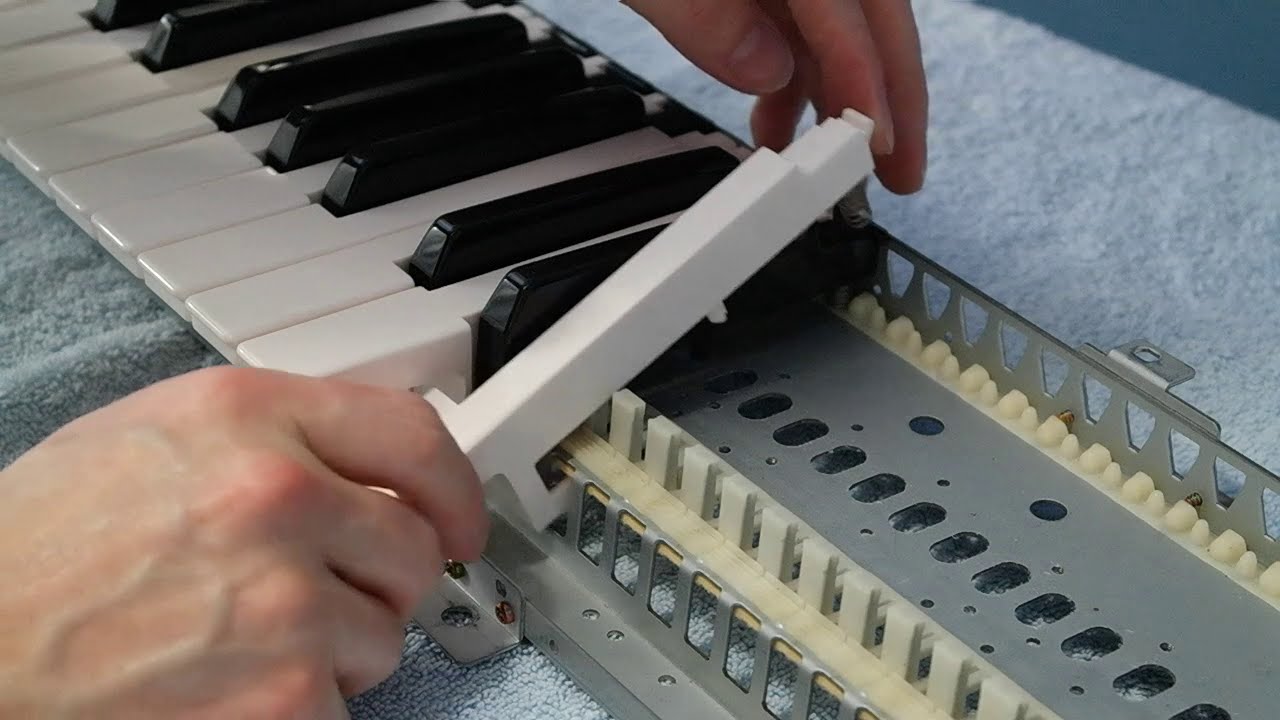
Replacing Broken Keys
When a MIDI keyboard sustains physical damage, such as broken or irreparably damaged keys, replacing the affected keys becomes necessary to restore the instrument’s full functionality. While this task may seem daunting, many MIDI keyboards are designed to facilitate key replacement, allowing users to address individual key issues without replacing the entire instrument. Here’s a comprehensive guide to replacing broken keys on your MIDI keyboard:
- Identifying the Damaged Keys: Inspect the keyboard to identify the specific keys that are broken, chipped, or otherwise damaged. Take note of the key sizes and designs, as well as any unique features that may affect the replacement process.
- Procuring Replacement Keys: Contact the keyboard’s manufacturer or authorized dealers to acquire genuine replacement keys designed for your specific MIDI keyboard model. Ensure that the replacement keys match the original design and dimensions for a seamless fit.
- Key Removal: Follow the manufacturer’s guidelines for removing the damaged keys from the keybed. This process may involve unscrewing key assemblies, releasing key clips, or using specialized tools to detach the keys.
- Installing Replacement Keys: Carefully position the replacement keys on the keybed, aligning them with the key mounts or connectors. Ensure a secure fit and proper alignment to prevent issues with key movement and playability.
- Testing the Replaced Keys: After installing the replacement keys, test each key to ensure proper triggering, responsiveness, and alignment. Make any necessary adjustments to the key placement or connections to achieve optimal performance.
By following these steps, you can effectively replace broken keys on your MIDI keyboard, restoring its playability and visual appeal. Additionally, the ability to replace individual keys underscores the modular and repair-friendly design of many MIDI keyboards, empowering users to address specific issues without extensive repairs or replacements.
Testing the Keyboard
After performing maintenance or repairs on your MIDI keyboard, thorough testing is essential to ensure that the issues have been effectively addressed and that the instrument is functioning optimally. Testing the keyboard involves assessing the playability, responsiveness, and overall performance across the entire keybed. Here’s a detailed approach to testing your MIDI keyboard:
- Key Responsiveness: Test each key individually to ensure that they trigger sounds consistently and with the appropriate sensitivity. Pay attention to any keys that may still exhibit issues, such as unresponsiveness or inconsistent triggering.
- Key Sensitivity: Evaluate the sensitivity of the keys, ensuring that they respond accurately to varying degrees of pressure. Adjust key sensor settings if necessary to achieve a balanced and uniform sensitivity across the keybed.
- Full Range Testing: Play notes across the entire range of the keyboard, from the lowest to the highest keys, to confirm that all keys produce sound and respond appropriately. Take note of any anomalies or irregularities in sound output or key behavior.
- Functional Controls: Test any additional controls, such as pitch bend wheels, modulation wheels, and assignable knobs or sliders, to ensure that they function as intended and do not exhibit any issues following maintenance or repairs.
- External Connectivity: If your MIDI keyboard interfaces with external devices or software, test its connectivity and communication to verify that it seamlessly integrates with your music production setup.
By meticulously testing your MIDI keyboard, you can confirm that the maintenance or repair efforts have been successful and that the instrument is ready for regular use. Address any lingering issues or anomalies that arise during testing to ensure that your keyboard delivers consistent and reliable performance, allowing you to focus on creating music with confidence and precision.