Introduction
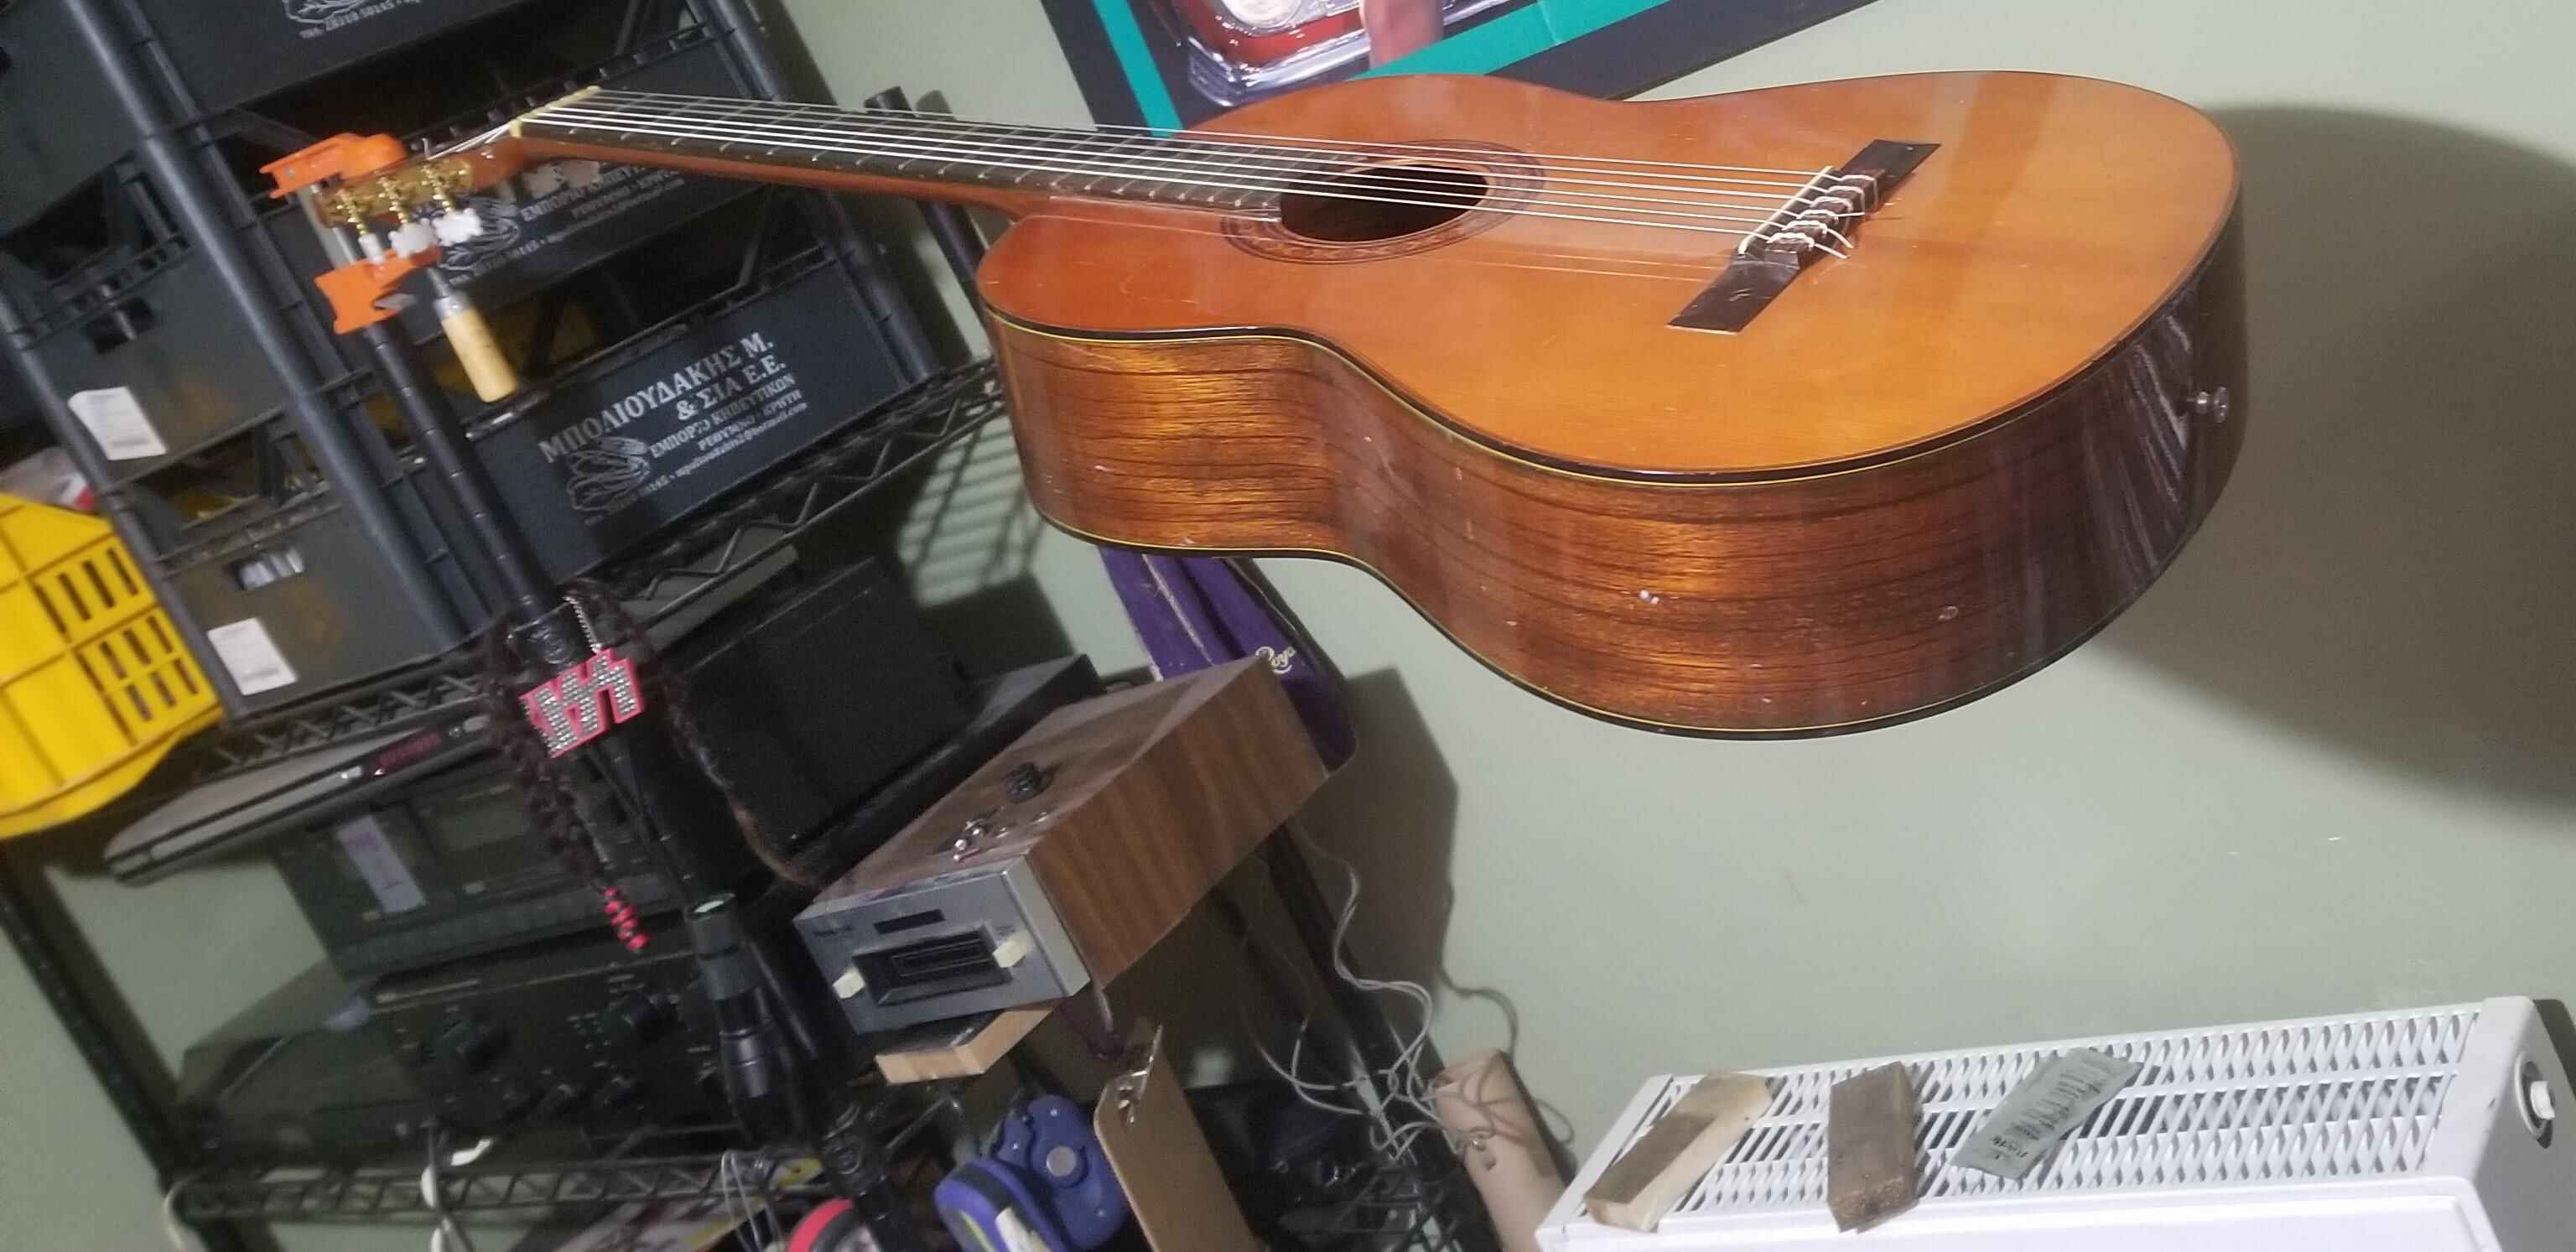
Fixing a broken neck on an acoustic guitar can seem like a daunting task, but it is certainly doable with the right tools, materials, and a little know-how. Whether your guitar suffered a minor crack or a complete break, repairing the neck will restore the instrument’s playability and ensure many more years of music-making.
A broken neck can be caused by various factors, such as accidental drops, temperature changes, or even just normal wear and tear over time. The good news is that as long as the break is clean and the pieces fit together properly, you can repair the neck without having to replace it entirely.
In this guide, we will walk you through the step-by-step process of fixing a broken neck on an acoustic guitar. We will cover everything from assessing the damage to restringing the guitar once the repair is complete. So, grab your tools and let’s get started on bringing your beloved guitar back to life!
Tools and Materials Needed
Before you begin repairing the broken neck on your acoustic guitar, you will need to gather the necessary tools and materials. Here’s a comprehensive list of what you’ll need:
- Woodworking clamps: These are crucial for holding the broken pieces of the neck together while the glue dries.
- Woodworking glue: Choose a high-quality wood glue that is suitable for bonding guitar necks. This will ensure a strong and durable repair.
- Scrap wood or cauls: These are used to distribute pressure evenly when clamping the neck, preventing any damage to the guitar.
- Fine-grit sandpaper: You’ll need sandpaper to smooth out the repaired area and remove any excess glue.
- Razor blade or craft knife: A sharp blade will come in handy for removing any old glue or debris from the broken surfaces.
- Small brush or applicator: Use this to apply the glue evenly to the surfaces that need to be bonded together.
- Tape or rubber bands: These can be used as temporary clamps while the glue dries.
- Lint-free cloth: Use a cloth to wipe away excess glue and keep the work area clean.
- Protective gloves: It’s important to protect your hands while working with glue and sharp tools.
- Protective eyewear: Safety goggles will prevent any debris from getting into your eyes during the repair process.
Make sure you have all these tools and materials ready before you start the repair. Having everything prepared in advance will help ensure a smooth and efficient repair process.
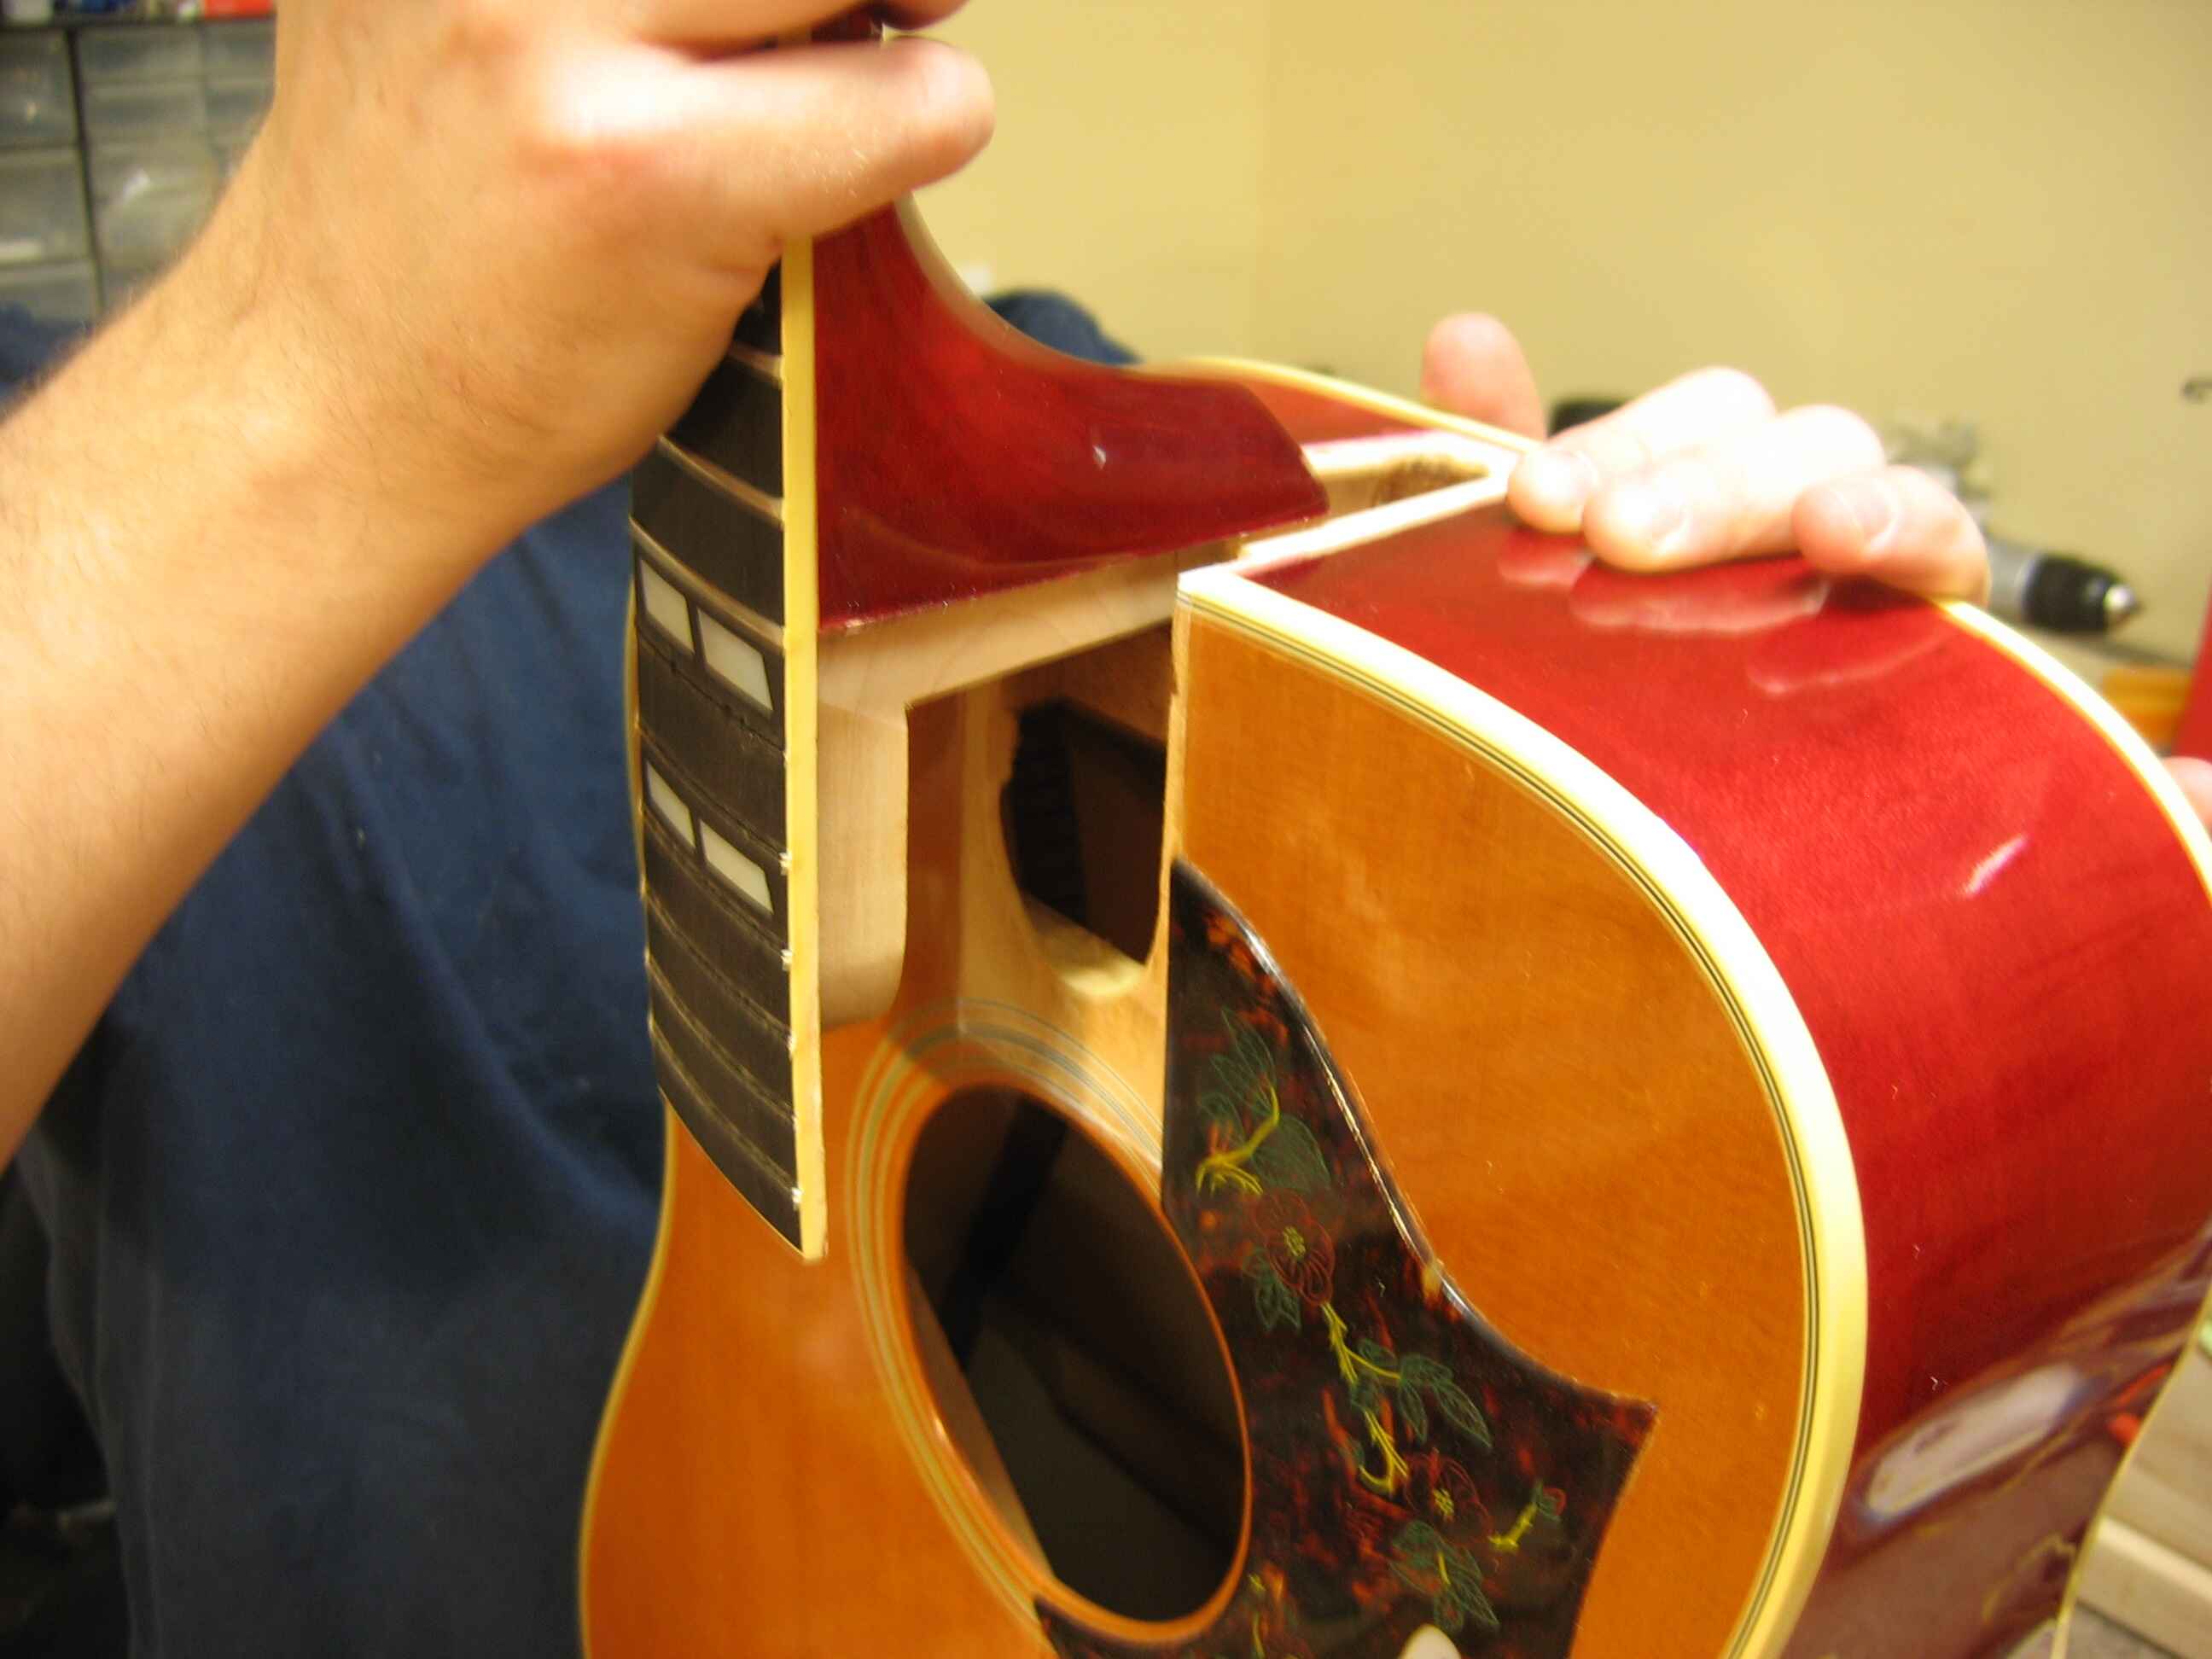
Assessing the Damage
The first step in fixing a broken neck on an acoustic guitar is to assess the extent of the damage. Carefully examine the broken area to understand the nature of the break and determine if it can be repaired.
Look for any visible cracks or breaks in the neck. If the break is clean and the pieces fit together well, there is a good chance that you can successfully repair it. However, if the break is jagged or the pieces do not align properly, it might be more challenging to achieve a solid repair.
Next, check for any additional damage to the guitar, such as dents or splintered wood. These issues should be addressed along with the broken neck repair to ensure the overall stability and longevity of the instrument.
It’s also important to assess the type of neck joint your guitar has. Most acoustic guitars have either a bolt-on or a dovetail joint. Understanding the specific joint type will determine the approach you take in repairing the broken neck.
If you’re unsure about the extent of the damage or the best course of action, it’s always a good idea to consult a professional guitar repairperson. They can provide expert advice and guidance based on their experience to help you make an informed decision.
Once you have assessed the damage, you’ll be ready to move on to the next steps of the repair process and get your guitar back in playing condition.
Removing the Strings
Before you can begin repairing the broken neck on your acoustic guitar, you’ll need to remove the strings. This step is essential to ensure that you have easy access to the damaged area and can work on it comfortably.
Start by loosening the tension on each string by turning the tuning pegs counterclockwise. Once the strings are loose enough, you can begin removing them one by one. Unscrew the tuning pegs and gently pull the strings out of the bridge pins. Be careful not to scratch the guitar’s body or damage the bridge in the process.
As you remove each string, it’s a good idea to save them for later use. You can keep them organized using a string winder or wrap them individually in a cloth or string organizer. This way, you can easily restring the guitar once the repair is complete.
After removing the strings, take a moment to clean the guitar’s body and fretboard. Use a lint-free cloth to wipe away any dust, dirt, or residue that may have accumulated. This will ensure a clean and optimal work surface as you proceed with the repair.
Remember to store the guitar in a safe place where it won’t be bumped or knocked over while you work on the broken neck. This will help prevent any additional damage and ensure the stability of the instrument during the repair process.
With the strings removed and the guitar cleaned, you’re now ready to move on to the next step: preparing the broken neck for repair.
Preparing the Broken Neck for Repair
Once you have removed the strings from your acoustic guitar, the next step in fixing the broken neck is to prepare it for repair. This involves carefully preparing the surfaces for bonding and ensuring a clean and secure repair.
Start by using a razor blade or craft knife to remove any old glue or debris from the broken surfaces. Be gentle to avoid causing any further damage to the neck. This step is crucial as it ensures a strong bond when you glue the broken pieces together.
Next, use fine-grit sandpaper to smooth out the surfaces where the break occurred. This will create a rough texture on the wood, helping the glue adhere better. Make sure to sand both sides of the break evenly, ensuring a tight fit when you rejoin the pieces.
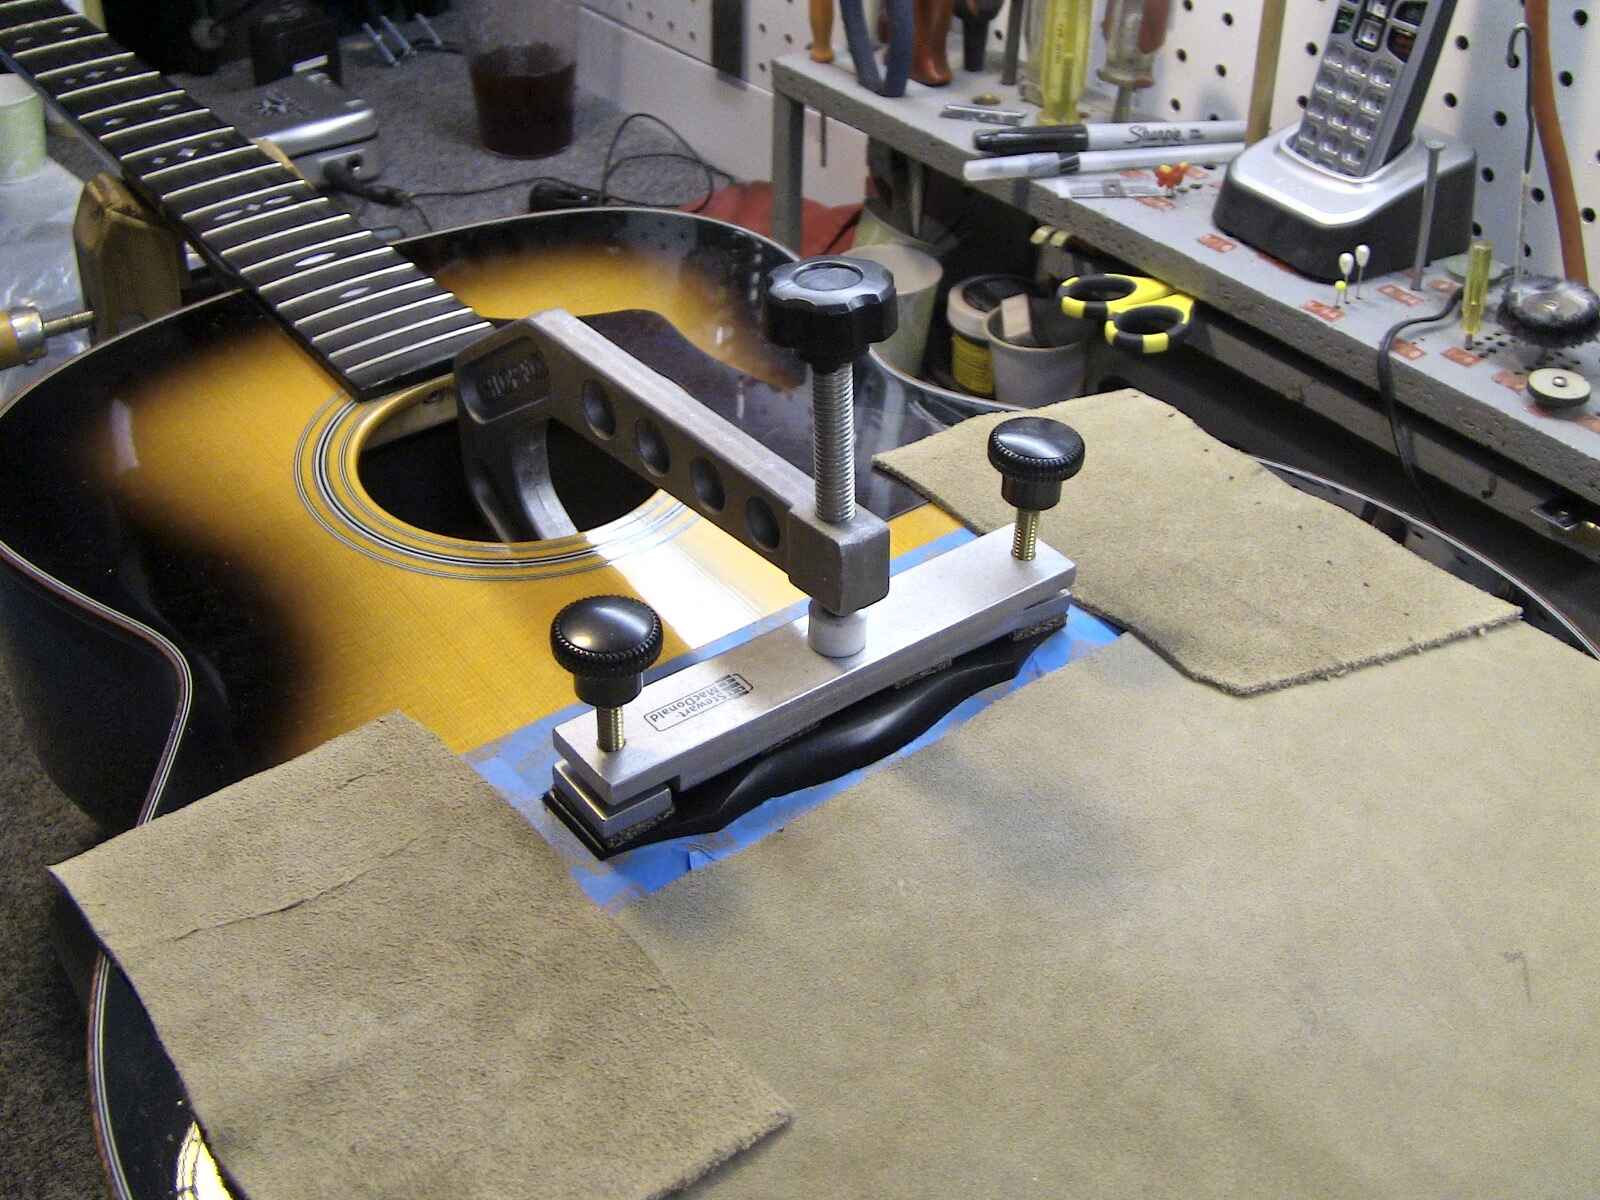
After sanding, it’s important to align the broken pieces accurately. Use woodworking clamps to hold the neck in place, ensuring that the broken edges meet precisely without any gaps. A snug fit is crucial to achieving a strong and seamless repair.
To distribute the pressure evenly during the gluing process, use scrap wood or cauls on either side of the neck. Place them between the clamps and the neck, acting as buffers to prevent any damage from the clamping pressure.
With the broken neck properly aligned and secured, you’re now ready to move on to the next step: gluing the broken pieces together.
Gluing the Broken Pieces Together
Now that you have prepared the broken neck of your acoustic guitar, it’s time to glue the pieces back together. This crucial step will ensure a strong and durable repair that can withstand the tension and stress of playing.
Begin by applying a thin, even layer of high-quality woodworking glue to both broken surfaces of the neck. Use a small brush or applicator to spread the glue evenly. Be careful not to apply too much glue, as excess glue can seep out and create a messy finish.
Once the glue is applied, carefully align the broken pieces and press them firmly together. Make sure the edges of the broken neck fit snugly without any gaps. This will ensure a solid bond and a seamless repair.
To hold the broken pieces together while the glue dries, use woodworking clamps. Place the clamps gently on the neck, applying enough pressure to secure the bond but not so much that it causes damage. Check the manufacturer’s recommendations for the appropriate clamping pressure for the specific type of glue you are using.
If you don’t have clamps available, you can use tape or rubber bands as temporary clamps. Wrap them tightly around the neck, ensuring the broken pieces remain in place until the glue sets.
Allow the glue to dry as per the manufacturer’s instructions. This typically ranges from a few hours to overnight. Avoid moving or placing any strain on the repaired neck during this time to ensure a strong bond.
Once the glue has fully dried and the bond is secure, you can remove the clamps or tape. Check the repaired area for any excess glue and use a razor blade or craft knife to carefully remove it. Finish off by lightly sanding the repaired section to achieve a smooth and seamless finish.
With the broken pieces successfully glued back together, you’re now ready to reinforce the repaired neck for added stability and strength.
Reinforcing the Repaired Neck
After successfully gluing the broken pieces of your acoustic guitar’s neck, it’s important to reinforce the repair to ensure long-term stability and durability. Reinforcing the repaired neck will help prevent future breaks and ensure that your guitar can withstand the tension and stress of playing.
There are a few different methods you can use to reinforce the repaired neck. One common approach is to install a wooden splint or dowel inside the neck. This additional support will provide extra strength and stability to the repaired area.
To do this, carefully drill small holes into the neck on either side of the repair. Make sure the holes are aligned, and their size matches the diameter of the wooden splint or dowel you will be using. Apply a small amount of woodworking glue to the holes, insert the splint or dowel, and tap it gently until it is fully inserted.
Another option for reinforcement is to install a hidden brace on the inside of the guitar. This can be done by removing the soundhole cover or pickguard and attaching a brace across the broken area. This method provides additional support without altering the appearance of the guitar’s neck.
If you are unsure about the best method of reinforcement for your specific repair, it is recommended to consult a professional guitar repairperson. They have the expertise to determine the most suitable reinforcement technique based on your guitar’s construction and the extent of the repair.
Once the reinforcement is in place, allow the glue to dry and set according to the manufacturer’s instructions. This will ensure that the repair is solid and secure for continued use.
Remember that reinforcing the repaired neck is an important step in ensuring the longevity and playability of your guitar. Taking the time to reinforce the repair will give you peace of mind knowing that your guitar is in good shape and ready to be played again.
Now that you have reinforced the repaired neck, it’s time to add the finishing touches to your guitar before restringing it and enjoying the beautiful sound it produces.
Finishing Touches
With the repaired neck of your acoustic guitar reinforced and ready to go, it’s time to add some finishing touches to ensure the overall appearance and playability of the instrument are at their best.
Start by sanding the repaired area using fine-grit sandpaper. This will help smooth out any rough edges and blend the repair seamlessly with the rest of the neck. Be careful not to sand too aggressively, as this can damage the surrounding wood.
After sanding, wipe away any dust or debris with a lint-free cloth. This will ensure a clean surface for the next step, which is applying a finish to protect and enhance the wood.
Choosing the right finish for your guitar is essential. There are various options to consider, such as polyurethane, lacquer, or oil-based finishes. Each has its own advantages and considerations, so do some research or consult a professional to determine the best finish for your guitar.
Apply the chosen finish to the repaired area according to the manufacturer’s instructions. Make sure to feather the finish into the surrounding wood for a seamless blend. Allow the finish to fully dry before moving on to the next step.
Once the finish is dry, assess the overall appearance of the neck and consider any cosmetic touch-ups that may be necessary. For example, if there are any small dents or scratches, you can use a touch-up pen or a matching wood stain to conceal them.
Take this opportunity to inspect the rest of the guitar for any additional cosmetic issues that may need attention. This could include polishing the body, cleaning the frets, or replacing worn-out hardware.
Now that the finishing touches are complete and your guitar looks good as new, it’s time to restring it and get ready to enjoy the sweet sounds it produces once again.
Carefully thread each string through the appropriate tuning pegs, making sure to follow the correct stringing pattern. Use a string winder to speed up the string-changing process and ensure the strings are securely in place.
After restringing, tune the guitar to your desired pitch. Stretch the strings gently to help them settle and stabilize. Take your time in tuning and closely monitor the tension on the repaired neck to ensure everything feels and sounds just right.
Congratulations! You have successfully repaired the broken neck on your acoustic guitar and put the final touches on your instrument. Now it’s time to strum those strings and enjoy the beautiful music that your guitar can create.
Restringing the Guitar
After successfully repairing and adding the finishing touches to your acoustic guitar, it’s time to restring the instrument. Restringing is an essential step to ensure optimal playability and sound quality. Follow these steps to restring your guitar:
1. Start by removing the old strings. Use a string winder to loosen the tension and unwind the strings from the tuning pegs. As you remove each string, make sure to discard it properly.
2. Before installing the new strings, give the guitar a quick clean. Use a lint-free cloth to wipe away any dust or debris that may have accumulated during the repair process. This will ensure a clean and smooth surface for the new strings.
3. Choose the appropriate strings for your acoustic guitar. Consider factors such as string gauge, material, and your playing preferences. Consult the guitar’s manufacturer or a knowledgeable music store professional if you’re unsure about the best strings for your instrument.
4. Start by attaching the new strings to the bridge. Insert one end of the string into the corresponding bridge pin hole and push it firmly until it is securely in place. Repeat this process for each string, making sure they are properly seated in the bridge.
5. With the strings attached to the bridge, bring them up and thread them through the appropriate tuning pegs. Make sure to follow the correct stringing pattern for your guitar. Pull the strings tight but leave a bit of slack for tuning later on.
6. Use a string winder to start turning the tuning pegs and tighten the strings. Be gentle and make sure the strings wind neatly and evenly onto the pegs. As you tighten each string, use your other hand to guide it along the fretboard and ensure it stays in the correct position.
7. Once all the strings are tightened to the desired pitch, give them a gentle tug to stretch them and then re-tune the guitar. Repeat this process a few times until the strings stabilize and hold their tune.
8. Check the overall tension on the repaired neck while tuning and playing the guitar. Pay attention to any signs of instability or discomfort in the neck. If you notice any issues, consult a professional to ensure the repair is holding up well.
By following these steps, you can restring your acoustic guitar and enjoy the beautiful sound it produces once again. Remember to regularly maintain and replace your strings to keep your guitar in optimal playing condition.
Conclusion
Repairing a broken neck on an acoustic guitar may seem like a daunting task, but with the right tools, materials, and knowledge, it is achievable. By following the step-by-step process outlined in this guide, you can bring your beloved instrument back to life and enjoy playing it for years to come.
Remember to carefully assess the damage, prepare the broken neck for repair, and use high-quality woodworking glue to bond the pieces back together. Reinforce the repaired neck for added stability and strength, and finish off with the appropriate touch-ups and a fresh set of strings.
Throughout this entire process, it is crucial to exercise caution, take your time, and pay attention to detail. Don’t hesitate to seek guidance and advice from professionals if needed. Safety should always be a priority when working with tools, sharp objects, and adhesives.
Repairing a broken neck on an acoustic guitar is a valuable skill to have. Not only does it save you money on costly repairs or replacements, but it also allows you to develop a deeper understanding of your instrument. It can be a rewarding experience to bring your guitar back to life with your own hands.
Remember, proper maintenance and care will help prevent future neck breakages. Store your guitar in a secure location, away from extreme temperature changes and potential accidents. Regularly check your guitar for any signs of wear and address them promptly to avoid further damage.
With patience, practice, and the confidence gained from successfully repairing your guitar’s broken neck, you’ll continue to grow as a musician and appreciate the craftsmanship of your instrument even more. So, pick up your newly repaired guitar and let the music fill the air!