Introduction
Welcome to our comprehensive guide on how to adjust the action on an acoustic guitar without using the truss rod. The action of a guitar refers to the height of the strings above the fingerboard. Having the correct action is crucial for a comfortable playing experience and optimal sound quality.
While the truss rod is commonly used to adjust the action on most guitars, there are situations where it may not be an option. For example, if your guitar doesn’t have a truss rod or if you’re dealing with a vintage instrument that has a stubborn or broken truss rod, you’ll need alternative methods to adjust the action.
In this article, we will explore step-by-step techniques for assessing and adjusting the action of your acoustic guitar without relying on the truss rod. We will take a close look at factors such as neck relief, nut height, and saddle height, all of which play a crucial role in achieving the desired action.
Before we proceed, it’s important to note that adjusting the action of a guitar requires careful attention and precision. If you’re not confident in your abilities or if you have a high-end instrument, it’s recommended to seek the assistance of a professional guitar technician. However, if you’re comfortable working on your own guitar and you understand the risks involved, then let’s dive into the world of adjusting the action on an acoustic guitar without using the truss rod!
What is the truss rod?
The truss rod is an essential component found in most modern acoustic guitars. It is a metal rod that runs through the neck of the guitar and helps to counteract the tension exerted by the strings. The primary function of the truss rod is to adjust the neck relief, which is the slight curvature of the neck that keeps the strings at the optimal height above the fingerboard.
By tightening or loosening the truss rod, you can control the amount of relief in the neck. If the neck has too much relief, the strings will be too far from the fingerboard, causing the guitar to feel difficult to play and potentially resulting in buzzes or fretting out. On the other hand, if there is too little relief, the strings may come into contact with the fingerboard, causing the guitar to play out of tune or create a buzzing sound.
The truss rod adjustment is typically done using a specialized wrench or Allen key, which allows you to turn the truss rod nut located at the headstock of the guitar. It’s important to make small adjustments and give the neck time to settle between adjustments, as sudden changes can have adverse effects on the stability and playability of the instrument.
While the truss rod is an integral tool for adjusting the action of a guitar, there are instances where it may not be a viable option. Some guitars, particularly older and vintage models, may not have a truss rod at all. Additionally, there are scenarios where the truss rod is damaged or non-functional, making it impossible to use for action adjustments.
Don’t worry! Even without access to the truss rod, there are alternative methods that can be employed to adjust the action of your acoustic guitar effectively. In the following sections, we will explore these techniques in detail, allowing you to achieve the desired action without relying on the truss rod.
Why you might want to adjust the action without using the truss rod
While the truss rod is a common and reliable method for adjusting the action of an acoustic guitar, there are a few scenarios where you might need to explore alternative options. Understanding why you might want to adjust the action without using the truss rod can help you determine if these alternative methods are suitable for your particular situation.
One common reason is that some guitars, particularly vintage or budget instruments, may not have a truss rod at all. These guitars were often manufactured before the use of truss rods became standard practice. If you find yourself with one of these older instruments, you won’t have the option to adjust the action using the truss rod and will need to explore different approaches.
Another reason to consider alternate methods is if your truss rod is damaged, broken, or not functioning correctly. Over time, truss rods can become worn out or may be improperly installed, leading to complications when adjusting the action. In such cases, attempting to adjust the truss rod could potentially cause further damage to your guitar. This is when knowing how to adjust the action without relying on the truss rod becomes particularly useful.
Furthermore, some guitarists prefer a specific type of action that falls outside the recommended range of the truss rod adjustment. While the truss rod allows for variations in neck relief, there are limitations to how much the action can be adjusted. By exploring alternative methods, you can fine-tune the action to your specific preferences, even if it falls outside the standard truss rod adjustment guidelines.
It’s important to note that adjusting the action without the truss rod may require extra care and precision. Proceed with caution and ensure you understand the steps involved before attempting any modifications. If you’re uncertain or uncomfortable with the process, it’s always best to consult a professional guitar technician who can assess the situation and suggest the appropriate course of action.
In the following sections, we will explore various techniques for adjusting the action of your acoustic guitar without using the truss rod. Whether you have an old guitar without a truss rod or you’re dealing with a truss rod issue, these methods will provide you with the tools you need to achieve the desired action on your instrument.
Checking the neck relief
Before you can start adjusting the action of your acoustic guitar without using the truss rod, it’s crucial to assess the current neck relief. Neck relief refers to the slight curvature of the neck, and it plays a vital role in determining the action.
To check the neck relief, you can follow these simple steps:
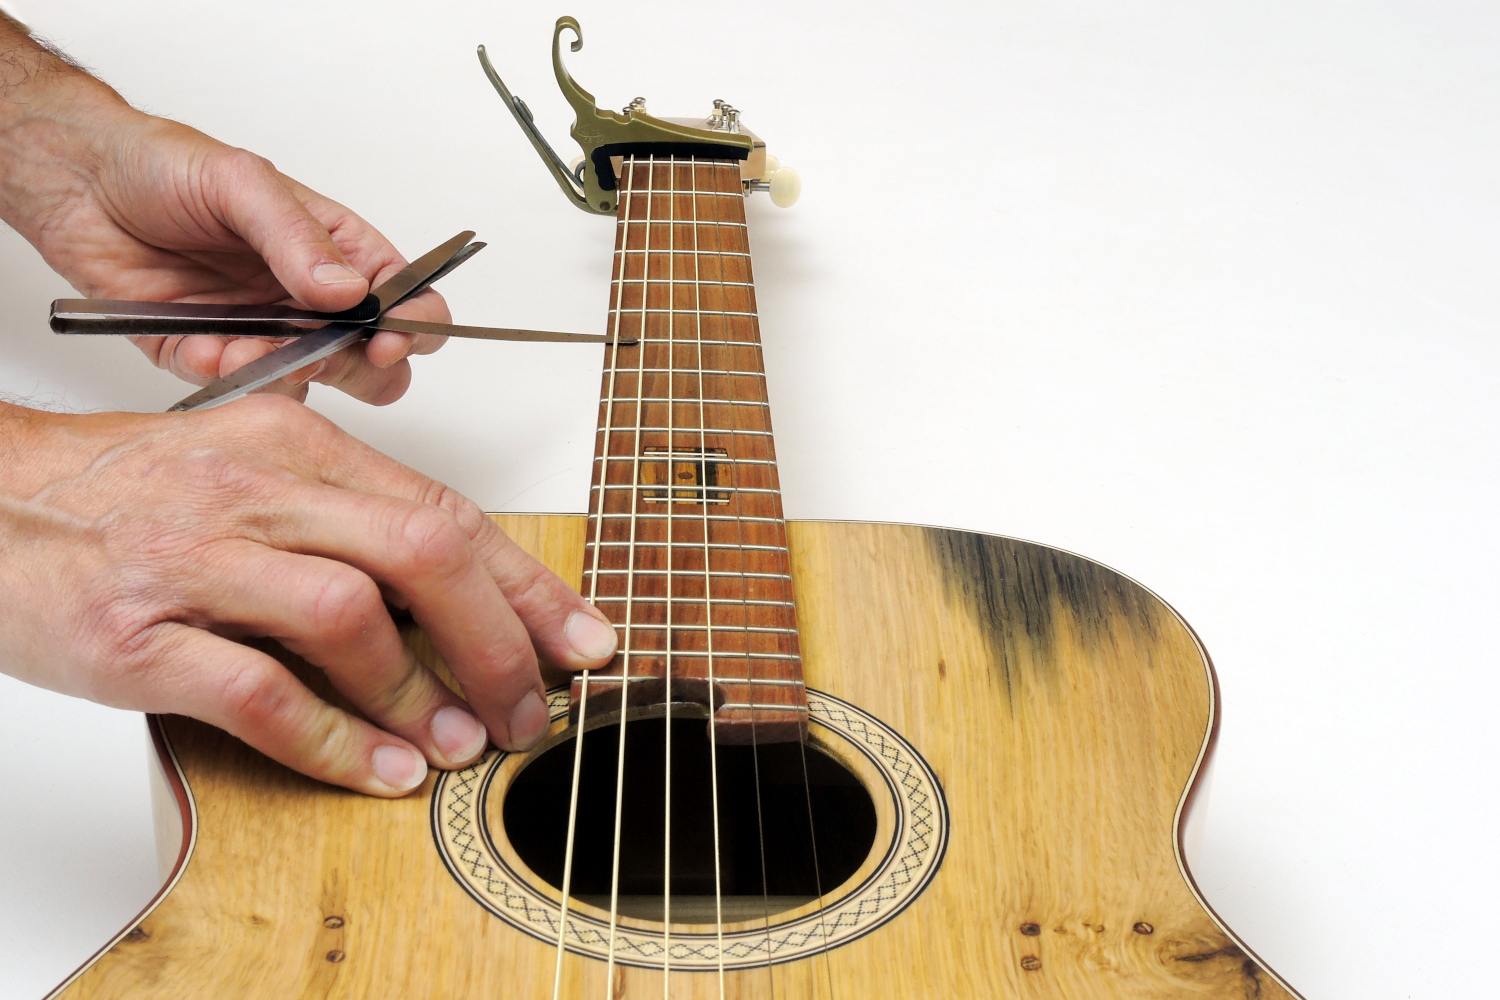
1. Capo the first fret: Using a capo, press down on the first fret of the guitar.
2. Press down at the highest fret: Place your finger on the highest fret of the guitar and press down firmly.
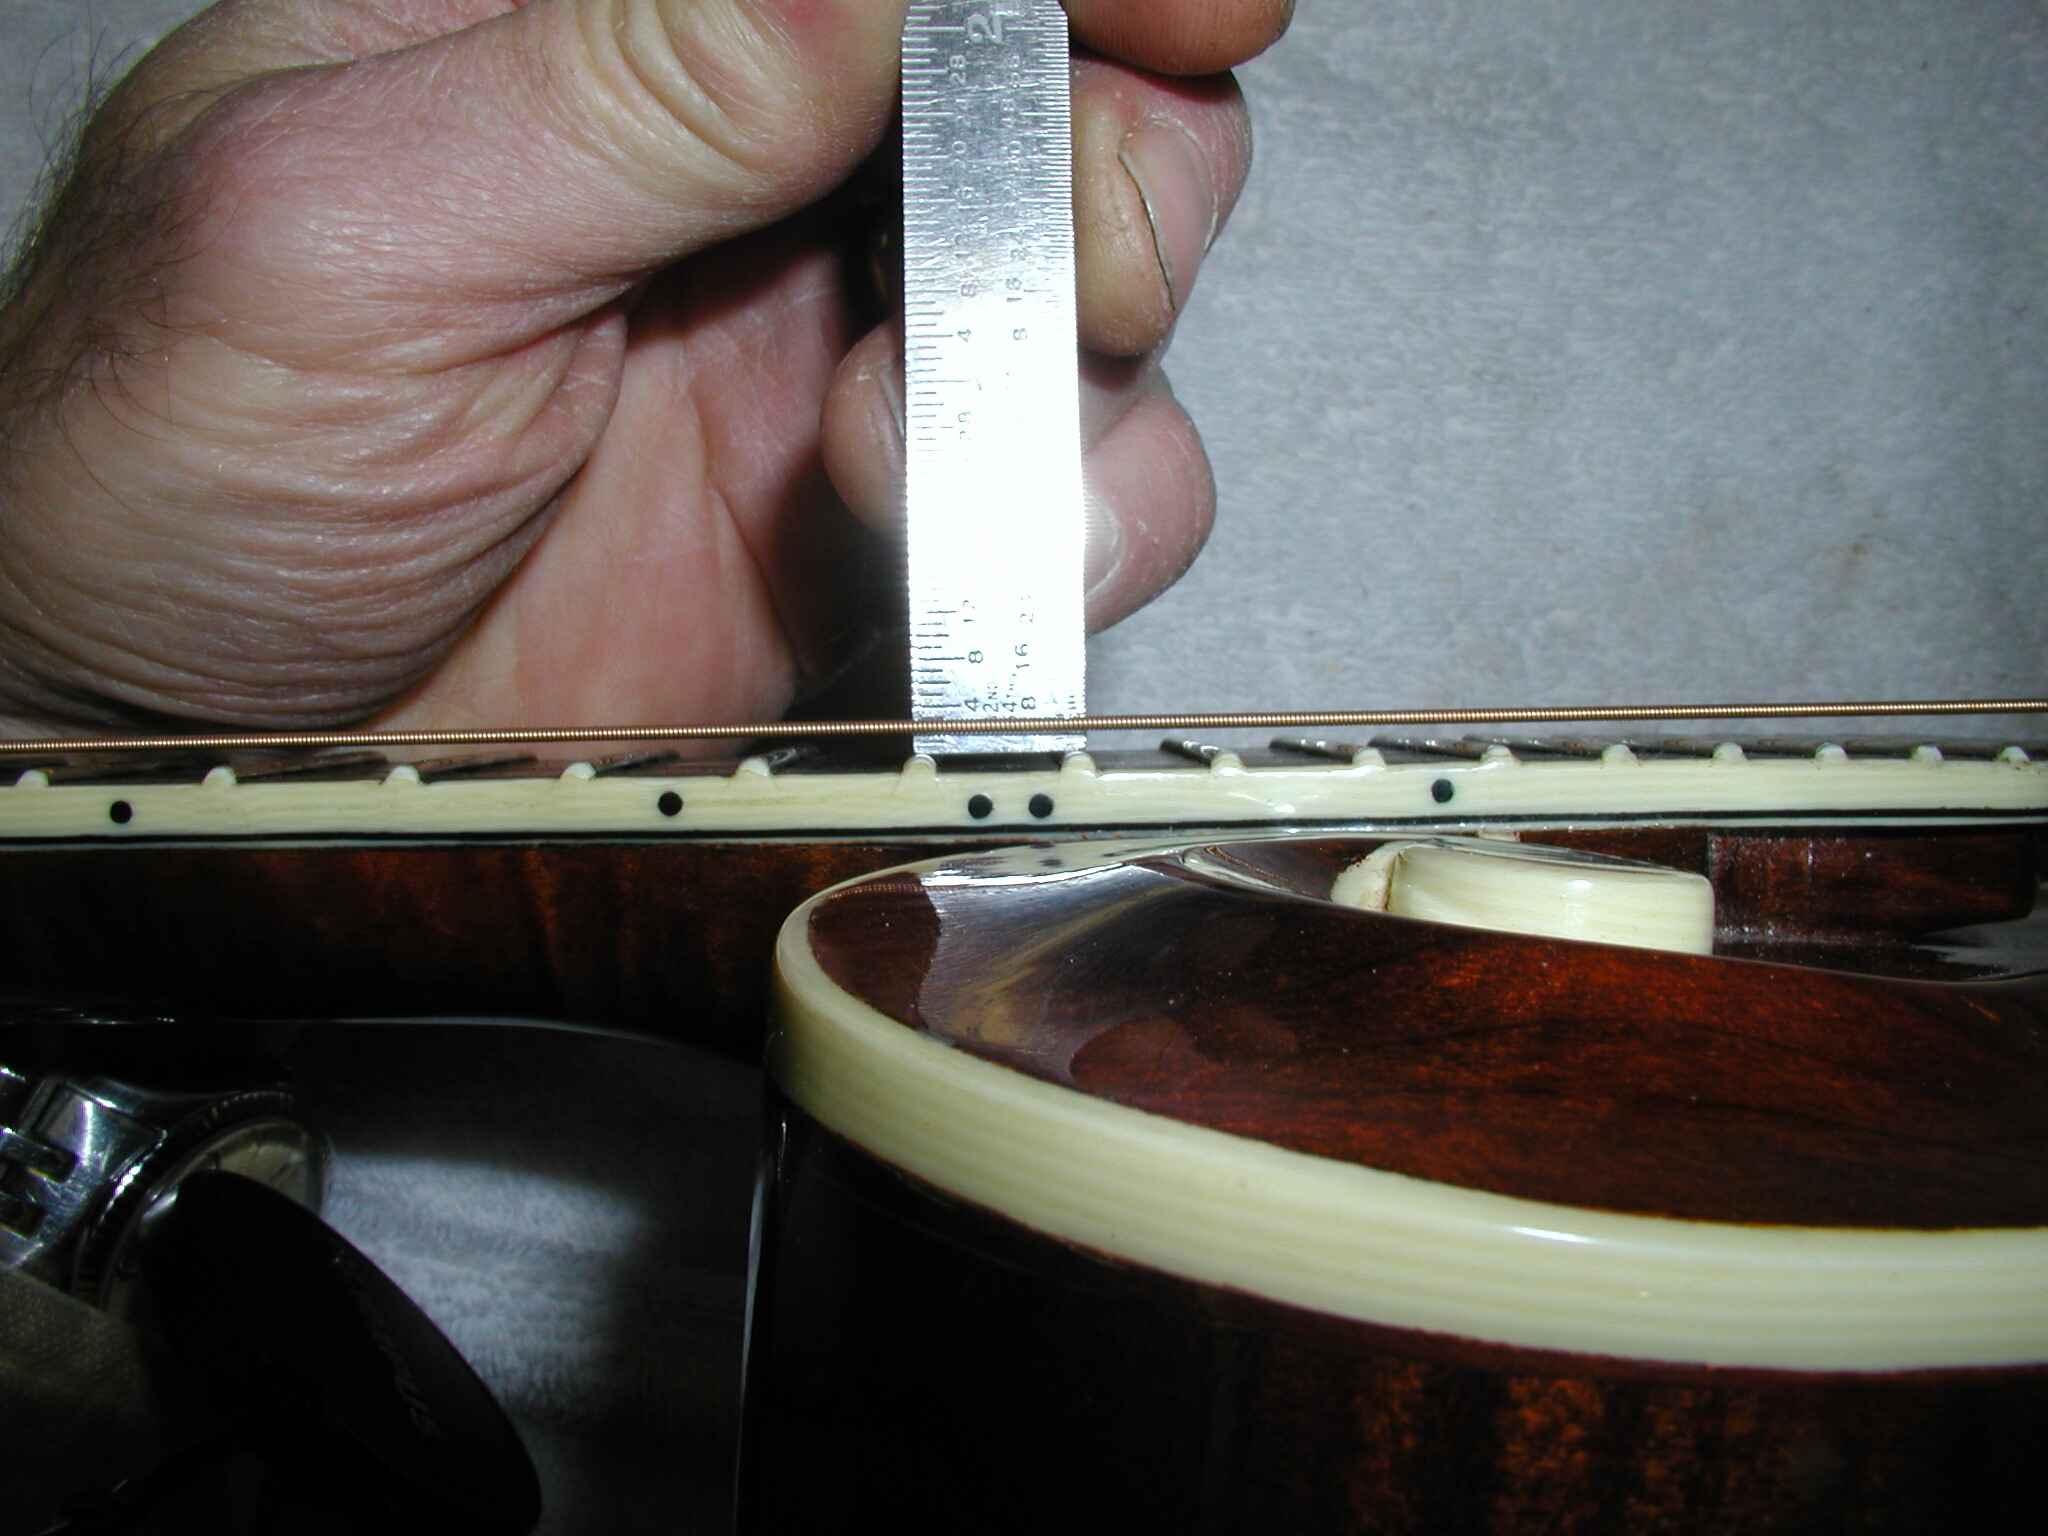
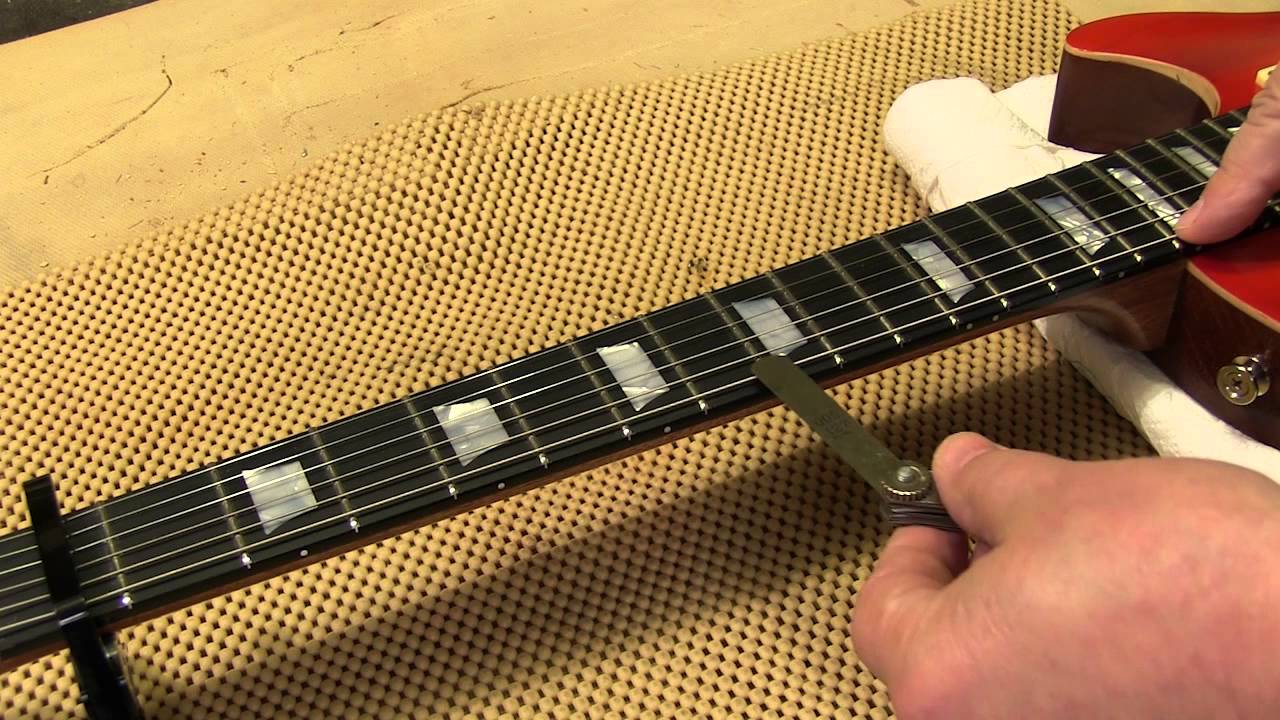
3. Observe the middle frets: Look at the gap between the bottom of the string and the top of the fret around the seventh to ninth fret area.
4. Check for ideal relief: Ideally, you want to see a slight gap, approximately the thickness of a business card, between the bottom of the string and the top of the fret. This indicates the correct amount of neck relief.
5. Adjust if necessary: If there is too much relief (excessive gap), you may need to reduce it. If there is not enough relief (no gap or the string touching the fret), you may need to increase it.
Keep in mind that the ideal amount of neck relief can vary depending on personal preference and playing style. Generally, a slight curvature is preferred to allow for easy string articulation without any buzzing or fretting out. It’s essential to maintain a balance, as too much or too little neck relief can affect playability and intonation.
By checking and adjusting the neck relief, you are laying the foundation for achieving the desired action without relying on the truss rod. In the next sections, we will explore additional factors, such as the nut and saddle, which further contribute to the overall action of the guitar.
Inspecting the nut and saddle
In addition to checking the neck relief, another crucial step in adjusting the action of your acoustic guitar without using the truss rod is inspecting the nut and saddle. These two components directly affect the height of the strings along the fingerboard and play a significant role in determining the action.
Here are the steps to inspect the nut and saddle:
1. Examine the nut: The nut is the small, typically white, piece located at the top of the fingerboard, where the strings sit before continuing to the tuners. Check for any signs of wear, such as grooves or unevenness. A worn-out or improperly shaped nut can cause the strings to sit too high, making it difficult to play comfortably.
2. Inspect the saddle: The saddle is located at the bridge of the guitar, where the strings rest before extending into the body. Similar to the nut, examine the saddle for wear or unevenness. A worn-down or improperly shaped saddle can also contribute to a higher action.
3. Check for proper fit: Ensure that both the nut and saddle fit correctly in their respective slots. They should be snugly in place without any gaps or movement.
If you identify any issues with the nut or saddle, it may be necessary to make adjustments or even replace these components. A qualified guitar technician can assist you in shaping and fitting a new nut or saddle if needed.
It’s important to note that altering the nut or saddle height directly affects the action of the guitar and should be done with caution. Making small adjustments to the height can help lower or raise the action as desired. However, significant changes may require professional assistance to avoid compromising the functionality and intonation of the instrument.
By carefully inspecting the nut and saddle, you can ensure that they are in good condition and properly fit, allowing for further adjustments to the action without relying on the truss rod. In the next sections, we will explore techniques for lowering the action at the nut and saddle to achieve your desired playing experience.
Lowering the action at the nut
One method to adjust the action of your acoustic guitar without using the truss rod is by lowering the action at the nut. The nut is responsible for spacing the strings at the top of the fingerboard, and adjusting its height can have a significant impact on the overall action of the guitar.
Here’s how you can lower the action at the nut:
1. Identify the problem areas: Play each string individually and listen for any buzzing or unwanted vibrations at the lower frets. This will help you determine which strings are sitting too high at the nut.
2. Remove the strings: Before proceeding, remove the strings from the guitar to ensure you have unrestricted access to the nut.
3. File the nut slots: Using a nut file or a fine-grit sandpaper, gently file the slots of the nut. Aim to create a slightly deeper groove for the strings that are sitting too high. Be cautious not to file too much, as this can result in the strings sitting too low and causing buzzing. Make small adjustments and regularly check the height with a string action gauge or a ruler.
4. File evenly: When filing the nut slots, ensure that you maintain an even slope across the nut, following the natural contour of the fingerboard. This helps ensure proper intonation and consistent action across all the strings.
5. Check the height: Reinstall the strings and tune up the guitar. Play each string individually and check if the action has improved at the lower frets. If necessary, repeat the filing process until you achieve the desired action.
6. Polish the nut slots: After adjusting the nut height, use a small piece of 1000-grit sandpaper or a nut slot polishing tool to smooth out the nut slots. This helps prevent any rough edges that could cause tuning instability or string binding.
Lowering the action at the nut can significantly improve the playability of your acoustic guitar. However, it’s essential to approach this task with caution and make gradual adjustments to avoid irreversible damage. If you’re uncertain about handling this on your own, seeking the guidance of a professional guitar technician is always a wise choice.
In the next section, we will explore techniques for lowering the action at the saddle, which further contributes to achieving your desired action without relying on the truss rod.
Lowering the action at the saddle
To further adjust the action of your acoustic guitar without relying on the truss rod, you can lower the action at the saddle. The saddle is the piece located on the bridge where the strings rest before extending into the body. By making careful adjustments to the saddle height, you can fine-tune the action and improve the playability of your instrument.
Here’s how you can lower the action at the saddle:
1. Identify the problem areas: Play each string individually and listen for any buzzing or unwanted vibrations at the higher frets. This will help you determine which strings are sitting too high at the saddle.
2. Remove the strings: Before proceeding, remove the strings from the guitar to ensure you have unrestricted access to the saddle.
3. Sand or file the saddle: Using sandpaper or a sanding block, gently sand or file the bottom of the saddle. Aim to reduce the height gradually, focusing on the strings that require adjustment. Be careful not to remove too much material, as this can cause the strings to sit too low and result in buzzing or fretting out. Make small adjustments and regularly check the height with a string action gauge or a ruler.
4. Check for even height: As you lower the saddle, make sure to maintain an even height across all the strings. This helps ensure consistent action and intonation. A straightedge or ruler can assist in checking for any unevenness.
5. Reinstall the strings and check: Once you have made the necessary adjustments to the saddle height, reinstall the strings and tune the guitar. Play each string individually and check if the action has improved at the higher frets. Make further adjustments as needed until you achieve the desired action.
6. Polish the saddle: After lowering the saddle and achieving the desired action, use fine-grit sandpaper or polishing compound to smooth out any rough edges. This helps prevent any string binding or unnecessary friction.
Lowering the action at the saddle can significantly enhance the playability and comfort of your acoustic guitar. However, it’s crucial to approach this task with care, making small adjustments and checking the results regularly. If you are unsure or uncomfortable with adjusting the saddle height, it is best to consult a professional guitar technician who can assist you in achieving the desired action without compromising the overall stability and playability of your instrument.
In the next section, we will discuss testing and adjusting the action to ensure optimal results.
Testing and adjusting as needed
After making adjustments to the neck relief, nut, and saddle height to lower the action of your acoustic guitar without using the truss rod, it’s crucial to test and fine-tune the action to ensure optimal results. Testing and adjusting as needed will allow you to achieve a comfortable playing experience and optimal sound quality.
Here are some steps you can take to test and adjust the action:
1. Play through different frets and positions: Test the guitar by playing through various frets and positions to assess the overall playability and feel. Pay attention to any buzzing, string height, and ease of playing. If you notice any issues or inconsistencies, continue with the necessary adjustments.
2. Listen for buzzing: Listen carefully for any buzzing or unwanted vibrations when playing both individual strings and chords. Buzzing can indicate that the action is still too low and may require minor adjustments.
3. Check intonation: Play the guitar and check if the intonation is accurate. Each string should be in tune when played open and when fretted at various positions along the neck. If the intonation is off, adjustments may be needed at the saddle or nut to correct it.
4. Make incremental adjustments: If you find areas that require further adjustments, make small, incremental changes to the neck relief, nut, or saddle height as needed. Remember to go slowly and retest after each adjustment to assess the impact on the action.
5. Consult a professional if needed: If you’re uncertain about the adjustments or encounter any difficulties, it’s advisable to seek the assistance of a professional guitar technician. They have the experience and expertise to help you achieve the desired action without compromising the integrity of your instrument.
Testing and adjusting the action of your guitar is an iterative process. It may take some time and experimentation to find the perfect balance that suits your playing style and preferences. Remember that small, gradual changes are often more effective than large, drastic adjustments. Patience and careful attention to detail will lead to the best results.
Keep in mind that adjusting the action without using the truss rod requires careful consideration and understanding of your specific guitar. If you’re uncertain or uncomfortable with the process, it’s always best to seek professional guidance to prevent any potential damage to your instrument.
Now that you know how to test and adjust the action of your acoustic guitar without relying on the truss rod, you can enjoy a comfortable playing experience and maximize the potential of your instrument.
Conclusion
Adjusting the action on your acoustic guitar without using the truss rod can be a valuable skill to possess, especially in situations where the truss rod is unavailable or not functional. By carefully assessing factors such as neck relief, nut height, and saddle height, you can achieve the desired action and enhance the playability of your instrument.
Throughout this guide, we have explored step-by-step techniques for adjusting the action without relying on the truss rod. Checking the neck relief and inspecting the nut and saddle were essential initial steps in understanding the current state of your guitar’s action. Lowering the action at the nut and saddle involved making precise adjustments to bring the strings closer to the fingerboard, improving playability and comfort.
Testing and adjusting the action as needed allowed you to fine-tune the instrument to your liking, ensuring optimal sound quality, intonation, and overall playability. It’s crucial to approach these adjustments with patience, making small, incremental changes and regularly testing the results to avoid compromising the stability and functionality of the guitar.
However, it’s important to note that adjusting the action without the truss rod should be approached with caution. If you’re uncertain about making these adjustments or if you have a high-end or delicate instrument, it’s always recommended to seek the assistance of a professional guitar technician. They have the necessary knowledge and experience to guide you through the process and make adjustments that preserve the integrity of your instrument.
By understanding and implementing the techniques outlined in this guide, you can confidently adjust the action of your acoustic guitar without relying on the truss rod. Whether you have an instrument without a truss rod or are dealing with truss rod issues, these alternative methods will help you achieve the desired action and improve your overall playing experience.
Remember, each guitar is unique, and finding the perfect action is a matter of personal preference. Experiment, listen to your instrument, and make adjustments accordingly, always keeping in mind the importance of maintaining the stability and playability of your guitar.
Now that you have a deeper understanding of how to adjust the action without using the truss rod, go ahead and take your acoustic guitar to new heights of playability and performance!