Introduction
Putting on an electric guitar strap may seem like a simple task, but doing it correctly ensures comfort, stability, and safety while playing. Whether you're a beginner or a seasoned guitarist, understanding the proper way to attach and adjust your guitar strap is essential for an enjoyable and secure playing experience. In this guide, we will walk you through the step-by-step process of correctly putting on an electric guitar strap. By following these instructions, you can avoid discomfort, prevent your guitar from slipping, and maintain proper posture while playing.
A well-attached and properly adjusted guitar strap not only provides support for the instrument but also allows for better control and maneuverability. It can make a significant difference in your playing experience, particularly during long practice sessions or live performances. With the right techniques, you can ensure that your guitar strap fits comfortably and securely, allowing you to focus on your music without distractions.
Whether you're standing or sitting while playing, the correct positioning of your guitar strap can help reduce strain on your shoulders, back, and arms. Additionally, it can contribute to better posture, which is crucial for preventing muscle fatigue and potential injuries. By mastering the art of putting on an electric guitar strap, you can enhance your overall playing experience and concentrate on unleashing your musical creativity without any hindrances.
Now, let's delve into the detailed steps for attaching and adjusting an electric guitar strap to optimize your playing comfort and performance.
Step 1: Attach the Strap to the Guitar
Before you start playing, it’s crucial to securely attach the guitar strap to your instrument. Most electric guitars have two strap buttons – one located at the bottom of the body and the other at the top, near the neck. Follow these steps to properly attach the strap:
- Locate the Strap Buttons: Identify the strap buttons on your electric guitar. The button at the bottom is typically located at the end of the body, while the top button is situated on the upper bout, near the base of the neck.
- Thread the Strap: Begin by threading one end of the strap through the hole in the strap button located at the bottom of the guitar. Ensure that the strap is securely threaded through the button’s hole, preventing any slippage during play.
- Attach the Other End: Once the strap is threaded through the bottom button, proceed to attach the other end of the strap to the button near the neck. Gently pull the strap to remove any slack, ensuring that it is snugly attached to the guitar.
It’s important to double-check the security of the strap’s attachment to prevent any potential accidents or damage to your guitar. A properly attached strap provides the necessary support and stability for comfortable and safe playing. With the strap securely fastened to your electric guitar, you’re ready to move on to the next step of adjusting its length to your preference.
Step 2: Adjust the Length of the Strap
Once the strap is securely attached to your electric guitar, it’s essential to adjust its length to ensure optimal comfort and playing posture. Follow these steps to customize the strap’s length according to your preference:
- Determine Your Preferred Length: Before making any adjustments, consider whether you prefer a higher or lower playing position. Experiment with different lengths to find the most comfortable and ergonomic position for your guitar.
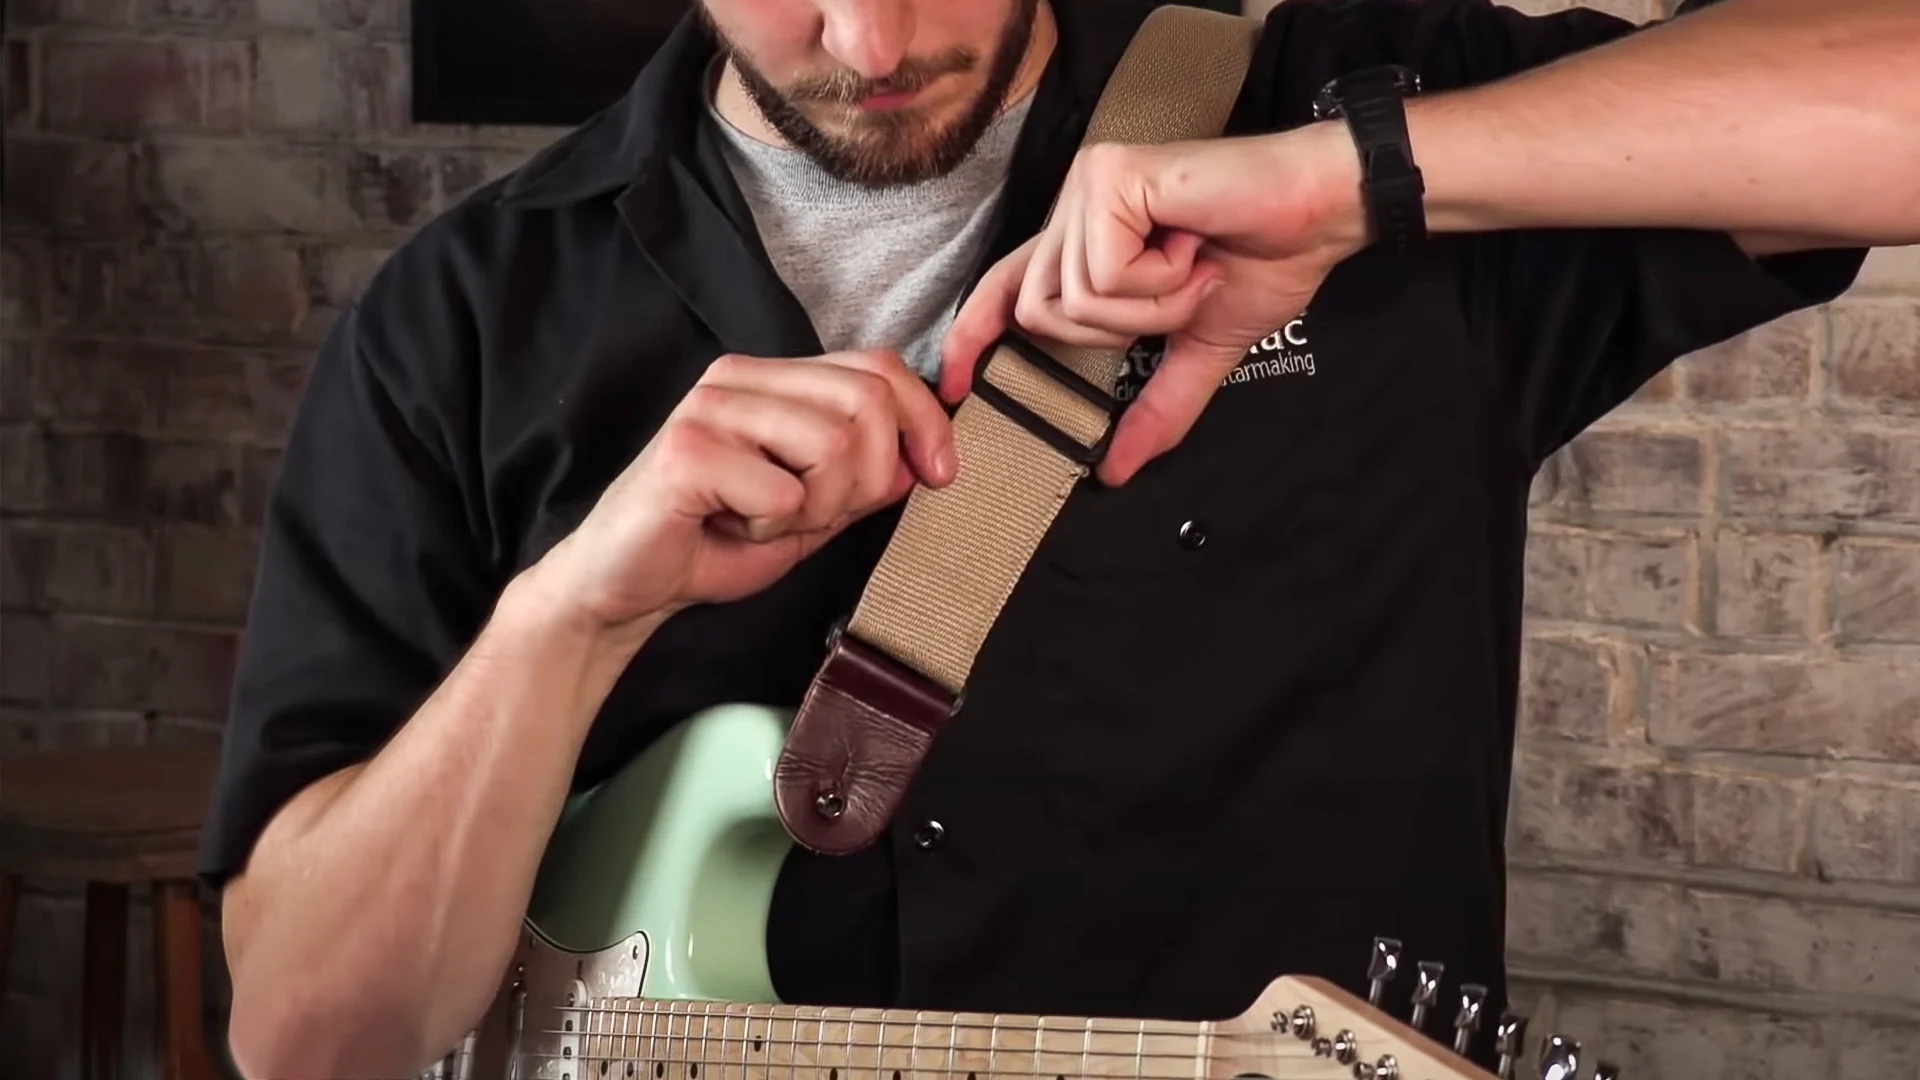
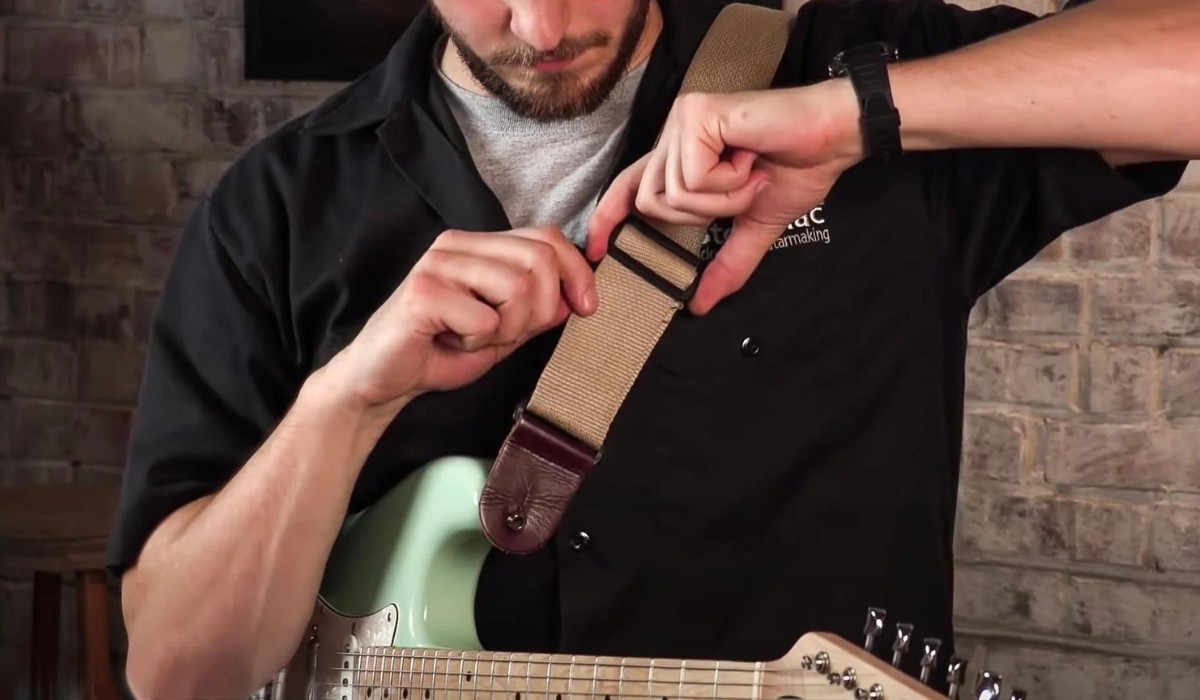
- Slide the Adjuster: Many guitar straps feature adjustable buckles or sliders that allow you to modify the length with ease. Slide the adjuster to lengthen or shorten the strap, depending on your desired playing height.
- Test the Length: Once you’ve made the initial adjustment, test the length of the strap by holding the guitar in playing position. Ensure that the strap provides ample support without causing strain on your shoulders or restricting your movement.
- Refine the Adjustment: Fine-tune the length of the strap until you find the perfect balance of comfort and stability. It’s important to avoid having the guitar hang too low or sit too high, as these positions can lead to discomfort and hinder your playing ability.
Customizing the length of your guitar strap allows you to tailor it to your individual playing style and physique. A well-adjusted strap not only enhances your comfort but also contributes to better control and maneuverability while playing. With the strap at the ideal length, you’re ready to proceed to the next step of putting it on with ease and efficiency.
Step 3: Put on the Guitar Strap
After attaching and adjusting the length of your electric guitar strap, it’s time to put it on with precision and comfort. Follow these steps to ensure a seamless and secure process:
- Hold the Guitar: Grasp your electric guitar by the body and neck, keeping it in a stable and upright position.
- Position the Strap: With the guitar in hand, hold the strap and position it over your shoulder on the side where you prefer to wear it. Ensure that the strap is oriented correctly, with the adjustable end hanging down.
- Insert Your Arm: Slide your arm through the strap, allowing it to rest comfortably on your shoulder. The guitar should hang at a height that feels natural and allows for easy fretting and strumming.
- Secure the Strap: Once your arm is through the strap, secure the adjustable end by fastening the buckle or adjusting mechanism. Ensure that the strap is snug but not constricting, providing ample support for the guitar.
Putting on the guitar strap correctly is essential for maintaining stability and comfort while playing. By following these steps, you can ensure that the strap fits securely and allows for unrestricted movement during your practice sessions or performances. With the strap securely in place, you’re ready to move on to the final step of testing its comfort and security for an optimal playing experience.
Step 4: Test the Strap for Comfort and Security
After putting on your electric guitar strap, it’s crucial to test its comfort and security to ensure an enjoyable and hassle-free playing experience. Follow these steps to assess the strap’s fit and functionality:
- Assess Comfort: Stand or sit with your guitar and assess the comfort of the strap. Ensure that it doesn’t dig into your shoulder or cause any discomfort, especially during extended playing sessions.
- Check Stability: Gently move and sway while wearing the guitar to test the stability of the strap. It should securely hold the instrument in place without slipping or shifting excessively.
- Perform Playing Movements: Practice a few basic playing movements, such as chord changes and strumming, to gauge the strap’s comfort and stability during active playing. It should support the guitar without hindering your movements.
- Adjust if Necessary: If you experience any discomfort or notice the strap slipping or causing inconvenience, make necessary adjustments to the length or positioning until you achieve an optimal fit.
Testing the strap for comfort and security allows you to make any final adjustments to ensure that it enhances your playing experience. A well-fitted and secure strap not only provides support for your guitar but also contributes to your overall comfort and confidence while playing. By carefully evaluating the strap’s performance, you can address any issues and fine-tune its fit to suit your preferences and playing style.
Conclusion
Mastering the correct method of putting on an electric guitar strap is essential for every guitarist, regardless of their skill level. By following the step-by-step process outlined in this guide, you can ensure that your guitar strap is attached securely, adjusted to the optimal length, and worn comfortably and securely. These fundamental steps not only contribute to your playing comfort but also play a significant role in maintaining proper posture and preventing potential strain or injuries during extended practice sessions or performances.
Attaching the strap to your electric guitar with precision and adjusting its length to your preference sets the stage for a seamless and enjoyable playing experience. The careful positioning and securing of the strap ensure that your instrument remains stable and well-supported, allowing you to focus on your music without distractions. Additionally, testing the strap for comfort and security enables you to fine-tune its fit and address any potential issues, ensuring that it seamlessly integrates into your playing routine.
By incorporating these essential techniques into your guitar-playing routine, you can optimize your comfort, stability, and freedom of movement while performing. Whether you’re practicing at home, recording in the studio, or rocking out on stage, a correctly positioned and secure guitar strap is your trusted ally in unleashing your musical creativity with confidence and ease.
Embrace the art of correctly putting on an electric guitar strap, and elevate your playing experience to new heights, free from discomfort or limitations. With these foundational skills at your disposal, you can embark on your musical journey with the assurance that your guitar is securely and comfortably positioned, allowing you to channel your focus and energy into creating exceptional music.