Introduction
Introduction
If you're a music producer or enthusiast looking to add some rhythmic punch to your tracks, connecting a drum machine to FL Studio can open up a world of creative possibilities. FL Studio, a popular digital audio workstation, offers seamless integration with external hardware, allowing you to harness the power of both software and hardware in your music production process. By linking a drum machine to FL Studio, you can leverage the tactile control and unique sound palette of the drum machine while benefiting from FL Studio's robust sequencing and mixing capabilities.
In this guide, we'll walk you through the process of connecting a drum machine to FL Studio, enabling you to tap into the best of both worlds and elevate your music production game. Whether you're a seasoned producer or just dipping your toes into the world of music production, this tutorial will provide you with the essential know-how to seamlessly integrate a drum machine into your FL Studio workflow.
Throughout this tutorial, we'll cover the step-by-step process of setting up the drum machine, establishing the connection between the drum machine and FL Studio, and configuring FL Studio to effectively communicate with the drum machine. By the end of this guide, you'll be well-equipped to sync up your drum machine with FL Studio and start crafting compelling beats and rhythms with ease.
So, grab your drum machine, fire up FL Studio, and let's dive into the exciting realm of hardware-software integration to take your music production endeavors to new heights. Whether you're aiming to lay down infectious grooves, experiment with intricate rhythmic patterns, or simply explore new sonic territories, connecting a drum machine to FL Studio will undoubtedly expand your creative horizons and infuse your music with an irresistible rhythmic energy.
Step 1: Setting up the drum machine
Before diving into the connection process, it’s crucial to ensure that your drum machine is properly set up and ready to interface with FL Studio. Here’s a step-by-step guide to prepare your drum machine for seamless integration:
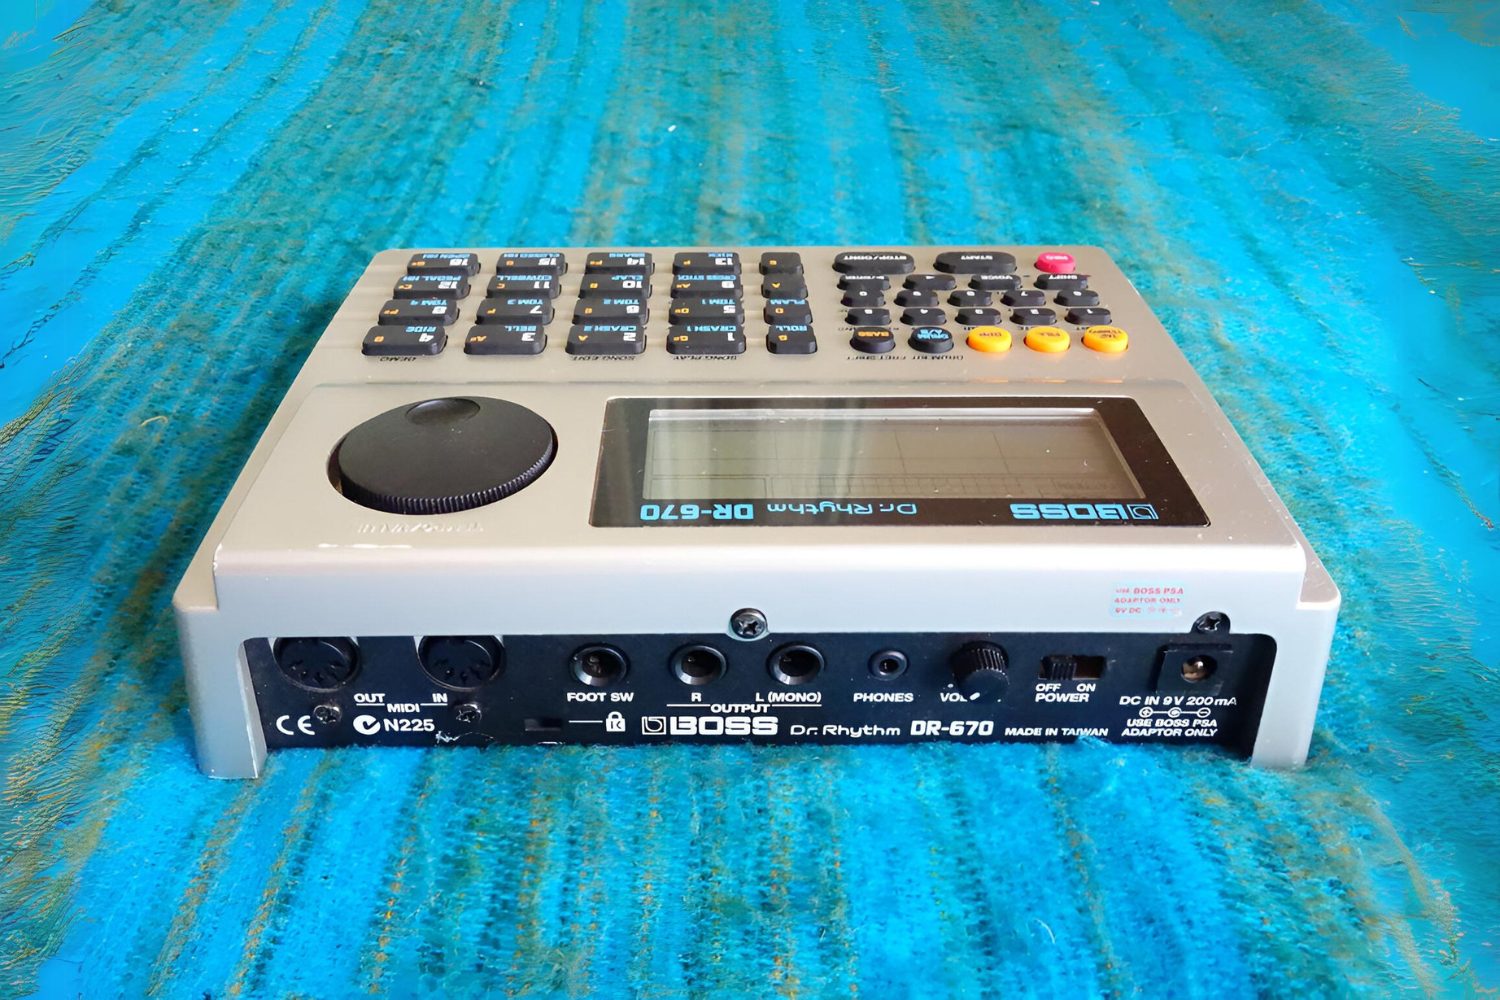
- Power On and Connectivity: Begin by powering on your drum machine and connecting it to a power source. Depending on the model, you may use batteries or an AC adapter to supply power. Additionally, if your drum machine features audio outputs, connect it to an audio interface or mixer using appropriate cables.
- Audio Routing: Review the audio routing options on your drum machine. Some models offer individual outputs for different drum sounds, allowing for versatile routing and processing within FL Studio. Familiarize yourself with the routing capabilities of your drum machine to make the most of its sonic potential.
- Sound Selection and Editing: Explore the sound library of your drum machine and select the drum kits or sounds you intend to use in your FL Studio projects. Some drum machines enable users to customize and edit individual sounds, offering a tailored sonic palette for your productions. Take the time to familiarize yourself with sound selection and editing features to streamline your workflow.
By following these preparatory steps, you’ll ensure that your drum machine is primed for integration with FL Studio, setting the stage for a smooth and efficient connection process. With your drum machine ready to go, you’re now poised to establish the vital link between your hardware and FL Studio, paving the way for a harmonious synergy of analog and digital music-making tools.
Step 2: Connecting the drum machine to FL Studio
Now that your drum machine is set up and awaiting integration, the next crucial step is to establish a physical connection between the drum machine and FL Studio. This process involves linking the audio outputs of the drum machine to an audio interface or mixer, which, in turn, connects to your computer running FL Studio. Follow these steps to seamlessly connect your drum machine to FL Studio:
- Audio Interface Connection: If your drum machine features audio outputs, use suitable cables to connect these outputs to the inputs of an audio interface or mixer. The audio interface serves as the bridge between your hardware and computer, facilitating the transfer of audio signals from the drum machine to FL Studio.
- Computer Interface: Connect the audio interface or mixer to your computer using USB or FireWire, depending on the interface’s connectivity options. Ensure that the audio interface is recognized by your computer and properly configured within FL Studio’s audio settings to enable seamless communication.
- Driver Installation: If you’re using a USB audio interface, install any necessary drivers or software provided by the manufacturer to ensure compatibility with your computer’s operating system. This step is crucial for establishing a stable and reliable connection between your drum machine and FL Studio.
By meticulously following these connection steps, you’ll forge a robust link between your drum machine and FL Studio, laying the groundwork for seamless audio transmission and control. With the physical connection established, you’re now ready to delve into the realm of software configuration within FL Studio, enabling the digital audio workstation to recognize and interact with your drum machine effectively.
Step 3: Configuring FL Studio for the drum machine
With the physical connection between your drum machine and FL Studio in place, the final step involves configuring FL Studio to recognize and integrate the drum machine seamlessly. This software-based setup is essential for enabling FL Studio to communicate with and control the drum machine effectively. Follow these essential configuration steps to optimize FL Studio for your drum machine:
- Audio Device Selection: Access FL Studio’s audio settings and ensure that the connected audio interface or mixer is selected as the primary audio device. This step ensures that FL Studio routes audio signals to and from the drum machine through the designated interface, establishing a direct audio pathway.
- MIDI Configuration: If your drum machine supports MIDI connectivity, configure FL Studio to recognize the MIDI input from the drum machine. Assign MIDI channels and note mappings to correspond with the drum sounds and patterns on your machine, allowing FL Studio to trigger and control the drum machine’s sounds via MIDI commands.
- Controller Mapping: Utilize FL Studio’s controller mapping features to assign parameters on the drum machine to specific functions within FL Studio. This may involve mapping drum pads, knobs, or faders on the drum machine to control various aspects of FL Studio, such as mixer channels, effects parameters, or instrument settings.
- Sync and Timing: If your drum machine offers tempo synchronization options, configure FL Studio to send and receive MIDI clock signals to ensure tight synchronization between the software and hardware. This synchronization enables FL Studio to align its tempo and timing with the drum machine, facilitating cohesive rhythmic interplay.
By meticulously configuring FL Studio to accommodate the unique capabilities of your drum machine, you’ll unlock a realm of creative possibilities, seamlessly integrating the tactile control and sonic character of the drum machine into your FL Studio workflow. With the software and hardware intricately linked, you’re poised to harness the combined power of FL Studio and your drum machine, empowering you to craft compelling beats, rhythms, and sonic textures with unparalleled flexibility and expressiveness.
Conclusion
Congratulations! You’ve successfully navigated the process of connecting a drum machine to FL Studio, unlocking a myriad of creative possibilities and expanding your music production toolkit. By seamlessly integrating the tactile control and unique sonic palette of the drum machine with FL Studio’s robust digital audio workstation capabilities, you’ve set the stage for crafting compelling beats, rhythms, and sonic textures with unparalleled flexibility and expressiveness.
As you embark on your music production journey with your newly connected drum machine and FL Studio, remember that experimentation and exploration are key to harnessing the full potential of this dynamic partnership. Whether you’re aiming to lay down infectious grooves, experiment with intricate rhythmic patterns, or simply explore new sonic territories, the fusion of hardware and software opens doors to boundless creative expression.
By following the preparatory steps to set up the drum machine, establishing a physical connection to FL Studio, and meticulously configuring the software to recognize and control the drum machine, you’ve solidified a harmonious synergy between analog and digital music-making tools. This harmonious integration empowers you to sculpt your sonic visions with precision and finesse, bringing your musical ideas to life with captivating rhythm and depth.
Embrace the fusion of traditional and modern music production techniques, leveraging the best of both worlds to craft music that resonates with emotion and energy. Whether you’re producing electronic dance tracks, hip-hop beats, or experimental soundscapes, the fusion of the drum machine and FL Studio equips you with a versatile sonic arsenal to realize your artistic vision.
As you continue to explore the endless sonic horizons made accessible by this integration, let your creativity flow freely, and allow the rhythmic pulse of the drum machine to infuse your music with an irresistible energy. With the knowledge and expertise gained from this guide, you’re poised to embark on a captivating music production journey, enriched by the seamless connection between your drum machine and FL Studio.