Introduction
Changing the strings on your acoustic guitar is an essential skill that every guitarist should learn. Over time, strings can become worn out, lose their tone, or even break, affecting the sound and playability of your instrument. By regularly replacing your strings, you can ensure that your guitar always sounds its best.
In this guide, we will walk you through the step-by-step process of changing the strings on an acoustic guitar with pegs. Whether you are a beginner or an experienced guitarist, following these instructions will help you achieve a smooth and successful string change.
Before we dive into the process, it’s important to gather the necessary tools. You will need a set of new guitar strings, a string winder, a pair of wire cutters, and a tuner. Having these tools handy will make the string-changing process faster and more efficient.
It’s worth noting that changing guitar strings can be somewhat frustrating in the beginning, but with practice, it will become easier and more intuitive. So, don’t get discouraged if you don’t get it right the first time. Now, let’s get started on changing those old strings and giving your acoustic guitar a fresh sound!
Tools You’ll Need
Before you begin changing the strings on your acoustic guitar, it’s important to gather all the necessary tools. Here is a list of items you’ll need:
- Guitar strings: Make sure you have a set of new strings that are compatible with your acoustic guitar. Different guitars may require different string gauges, so consult your guitar manufacturer’s specifications or ask for assistance at your local music store if you’re unsure.
- String winder: This handy tool makes the process of loosening and tightening the strings much faster and easier. It is designed to fit over the tuning pegs and helps speed up the winding process.
- Wire cutters: You’ll need a pair of wire cutters to trim the excess string length once you’ve secured them to the pegs. Make sure the wire cutters are sharp and suitable for cutting guitar strings.
- Tuner: A tuner is an essential tool for ensuring your guitar is in tune. There are various types of tuners available, including clip-on tuners and smartphone apps, so choose one that you find convenient and accurate.
Having these tools ready before you start will make the string-changing process smoother and more efficient. It’s important to invest in good-quality tools to ensure accurate tuning and a longer lifespan for your guitar strings.
Now that you have all the necessary tools, you’re ready to proceed with changing the strings on your acoustic guitar. Let’s move on to the step-by-step instructions for an effective string change.
Step 1: Loosen the Strings
Before you can remove the old strings, it’s important to loosen them first. This will relieve tension on the strings and make it easier to remove them from the guitar. Follow these steps to loosen the strings:
- Start with the thickest string (the low E string) and locate the tuning peg at the headstock corresponding to that string.
- Using the string winder, turn the tuning peg counterclockwise to loosen the string. You’ll notice the pitch of the string becoming lower as you turn.
- Continue loosening the string until you can easily slide your hand between the string and the neck of the guitar.
- Repeat this process for each string, working your way from the thickest to the thinnest string.
Remember to loosen the strings gradually and evenly to avoid any sudden shifts in tension on the neck or bridge of the guitar. Take your time with this step, as it will ensure a smoother transition when removing the old strings in the next step.
Once all the strings are sufficiently loosened, you’re ready to move on to the next step: removing the old strings. Continue following the steps in this guide to successfully change the strings on your acoustic guitar.
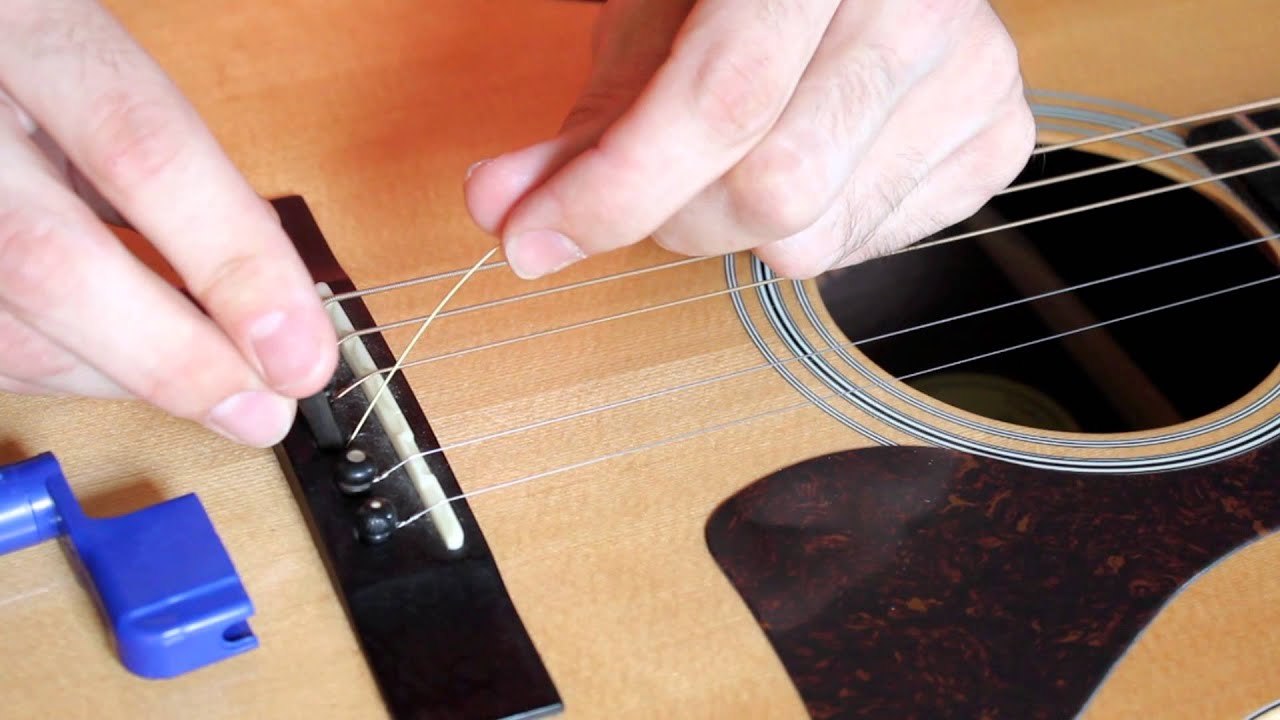
Step 2: Remove the Old Strings
Now that you have loosened the strings, it’s time to remove the old ones from your acoustic guitar. Follow these steps to safely and effectively remove the old strings:
- Start with the thinnest string (the high E string) and locate the end of the string attached to the bridge of the guitar.
- Gently unwind the string from the tuning peg at the headstock and carefully pull it out from the bridge.
- If the string is too tight to remove by hand, use the wire cutters to cut it near the bridge. Be cautious not to damage the guitar’s finish or any other strings in the process.
- Repeat this process for each string, working your way from the thinnest to the thickest string.
As you remove each string, take note of where it was located on the bridge and the corresponding tuning peg. This will make it easier to properly align the new strings when you insert them later.
Once all the old strings have been removed, take a moment to clean the guitar’s fretboard and body using a soft, lint-free cloth. This will remove any dirt or debris that may have accumulated during the string removal process.
With the old strings removed and the guitar cleansed, you’re now ready to move on to the next step: inserting the new strings.
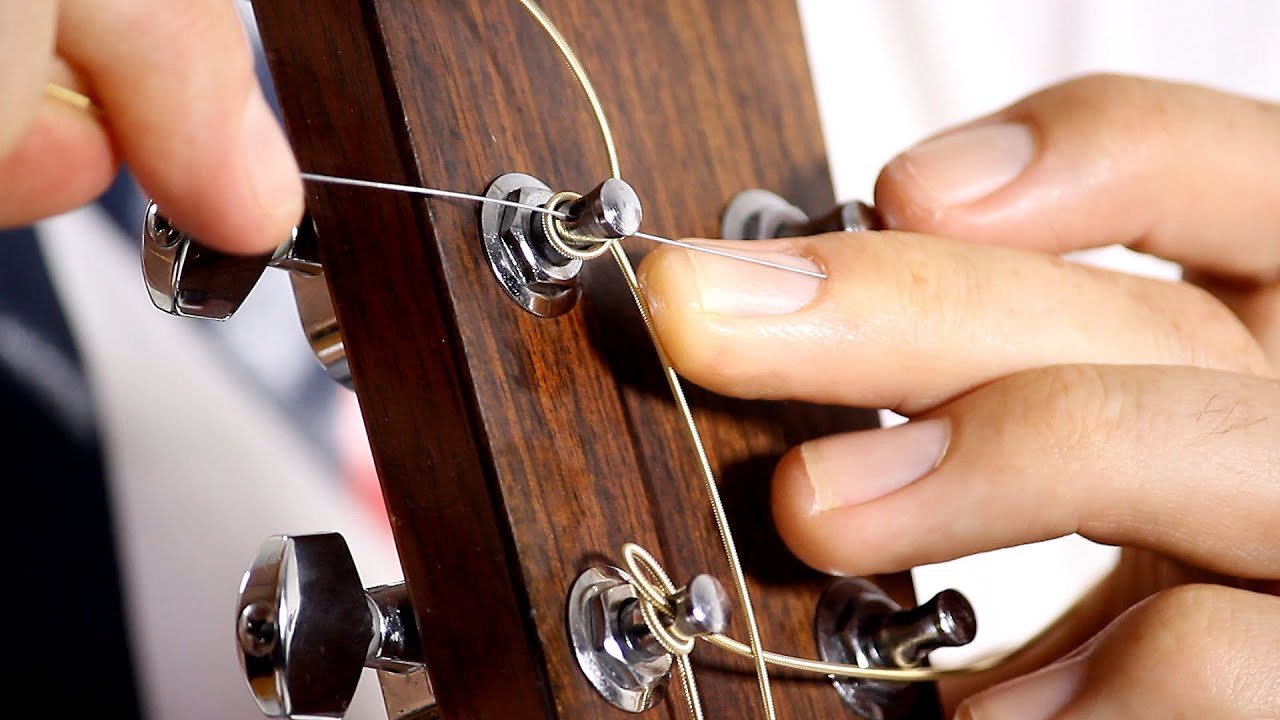
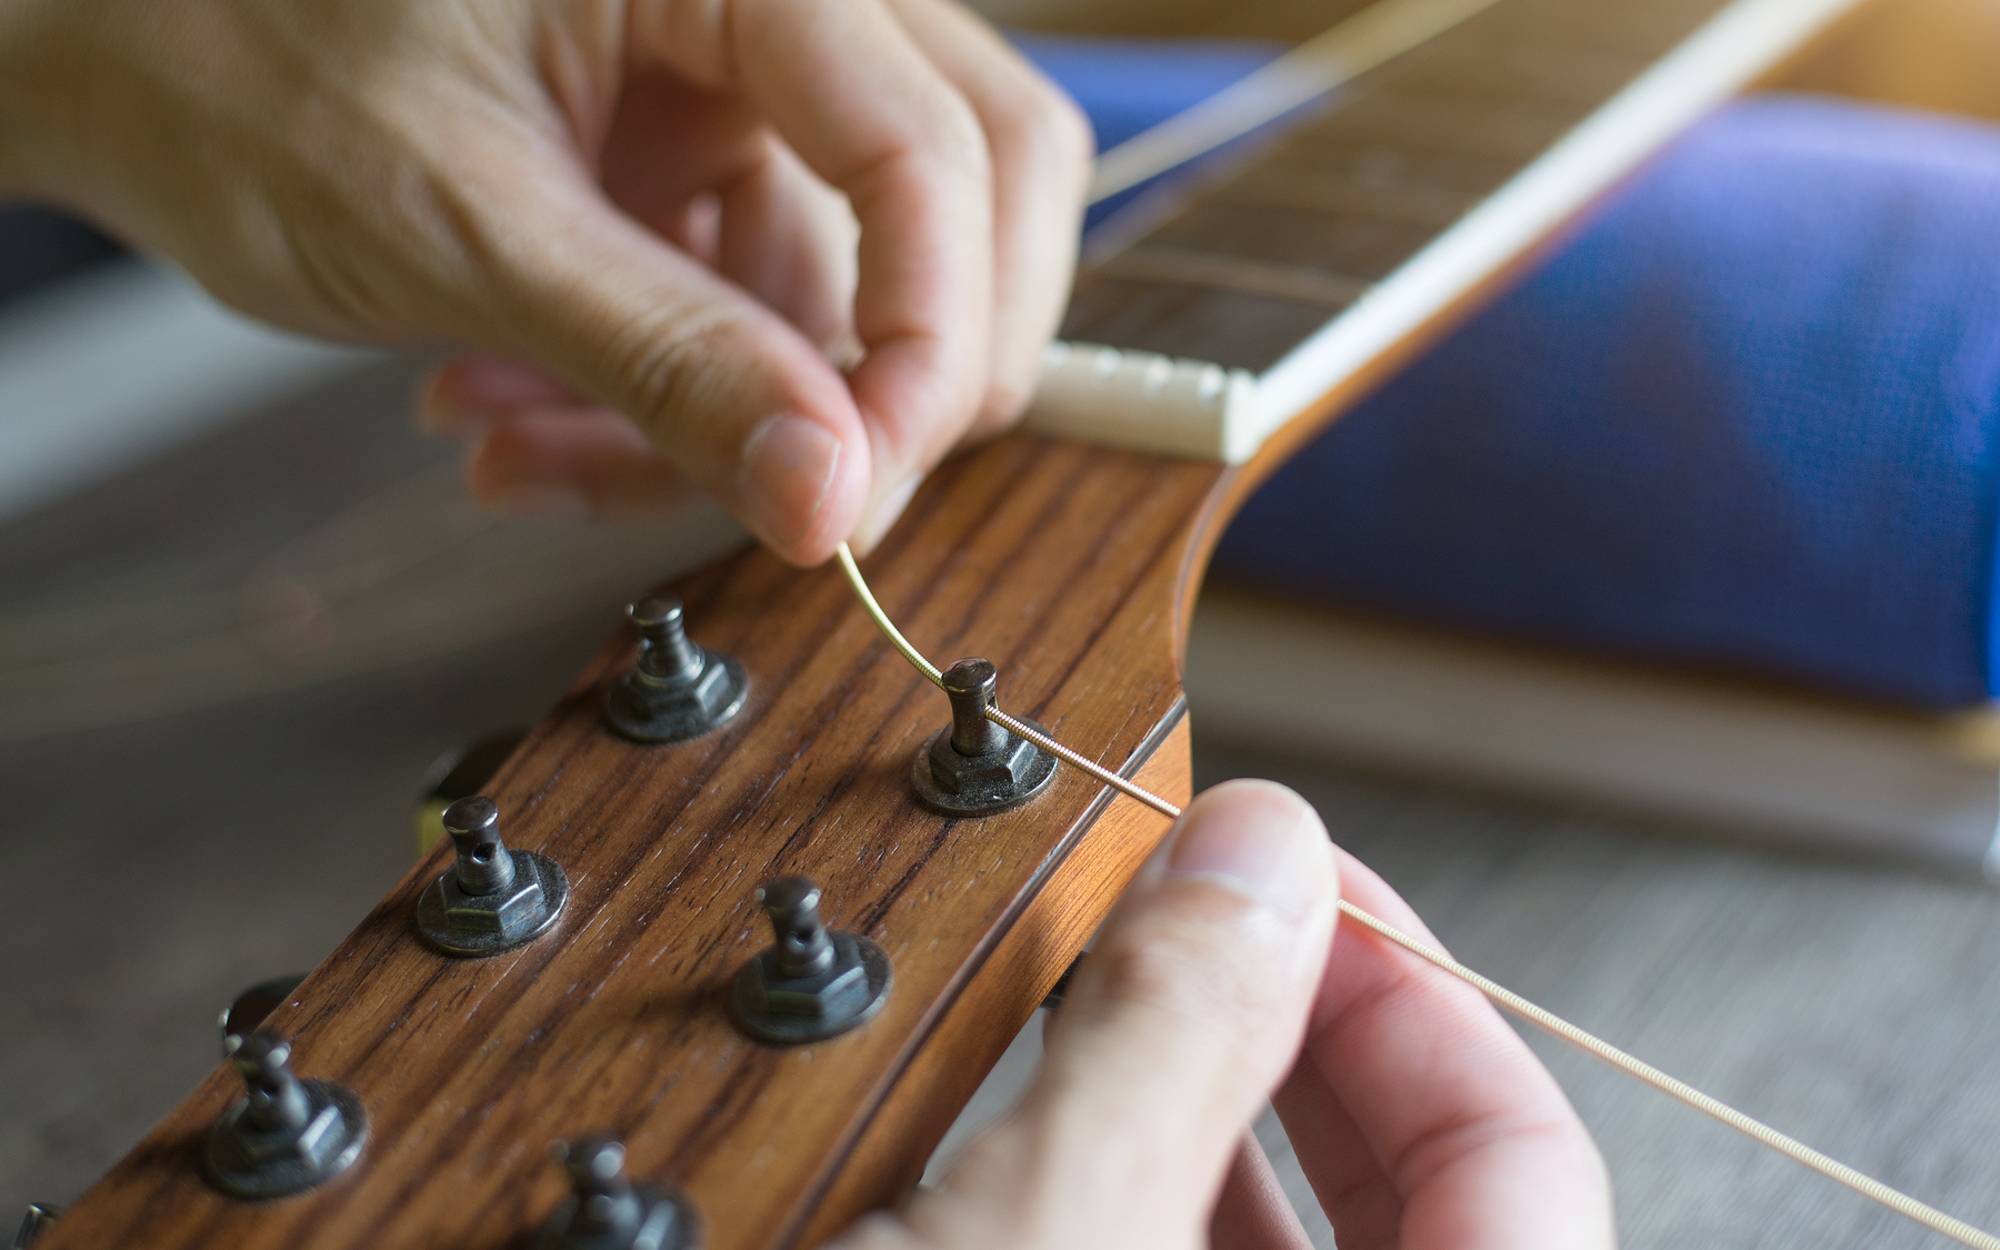
Step 3: Insert the New Strings
With the old strings removed, it’s time to insert the new strings into your acoustic guitar. Follow these steps to properly insert the new strings:
- Start with the thickest string (the low E string) and locate the corresponding tuning peg at the headstock.
- Insert the end of the string through the hole in the tuning peg, leaving a few inches of excess string protruding from the hole.
- Hold the string with one hand and use the other hand to begin winding the tuning peg clockwise. As you wind, guide the string towards the edge of the headstock to prevent overlapping.
- Make sure the string wraps neatly around the tuning peg and avoid any overlapping or crossing of the wraps.
- Continue winding until the string is taut and there is no slack. Be careful not to over-tighten the string, as this can cause it to break or put excessive strain on the guitar’s neck.
- Repeat this process for each string, working your way from the thickest to the thinnest string.
When inserting the strings, make sure they sit properly in the bridge of the guitar. Double-check that each string is seated securely and positioned in the correct saddle or bridge pin slot.
As you tighten each string, periodically pluck it to check the pitch and make any necessary adjustments. This way, you can ensure that each string is in tune as you move on to the next one.
Once all the new strings have been inserted and properly secured, it’s time to move on to the next step: securing the strings to the pegs.
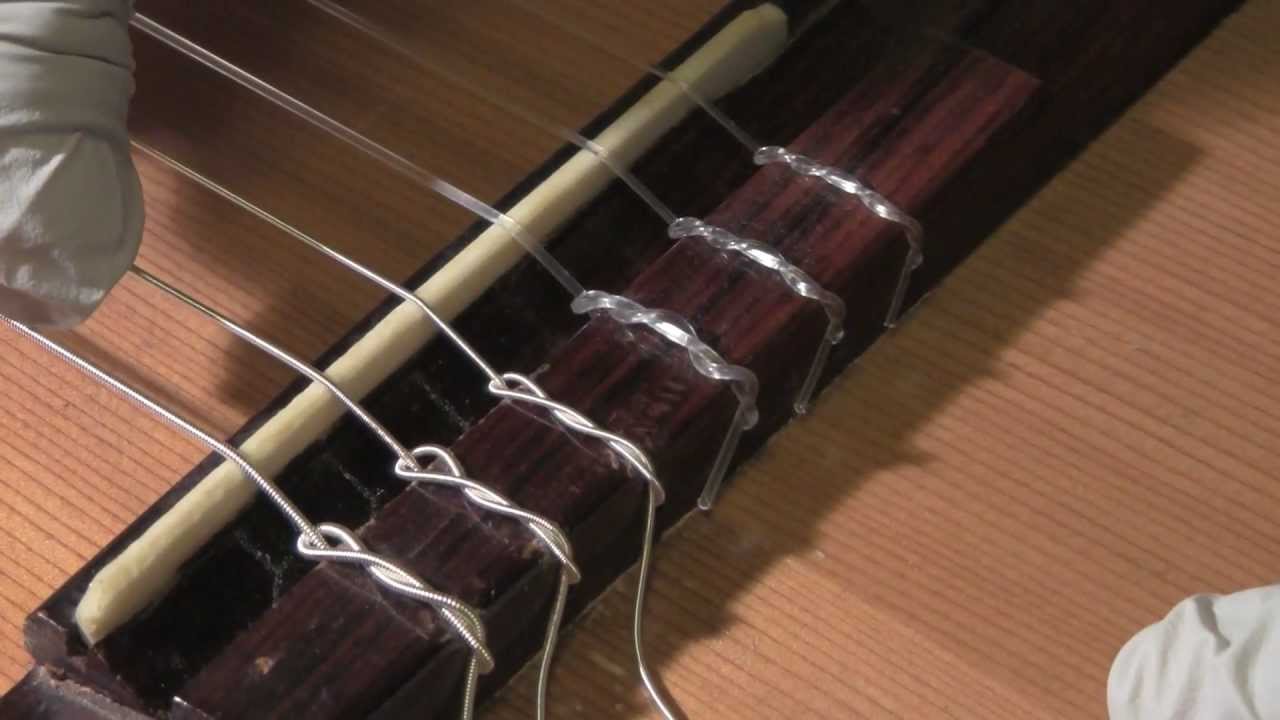
Step 4: Secure the Strings to the Pegs
After inserting the new strings, it’s important to properly secure them to the pegs to ensure they remain in place and maintain proper tension. Follow these steps to securely fasten the strings to the tuning pegs:
- Start with the thickest string (the low E string) and locate the tuning peg at the headstock.
- Using one hand, hold the string tension with a firm grip just above the nut of the guitar.
- With your other hand, use the wire cutters to trim the excess string length beyond the tuning peg. Leave approximately half an inch of excess string.
- Using the string winder, slowly turn the tuning peg clockwise to tighten the string. As you tighten, maintain tension with your hand on the string just above the nut.
- Continue tightening until the string is securely in place, making sure it is properly seated in the nut and bridge.
- Repeat this process for each string, ensuring all strings are securely fastened and have adequate tension.
As you secure each string, make sure there are no kinks or tangles in the string winding around the tuning peg. Proper winding will help maintain stable tuning and prevent unnecessary strain on the string.
By properly securing the strings to the tuning pegs, you can ensure stability and maintain consistent tension across all the strings. This will contribute to better playability and tuning accuracy.
Now that the new strings are securely fastened to the pegs, the next step is one of the most important: stretching the strings.
Step 5: Stretching the Strings
Now that the new strings are securely in place, it’s crucial to stretch them to stabilize their tension and improve tuning stability. Follow these steps to properly stretch the strings:
- Start with the thickest string (the low E string) and place one hand on the string near the 12th fret.
- With your other hand, use your thumb and index finger to apply gentle but firm pressure to the string, pulling it away from the fretboard.
- While maintaining the tension, use your other hand to pluck the string at various points along its length. This will help to stretch out any slack or elasticity in the string.
- Repeat this process for each string, working your way from the thickest to the thinnest string.
- After stretching each string individually, strum or pick all the strings together to further work out any remaining stretch in the strings.
- Perform this stretching process multiple times until the strings hold their tuning more consistently and there is minimal or no noticeable stretching after re-tuning.
Stretching the strings is important because new strings tend to stretch and settle into their optimal tension over time. By proactively stretching the strings, you can speed up this settling process and reduce the need for frequent re-tuning.
During the stretching process, it’s normal to experience some minor tuning instability. Simply re-tune the strings as needed and continue stretching until the strings stabilize.
Once the strings have been properly stretched and tuned, you’re ready for the final step: tuning the guitar.
Step 6: Tune the Guitar
After changing the strings and stretching them, it’s essential to tune your acoustic guitar to ensure accurate pitch and proper intonation. Follow these steps to tune your guitar:
- Start by using the tuner to check the tuning of each string.
- Pluck the first string (the low E string) and adjust the tuning peg as needed to match the desired pitch. Repeat this process for each string, working your way from the thickest to the thinnest string.
- As you tune each string, pay attention to the pitch and use small adjustments to achieve the correct note. Be patient and take your time to ensure accurate tuning.
- After tuning each string individually, play some chords or strum the guitar to check the overall balance and tonality. Make any necessary adjustments to individual strings if you notice any inconsistencies or dissonance.
- Continue tuning and testing until you are satisfied with the overall sound and playability of the instrument.
Remember, it’s normal for newly changed strings to go slightly out of tune during the first few hours of playing. Therefore, it’s recommended to frequently check and re-tune the guitar until the strings settle and retain their tuning stability.
Lastly, keep in mind that acoustic guitars can be affected by changes in temperature and humidity. Regularly check your guitar’s tuning, especially during seasonal transitions or when exposed to varying environmental conditions.
Once you have successfully tuned your guitar, you’re ready to enjoy playing and making beautiful music with your newly changed strings!
Conclusion
Changing the strings on your acoustic guitar may seem like a daunting task at first, but with proper guidance and practice, it becomes a routine maintenance procedure that contributes to the longevity and optimal performance of your instrument.
In this article, we have provided a step-by-step guide on how to change the strings on an acoustic guitar with pegs. From loosening and removing the old strings to securing and stretching the new ones, each step is crucial in achieving a successful string change.
Remember to gather the necessary tools – guitar strings, string winder, wire cutters, and a tuner – before beginning the process. Take your time to loosen the strings, remove the old ones with care, and insert the new strings correctly. Secure them properly to the pegs while ensuring adequate tension, and don’t forget to stretch the strings to stabilize their tension and improve tuning stability.
Finally, tune your guitar using a reliable tuner, making adjustments as necessary, and ensuring overall balance and tonality. Regularly check and re-tune your guitar as the new strings settle and environmental conditions change.
By following these steps and implementing good string-changing practices, you can maintain the optimal sound, playability, and performance of your acoustic guitar. Enjoy the crisp, vibrant tones and inspiring music that your newly changed strings will bring to your playing sessions!