Introduction
The sound of a well-maintained acoustic guitar can be truly mesmerizing. One integral part of maintaining your acoustic guitar is changing the strings regularly. Over time, strings can become worn out and lose their tone and intonation. By changing your strings, you can breathe new life into your instrument and ensure it sounds its best.
In this guide, we will take you through the step-by-step process of safely changing the strings on your acoustic guitar. Whether you’re a beginner or an experienced player, this guide will help you keep your instrument in top shape and maintain its playability.
Before we dive into the process of changing guitar strings, it’s important to gather the necessary tools. You’ll need a pair of wire cutters, a string winder, a cloth, and, of course, a set of new strings. These tools will make the process much easier and more efficient.
Once you have all the tools ready, you’re ready to embark on the journey of string replacement. Remember, while this process may seem daunting at first, with practice, it will become second nature. So, let’s get started!
Tools You’ll Need
Before you begin changing the strings on your acoustic guitar, it’s essential to have the right tools at hand. Being properly equipped will make the process more efficient and ensure that you can safely change the strings without damaging your instrument. Here are the tools you’ll need:
- Wire cutters: These are necessary for cutting the strings to the correct length.
- String winder: This tool will help you quickly remove the old strings and tighten the new ones.
- Cloth: Use a soft cloth to clean the fretboard and remove any dirt or residue.
- New strings: Choose a set of strings that is suitable for your acoustic guitar and your playing style.
Having these tools readily available will save you time and frustration during the string-changing process. If you don’t already have them, you can easily find these tools at your local music store or online.
It’s worth investing in good quality tools as they will last longer and provide better results. Sharp wire cutters will ensure clean cuts, a sturdy string winder will make winding the new strings a breeze, and a soft cloth will help protect your guitar finish while cleaning the fretboard.
Once you have gathered all the necessary tools, you’re well-prepared to begin changing the strings on your acoustic guitar. With careful attention to detail and following the steps outlined in this guide, you’ll have your guitar sounding fresh and ready to play in no time.
Step 1: Removing the Old Strings
Before you can replace your acoustic guitar strings with fresh ones, you need to remove the old strings. Follow these steps to safely remove each string:
- Loosen the string: Start by loosening the tension of the first string by turning the tuning peg counterclockwise. This will relieve the pressure on the string and make it easier to remove.
- Unwind the string: Once the tension is reduced, unwind the string from the tuning peg. Use a string winder to speed up the process, if you have one. Continue unwinding until the string is completely loose.
- Cut the string: Once the string is loose, use wire cutters to cut it near the bridge of the guitar. Be careful not to damage the guitar’s top or body.
- Remove the bridge pin: For guitars with bridge pins, gently pull the bridge pin out of the bridge while holding the string. This will release the string from the bridge and make it easier to remove.
- Remove the string: Once the bridge pin is removed, slide the string out from the bridge and discard it. Repeat these steps for the remaining strings.
Take your time during this process to ensure that each string is removed safely without causing any damage to your guitar. If you encounter any resistance or difficulty, don’t force it. Take a step back, assess the situation, and gently try again. It’s better to proceed carefully to protect your instrument.
Removing the old strings is a crucial step in the string-changing process. Once all the old strings are removed, you can proceed to the next step of cleaning the fretboard, which we’ll cover in the next section.
Step 2: Cleaning the Fretboard
After removing the old strings from your acoustic guitar, it’s a great opportunity to clean the fretboard. Over time, dirt, sweat, and residue can accumulate, affecting the playability and tone of your instrument. Follow these steps to effectively clean your guitar’s fretboard:
- Gather the necessary materials: You’ll need a soft cloth and some guitar fretboard cleaner or a solution of mild soap and water.
- Apply the cleaner: If you’re using a guitar fretboard cleaner, apply it to the fretboard according to the manufacturer’s instructions. If you’re using a mild soap and water solution, dampen the cloth with the solution and gently rub it onto the fretboard.
- Gently scrub the fretboard: Use the cloth to gently scrub the fretboard, paying close attention to areas with built-up grime. Be careful around the frets to avoid scratching them.
- Remove excess cleaner: Once you’ve thoroughly cleaned the fretboard, use a dry part of the cloth to remove any excess cleaner or moisture.
- Let it dry: Allow the fretboard to air dry completely before proceeding to the next step. This will prevent any potential damage or warping that may occur if the guitar is restrung while the fretboard is still damp.
Cleaning the fretboard not only improves the appearance of your guitar but also ensures smoother playability and enhances the longevity of your strings. It’s a crucial step that shouldn’t be overlooked during the string-changing process.
Once the fretboard is clean and dry, you’re ready to move on to the next step: choosing the right strings for your acoustic guitar.
Step 3: Choosing the Right Strings
Choosing the right strings for your acoustic guitar is essential in achieving the desired tone and playability. There are various factors to consider when selecting strings, such as the type of music you play, your playing style, and personal preference. Follow these guidelines to help you make the right choice:
- Gauge: Strings come in different gauges, referring to the thickness of the strings. Lighter gauge strings (e.g., .010-.047) are easier to play and produce a brighter tone, while heavier gauge strings (e.g., .012-.054) offer more volume and a fuller sound. Consider experimenting with different gauges to find the one that suits your playing style.
- Material: Acoustic guitar strings are typically made from steel or bronze. Steel strings provide a brighter and more focused tone, ideal for genres like rock, pop, and country. Bronze strings, on the other hand, have a warmer and more balanced tone, making them well-suited for folk, fingerstyle, and jazz music.
- Coated vs. non-coated: Coated strings have a protective coating that extends their lifespan by reducing corrosion and preserving their tone for a longer time. While they may be more expensive, coated strings are a great option if you want strings that last longer and retain their brightness for an extended period.
It’s important to keep in mind that not all guitars are compatible with all string gauges. Consult your guitar manufacturer’s guidelines or consult with a knowledgeable guitar technician to ensure you choose strings that won’t put unnecessary strain on your instrument.
Ultimately, the choice of strings comes down to personal preference and experimentation. Don’t be afraid to try out different brands, gauges, and materials until you find the strings that best suit your playing style and musical taste.
Once you’ve chosen the right strings for your acoustic guitar, it’s time to move on to the next step: stringing the guitar.
Step 4: Stringing the Guitar
Now that you have chosen the right strings for your acoustic guitar, it’s time to string your instrument. Follow these step-by-step instructions to properly string your guitar:
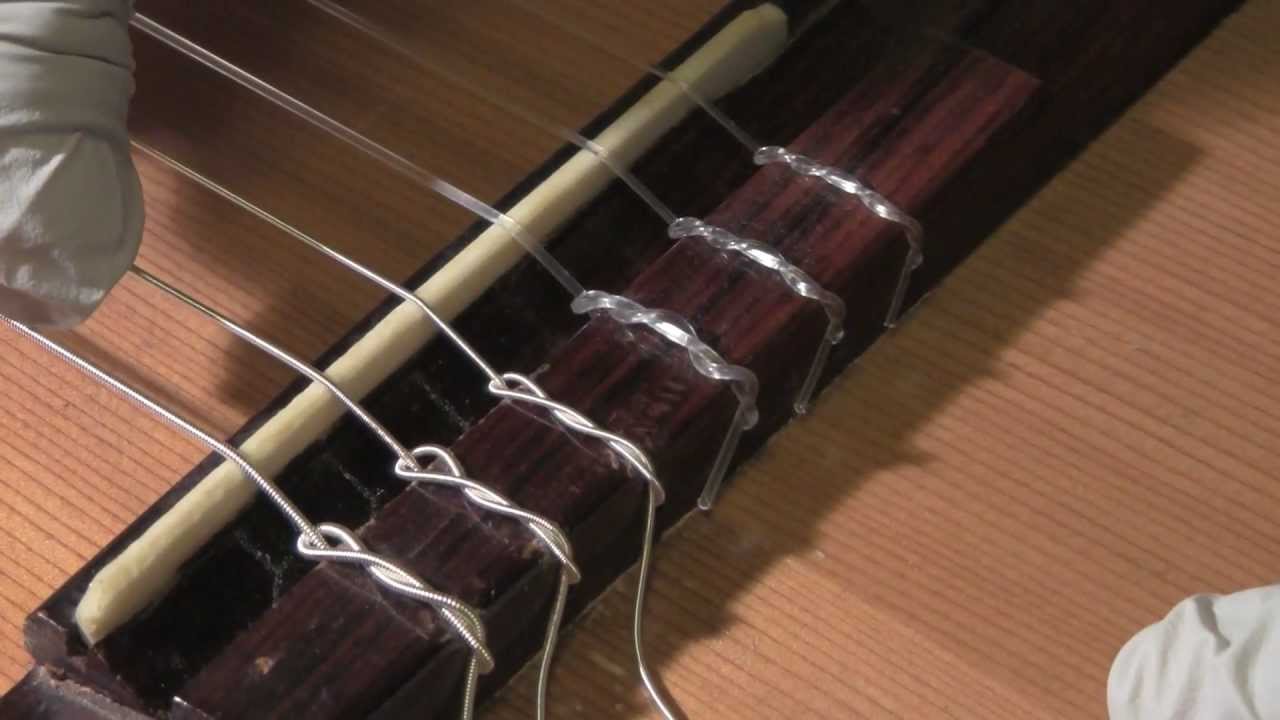
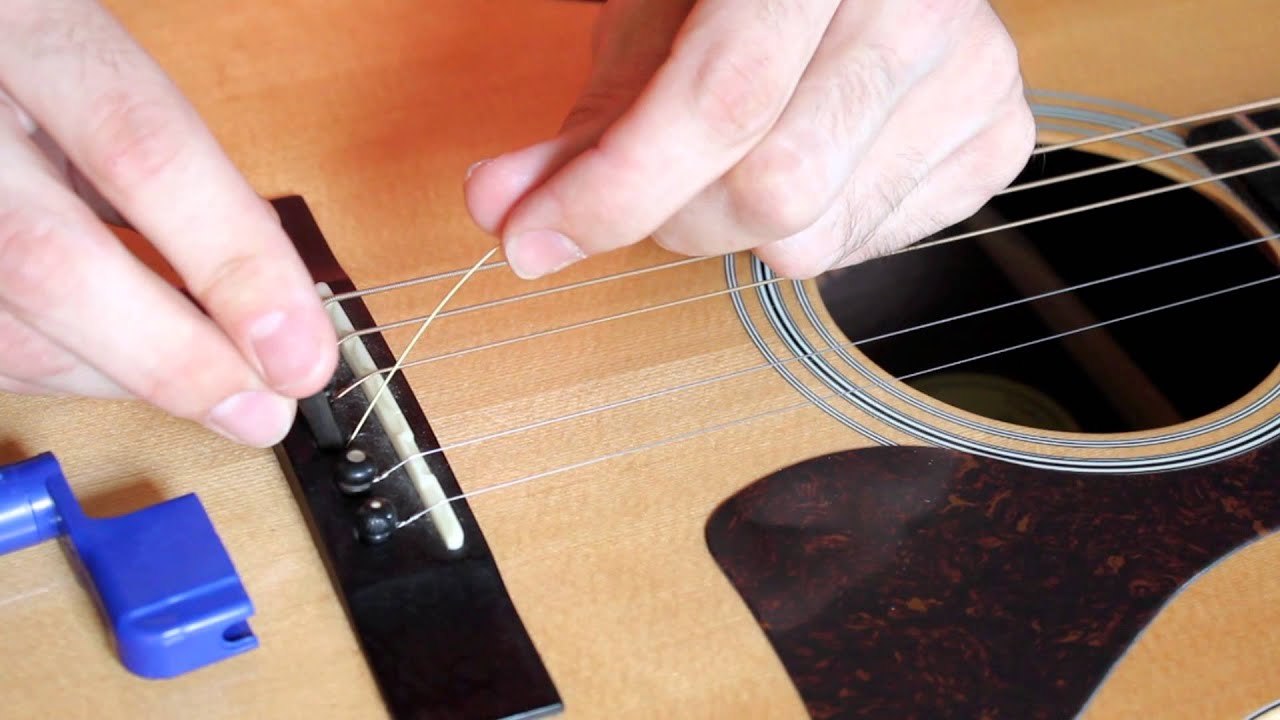
- Begin with the first string: Start with the thinnest string (usually the high E string) and insert it through the corresponding hole in the bridge. For guitars with bridge pins, place the ball end of the string into the bridge pin hole and push the pin back into the bridge until it’s secure.
- Pull the string through: Pull the string through the bridge or the bridge pin until there is no slack. Make sure the string is properly seated in the bridge and that the ball end is securely fastened.
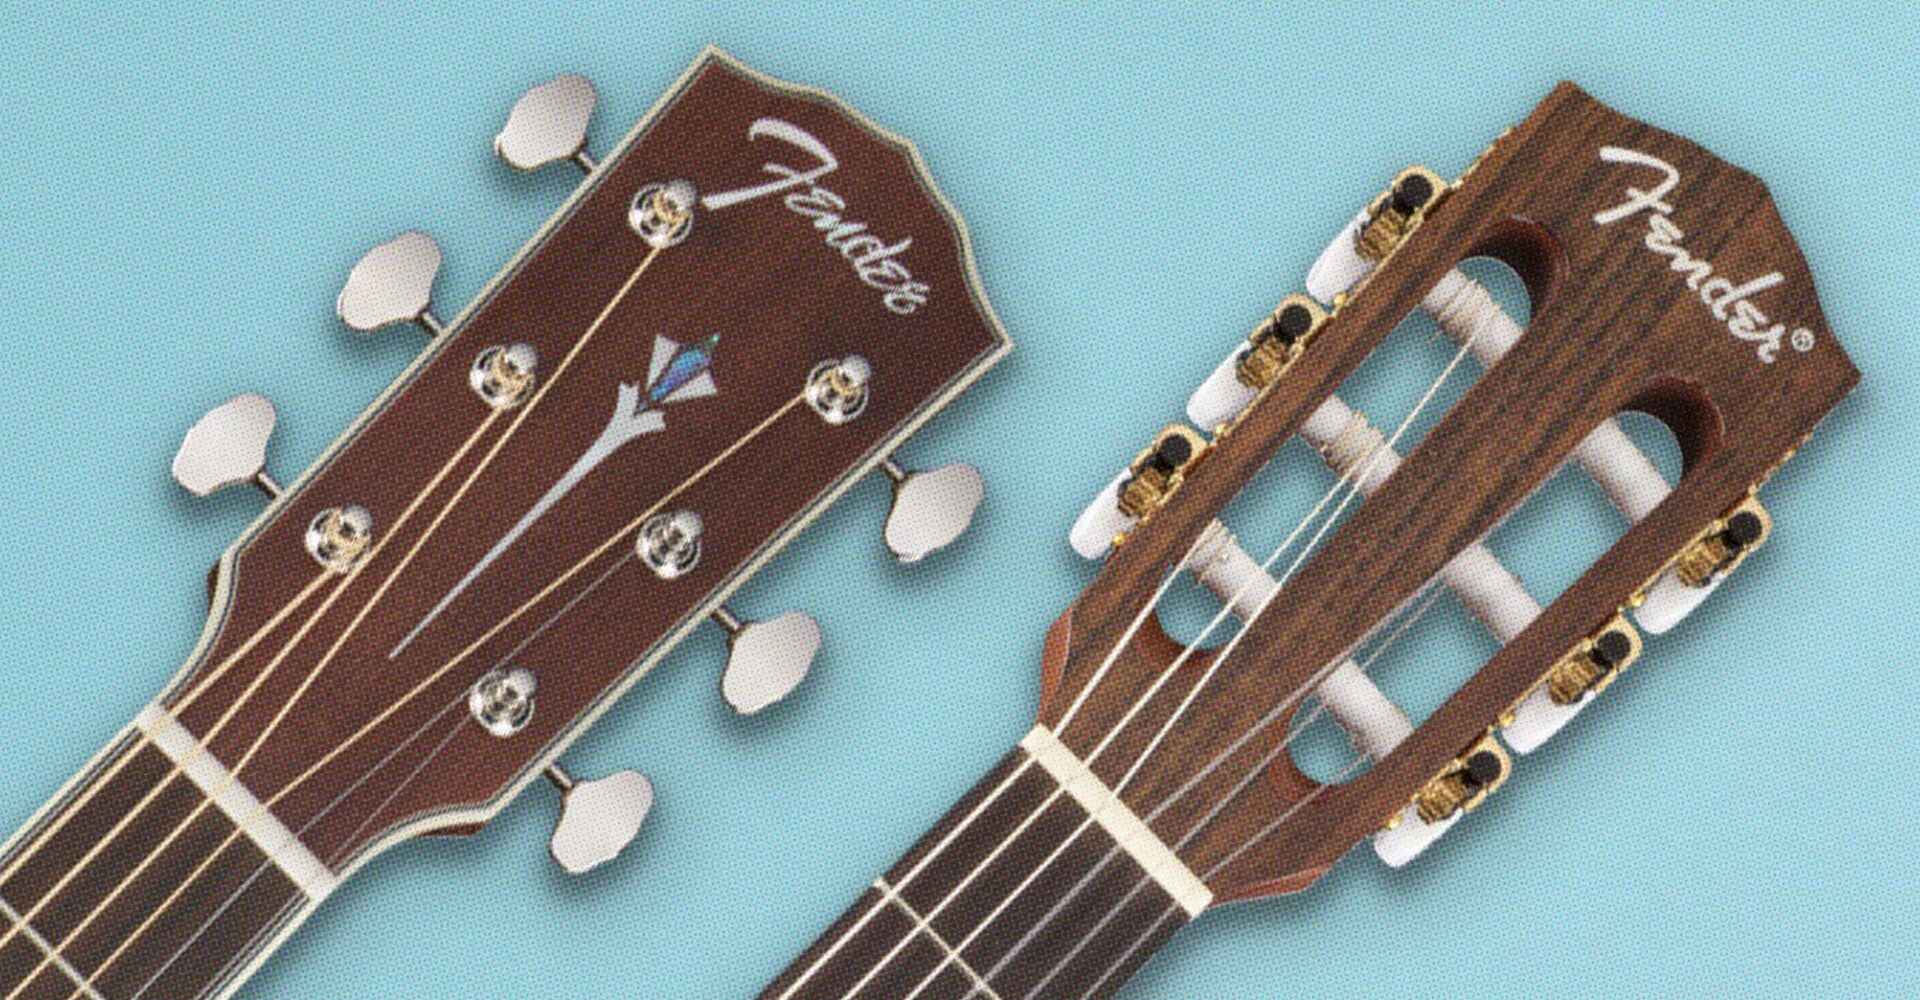
- Guide the string through the nut: On the opposite end of the guitar’s neck, guide the string through the appropriate slot in the nut. Make sure the string rests properly in the nut slot and is aligned with the corresponding tuning peg.
- Secure the string to the tuning peg: Hold the string taut, and begin winding it around the tuning peg in a clockwise direction. Make sure the wraps are tight and evenly spaced, with about 2-3 wraps around the peg for optimal stability.
- Tune the string: Use a tuner to gradually tighten the string, bringing it up to pitch. Be patient and tune the string carefully, making slight adjustments to ensure it reaches the correct pitch.
- Repeat the process: Once the first string is securely in place and properly tuned, repeat the same steps for the remaining strings in ascending order of thickness. Ensure that each string is properly seated in the bridge and the nut, and that the wraps around the tuning pegs are neat and secure.
As you string the guitar, pay attention to the tension of the strings and make any necessary adjustments to ensure the strings are evenly balanced across the instrument and at the correct pitch.
Remember, it’s important not to rush this process. Take your time to properly secure each string, and constantly check the tuning as you go along. This will help maintain a stable and consistent tuning for your guitar.
Once all the strings are securely in place and properly tuned, you’re ready to move on to the next step: stretching the new strings.
Step 5: Tuning the Strings
After stringing your acoustic guitar, it’s crucial to tune the strings to ensure they are at the correct pitch. Here are the steps to properly tune your guitar:
- Start with the first string: Begin by plucking the first string (high E) and compare the pitch to a reference note from a tuner. If the string is flat (lower in pitch), tighten the tuning peg clockwise. If the string is sharp (higher in pitch), loosen the tuning peg counterclockwise.
- Use a tuner: Utilize an electronic tuner or a tuning app on your phone to ensure accurate tuning. The tuner will indicate whether the string is sharp, flat, or in tune. Adjust the tuning peg accordingly until the string matches the desired pitch.
- Proceed to the next string: Once the first string is in tune, move on to the second string (B string) and repeat the process. Carefully pluck the string, compare the pitch to the tuner, and make any necessary tuning adjustments.
- Continue tuning all strings: Repeat the tuning process for each string, moving from the third string (G string) to the sixth string (low E). Take your time and tune each string carefully, ensuring they are all in tune with the reference notes provided by the tuner.
It’s important to note that new strings may take some time to stabilize and hold their tuning. As you tune each string, be aware that you may need to repeat the process a few times to achieve stable and accurate tuning.
While tuning, it’s a good idea to periodically check the overall tuning of the guitar by playing chords or open strings. This will help you identify any discrepancies in tuning and make any necessary adjustments.
By following these steps and tuning each string accurately, you’ll ensure that your acoustic guitar is in tune and ready to be played. Now that your strings are properly tuned, it’s time to move on to the next step: stretching the new strings.
Step 6: Stretching the New Strings
After tuning your newly stringed acoustic guitar, it’s important to stretch the strings to minimize their potential for going out of tune. New strings have a tendency to stretch and settle, especially during the initial stages of playing. Stretching them helps accelerate this process and ensures better tuning stability. Here’s how to stretch your new strings:
- Starting with the first string: Hold the guitar neck with one hand, and with your other hand, firmly grip the string near the soundhole.
- Pull the string away from the guitar: Gently pull the string away from the guitar body, applying even pressure along the string’s length. You should feel the string stretching and hear it slipping over the nut and bridge.
- Repeat for each string: Move on to the second string, third string, and so on, repeating the stretching process for each string. Remember to use caution and avoid pulling too hard, as excessive force could cause the string to snap.
- Retune the strings: After stretching each string, retune the guitar using the same process mentioned in the previous step. The stretching process may have caused the strings to go slightly out of tune, so it’s important to bring them back to the desired pitch.
- Continue the stretching process: Repeat the stretching and tuning process until the strings settle and hold their pitch more consistently. You may need to stretch the strings a few times before they stabilize.
Stretching the strings helps remove any excess slack and allows them to settle more evenly across the guitar’s neck. This process is particularly important for maintaining proper intonation and minimizing the need for frequent retuning.
Keep in mind that stretching the strings is most effective when done gradually over a period of time. As you continue to play your acoustic guitar, the strings will naturally stretch and settle further, contributing to better tuning stability. Regularly tuning and stretching your strings will enhance their longevity and playability.
Once you’ve stretched the new strings and achieved better tuning stability, you can move on to the final step: trimming the excess string length.
Step 7: Trimming the Excess String
After successfully stringing and stretching your acoustic guitar, you’ll often be left with excess string length. Trimming the excess string is not only aesthetically pleasing but also prevents any potential interference with your playing. Follow these steps to safely trim the excess string:
- Decide on the desired length: Determine how much excess string you want to remove. It’s recommended to leave approximately 1 to 2 inches of extra string length beyond the tuning peg for easier future adjustments.
- Hold the string: Use one hand to hold the string firmly just above the tuning peg where you want to make the cut. This will prevent the string from slipping or moving while you trim it.
- Trim the string: With your free hand, use a pair of wire cutters to safely trim the excess string. Position the cutters close to the tuning peg and make a clean cut to remove the excess string length.
- Check for sharp edges: After trimming the string, gently run your finger along the cut end to ensure there are no sharp edges that could potentially cause injury or damage. If you notice any sharp edges, use a file or sandpaper to smooth them out.
- Repeat for each string: Trim the excess length of all the remaining strings using the same process.
By trimming the excess string, you not only improve the aesthetics of your guitar but also reduce the risk of accidental contact or tangling. It’s important to ensure that the trimmed ends are smooth to prevent any scratching or discomfort while playing.
Once you have safely trimmed the excess string length on all of your guitar’s strings, your acoustic guitar is now fully restrung, tuned, and ready to be played. Congratulations on successfully changing your guitar strings!
Remember, regular string maintenance and replacement will help keep your acoustic guitar sounding its best. As you continue to play and enjoy your instrument, it’s good practice to periodically check the strings for signs of wear and replace them as needed.
Now, it’s time to strum your newly restrung acoustic guitar and enjoy the fresh sound of your instrument!
Conclusion
Changing the strings on your acoustic guitar is an essential part of maintaining its playability and ensuring optimal sound quality. By following the step-by-step process outlined in this guide, you can safely and efficiently replace your guitar strings.
We began by gathering the necessary tools, including wire cutters, a string winder, a cloth, and a set of new strings. These tools will make the string-changing process smoother and more manageable.
We then walked through each step, from removing the old strings and cleaning the fretboard to choosing the right strings, stringing the guitar, tuning the strings, stretching them, and finally trimming the excess string length. Each step plays a crucial role in the overall process, ensuring that your guitar is properly restringed, tuned, and ready to be played.
Remember, as with any new strings, there may be a settling-in period where the strings may require some readjustment and additional stretching. This is normal, so be patient and fine-tune the strings as necessary until they hold their pitch consistently.
Regularly changing your acoustic guitar strings and maintaining proper string care will contribute to better tonal quality and playability. It’s a good practice to establish a string changing routine based on your playing frequency and the condition of your strings.
By taking the time and effort to change your acoustic guitar strings safely, you’re not only preserving the life of your instrument but also ensuring that it continues to produce beautiful and resonant sounds for years to come.
So go ahead, pick up your freshly restringed guitar, and let the music flow. Enjoy the renewed tone and playability of your acoustic guitar, and keep exploring the endless musical possibilities that await!