Introduction
Replacing the strings on your acoustic guitar is an essential skill that every guitarist should master. Whether you’re a beginner or an experienced player, knowing how to change your guitar strings is crucial for maintaining the sound quality and playability of your instrument.
Over time, guitar strings wear out, lose their tone, and become harder to play. Replacing them regularly not only improves the sound of your guitar but also ensures optimal performance. It’s a simple process that can be done at home with just a few tools and some basic knowledge.
In this article, we’ll guide you through the step-by-step process of replacing the strings on your acoustic guitar. We’ll cover everything from removing the old strings to tuning the newly installed ones. So, grab your guitar and let’s get started!
Before we dive into the details, it’s important to note that the specific steps and techniques may vary slightly depending on the type of acoustic guitar you have. However, the basic principles remain the same. It’s always a good idea to consult your guitar’s manufacturer’s manual or seek professional advice if you’re unsure about any aspect of the process.
Now that we’ve got that covered, let’s move on to the preparations you’ll need to make before replacing your guitar strings.
Preparation
Before you start replacing the strings on your acoustic guitar, there are a few preparations you need to make. Having the right tools and creating a clean, organized workspace will make the process much smoother and more efficient.
Here’s what you’ll need:
- String winder: This handy tool makes it easier and faster to remove and install guitar strings. It saves you from having to twist the tuning pegs manually.
- Wire cutters: You’ll need these to trim the excess string length once you’ve installed the new strings. Make sure your wire cutters are sharp to get clean and precise cuts.
- Guitar polish: Cleaning your guitar before restringing is a great way to maintain its appearance and prolong its life. Use a guitar polish specifically formulated for acoustic guitars to avoid damage.
- Clean cloth: A soft, lint-free cloth will come in handy for wiping down your guitar and removing any dust or debris.
- New guitar strings: Choose the appropriate strings for your acoustic guitar. There are various types of strings available, such as bronze, phosphor bronze, and steel. Each type offers a different tone and feel, so consider your personal preferences and playing style when selecting new strings.
Now that you have all the necessary tools and supplies, it’s time to prepare your workspace. Find a clean and well-lit area where you can comfortably work on your guitar. Lay down a soft cloth or towel to protect the guitar’s body and prevent any scratches or damage.
Before removing the old strings, it’s a good idea to take a moment to clean your guitar. Use a guitar polish and a clean cloth to gently wipe down the body, neck, and fretboard. This will help remove any built-up grime and oils, keeping your guitar in top condition.
With your tools ready and your workspace prepared, you’re now ready to move on to the next step: removing the old strings from your acoustic guitar.
Step 1: Removing the Old Strings
Before you can install new strings on your acoustic guitar, you’ll need to remove the old ones. Follow these steps to safely and effectively remove the old strings:
- Loosen the tension: Start by turning the tuning pegs in a counterclockwise direction to loosen the tension on the strings. This will make it easier to remove them later on.
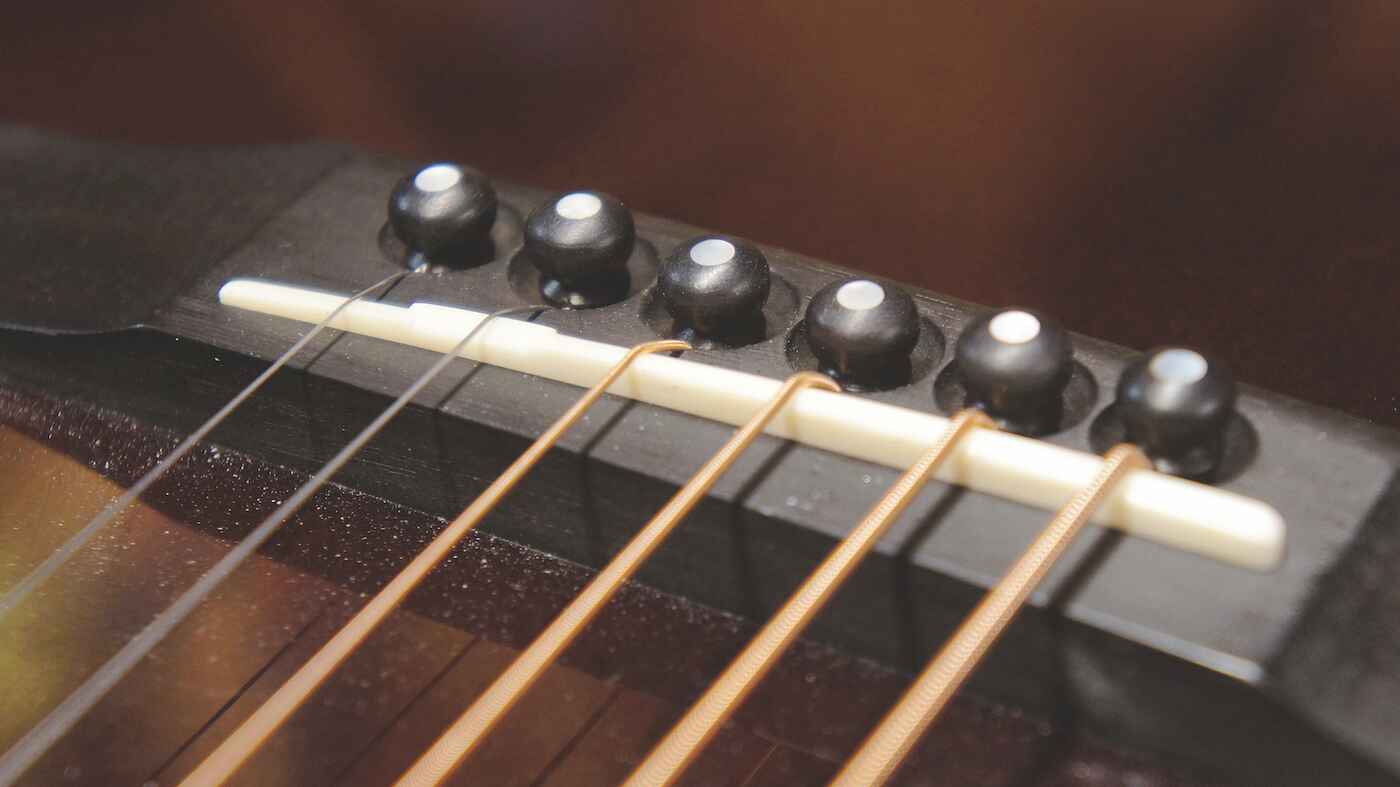
- Remove the bridge pins: Look for the bridge pins located on the bridge of your guitar. They hold the strings in place at the bridge. Use a peg winder or your fingers to gently push the bridge pin upward and then pull it out. Repeat this for each string.
- Remove the strings from the tuning pegs: Once the bridge pins are removed, unwind each string from the tuning pegs at the headstock. This can be done by turning the tuning pegs counterclockwise until the string is loose enough to slide out of the peg.
- Remove the strings completely: Once all the strings are removed from the tuning pegs, you can remove them from the guitar entirely. Simply lift each string out of its respective slot on the bridge and carefully pull it through the soundhole.
As you remove each string, make sure to keep them organized and separate from one another. You can coil them loosely and place them aside to avoid tangling. It’s also a good time to inspect your guitar for any signs of damage or wear. Take note of any issues you may need to address later on.
With the old strings removed, your guitar is now ready for the next step: cleaning and preparing the guitar for the new strings.
Step 2: Cleaning the Guitar
Now that you’ve removed the old strings from your acoustic guitar, it’s time to give it a thorough cleaning. Cleaning your guitar before installing new strings not only improves its appearance but also helps maintain its overall condition. Here’s how you can clean your guitar:
- Clean the body: Take a soft cloth and gently wipe down the guitar’s body, paying attention to any areas that may have accumulated dirt or smudges. Use a guitar polish specifically designed for acoustic guitars to safely clean the finish. Apply the polish to your cloth and gently rub it onto the surface, following the direction of the grain.
- Clean the fretboard: The fretboard can accumulate dirt, sweat, and grime over time. Use a small amount of guitar polish or a specially formulated fretboard cleaner on a cloth to clean the fretboard. Gently rub the cloth along the length of the fretboard, being careful around the frets. This will help remove any buildup and restore its natural beauty.
- Clean the bridge and hardware: Pay attention to the bridge area, where the strings make contact with the guitar. Wipe down the bridge and any hardware, such as the tuning pegs and bridge pins, to remove any dust or debris. Use a soft brush or cloth to reach into any crevices and clean thoroughly.
- Inspect for any issues: While cleaning your guitar, take the opportunity to inspect it for any signs of damage or wear. Look for cracks, loose hardware, or any other issues that may need attention. If you notice anything concerning, it’s best to consult a professional guitar technician for further assistance.
Once you’ve cleaned and inspected your guitar, you’ll be ready to move on to the next step: choosing the right strings for your acoustic guitar.
Step 3: Choosing the Right Strings
When it comes to selecting new strings for your acoustic guitar, it’s essential to choose the ones that suit your playing style and preferences. The right strings can greatly impact the tone, playability, and overall sound of your instrument. Here are some factors to consider when choosing the right strings:
- String Gauge: The gauge refers to the thickness of the strings. Lighter gauge strings are easier to play and produce a brighter tone, while heavier gauge strings offer more volume and sustain. Consider your playing style and the type of sound you want to achieve when selecting the gauge of your strings.
- String Material: Acoustic guitar strings are typically made of bronze, phosphor bronze, or steel. Bronze strings are the most common and provide a balanced tone. Phosphor bronze strings have a warmer and richer tone, while steel strings offer a bright and crisp sound. Experiment with different materials to find the one that suits your playing style and desired tone.
- Coated or Uncoated: Coated strings have a protective coating that helps them last longer and resist corrosion. They are a good option if you have acidic sweat or play frequently. Uncoated strings offer a more natural feel and tone but may require more frequent changes.
- Brand and Price: Different brands offer various qualities and price ranges. It’s always a good idea to research and read reviews to find reputable brands that produce high-quality strings within your budget.
Ultimately, choosing the right strings is a personal preference. Consider trying out different brands, gauges, and materials to find the combination that suits your playing style and enhances the sound of your guitar.
Once you have selected the perfect strings for your acoustic guitar, you’re ready to move on to the next step: installing the new strings.
Step 4: Installing the New Strings
With the old strings removed, it’s time to install the new strings on your acoustic guitar. Follow these steps carefully to ensure a proper and secure installation:
- Start with the thickest string: Begin by threading the first (thickest) string through the appropriate bridge pin hole. Make sure the ball end of the string is securely seated against the bridge and the pin fits snugly into place.
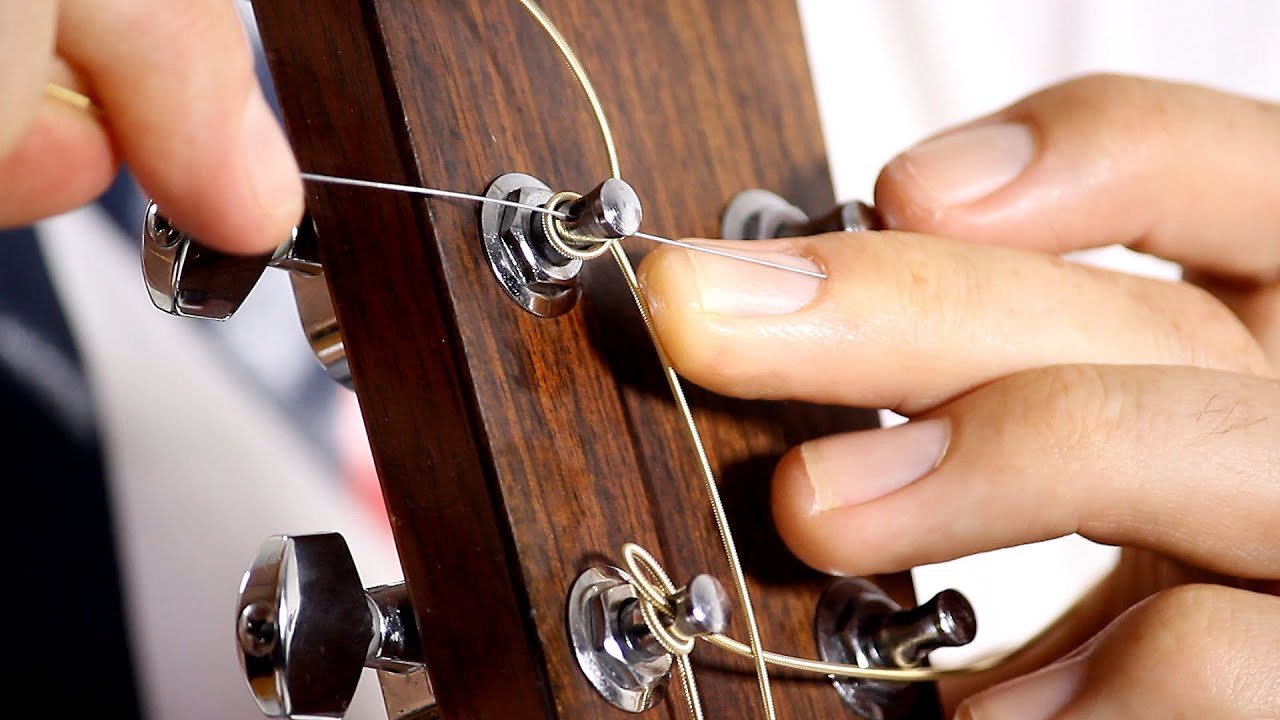
- Thread the string through the tuner: Pull the string through the appropriate tuner hole, leaving a few inches of excess string beyond the tuner post. Begin winding the string around the post in a clockwise direction, making sure each turn is tight and neat.
- Leave some slack: After a few revolutions around the tuner post, leave some slack in the string between the nut and the tuner. This allows for easier stretching and tuning later on.
- Repeat for the remaining strings: Follow the same steps for the remaining strings, working from the thickest to the thinnest. Ensure each string is properly threaded through the bridge pin and the tuner, and maintain the appropriate amount of slack.
- Wind and tune the strings: Once all the strings are installed, use a string winder to start winding the tuning pegs. Turn the pegs clockwise to tighten the strings and bring them to pitch. As you wind each string, be careful not to overtighten or tune it too high to avoid damaging the string or the guitar.
As you tune the strings, it’s important to stretch them to prevent them from constantly going out of tune. Gently tug on each string, applying light pressure at various points along the length of the string. This helps to stretch and settle the strings, allowing them to hold their tuning better.
Continue tuning and stretching the strings until they reach the desired pitch. Use a tuner to ensure accurate tuning for each string.
Congratulations! You have successfully installed the new strings on your acoustic guitar. The next step is to stretch the strings for better stability and then add the finishing touches.
Step 5: Tuning the Guitar
Once you have installed the new strings on your acoustic guitar, it’s time to tune them to the correct pitch. Proper tuning is crucial for achieving the desired sound and ensuring that your guitar is ready to play. Follow these steps to tune your guitar:
- Use a reliable tuner: Start by using a chromatic tuner, either a physical tuner or a tuner app on your smartphone. This will help you accurately tune each string to the correct pitch. Make sure the tuner is set to the standard tuning of EADGBE.
- Tune the thickest string (E string): Begin by plucking the thickest string, the E string. Adjust the tuning peg while looking at the tuner display until the string is in tune. Keep turning the peg slowly until the tuner indicates that the string is at the correct pitch.
- Move to the next string: Once the thickest string is in tune, move on to the next string, the A string. Pluck the A string and adjust the tuning peg until it matches the desired pitch as indicated by the tuner. Repeat this process for each remaining string, moving from thickest to thinnest.
- Check for accuracy: After tuning each string, take a moment to play a few chords or notes to ensure the overall tuning of the guitar sounds harmonious and in tune. Make any necessary adjustments if you notice any discrepancies.
It’s important to note that new strings can take some time to settle in and stabilize, which may cause them to stretch and go out of tune frequently at first. In this case, simply retune the strings as needed, and they will eventually hold their tune more effectively.
With the guitar properly tuned, you’re ready to move on to the next step: stretching the strings to improve their stability.
Step 6: Stretching the Strings
After tuning your newly installed strings, it’s crucial to stretch them to improve their stability and prevent them from constantly going out of tune. New strings tend to stretch and settle, so it’s important to stretch them manually to expedite the process. Follow these steps to stretch the strings on your acoustic guitar:
- Gently pull on each string: Starting with the thickest string, use your fingers to apply gentle pressure and pull the string away from the fretboard. Pull at various points along the length of the string, moving from the nut towards the bridge. Be careful not to pull too hard to avoid damaging the string.
- Repeat for each string: Continue stretching each string individually, paying attention to any areas that seem to be resisting stretching. Focus on the wound part of the string, as these portions tend to have more elasticity. Repeat this process for all the strings.
- Retune the guitar: As you stretch the strings, you’ll notice that they will go slightly out of tune. After stretching each string, go back and retune it using your tuner. Keep repeating the stretching and tuning process until the strings hold their pitch more consistently.
By stretching the strings, you are helping to remove any excess elasticity and minimize the likelihood of them going out of tune during your playing sessions. This step is especially important with new strings, as they tend to stretch more initially.
Once you have stretched the strings and retuned your guitar, you’re almost done. The final step involves adding some finishing touches to ensure your guitar is ready to be played.
Step 7: Finishing Touches
Now that you have replaced and tuned the strings on your acoustic guitar, it’s time to add some finishing touches to ensure your instrument is in optimal condition and ready to be played. Follow these steps to complete the restringing process:
- Trim the excess string length: Use a pair of wire cutters to carefully trim the excess string length protruding from the tuning pegs. Make sure to cut the strings close to the tuner posts, taking care not to damage the guitar’s finish.
- Double-check the tuning: After trimming the excess string length, double-check the tuning of each string to ensure they are still in tune. Use your tuner to confirm the correct pitch.
- Clean and polish: Take a clean cloth and wipe down your guitar to remove any fingerprints, smudges, or residue that may have accumulated during the restringing process. Apply a small amount of guitar polish and gently buff the body and other polished surfaces to restore their shine.
- Test and play: Now that your guitar is properly restrung, tuned, and cleaned, it’s time to put it to the test. Play some chords, strum your favorite songs, or experiment with different playing techniques to ensure that the guitar feels and sounds the way you want it to.
- Monitor the strings: Keep an eye on your strings in the following days and weeks. New strings may continue to stretch and settle, requiring periodic retuning. Check for any signs of wear or inconsistencies in the sound, and replace any damaged or worn-out strings as needed.
By adding these finishing touches, you ensure that your guitar is well-maintained and ready to deliver its best performance. Regularly cleaning, tuning, and checking your guitar will contribute to its longevity and keep it sounding great.
Congratulations on successfully replacing the strings on your acoustic guitar! With proper maintenance and regular string changes, you’ll continue to enjoy the best possible sound and playing experience on your instrument for years to come.
Conclusion
Replacing the strings on your acoustic guitar is a fundamental skill that all guitarists should learn. It not only improves the sound and playability of your instrument but also ensures its longevity and optimal performance. By following the step-by-step process outlined in this article, you can confidently restring your acoustic guitar with ease.
In the preparation phase, gather the necessary tools, such as a string winder, wire cutters, guitar polish, and new strings. Create a clean and organized workspace to facilitate the process. The next step involves removing the old strings carefully, starting with loosening the tension, removing the bridge pins, and finally taking off the strings from the tuning pegs.
Cleaning the guitar thoroughly is an important step that helps maintain its appearance and prolong its life. Use a soft cloth and a guitar polish specifically formulated for acoustic guitars to clean the body, fretboard, and hardware.
Choosing the right strings for your acoustic guitar is crucial for achieving the desired tone and playability. Consider factors such as string gauge, material, and coating to make an informed decision that suits your preferences.
Installing the new strings requires threading them through the bridge pin holes and tuning pegs, maintaining the appropriate amount of slack, and winding them correctly. Once the new strings are installed, tuning the guitar accurately using a tuner is essential for achieving the correct pitch.
Stretching the strings helps stabilize them and minimize tuning issues. Gently pull on each string and retune as needed until the strings hold their pitch more consistently.
Finishing touches include trimming the excess string length, cleaning and polishing the guitar, and testing it by playing chords or songs to ensure it sounds and feels as desired. Monitor the strings for any signs of wear or changes in sound and replace them as necessary.
By mastering the process of replacing the strings on your acoustic guitar and incorporating regular string changes into your maintenance routine, you can ensure that your instrument continues to deliver its best sound and performance. Enjoy playing your newly restrung guitar and keep exploring the world of music!