Introduction
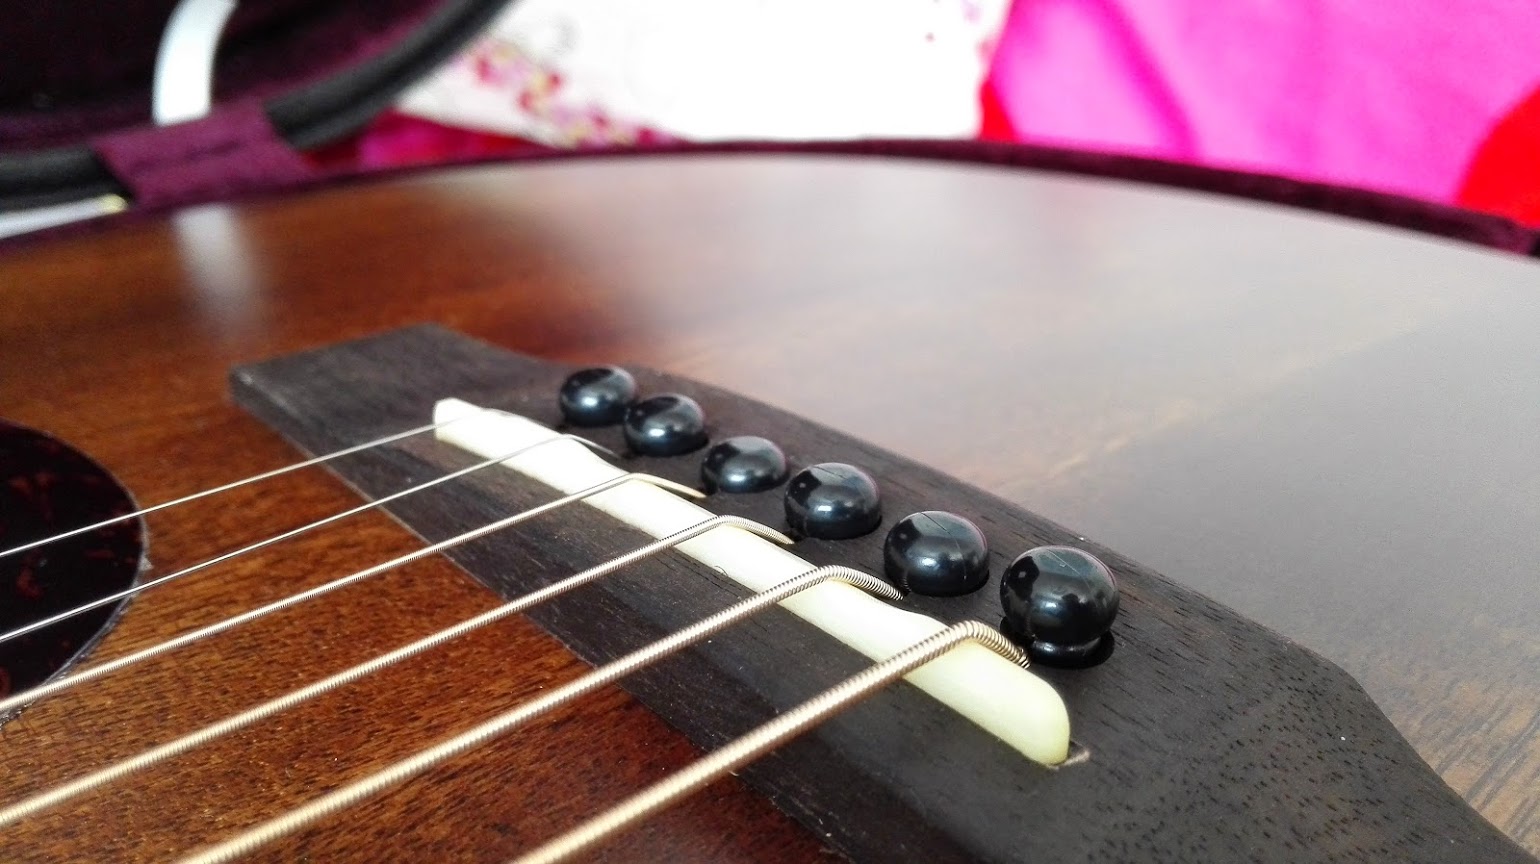
Replacing the nut on an acoustic guitar is an essential task for any guitar player. The nut is a small piece located at the top of the guitar’s neck, responsible for guiding the strings and maintaining proper string height and spacing. Over time, the nut may wear down, become chipped, or simply need to be replaced to improve the guitar’s playability.
Fortunately, replacing the nut on an acoustic guitar is a relatively straightforward process that can be done at home with the right tools and techniques. In this article, we will guide you through the step-by-step process of replacing the nut on your acoustic guitar, helping you restore optimal functionality and playability to your instrument.
Before we dive into the process, it’s essential to ensure you have the necessary tools and materials on hand. Having everything ready will streamline the process and make the replacement smoother and more efficient.
Tools and Materials Needed:
- Acoustic guitar
- Replacement nut
- Small ruler or measuring tool
- Sanding block or sandpaper
- Needle files
- Masking tape
- Pencil
- Super glue or wood glue
- Guitar strings
- Guitar tuner
With these tools and materials at your disposal, you’ll be ready to embark on the journey of replacing the nut on your acoustic guitar. So, gather your supplies and let’s get started!
Tools and Materials Needed
Before you can begin replacing the nut on your acoustic guitar, make sure you have the following tools and materials on hand:
- Acoustic guitar: Your guitar is, of course, the central piece needed for this task. Ensure it is in good condition and free of any other issues.
- Replacement nut: Measure the dimensions of your current nut and find a replacement nut that matches its size and specifications. Nut materials commonly used include bone, synthetic bone, and various types of plastic.
- Small ruler or measuring tool: Accurate measurement is crucial when determining the dimensions of your current nut and the replacement nut. A small ruler or measuring tool will help you achieve precise measurements.
- Sanding block or sandpaper: Sometimes, the replacement nut may need to be sanded down slightly to ensure it fits perfectly. A sanding block or sandpaper of various grits will come in handy for this task.
- Needle files: Needle files are used to shape the slots in the replacement nut to match the gauge of your guitar strings.
- Masking tape: Masking tape helps protect the guitar’s finish from accidental scratches or nicks during the replacement process.
- Pencil: You’ll need a pencil to mark the top of the nut and the slot positions, ensuring accurate placement.
- Super glue or wood glue: Adhesive is necessary to secure the replacement nut in place after proper fitting and adjustments.
- Guitar strings: While not directly part of the nut replacement process, it’s a good idea to consider replacing your guitar strings as well, especially if they are old or worn.
- Guitar tuner: A guitar tuner is essential for ensuring proper string tension and intonation after the nut replacement.
Having all the necessary tools and materials ready will make your nut replacement journey smooth and efficient. Take the time to gather these items before proceeding to the next steps.
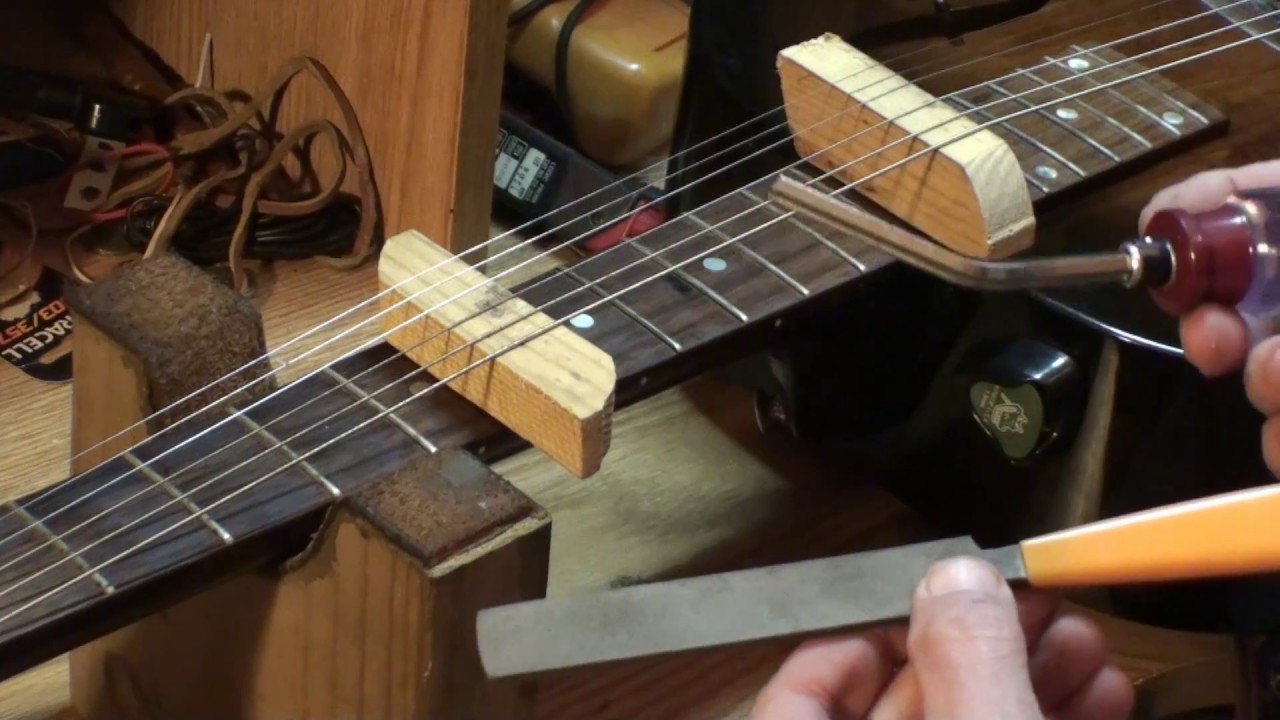
Step 1: Removing the Old Nut
The first step in replacing the nut on your acoustic guitar is to remove the old nut. Follow these steps to safely remove the nut:
- Loosen the strings: Start by loosening the tension of the strings. You can do this by turning the tuning pegs or using a string winder if available. Loosen the strings to the point where you can easily remove them from the nut.
- Protect the guitar: To prevent any damage to the guitar’s finish, place a small piece of masking tape on either side of the nut, covering the top of the neck around the nut.
- Apply heat: Applying heat to the nut can help loosen any adhesive holding it in place. Use a hairdryer or heat gun on a low setting and gently heat the nut for a few seconds. Avoid excessive heat to prevent any damage to the guitar.
- Apply gentle pressure: With the guitar gently held in place, use a small flat-head screwdriver or a thin, pointed object to apply gentle pressure under the nut. Wiggle it back and forth to loosen the nut from its slot.
- Remove the nut: Once the nut is loosened, carefully lift it from its slot. Be cautious not to use excessive force to prevent any damage to the neck or the surrounding wood.
- Clean the slot: After removing the old nut, clean out any debris or adhesive residue from the nut slot using a small brush or a toothpick. This will ensure a clean surface for installing the new nut.
By following these steps, you will successfully remove the old nut from your acoustic guitar, preparing the way for the installation of the new nut in the next steps. Take your time and be gentle during this process to avoid any unnecessary damage to your instrument.
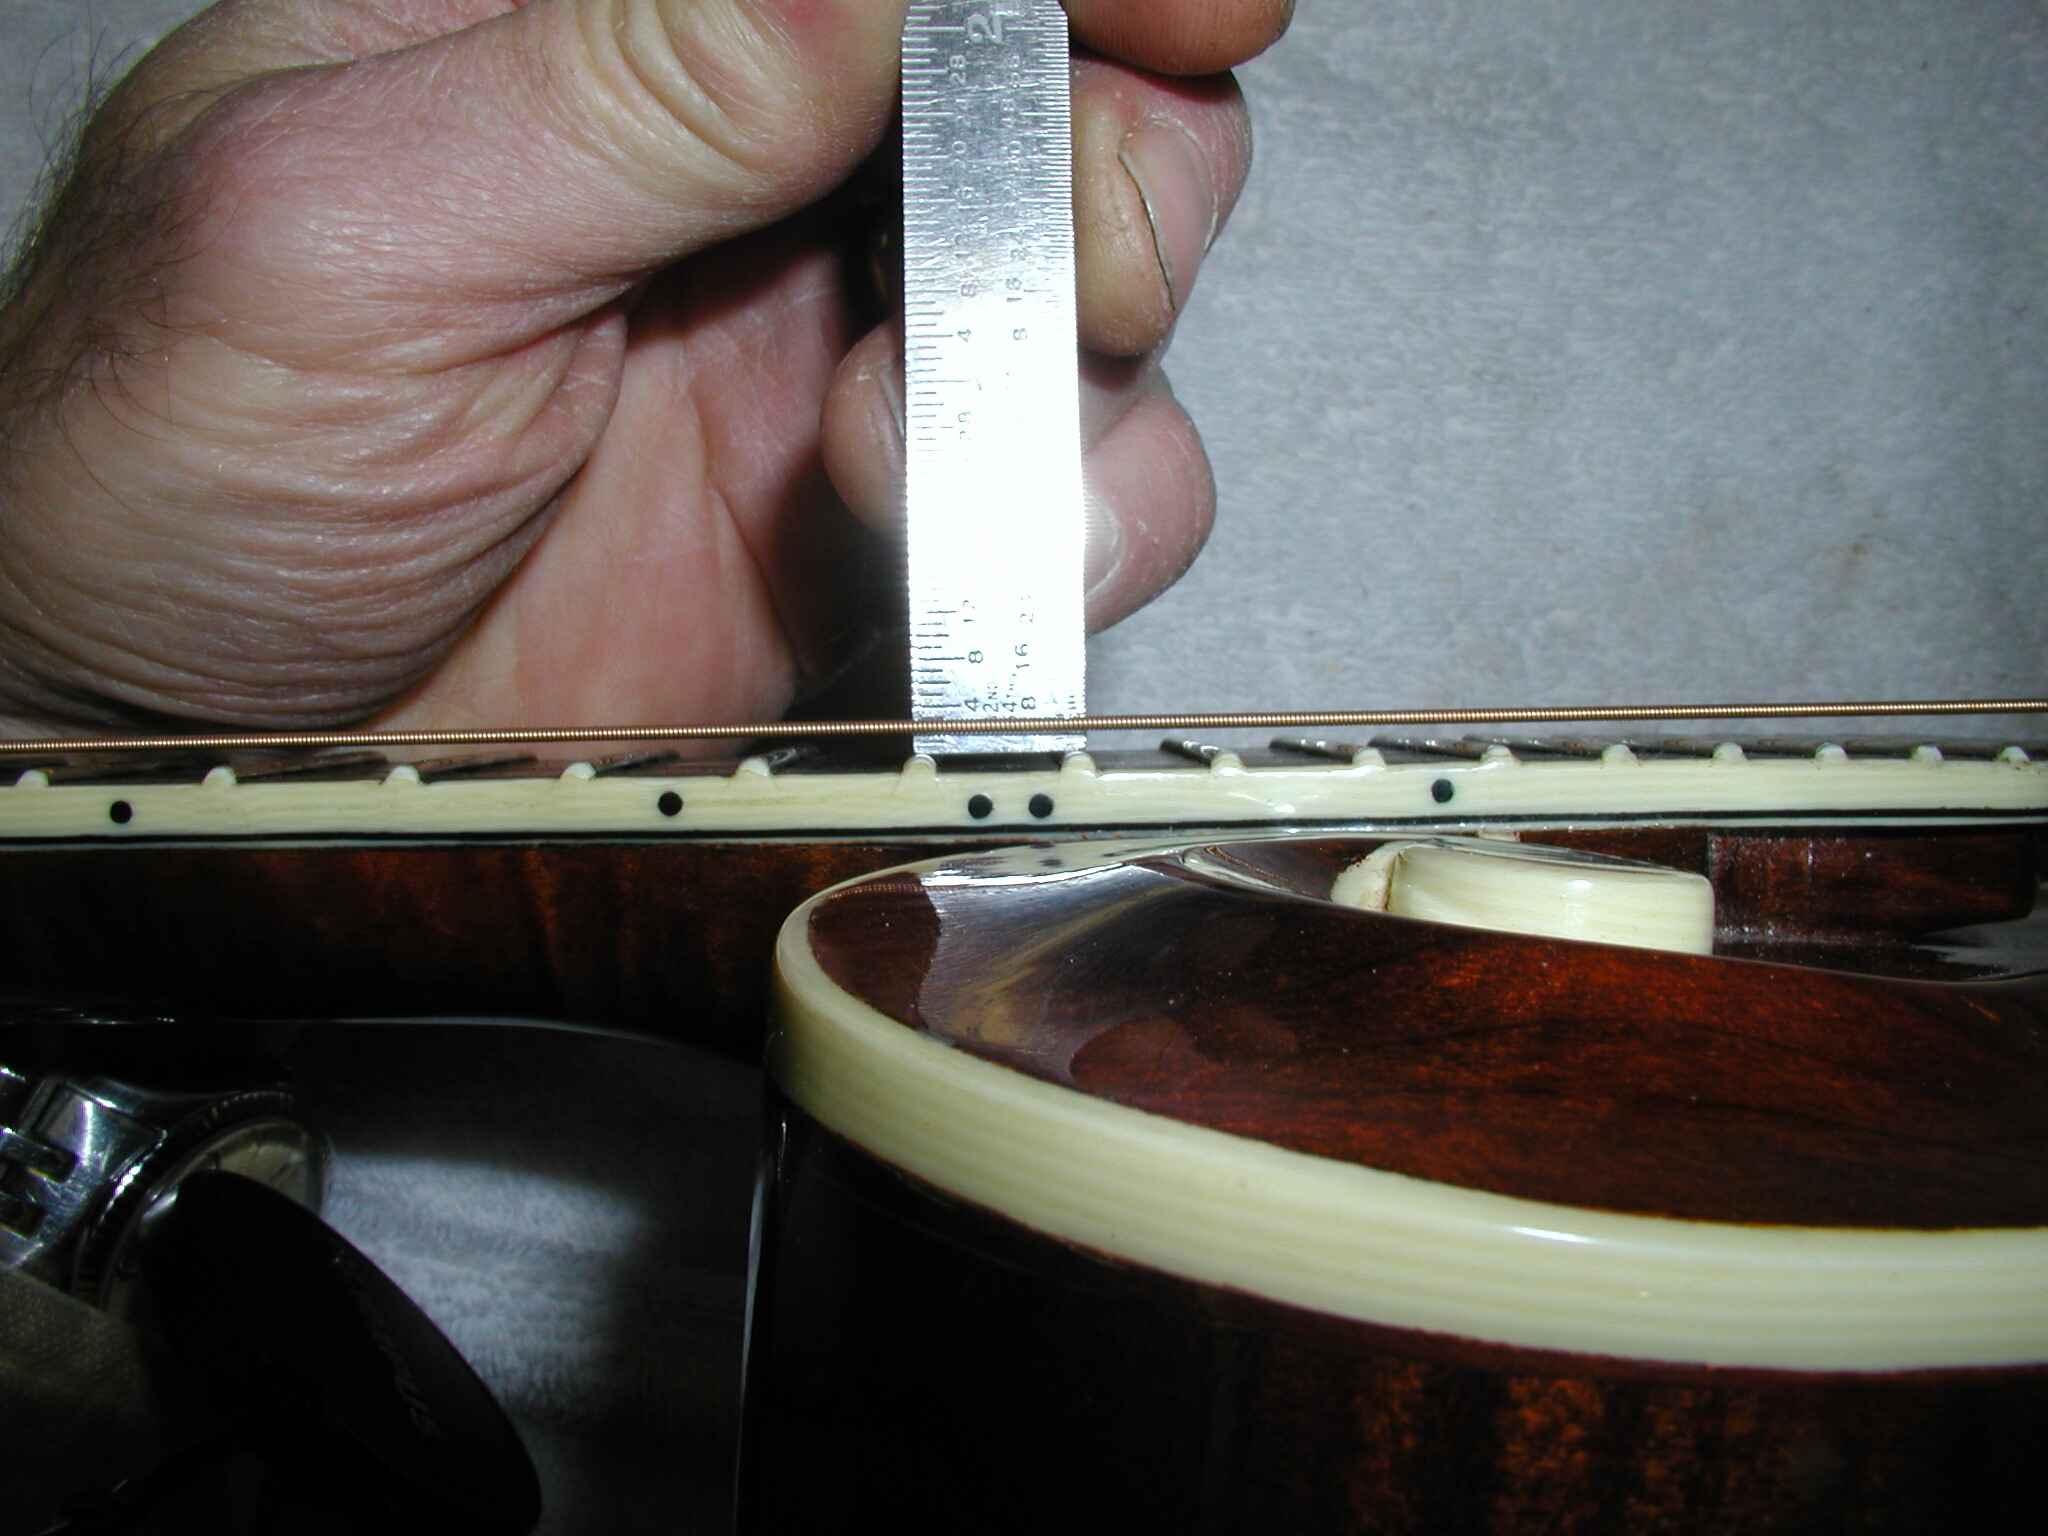
Step 2: Taking Measurements
Before proceeding with the replacement of the nut on your acoustic guitar, it is crucial to take accurate measurements. This step ensures that you find a replacement nut that fits correctly and maintains proper string height and spacing. Follow these steps to take the necessary measurements:
- Measure the width: Use a small ruler or measuring tool to measure the width of the old nut. Place the ruler at the top of the nut and measure from one edge to the other. This measurement will help you find a replacement nut of the same width.
- Measure the height: Next, measure the height of the old nut. This measurement refers to the distance between the bottom of the nut and the top of the fretboard. It helps ensure proper string action. Make sure to measure at the highest point of the nut.
- Measure the string spacing: String spacing refers to the distance between the strings at the nut. Measure the spacing between each pair of adjacent strings at the top of the nut. This measurement will help you find a replacement nut that matches the string spacing of your guitar.
- Measure the string slot depth: Finally, measure the depth of the string slots in the old nut. This measurement ensures that your replacement nut has slots of adequate depth for your guitar strings. Use a small ruler or feeler gauge to measure the depth of each string slot.
Once you have taken these measurements, write them down or keep them in mind while searching for a replacement nut. It is important to find a nut that matches these measurements as closely as possible for optimal playability. Keep in mind that there may be slight variations in measurements between different guitars and manufacturers, so choosing a nut specifically designed for your guitar model is ideal.
With the measurements in hand, you are now ready to search for the perfect replacement nut for your acoustic guitar. Take your time to find a nut that matches the width, height, string spacing, and slot depth of the old nut for optimal results.
Step 3: Finding the Right Replacement Nut
Now that you have taken the necessary measurements, it’s time to find the perfect replacement nut for your acoustic guitar. Finding a nut that matches the dimensions and specifications of the old nut will ensure a proper fit and optimal playability. Here’s how to go about it:
- Check with the manufacturer: If your guitar is from a well-known brand, the manufacturer may offer replacement parts, including nuts. Check the manufacturer’s website or reach out to their customer support to see if they have the exact replacement nut for your specific guitar model.
- Visit a local music store: Local music stores often carry a variety of guitar parts, including replacement nuts. Bring the old nut and the measurements you took with you to the store. The staff will be able to help you find a suitable replacement nut or provide guidance on ordering one.
- Search online: Online marketplaces, music stores, and specialized guitar part websites offer a wide range of replacement nuts. You can search using the specific measurements and specifications you obtained. Read product descriptions carefully to ensure they match your requirements.
- Consider material and quality: Replacement nuts are available in a variety of materials, including bone, synthetic bone, and various types of plastic. Consider the tonal characteristics of the material and choose one that suits your preferences. Additionally, ensure that the replacement nut is of good quality to ensure longevity and durability.
- Read reviews and recommendations: Before making a final decision, read customer reviews and recommendations for the replacement nut you are considering. This can give you insight into the quality, compatibility, and performance of the nut from other guitarists who have used it.
Remember, finding the right replacement nut may take some time and research. Take into account your guitar’s specific needs and your personal preferences to make the best choice. Once you have found the perfect replacement nut, you are ready to move on to the next step of the process.
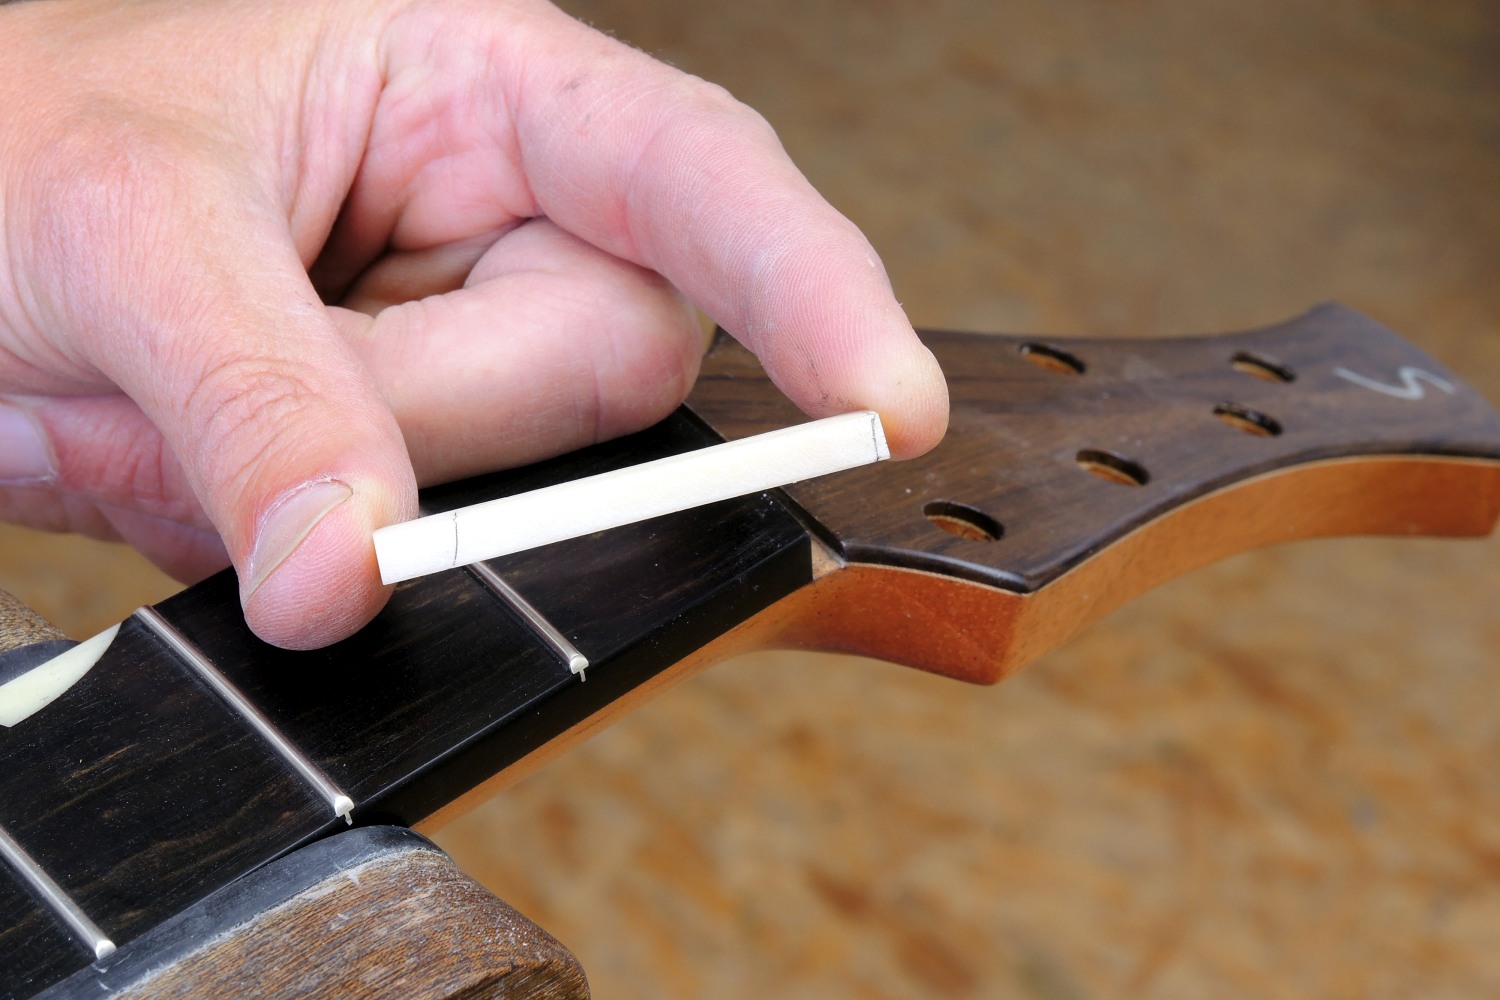
Step 4: Preparing the Replacement Nut
After finding the right replacement nut for your acoustic guitar, the next step is to prepare it for installation. This involves making necessary adjustments and ensuring a proper fit. Here’s what you need to do:
- Compare and adjust the width: Compare the width of the replacement nut with the measurement you took of the old nut. If the replacement nut is slightly wider, use a sanding block or sandpaper to carefully sand down the sides until it matches the width of the old nut. Take your time and check the fit frequently to avoid removing too much material.
- Check the height: Measure the height of the replacement nut and compare it to the height of the old one. Ideally, the replacement nut should have the same height or be slightly taller. If it’s too tall, use sandpaper to carefully sand the bottom of the nut until the desired height is achieved. Be cautious to maintain an even and flat surface.
- Shape the slots: Use needle files to shape the slots in the replacement nut according to the gauge of your guitar strings. Each slot should be smooth and widened enough to accommodate the respective string, ensuring proper string spacing and alignment.
- Test the fit: Once you have adjusted the width, height, and slots, test the fit of the replacement nut in the nut slot of your guitar. Gently place the nut in its designated spot and ensure that it sits flush against the top of the neck. The slots should align with the corresponding frets.
During the preparation process, make sure to periodically clean the replacement nut and the nut slot to remove any debris or dust. This will help ensure a clean and secure fit.
Remember, the goal of preparing the replacement nut is to achieve an accurate fit and proper alignment with the guitar neck. Take your time, work carefully, and make necessary adjustments to ensure a seamless installation in the upcoming steps.
Step 5: Installing the New Nut
With the replacement nut properly prepared, it’s time to install it onto your acoustic guitar. Follow these steps to ensure a smooth and successful installation:
- Apply adhesive: Apply a small amount of super glue or wood glue to the bottom of the replacement nut. Be careful not to use too much adhesive, as it can seep into the slots or create a messy finish.
- Position the nut: Carefully place the replacement nut into the nut slot, ensuring it sits flush against the top of the neck. The slots should align with the corresponding frets. Press the nut firmly into place to allow the adhesive to bond properly.
- Align the string slots: Verify that the string slots in the replacement nut are properly aligned with the corresponding bridge and tuning pegs. This ensures proper string angle and tension.
- Remove any excess adhesive: Use a cotton swab or a damp cloth to remove any excess adhesive that may have squeezed out from the sides of the nut during installation. Wipe the area clean for a neat finish.
- Allow the adhesive to dry: Follow the instructions provided with the adhesive you used and allow sufficient time for it to dry and bond the nut to the neck. Avoid placing any tension on the strings or disturbing the nut during this time.
Once the adhesive has completely dried, you can move on to the final step of the nut replacement process.
Note that if you are not comfortable using adhesive, you can also opt to use a small amount of graphite or lubricant in the slots to reduce friction and improve string movement. However, using adhesive provides added stability and ensures that the nut remains securely in place.
By carefully installing the new nut onto your guitar, you are one step closer to restoring optimal playability and performance to your instrument.
Step 6: Final Adjustments and Testing
After successfully installing the new nut on your acoustic guitar, it’s time to make any final adjustments and test the instrument to ensure everything is in proper working order. Follow these steps to complete the nut replacement process:
- Reinstall the strings: Begin by reattaching the strings to the guitar. Start with the low E string and work your way up to the high E string. Make sure to securely fasten each string to its respective tuning peg.
- Tune the guitar: Use your guitar tuner to tune each string to its correct pitch. Take your time and ensure each string is in tune before moving on to the next one.
- Check string height: With the guitar properly tuned, check the string height at the first fret. It should be low enough to allow for easy fretting without causing any buzz or unwanted string noise. If needed, carefully sand the bottom of the nut to adjust the height slightly.
- Test string spacing: Strum each string individually and listen for any buzzing or rattling sounds. If you notice any issues, check the string spacing to make sure each string has enough room in its respective slot. Use needle files to widen the slots if necessary.
- Assess overall playability: Play different chords and notes up and down the neck to assess the overall playability of the guitar. Pay attention to intonation, string action, and any potential issues with the nut. If anything feels off or sounds off, consult with a guitar technician for further adjustments.
During the testing phase, take your time and listen to the guitar’s sound and feel. Make note of any areas that may require further adjustment or setup. It is normal to make minor tweaks and refinements to optimize your guitar’s playability.
Once you are satisfied with the final adjustments and testing, you are ready to enjoy your newly replaced nut and the improved playability of your acoustic guitar.
Conclusion
Replacing the nut on an acoustic guitar is a task that can greatly improve the playability and performance of your instrument. By following the step-by-step process outlined in this guide and being mindful of the tools and measurements required, you can successfully replace the nut and enjoy a guitar that feels and sounds fantastic.
Starting with the removal of the old nut and taking accurate measurements, you can then proceed to find the right replacement nut that matches your guitar’s specifications. By preparing the replacement nut carefully and ensuring a proper fit, you set the foundation for a successful installation.
Installing the new nut with the appropriate adhesive creates a secure bond with the neck, and any final adjustments can be made to fine-tune the guitar’s playability. Testing the instrument thoroughly ensures that everything is set up correctly and that you can enjoy optimal sound and performance when playing.
Remember, if you ever feel unsure or uncomfortable performing these steps yourself, it is always a good idea to consult with a professional guitar technician. They can provide additional guidance, expertise, and ensure that your guitar is properly set up for optimal playability.
By taking the time and effort to replace the nut on your acoustic guitar, you are investing in the longevity and quality of your instrument. So, gather the necessary tools, follow the steps outlined in this guide, and experience a guitar that plays like new.