Introduction
Welcome to this comprehensive guide on how to install the Video Doorbell V5. This popular smart home device offers advanced security features, allowing you to see and communicate with whoever is at your front door, whether you are home or away. By following the step-by-step instructions in this guide, you will have your Video Doorbell V5 up and running in no time.
The installation process may seem daunting at first, but rest assured, it is quite straightforward. We will walk you through each stage, providing clear instructions and helpful tips along the way. Before you know it, you’ll be enjoying the convenience and peace of mind that the Video Doorbell V5 brings to your home.
But before we dive into the installation process, it’s important to make sure you have everything you need and that you meet the prerequisites. This will ensure a smooth installation experience and help you avoid any unnecessary delays or complications.
Prerequisites
Before starting the installation of the Video Doorbell V5, there are a few prerequisites to consider. Ensuring that you have the following items and meet the requirements will help make the installation process seamless:
- A Video Doorbell V5: Make sure you have purchased a Video Doorbell V5 from a reputable retailer or online store. Having the product on hand is essential for the installation process.
- A Wi-Fi Network: The Video Doorbell V5 requires a stable internet connection to function properly. Ensure that you have an active Wi-Fi network in your home before proceeding with the installation.
- A Smartphone or Tablet: To set up and control the Video Doorbell V5, you will need a smartphone or tablet with the compatible operating system. Check the product specifications and make sure your device meets the requirements.
- Power Tools: Depending on your specific installation needs, you may require certain power tools such as a drill and screwdriver. Having these tools readily available will make the installation process easier.
- Electrical Wiring Knowledge: Although the installation process is relatively straightforward, having a basic understanding of electrical wiring is useful. If you feel uncertain, it’s always recommended to consult a professional electrician.
By ensuring that you have all the prerequisites in place, you can proceed with the installation without any hindrances. With these requirements met, you’re ready to unbox the Video Doorbell V5 and start the installation process.
Step 1: Unboxing the Video Doorbell
Before we begin the installation process, the first step is to unbox the Video Doorbell V5. Carefully remove the product from its packaging, making sure not to damage any components. Inside the box, you should find the following items:
- The Video Doorbell V5 device
- Mounting screws and anchors
- A mounting bracket
- A doorbell cover
- A doorbell baseplate
- Wire connectors and nuts
- A power adapter
- Instruction manual and setup guide
Take a moment to familiarize yourself with each of these components. Read through the instruction manual and setup guide to gain a basic understanding of the installation process. This will help you navigate the subsequent steps more efficiently.
Inspect the Video Doorbell V5 for any visible damage or defects. If you notice any issues, contact the retailer or manufacturer for assistance. It’s important to ensure that all components are in optimal condition before proceeding with the installation.
Once you have inspected the Video Doorbell V5 and become familiar with the components, you’re ready to move on to the next step: choosing the installation location.
Step 2: Choosing the Installation Location
Choosing the right location for installing your Video Doorbell V5 is crucial for its optimal functionality. Here are some important factors to consider when selecting the installation spot:
- Visibility: The Video Doorbell V5 should be installed in a location that provides a clear view of your front door. Ensure that there are no obstructions like trees or bushes that may hinder the camera’s line of sight.
- Height: Mount the doorbell at a height that allows for easy access and interaction. It should be within a comfortable range for both adults and children.
- Wi-Fi Signal Strength: Check the Wi-Fi signal strength in the area where you plan to install the doorbell. A strong signal is essential for reliable video and audio transmission.
- Power Source: Depending on the installation method you choose (battery-powered or hardwired), consider the proximity to a power source or existing doorbell wiring. If opting for battery power, ensure easy access for battery replacement.
- Weatherproofing: The Video Doorbell V5 is designed to withstand various weather conditions. However, choosing a location protected from direct sunlight and extreme elements will help extend its lifespan.
- Safety: Take security and safety into account when choosing the installation location. Avoid mounting the doorbell where it can be easily tampered with or stolen.
Once you have considered these factors, identify the most suitable location that meets all the requirements. Mark the spot and move on to the next step, where we will prepare the tools and materials needed for the installation.
Step 3: Preparing the Tools and Materials
Before you begin the installation of the Video Doorbell V5, it’s important to gather all the necessary tools and materials. By having everything prepared in advance, you can make the installation process smoother and more efficient. Here is a list of the tools and materials you will need:
- Screwdriver: Depending on the mounting method and doorbell baseplate, you may need a Phillips or flathead screwdriver.
- Drill: If you are opting for a hardwired installation, you will need a drill to create holes for the wiring and anchor screws.
- Drill Bits: Ensure you have the appropriate drill bits for the size of the anchor screws and wiring holes.
- Level: A level is useful for ensuring that the doorbell is installed straight and level.
- Wire Strippers: If you are connecting the doorbell to existing wiring, wire strippers will be necessary to properly prepare the wires.
- Wire Connectors: Wire connectors, such as wire nuts or electrical tape, are needed to securely connect the doorbell wiring.
- Anchors and Screws: Depending on the mounting surface, you may need anchors and screws to secure the doorbell baseplate.
- A Power Drill: If the mounting surface requires anchors, a power drill will be necessary to drive them into place.
- A Smartphone or Tablet: Prepare your smartphone or tablet, as you will need it to download the necessary app and connect the Video Doorbell V5 to your Wi-Fi network.
Once you have gathered all the required tools and materials from the list above, you’re ready to proceed to the next step: mounting the doorbell baseplate.
Step 4: Mounting the Doorbell Baseplate
Now that you have gathered the necessary tools and materials, it’s time to mount the doorbell baseplate. The baseplate serves as the foundation for the Video Doorbell V5 and provides a secure mounting surface. Follow these steps to properly install the baseplate:
- Positioning the Baseplate: Hold the baseplate against the chosen installation location. Ensure that it is aligned with the desired orientation and the mounting holes match up with the surface.
- Marking the Hole Locations: Use a pencil or marker to mark the locations for the anchor holes. Make sure the marks are clearly visible and accurately aligned with the baseplate’s mounting holes.
- Drilling Pilot Holes: If using anchors, drill pilot holes at the marked locations. The size of the pilot holes should match the size of the anchors being used. Remember to choose a drill bit smaller than the anchors to ensure a snug fit.
- Securing the Baseplate: Insert the anchors into the pilot holes. Then, align the mounting holes on the baseplate with the anchors. Secure the baseplate to the surface by driving screws through the mounting holes and into the anchors. Tighten the screws firmly, but be cautious not to overtighten and damage the baseplate or mounting surface.
Once you have successfully mounted the doorbell baseplate, give it a gentle tug to ensure it is securely attached. Check for any wobbling or looseness. If needed, tighten the screws further to achieve a stable installation.
At this stage, the baseplate should be firmly in place, ready to support the Video Doorbell V5. In the next step, we will move on to wiring the doorbell for power and functionality.
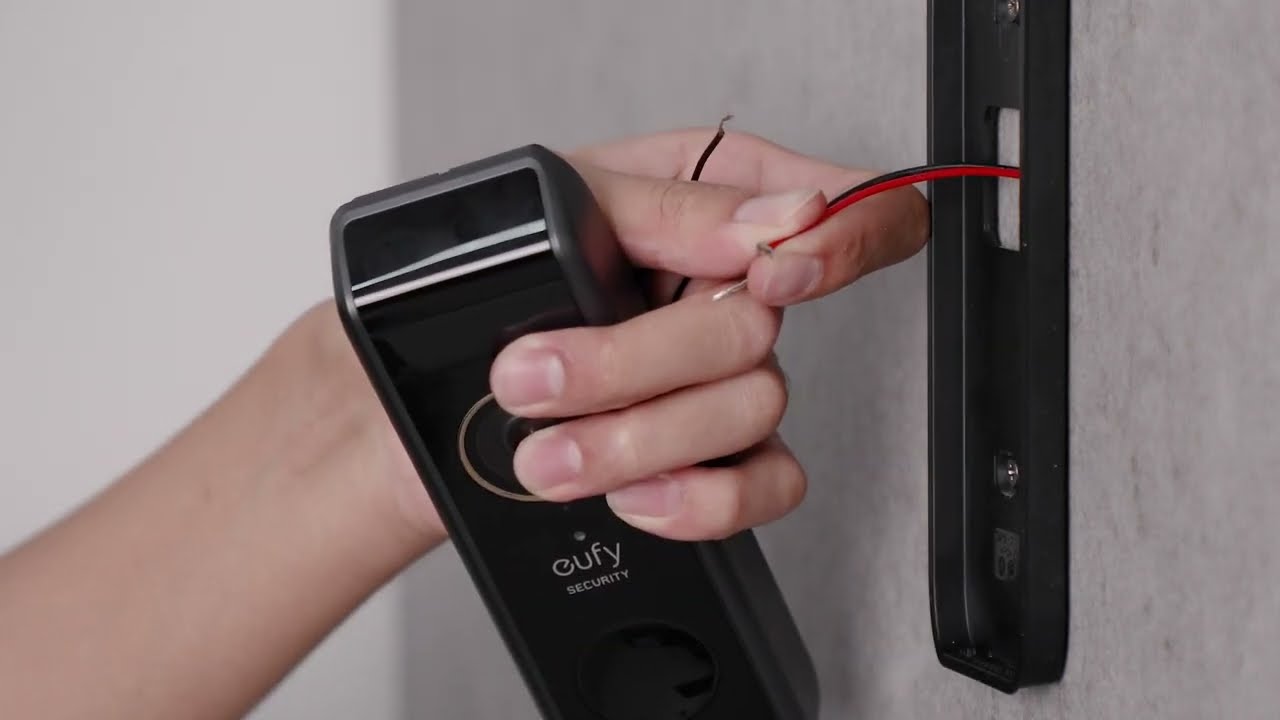
Step 5: Wiring the Doorbell
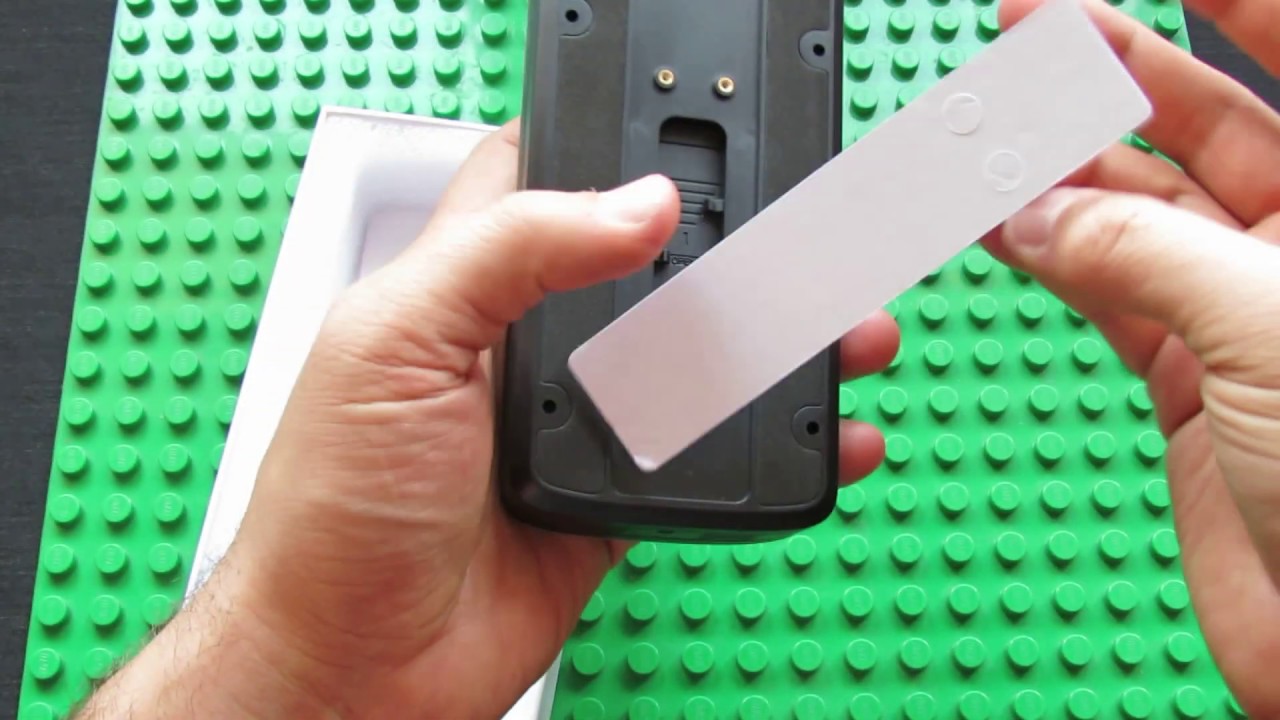
With the doorbell baseplate securely mounted, it’s time to wire the Video Doorbell V5 for power and functionality. The wiring process may vary depending on the type of installation you choose: battery-powered or hardwired. Follow these general steps for wiring the doorbell:
- Battery-powered Installation: If you opt for a battery-powered installation, skip this step as there is no need for wiring. Proceed to Step 6 to attach the doorbell cover.
- Hardwired Installation: If you choose a hardwired installation, follow these steps:
- Locate Existing Doorbell Wiring: If you have existing doorbell wiring, identify the transformer and doorbell wiring at the chime or transformer location. Ensure the power to the wiring is turned off at the breaker panel.
- Prepare the Wires: Strip the insulation from the ends of the doorbell wires, exposing a small section of copper wire.
- Connect the Wires: Connect the wires from the Video Doorbell V5 to the existing doorbell wires. Match the appropriate colors: red to red (+) and white to white (-) or follow the manufacturer’s instructions for your specific wiring configuration.
- Secure the Connection: Use wire connectors, such as wire nuts or electrical tape, to securely connect the corresponding wires. Make sure the connection is tight and insulated to prevent any electrical shorts.
- Tuck and Conceal the Wiring: Once the wires are securely connected, tuck them neatly into the wall or wiring cavity. Use cable clips or adhesive tape to keep the wiring organized and concealed.
Note: If you are unsure about any part of the wiring process, it’s recommended to consult a professional electrician to ensure a safe and proper installation.
After completing the wiring, proceed to the next step: attaching the doorbell cover.
Step 6: Attaching the Doorbell Cover
Now that the Video Doorbell V5 is properly wired and ready for use, it’s time to attach the doorbell cover. The cover not only adds aesthetic appeal but also protects the internal components from dust, moisture, and other environmental factors. Follow these steps to securely attach the doorbell cover:
- Positioning the Doorbell Cover: Hold the doorbell cover against the baseplate, aligning the screw holes on the cover with the corresponding holes on the baseplate.
- Inserting and Tightening the Screws: Insert the provided screws through the screw holes on the cover and into the baseplate. Use a screwdriver to tighten the screws snugly, but avoid over-tightening, as it may cause damage to the components.
- Checking for Proper Fit and Alignment: Ensure that the doorbell cover is securely attached and aligned with the baseplate. Gently press on the cover to ensure it is seated properly and level.
Congratulations! You have successfully attached the doorbell cover, giving your Video Doorbell V5 a polished and finished look. The next step involves connecting the doorbell to your Wi-Fi network for remote access and functionality. Let’s move on to that step.
Step 7: Connecting the Video Doorbell to Wi-Fi
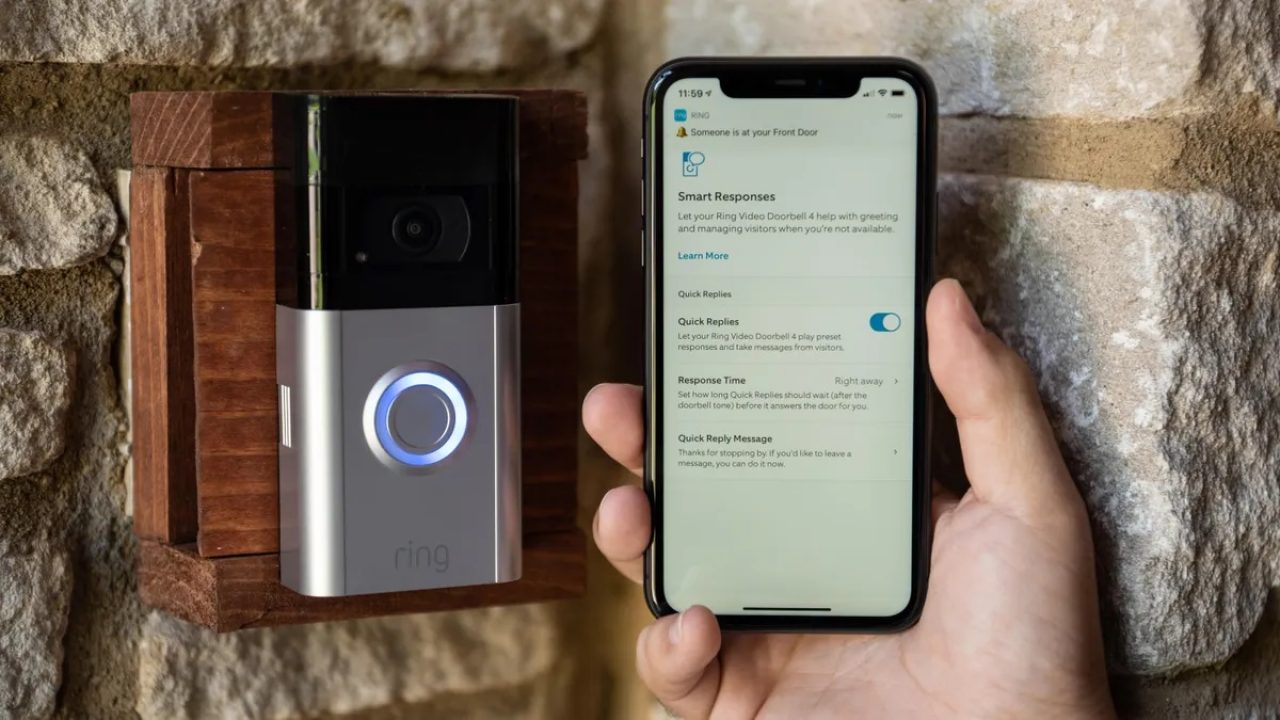
To fully leverage the features and capabilities of your Video Doorbell V5, it needs to be connected to your home Wi-Fi network. This allows you to remotely access the doorbell’s live feed, receive notifications, and interact with visitors from anywhere through your smartphone or tablet. Follow these steps to connect the Video Doorbell V5 to Wi-Fi:
- Download the App: Visit the app store on your smartphone or tablet and search for the official app associated with your Video Doorbell V5. Download and install the app onto your device.
- Create an Account: Launch the app and create a new account if prompted. Follow the on-screen instructions to set up your account and provide the necessary information.
- Add a New Device: Once you have created an account, follow the in-app instructions to add a new device. Select the Video Doorbell V5 from the available options.
- Enter Wi-Fi Details: Follow the on-screen prompts to enter your home Wi-Fi network credentials, such as the network name (SSID) and password. Ensure that you enter the correct information to establish a successful connection.
- Complete the Setup: Once you have provided the necessary Wi-Fi details, follow the instructions to complete the setup process. The app will guide you through any additional steps, such as firmware updates or device configurations.
- Test the Connection: After the setup is complete, test the connection by accessing the live feed or performing a test notification. Make sure you receive notifications on your device when someone presses the doorbell or when motion is detected.
Note: It’s important to ensure that your smartphone or tablet is connected to the same Wi-Fi network that you are connecting the Video Doorbell V5 to during the setup process. This helps establish a stable and reliable connection between the devices.
Once you have successfully connected the Video Doorbell V5 to your Wi-Fi network, you’re one step closer to enjoying the convenience and security it provides. The next and final step involves testing the video doorbells functionality. Let’s move on to that step.
Step 8: Testing the Video Doorbell
Now that the Video Doorbell V5 is installed and connected to your Wi-Fi network, it’s time to test its functionality to ensure everything is working as expected. Follow these steps to perform a basic test of the video doorbell:
- Triggering a Test Notification: Use the designated button or feature on the app to simulate a test notification. This will trigger the doorbell to send a notification to your device, allowing you to test the audio and visual components.
- Checking the Live Feed: Open the app and access the live feed of the Video Doorbell V5. Ensure that the video is clear, the audio is audible, and any motion or activity in front of the doorbell is displayed in real-time.
- Testing Two-Way Audio: Use the app to initiate a two-way audio conversation with the Video Doorbell V5. Speak into your device and verify that your voice is transmitted clearly through the doorbell’s speaker. Additionally, ensure that you can hear any audio from the doorbell on your device.
- Testing Motion Detection: Walk in front of the Video Doorbell V5 and confirm that the motion detection feature is working correctly. You should receive a notification on your device and the doorbell should record the detected motion.
- Adjusting Settings: Explore the app settings to customize preferences such as motion sensitivity, notification settings, and recording options. Make any necessary adjustments and test the changes to ensure they are being applied correctly.
By performing these tests, you can ensure that the Video Doorbell V5 is functioning properly and meeting your expectations. If you encounter any issues or have concerns about its performance, consult the instruction manual, troubleshooting guide, or reach out to the manufacturer for further assistance.
Congratulations! You have successfully installed and tested the Video Doorbell V5. Enjoy the convenience and security it brings to your home, providing peace of mind and allowing you to stay connected with your front door at all times.
Conclusion
Congratulations on successfully installing and setting up your Video Doorbell V5! By following the step-by-step instructions in this guide, you have learned how to unbox the doorbell, choose the installation location, prepare the necessary tools and materials, mount the doorbell baseplate, wire the doorbell, attach the doorbell cover, connect the doorbell to Wi-Fi, and test its functionality.
The Video Doorbell V5 offers advanced security features, allowing you to see and communicate with visitors at your front door from anywhere in the world. Its easy installation process and user-friendly app make it an ideal addition to any home, providing convenience and peace of mind.
Remember to follow safety precautions during the installation, such as turning off the power when working with electrical wiring, and consulting a professional if you are unsure about any electrical aspects. Always refer to the manufacturer’s instructions and guides specific to your device for the most accurate and up-to-date information.
Now that your Video Doorbell V5 is up and running, you can enjoy the benefits of enhanced security and convenience. Monitor your front door, receive notifications, and communicate with visitors all from the palm of your hand.
Thank you for choosing the Video Doorbell V5 and for taking the time to follow this installation guide. We hope this guide has been helpful and that your Video Doorbell V5 enhances your home security and brings you peace of mind for years to come.