The Importance of a Quiet Acoustic Guitar
Having a quiet acoustic guitar is essential for any guitarist, whether you’re playing at home, in a studio, or performing on stage. No one wants their beautiful melodies and intricate chords to be overshadowed by unwanted rattling, buzzing, or squeaking sounds. A quiet guitar allows you to fully express yourself and create a rich, clear, and professional sound.
When your acoustic guitar produces excessive noise, it can be distracting not only to you as the player but also to your audience. The clattering of loose components, like tuners or the pickguard, or the rattle of the bridge can disrupt the overall tone and diminish the quality of your performance. In recordings or live performances, these noises can be amplified and become even more noticeable.
Furthermore, a noisy guitar can also affect the playability and comfort of your instrument. Fret buzz, caused by low action or improper setup, can lead to frustrating string buzzes when playing certain chords or notes. This can hinder your ability to perform smoothly and can even cause pain or discomfort in your fingers.
Additionally, an acoustic guitar that isn’t properly maintained and cleaned can lead to deteriorating sound quality over time. Dust, dirt, and grime can accumulate in the crevices of your guitar, affecting the vibrations of the strings and ultimately altering the tone. Regular maintenance and cleaning can help preserve the clarity and resonance of your guitar’s sound.
To summarize, a quiet acoustic guitar is crucial for both the quality of your performance and the enjoyment of your playing experience. A well-maintained and properly adjusted instrument allows you to fully showcase your talent and express your musical creativity without any unnecessary distractions or hindrances.
Identifying the Noisy Parts of Your Guitar
Before you can effectively quiet your acoustic guitar, it’s important to identify the specific parts that are causing the noise. By pinpointing the source of the issue, you can tackle each problem area directly. Here are some common culprits:
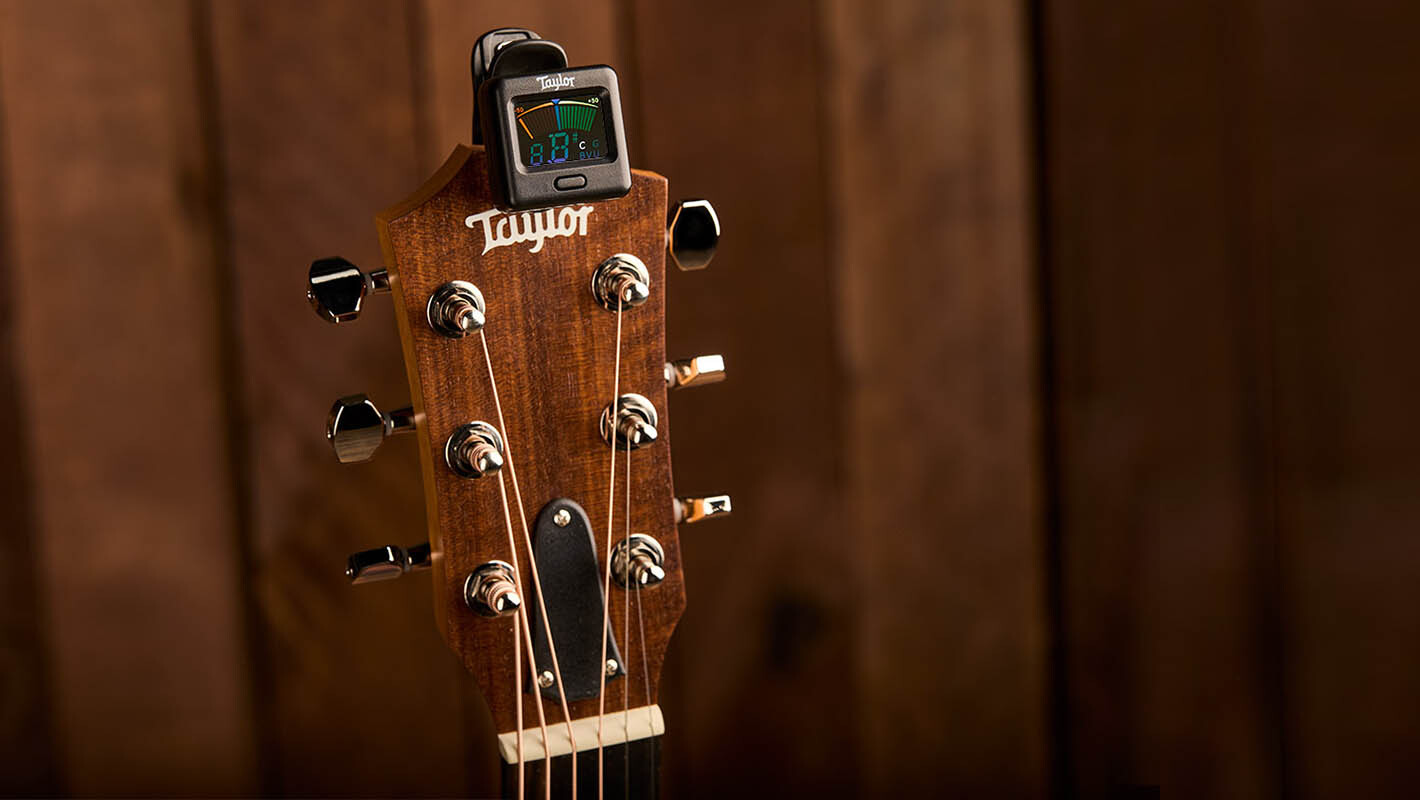
- Tuners: Loose or worn-out tuning pegs can be a major source of rattling or clicking noises. Pay close attention to each tuner as you strum and listen for any unwanted sounds.
- Fret buzz: Buzzing or vibrating sounds when playing certain chords or notes can indicate a problem with the frets. Run your fingers along the length of the neck and press down on each fret to check for any irregularities.
- Bridge: A loose or poorly fitted bridge can cause rattling or buzzing sounds, especially when playing certain strings or notes. Inspect the bridge area and make sure it’s securely attached to the body of the guitar.
- Nut and saddle: These small components play a crucial role in maintaining proper string height and spacing. If they are poorly fitted or worn out, they can cause buzzing or clicking noises. Check for any visible wear or damage on these parts.
- Pickguard: The pickguard, if loose or not properly fitted, can produce unwanted noises as the guitar vibrates. Gently tap on the pickguard while playing to see if it’s causing any rattling sounds.
- Internal components: Loose internal braces or other components within the body of the guitar can contribute to unusual noises. If you suspect this to be the issue, it’s best to consult a professional guitar technician.
Take your time to carefully assess each of these areas and listen for any noise or irregularities as you play. By narrowing down the source of the problem, you’ll be better equipped to tackle the necessary repairs and improvements to make your acoustic guitar quiet and enjoyable to play.
Cleaning and Maintaining Your Guitar
Regular cleaning and maintenance of your acoustic guitar is essential for keeping it in optimal condition and minimizing unwanted noise. Here are some key steps to consider:
- Wipe down the exterior: Use a soft, lint-free cloth to remove any dust, fingerprints, or smudges from the body, neck, and headstock of your guitar. Pay attention to hard-to-reach areas and ensure that the surface is clean and free from any debris.
- Clean the fretboard: Use a specialized fretboard cleaner that is safe for the type of wood used in your guitar. Gently apply the cleaner with a cloth or a small brush, ensuring that you remove any dirt or grime that may have accumulated on the fretboard.
- Polish the body: Apply a suitable guitar polish or wax to the body of your acoustic guitar to maintain its shine and protect the finish. Follow the instructions on the product and use a clean cloth to evenly distribute the polish, taking care not to apply too much pressure.
- Check the action and neck relief: The action refers to the height of the strings above the fretboard, and neck relief refers to the slight curvature of the neck. If the action is too low or high, or if the neck relief is off, it can cause buzzing or fretting issues. Consult a professional guitar technician to adjust these settings if needed.
- Inspect and tighten hardware: Regularly check all the hardware components, such as tuners, knobs, and strap buttons, to make sure they are securely fastened. Use a screwdriver or the appropriate tool to tighten any loose screws.
Remember to use guitar-specific cleaning products and avoid using household cleaners or abrasive materials that can damage the delicate finish or components of your guitar.
By following a regular cleaning routine and performing basic maintenance tasks, you can ensure that your acoustic guitar remains in top condition. A clean and well-maintained instrument will not only sound better but also contribute to a quieter playing experience.
Adjusting the Truss Rod
The truss rod is a crucial component of your acoustic guitar that helps maintain the proper amount of relief in the neck. Adjusting the truss rod can greatly impact the playability and sound of your guitar, and it can also help alleviate buzzing or fretting issues. Here are the steps to adjust the truss rod:
- Understand the truss rod’s purpose: The truss rod is responsible for countering the tension of the strings and ensuring that the neck remains straight. Too much relief can cause a high action and buzzing, while too little relief can result in low action and fret buzzing. Adjusting the truss rod helps find the optimal balance.
- Locate the truss rod adjustment point: On most acoustic guitars, the truss rod adjustment point is located at the headstock, underneath a small cover. It may either be a hex key or a screw that you can turn to make adjustments.
- Assess the neck relief: To determine if your guitar’s neck needs adjustment, hold down the low E string at the first and last frets simultaneously, using your other hand. Check the gap between the 7th fret and the bottom of the string. A slight curvature or gap is normal.
- Make adjustments: Use the appropriate tool to turn the truss rod adjustment point, typically clockwise to increase relief or counter-clockwise to reduce relief. Make small quarter-turn adjustments at a time, allowing the neck to settle before evaluating the relief again.
- Reassess and repeat if necessary: After making the adjustment, recheck the neck relief by fretting the low E string again. Continue adjusting the truss rod until you achieve the desired amount of relief, taking care not to over tighten or force the adjustment.
It’s essential to work with caution when adjusting the truss rod, as improper adjustments can lead to damage to your guitar. If you’re uncertain or uncomfortable with the process, it’s advisable to seek assistance from a professional guitar technician.
By properly adjusting the truss rod, you can ensure that your acoustic guitar’s neck relief is optimized, resulting in improved playability and reduced buzzing or fretting issues.
Replacing Noisy Tuners
Tuners, also known as tuning pegs or machine heads, play a crucial role in keeping your acoustic guitar in tune. However, over time, tuners can become worn out or damaged, causing them to produce unwanted noise. If you’ve identified your tuners as the source of the noise, it may be time to replace them. Here’s how:
- Identify the type of tuners: Acoustic guitars can have different types of tuners, such as open-gear or sealed-gear tuners. Take note of the style and size of your existing tuners to ensure that you purchase replacements that are compatible.
- Obtain the replacement tuners: Visit a local music store or an online retailer specializing in guitar parts to find the appropriate replacements. Make sure to match the specifications of your old tuners to the new ones, including the hole diameter and the mounting screw position.
- Prepare your guitar: Begin by detuning your strings to relieve tension on the headstock. Use a suitable screwdriver to remove the screws holding the existing tuners in place. Carefully lift and remove each tuner, being mindful not to damage the headstock or the surrounding finish.
- Install the new tuners: Line up the holes of the new tuners with the corresponding holes on the headstock. Gently insert the tuner shafts into the holes, ensuring that they are aligned properly. Secure them in place using the provided screws, being careful not to over-tighten them.
- Tune and test: Once the new tuners are installed, restring your guitar and tune it to pitch. Test the new tuners by adjusting the tuning and playing different chords and notes. Make sure that they turn smoothly and securely without producing any unwanted noise.
If you’re not confident in replacing the tuners yourself, it’s advisable to have a guitar technician or luthier perform the replacement for you. They have the expertise and tools necessary to ensure a proper installation.
By replacing your noisy tuners, you can eliminate the rattling or clicking sounds and restore the smooth functionality of your acoustic guitar, resulting in a quieter and more enjoyable playing experience.
Dealing with Fret Buzz
Fret buzz is a common issue that guitarists encounter, causing unwanted buzzing or rattling sounds when playing certain chords or notes. It can be frustrating and can negatively impact the overall sound and playability of your acoustic guitar. Here are some steps to help you deal with fret buzz:
- Check the action: The action of your guitar refers to the distance between the strings and the fretboard. If the action is too low, the strings may come into contact with the frets, causing buzzing. You may need to adjust the action by raising the saddle or adjusting the truss rod (as discussed in previous sections).
- Identify the problem frets: Play each fret on each string and listen for any buzzing sounds. Pay close attention to specific frets and determine which ones are causing the buzz. This will help you target the issue more accurately.
- Inspect the problem area: Once you’ve identified the frets causing the buzz, visually inspect them. Look for any signs of wear, unevenness, or high spots on the frets. Issues like worn-out frets or uneven frets can contribute to buzzing.
- Adjust the truss rod: If the overall neck relief is not balanced, it can contribute to fret buzz. Make small adjustments to the truss rod (as explained earlier) to find the right amount of relief and minimize buzzing.
- Address specific fret issues: If certain frets are causing the buzzing, you may need to level, crown, or replace them. This delicate task is best left to a professional guitar technician who will have the necessary tools and expertise to ensure a proper fret job.
- Check for loose components: Loose frets, loose nut, or loose saddle can also result in fret buzz. Gently tap on each component and listen for any rattling or movement. Tighten or repair any loose components accordingly.
It’s important to note that a small amount of buzz may still be present, especially on lower action guitars. However, if the buzzing is severe or affects your playing significantly, seeking professional help is recommended to address the issue properly.
By taking these steps and addressing the specific causes of fret buzz, you can improve the overall playability and reduce unwanted buzzing sounds on your acoustic guitar, allowing you to enjoy a quieter and more satisfying playing experience.
Eliminating Bridge Rattle
Bridge rattle is a common issue that can cause unwanted buzzing or rattling sounds coming from the bridge area of your acoustic guitar. These noises can be distracting and affect the overall tone and playability of the instrument. Here are some steps you can take to eliminate bridge rattle:
- Identify the source of the rattle: Before you can effectively eliminate bridge rattle, it’s important to determine its source. Gently tap on different parts of the bridge, such as the saddle, pins, and bridge plate, while playing, to pinpoint where the noise is coming from.
- Inspect the bridge components: Once you’ve identified the specific area or component causing the rattle, visually inspect it for any signs of damage, loose pieces, or improper fit. Pay close attention to the saddle, pins, and bridge plate. Tighten or adjust any loose parts accordingly.
- Check the saddle fit: If the saddle is not securely in place or if there are gaps between the saddle and the bridge, it can cause buzzing sounds. Carefully remove the saddle and inspect both the saddle and the bridge slot. Clean any debris or dust, and ensure that the saddle fits snugly into the bridge.
- Replace worn-out bridge pins: Bridge pins, particularly if they’ve become worn or loose, can contribute to bridge rattle. Consider replacing old or damaged bridge pins with new ones that fit properly and provide a secure connection between the strings and the bridge plate.
- Address loose bridge plate: If the bridge plate itself is loose or coming unglued, it may require professional repair. A qualified guitar technician or luthier can stabilize or reglue the bridge plate to eliminate any rattling or buzzing caused by its movement.
- Consider using a specialized lubricant: Applying a small amount of lubricant, such as graphite or nut sauce, to the contact points between the bridge components can help reduce friction and minimize any potential rattling sounds.
If you’re unsure about making any adjustments or repairs to your guitar, it’s recommended to seek assistance from a professional guitar technician. They have the expertise to diagnose and resolve bridge rattle issues effectively without causing further damage.
By following these steps and addressing the specific causes of bridge rattle, you can enjoy a quieter and more enjoyable playing experience with your acoustic guitar.
Quieting the Nut and Saddle
The nut and saddle are essential components of your acoustic guitar, and ensuring they are properly fitted and maintained can help minimize unwanted noise and buzzing. Here’s how you can quiet the nut and saddle:
- Inspect the nut and saddle: Visually examine both the nut and saddle for any signs of wear, damage, or improper fit. Look for cracks, unevenness, or spaces between the components and their respective slots. If you notice any issues, consider replacing them with new ones that fit properly.
- Check the string slots: The string slots in the nut and saddle should be clean, smooth, and properly cut to accommodate the strings. Use a small file or a nut file to gently widen or deepen the slots if necessary. Be careful not to remove too much material, as this can affect the action and intonation of the guitar.
- Lubricate the nut slots: Applying a small amount of graphite or a specialized lubricant, like nut sauce, to the nut slots can help reduce friction between the strings and the material. This can minimize binding and unnecessary noise caused by string movement within the slots.
- Ensure proper string height: The action or string height at the nut and saddle affects the playability and tone of your guitar. If the action is too low at either end, it can cause buzzing. Adjusting the nut and saddle height may require professional expertise to avoid compromising the intonation or structural integrity of the guitar.
- Consider a bone or synthetic material: Upgrading to a bone or synthetic nut and saddle can improve the overall performance and tone of your guitar. These materials are known for transferring vibrations more efficiently and reducing any potential rattling sounds caused by inferior materials.
- Seek professional help if needed: If you’re unsure about making adjustments to the nut and saddle, or if you encounter any issues that require specialized attention, it’s best to consult a professional guitar technician. They have the experience and tools to ensure proper fitting and can diagnose and address any related problems.
Ensuring that the nut and saddle of your acoustic guitar are in good condition and properly adjusted is crucial for reducing unwanted noise and buzzing. By following these steps and seeking professional help if needed, you can enjoy a quieter and more pleasant playing experience.
Silencing the Pickguard
The pickguard on an acoustic guitar serves the practical purpose of protecting the finish from scratches and pick marks. However, it can sometimes produce unwanted noise or rattling sounds that can detract from your playing experience. Here are some steps to help you silence the pickguard:
- Identify the source of the noise: Gently tap on the pickguard while playing to determine if it’s causing any rattling or buzzing sounds. Pay attention to specific areas and try to pinpoint where the noise is coming from.
- Tighten the pickguard: In some cases, the pickguard may be slightly loose, causing it to vibrate and create unwanted noise. Use a screwdriver or the appropriate tool to tighten any screws or fasteners holding the pickguard in place. Be careful not to overtighten and risk damaging the guitar’s finish.
- Inspect for gaps: Examine the edges of the pickguard where it meets the body of the guitar. Look for any gaps or spaces that may be causing the pickguard to vibrate against the body. If you find any, consider using a specialized adhesive or double-sided tape to secure the edges and eliminate the rattling.
- Apply dampening material: To further reduce any buzzing or rattling sounds, consider placing small pieces of soft material, such as foam or felt, between the pickguard and the body of the guitar. This can help dampen vibrations and minimize unwanted noise.
- Consult a professional: If the pickguard noise persists or if you’re uncertain about making any adjustments yourself, it’s best to consult a professional guitar technician. They can assess the situation and provide expert guidance or make any necessary modifications to the pickguard.
It’s worth noting that completely eliminating all pickguard noise may not always be possible, especially if the noise is caused by the materials or construction of the pickguard itself. However, by following these steps, you can significantly reduce pickguard-related rattling or buzzing sounds and improve the overall playability of your acoustic guitar.
Using Dampening Materials
When it comes to minimizing unwanted noise and vibrations on your acoustic guitar, using dampening materials can be an effective solution. These materials help absorb and dampen vibrations, reducing the chances of rattling or buzzing sounds. Here are some ways you can use dampening materials on your guitar:
- Inside the body: Adding dampening materials inside the body of the guitar can help reduce resonance and minimize unwanted vibrations. Materials such as foam or felt can be strategically placed in areas where vibrations are most likely to occur, such as near the soundhole or on the back panel.
- Pickup cavities: If your guitar is equipped with a pickup system, vibrations from the strings and body can sometimes cause unwanted noise. Placing foam or other dampening materials inside the pickup cavities can help minimize these vibrations and reduce any resulting buzzing sounds.
- Between components: Vibrations may occur between various components of the guitar, resulting in annoying noises. Placing small pieces of foam or felt between the bridge and bridge pins, or between the nut and the strings, can help reduce these vibrations and eliminate buzzing sounds.
- Under the pickguard: If you’ve already tried silencing the pickguard but are still experiencing noise issues, consider applying a thin layer of dampening material underneath it. This can further absorb vibrations and reduce any rattling or buzzing sounds caused by the pickguard’s contact with the guitar’s body.
- On the back of the headstock: Vibrations can sometimes travel up the neck and cause noise at the headstock. Applying a small piece of foam or felt on the back of the headstock, near the tuner mechanisms, can help minimize these vibrations and reduce any resulting buzzing or rattling sounds.
Experiment with different types of dampening materials and placements to find the most effective solution for your specific guitar and noise issues. It’s important to keep in mind that while dampening materials can greatly reduce unwanted noise, they should be used sparingly and not impede the natural resonance and tone of the instrument.
If you’re unsure about the best approach or placement for dampening materials, consulting with a professional guitar technician can provide valuable guidance and ensure that you optimize your guitar’s sound while reducing any unwanted noise.
Applying Lubrication to Reduce Noise
Lubricating key components of your acoustic guitar can significantly reduce friction and eliminate unwanted noise. By applying lubrication to specific areas, you can ensure smooth movement and minimize any rattling or buzzing sounds. Here are some important areas to consider when applying lubrication:
- Nut slots: Apply a small amount of graphite or specialized nut lubricant to the nut slots. This helps reduce friction between the strings and the nut, allowing the strings to move freely and reducing any binding or buzzing noises at the nut. Be sure to wipe off any excess lubricant to avoid buildup.
- String trees: If your guitar has string trees or string retainers, these can sometimes cause string binding and create unnecessary noise. Apply a drop of lubricant to the contact points between the strings and the string trees to reduce friction and promote smooth string movement.
- Bridge pins: The interaction between the strings and bridge pins can be a source of noise. Apply a small amount of lubricant to the area where the strings contact the bridge pins to reduce friction and eliminate any resulting rattling or buzzing sounds.
- Tuner mechanisms: Lubricating the gears and moving parts of your tuners can prevent them from sticking, which can cause clicking or rattling noises while tuning. Use a small amount of appropriate lubricant, such as machine oil or silicone lubricant, on the tuner mechanisms for smoother operation.
- Saddle and bridge contact points: Apply a small drop of lubricant to the points where the strings make contact with the saddle or bridge. This helps reduce friction and promotes better string vibration, resulting in improved sustain and reduced noise.
When applying lubrication, it’s crucial to use the appropriate type of lubricant for each component and to apply it sparingly. Wipe off any excess lubricant after application to prevent buildup that can affect the tone or collect dirt and debris.
It’s worth noting that lubrication is not a permanent solution, and depending on the usage and conditions, reapplication may be necessary over time. Regular maintenance and inspection are essential to ensure that your guitar continues to perform optimally and quietly.
If you’re unsure about the right lubrication or application technique, it’s advisable to consult a professional guitar technician who can provide guidance and perform the necessary lubrication for your specific guitar model.
Final Thoughts
Keeping your acoustic guitar quiet is crucial for enjoying a seamless and immersive playing experience. Whether you’re practicing at home, recording in a studio, or performing on stage, minimizing unwanted noise and buzzing can make a significant difference in the overall sound quality and playability of your instrument. By following the steps outlined in this guide, you can effectively address various causes of noise and take the necessary measures to quiet your acoustic guitar.
Remember, regular maintenance and care are key to preventing and resolving noise issues. Cleaning your guitar, inspecting and adjusting key components, and addressing any wear or damage promptly will help maintain a consistently quiet and enjoyable playing experience. Additionally, working with a professional guitar technician can provide invaluable expertise and ensure that any repairs or adjustments are executed properly.
Lastly, always remember that the main goal is to strike a balance between achieving a quiet guitar and preserving the natural resonance and tone. Over-dampening or excessively modifying your instrument can hinder its sound quality. Therefore, approach each step with care, and make adjustments as needed while considering the unique characteristics of your specific guitar.
With patience, attention to detail, and the proper techniques, you can achieve a quiet acoustic guitar that allows your musical expression to shine through. Embrace the process of quieting your guitar as an opportunity to deepen your connection with your instrument and enhance your playing experience. Happy playing!