Introduction
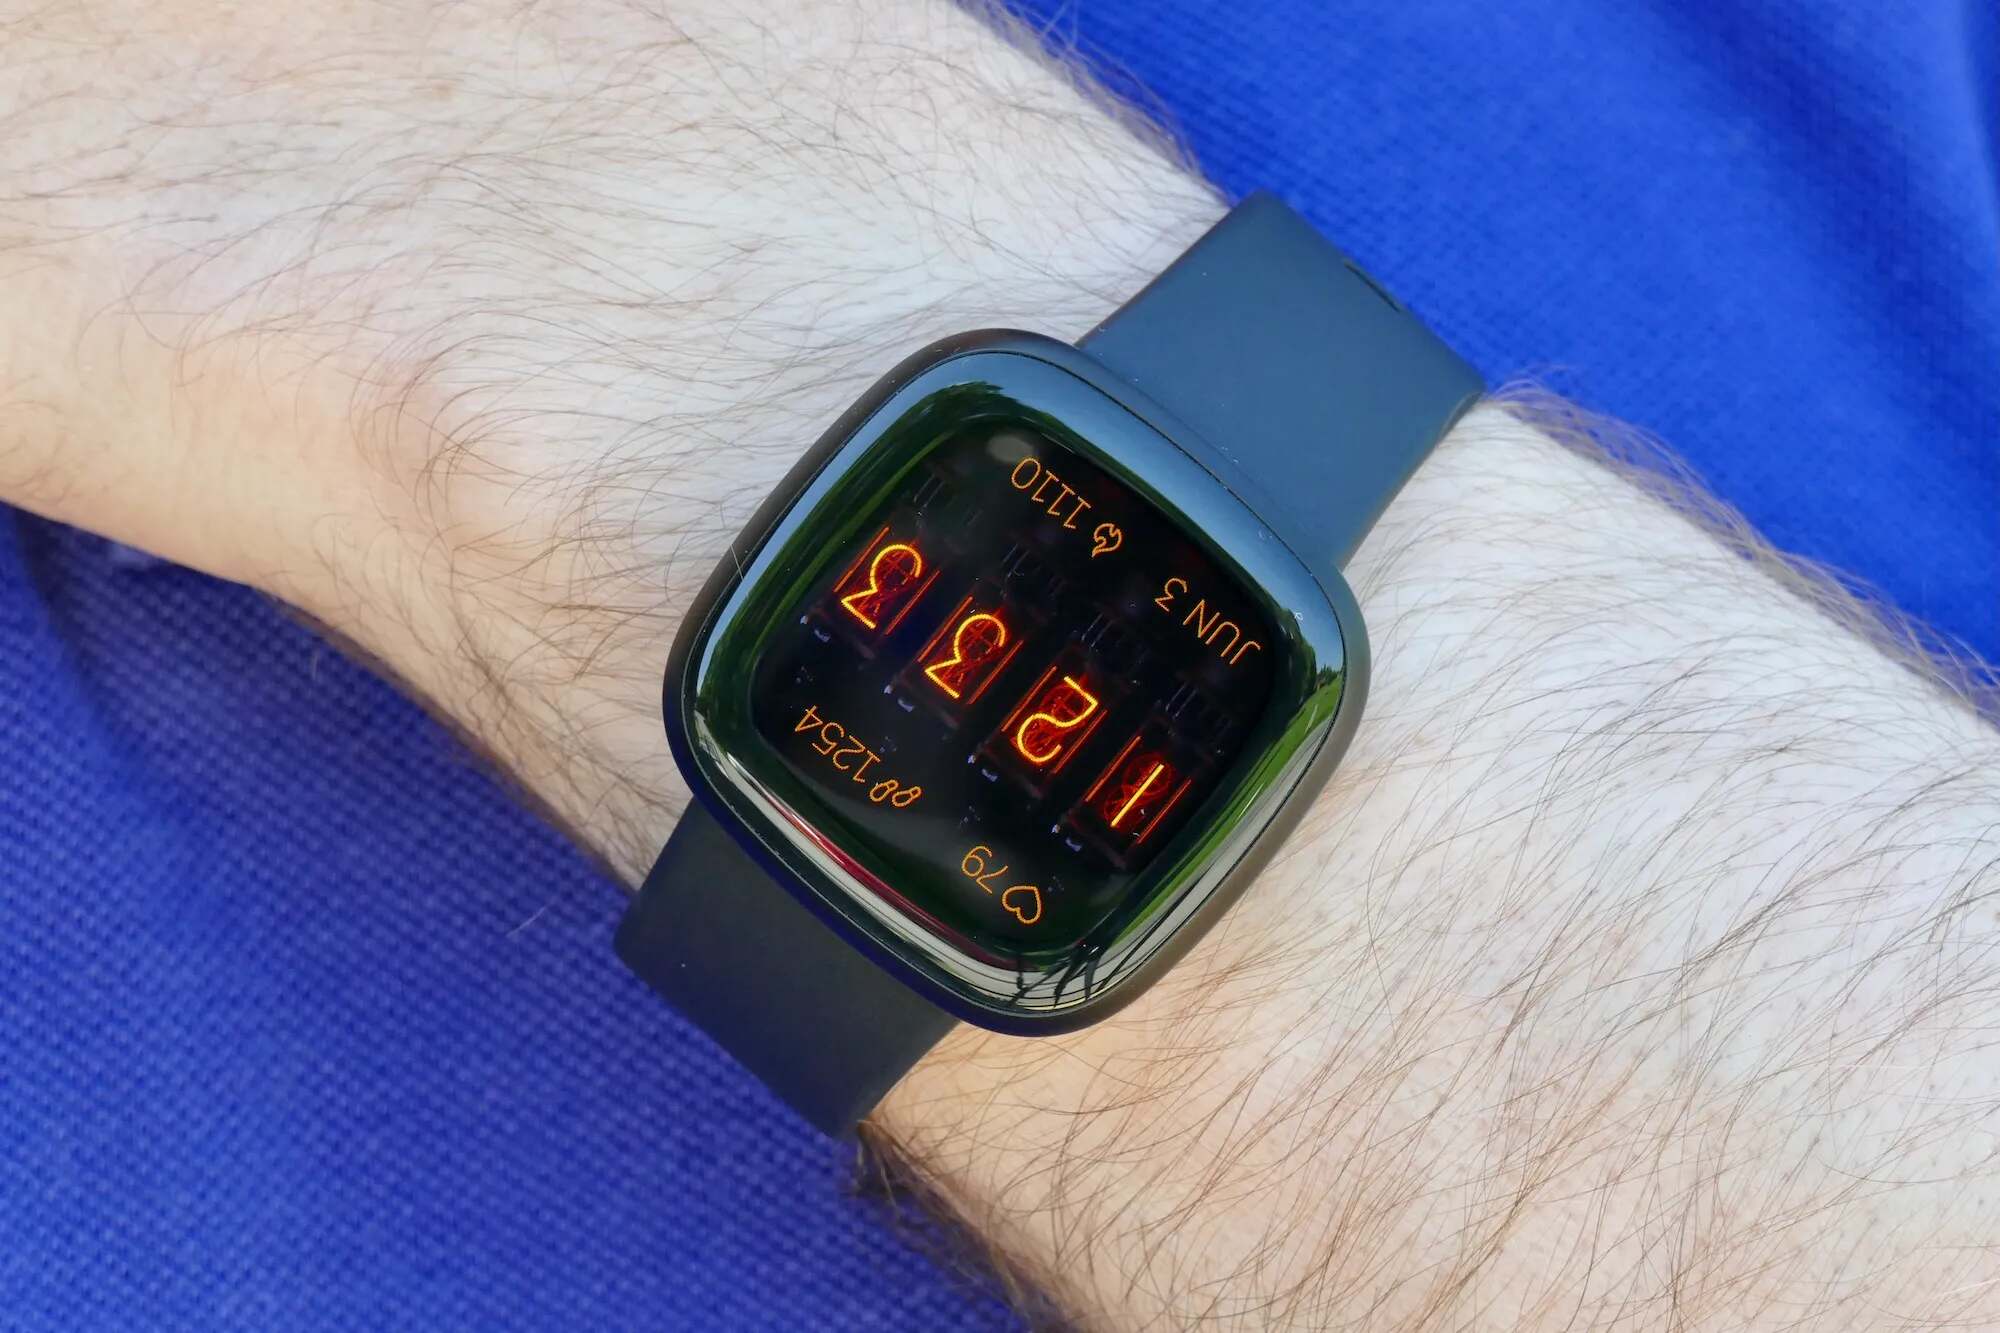
Are you looking to give your Fitbit a fresh new look or replace a worn-out band? Changing the band on your Fitbit is a simple and rewarding way to personalize your wearable device. Whether you want to switch to a different color, upgrade to a more durable material, or simply try out a new style, this step-by-step guide will walk you through the process with ease.
Your Fitbit is more than just a fitness tracker; it's a reflection of your personal style and commitment to a healthy lifestyle. By customizing its band, you can make a fashion statement while staying on top of your fitness goals. With a wide range of band options available, including silicone, leather, metal, and woven materials, you have the flexibility to choose a band that suits your preferences and lifestyle.
In this guide, you'll discover the simple yet empowering process of changing your Fitbit band. Whether you own a Fitbit Charge, Versa, Inspire, or any other model, the basic principles remain the same. By following these steps, you can seamlessly transition from your current band to a new one, ensuring a comfortable and secure fit that will keep up with your active lifestyle.
So, gather your tools, set aside a few minutes, and get ready to give your Fitbit a fresh new look. Let's dive into the step-by-step process of changing your Fitbit band and unleash the full potential of your wearable device.
Step 1: Gather the necessary tools
Before embarking on the journey of changing your Fitbit band, it's essential to gather the necessary tools to ensure a smooth and hassle-free process. Here's what you'll need:
-
New Fitbit Band: Whether you've opted for a sleek silicone band, a stylish leather band, or a durable metal band, make sure you have the new band ready. Ensure that it is compatible with your specific Fitbit model to guarantee a perfect fit.
-
Small Flathead Screwdriver or Pin: Depending on your Fitbit model, you may need a small flathead screwdriver or pin to release the existing band. This tool will help you detach the old band from the tracker, allowing you to seamlessly transition to the new one.
-
Clean Cloth: It's always a good idea to have a clean cloth on hand to wipe down your Fitbit and ensure that it's free from any dirt or residue before attaching the new band. This will help maintain the pristine condition of your device.
-
Comfortable Workspace: Find a well-lit and comfortable workspace where you can spread out your tools and work with ease. A clutter-free environment will make the process more enjoyable and help prevent any accidental misplacement of small components.
-
Patience and Attention to Detail: While not physical tools, patience and attention to detail are essential for this task. Take your time and pay close attention to the steps involved in changing the band to ensure that everything is done correctly.
By gathering these tools, you'll be fully prepared to embark on the journey of transforming the look and feel of your Fitbit. With everything at your fingertips, you can confidently move on to the next step of removing the old band and embracing the exciting possibilities that come with a new Fitbit band.
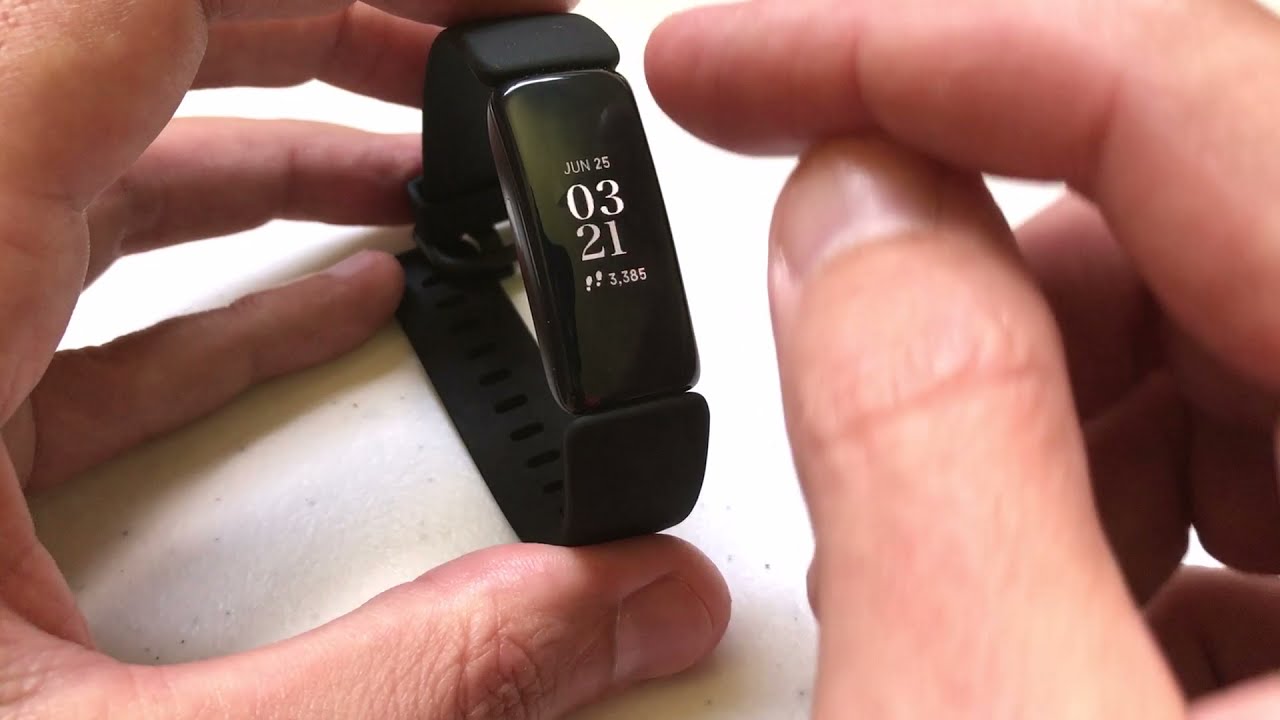
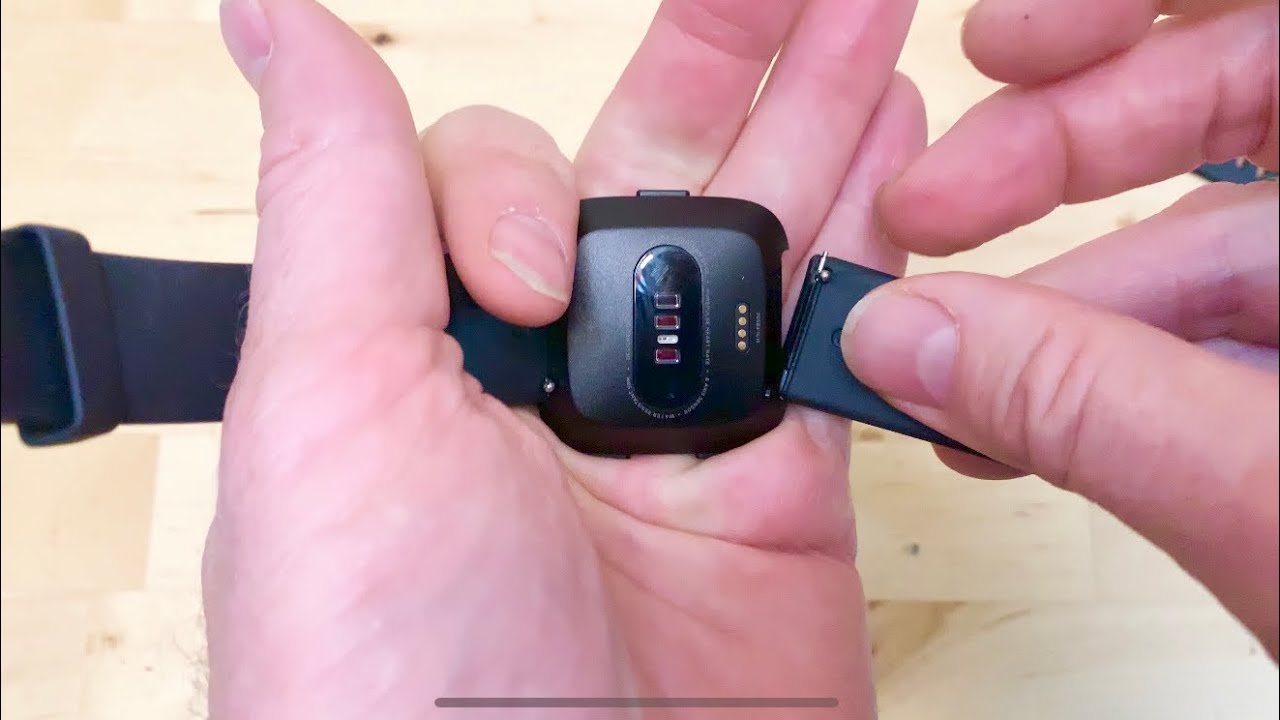
Step 2: Remove the old band
Removing the old band from your Fitbit is the crucial first step in the process of refreshing its appearance and functionality. Depending on the Fitbit model you own, the method for removing the band may vary slightly. Here's a comprehensive guide to help you seamlessly detach the old band from your Fitbit:
-
Locate the Release Button or Pins: Examine your Fitbit to identify the mechanism used to secure the band. Most Fitbit models feature a release button or pins near the connection point between the band and the tracker. These are designed to hold the band securely in place.
-
Use the Flathead Screwdriver or Pin: If your Fitbit band is secured with pins, gently insert the flathead screwdriver or pin into the slot near the pin. Apply slight pressure to release the pin and carefully slide it out. Repeat this process for each pin until the band is completely detached. For models with a release button, simply press the button to release the band.
-
Handle with Care: As you remove the old band, handle it with care to avoid any damage to the tracker or the band itself. Take your time and ensure that the detachment process is smooth and controlled.
-
Clean the Connection Area: Once the old band is removed, take a moment to inspect the connection area on the Fitbit tracker. Use a clean cloth to wipe away any dirt or debris that may have accumulated. This will prepare the tracker for the seamless attachment of the new band.
By carefully following these steps, you can effectively remove the old band from your Fitbit, setting the stage for the exciting transition to a new and personalized band. With the old band safely detached, you're now ready to embark on the next phase of this transformative journey: attaching the new band.
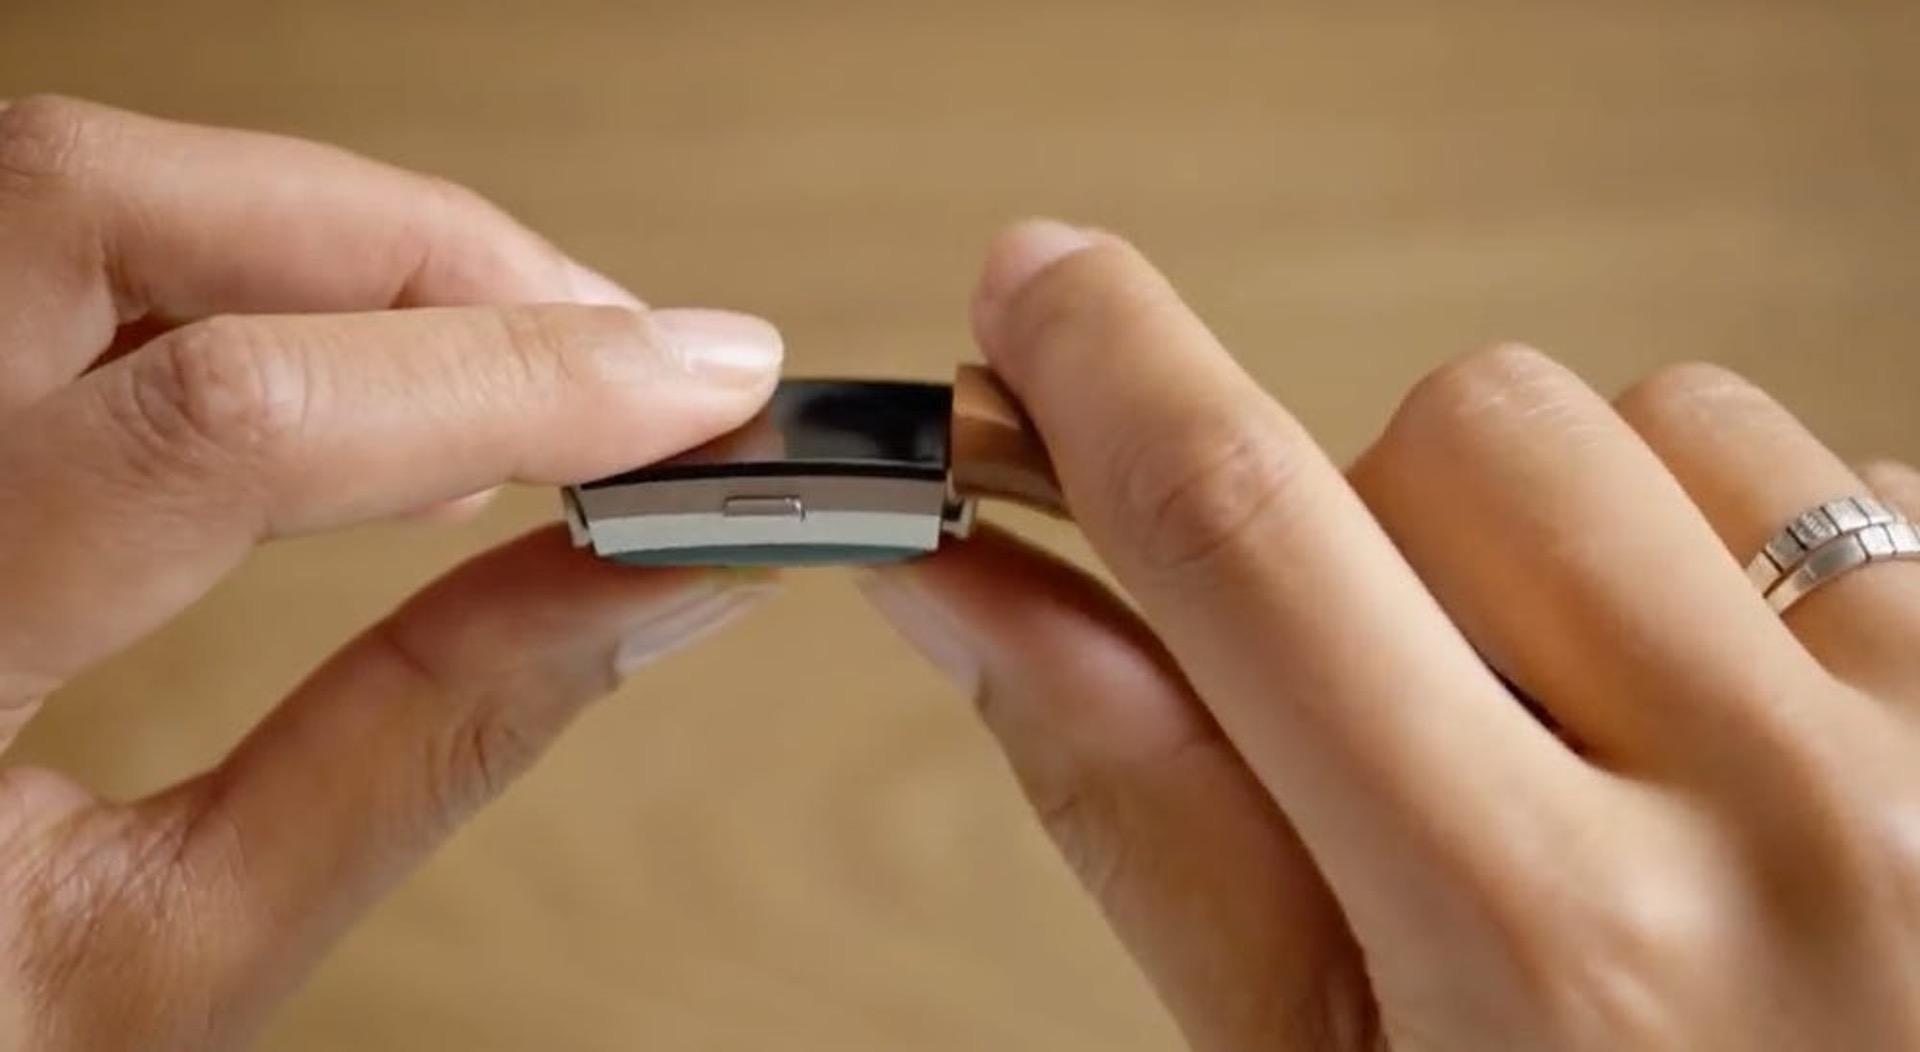
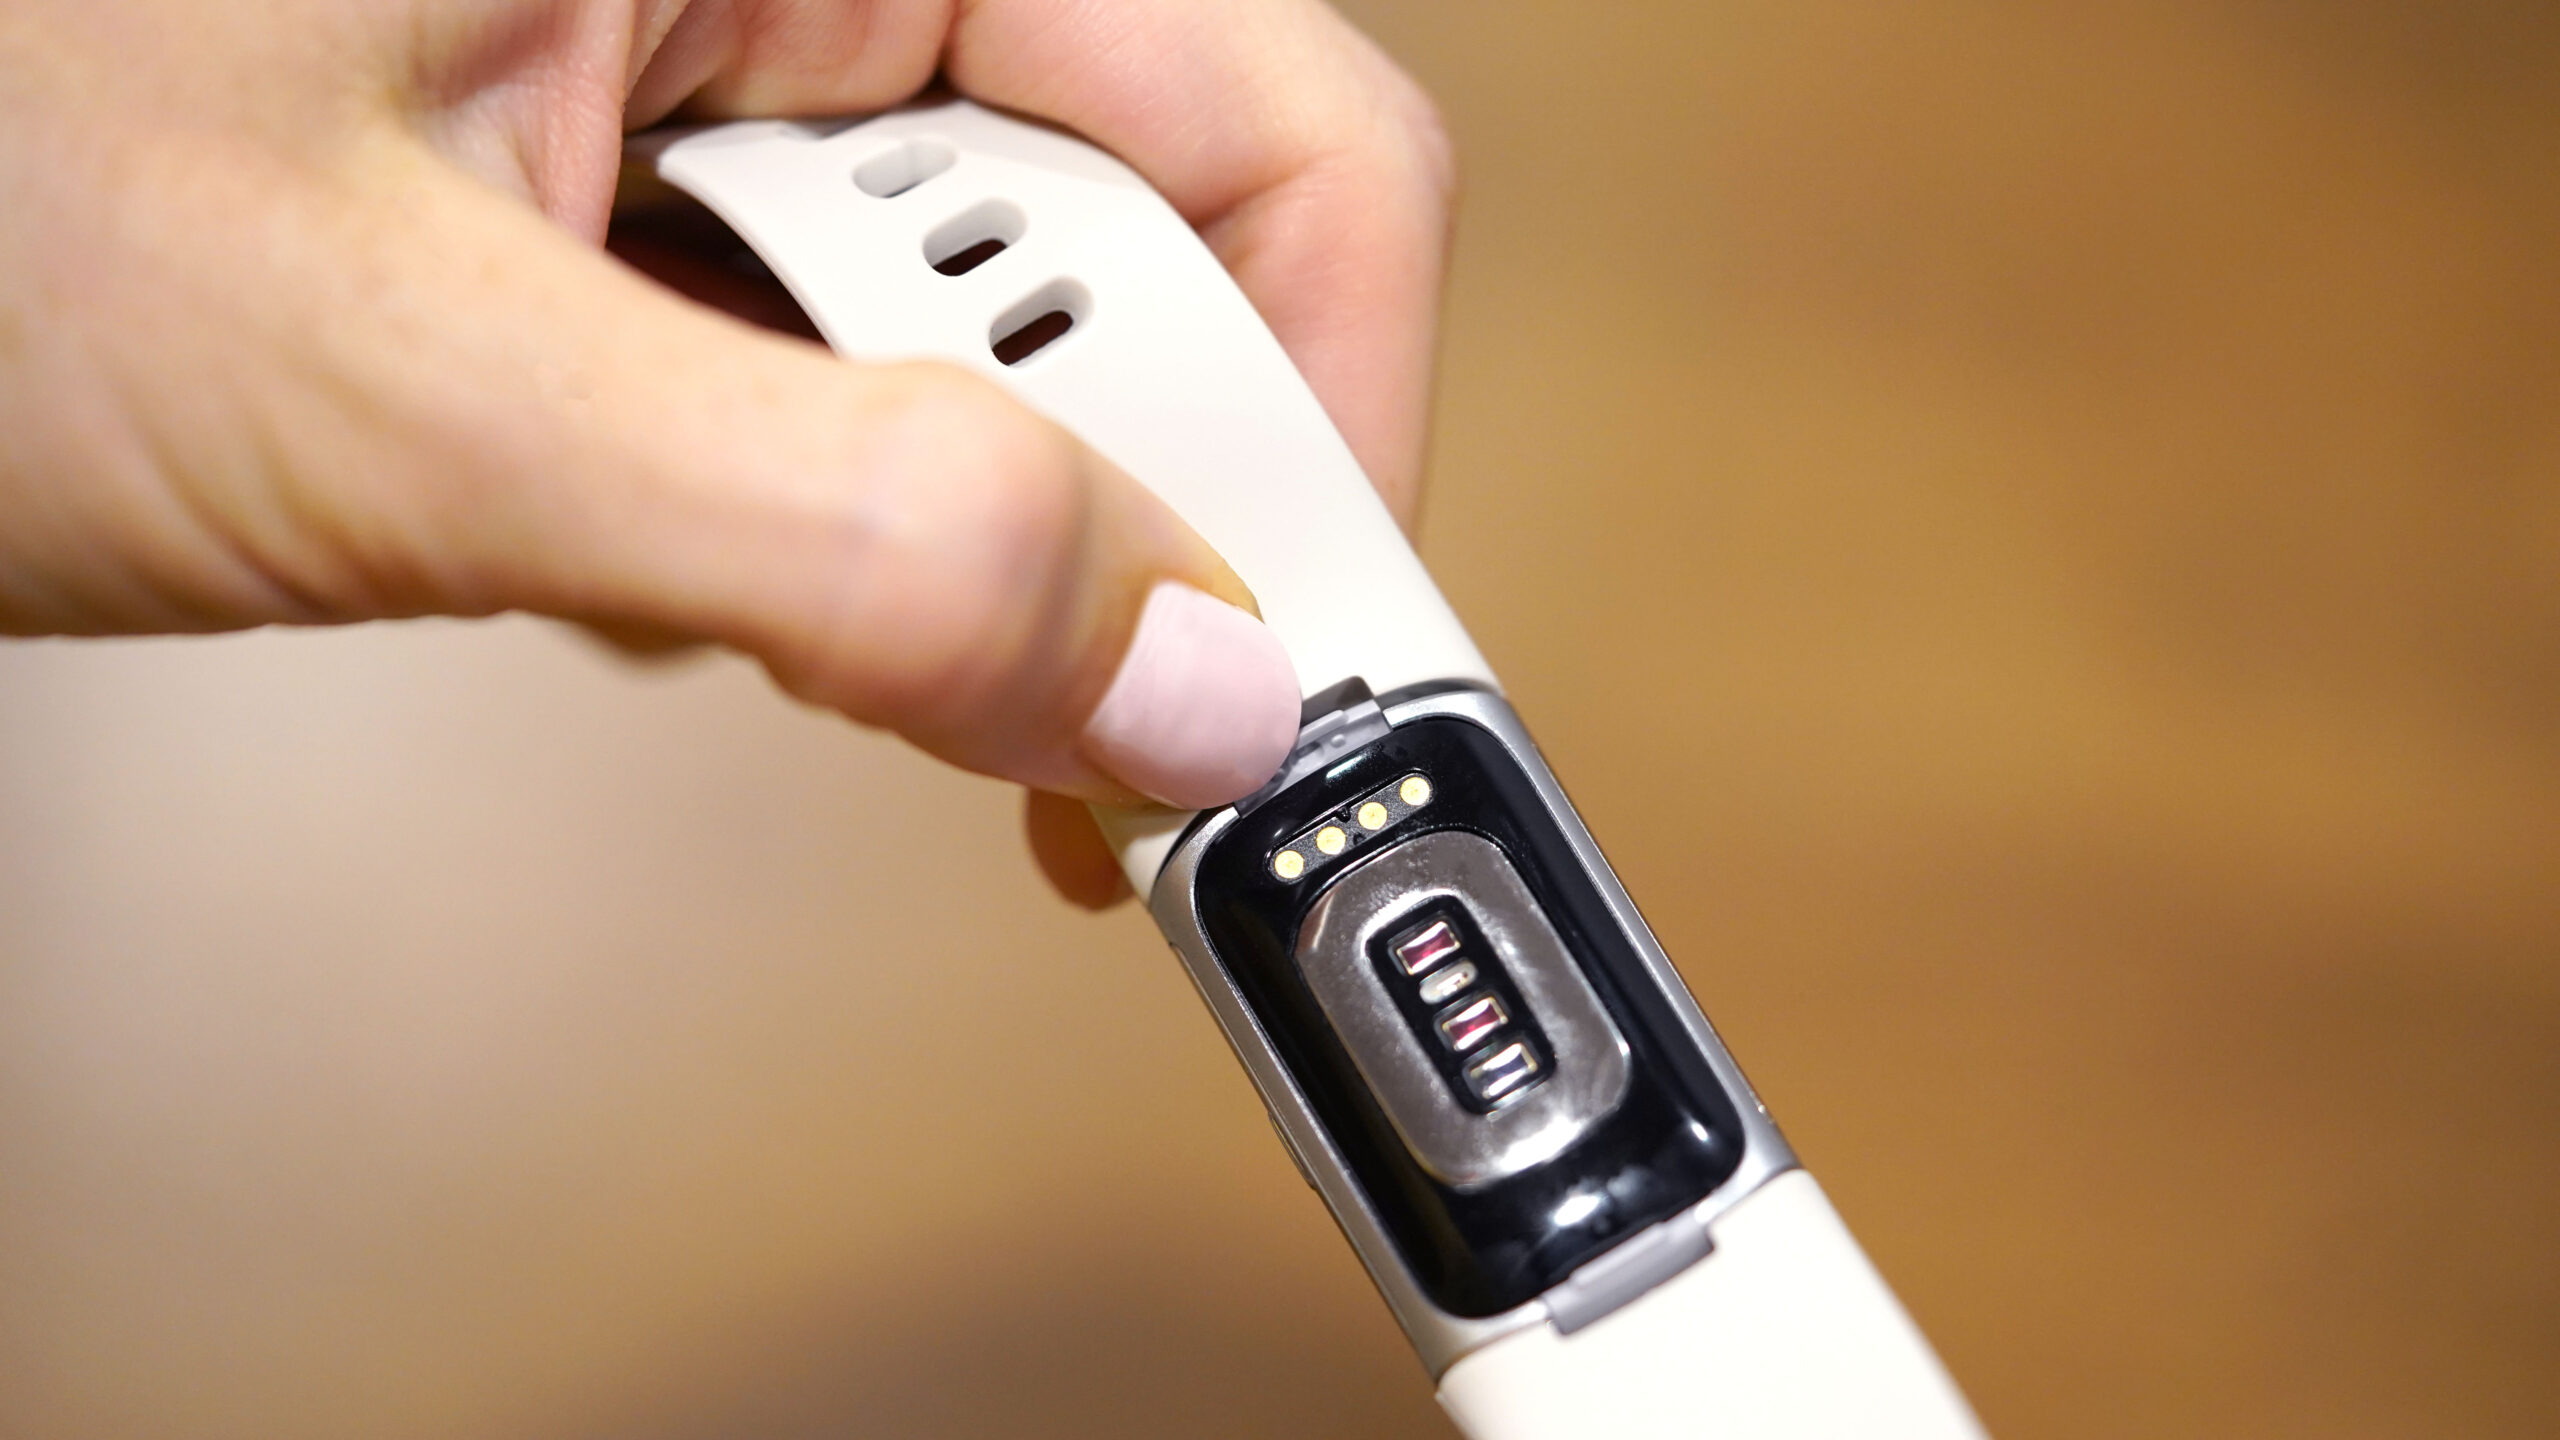
Step 3: Attach the new band
With the old band successfully removed, it's time to embark on the exciting phase of attaching the new band to your Fitbit. This step marks the beginning of a transformative process, allowing you to infuse your personal style and preferences into your wearable device. Here's a detailed guide to seamlessly attach the new band to your Fitbit:
-
Select the Appropriate Attachment Method: Different Fitbit models may employ varying attachment methods for the bands. Some models feature pins, while others utilize a quick-release mechanism. Ensure that the new band you've chosen is compatible with your specific Fitbit model and is equipped with the corresponding attachment mechanism.
-
Align and Secure the New Band: Carefully align the new band with the connection points on your Fitbit tracker. For bands with pins, gently insert the pins into the designated slots, ensuring a snug and secure fit. If your new band features a quick-release mechanism, follow the manufacturer's instructions to seamlessly attach it to the tracker.
-
Apply Gentle Pressure: Once the new band is aligned with the connection points, apply gentle pressure to ensure that it is securely attached to the tracker. Take a moment to inspect the attachment, ensuring that the band sits flush against the tracker and there are no gaps or misalignments.
-
Perform a Secure Fit Check: After attaching the new band, perform a secure fit check by gently tugging on the band to ensure that it is firmly in place. A properly attached band should not shift or detach easily. This step is crucial in ensuring that the new band is securely fastened to your Fitbit.
-
Double-Check the Alignment: Take a moment to double-check the alignment and positioning of the new band. Ensure that it sits comfortably on your wrist and does not obstruct the tracker's display or impede its functionality. Making any necessary adjustments at this stage will guarantee a comfortable and functional fit.
By following these detailed steps, you can seamlessly attach the new band to your Fitbit, ushering in a fresh and personalized look for your wearable device. With the new band securely in place, you're now ready to move on to the next phase of the process: adjusting the fit to ensure optimal comfort and functionality.
Step 4: Adjust the fit
After successfully attaching the new band to your Fitbit, the next crucial step is to ensure that it fits comfortably and securely on your wrist. Proper fit adjustment is essential for maximizing both the comfort and functionality of your wearable device. Whether you're gearing up for an intense workout or simply navigating through your daily activities, a well-fitted band will ensure that your Fitbit stays in place and provides accurate data. Here's a detailed guide on how to adjust the fit of your new Fitbit band:
-
Evaluate the Fit: Begin by wearing your Fitbit with the new band and assessing how it feels on your wrist. Pay attention to any tightness or looseness, and take note of any discomfort or irritation caused by the band. The goal is to achieve a snug fit without compromising your comfort.
-
Adjust the Sizing: If your new band features an adjustable clasp or buckle, experiment with different sizing options to find the perfect fit. Gradually tighten or loosen the band until it sits comfortably on your wrist. Ensure that it's not too tight, as this may restrict blood circulation, nor too loose, as it may affect the accuracy of the heart rate monitor and activity tracking.
-
Positioning: Take a moment to adjust the positioning of the band on your wrist. The tracker should sit on the top side of your wrist, aligning with the back of your hand. This positioning not only ensures accurate heart rate monitoring but also enhances the overall comfort and stability of the Fitbit during physical activities.
-
Comfort Test: Perform various movements, such as bending your wrist and flexing your hand, to gauge the comfort and flexibility of the band. It should move with your wrist without causing any discomfort or irritation. Additionally, ensure that the band does not dig into your skin during movements.
-
Secure Fastening: Double-check the fastening mechanism of the band to ensure that it remains securely in place. If your band features a clasp or buckle, listen for a distinct click to confirm that it's properly fastened. For bands with alternative closure systems, ensure that they provide a secure and reliable fit throughout the day.
By meticulously adjusting the fit of your new Fitbit band, you can tailor it to your wrist's unique size and shape, ensuring optimal comfort and functionality. A well-fitted band not only enhances the overall experience of wearing your Fitbit but also contributes to the accuracy of the data it captures, empowering you to make the most of your fitness journey. With the fit perfectly adjusted, you're now ready to put your new band to the test and embrace the exciting possibilities it brings to your Fitbit experience.
Step 5: Test the new band
With the new band securely attached and the fit finely adjusted, it's time to put your Fitbit to the test and ensure that the new band seamlessly integrates into your daily routine. Testing the new band is a crucial step that allows you to validate its comfort, durability, and functionality, ensuring that it meets your expectations and complements your active lifestyle.
Activity Compatibility
Begin by engaging in various activities that are typical of your daily routine. Whether it's a brisk walk, a cardio workout, or even household chores, pay attention to how the new band feels during movement. It should remain securely in place without causing any discomfort or irritation, allowing you to move freely and confidently.
Sweat and Moisture Resistance
If your activities involve perspiration or exposure to moisture, such as during workouts or outdoor adventures, assess how the new band handles these conditions. A high-quality band should resist moisture and sweat, maintaining its integrity and comfort even during intense physical activities. Take note of any signs of moisture absorption or discomfort, as these may indicate a need for adjustments or alternative band materials.
Skin Sensitivity
For individuals with sensitive skin, it's essential to monitor how the new band interacts with the skin throughout the day. Look for any signs of irritation or redness, particularly after prolonged wear. A hypoallergenic band material is designed to minimize skin reactions, providing a comfortable and irritation-free experience. Assess the band's compatibility with your skin type to ensure long-term wearability.
Tracker Functionality
Throughout the testing phase, pay close attention to the functionality of the Fitbit tracker itself. Ensure that the new band does not obstruct the tracker's sensors or impede its performance. Verify that features such as heart rate monitoring, step tracking, and notifications operate seamlessly with the new band in place. Any interference or limitations in functionality may require further adjustments to the band's positioning or fit.
Long-Term Wear
As you go about your daily activities, consider the long-term wearability of the new band. Evaluate its comfort and flexibility during extended wear, taking note of any pressure points or discomfort that may develop over time. A well-designed band should maintain its comfort and functionality throughout the day, seamlessly integrating into your lifestyle without causing any distractions.
By thoroughly testing the new band in various scenarios and activities, you can gain valuable insights into its performance and suitability for your needs. This process allows you to make informed decisions about the long-term use of the band, ensuring that it aligns with your preferences and enhances your overall Fitbit experience.
With the new band successfully tested and proven to meet your expectations, you can confidently embrace its role as an essential component of your personalized Fitbit setup. Whether you're tracking your fitness progress, staying connected, or making a fashion statement, the new band is now ready to accompany you on your journey to a healthier and more active lifestyle.
Conclusion
In conclusion, the process of changing your Fitbit band is not only a practical endeavor but also a means of expressing your individuality and personal style. By following the step-by-step guide outlined in this article, you've embarked on a journey of transformation, elevating the appearance and functionality of your Fitbit to align with your unique preferences and lifestyle.
As you reflect on the journey of changing your Fitbit band, it's important to recognize the significance of personalization in the realm of wearable technology. Your Fitbit is more than just a fitness tracker; it's a reflection of your commitment to well-being and your fashion sensibilities. The ability to customize its band empowers you to make a statement while staying true to your fitness goals.
The meticulous process of gathering the necessary tools, removing the old band, attaching the new band, adjusting the fit, and testing the band has allowed you to engage with your Fitbit on a deeper level. It's not merely a device strapped to your wrist; it's a companion that evolves with you, adapting to your activities and enhancing your overall experience.
As you embrace the new band, take a moment to appreciate the seamless fusion of technology and style. Your Fitbit now embodies your personality, whether through a vibrant silicone band that energizes your workouts, a sophisticated leather band that seamlessly transitions from the gym to the office, or a resilient metal band that exudes durability and elegance. Your choices have transformed your Fitbit into a true reflection of your identity.
The journey doesn't end with the successful attachment of the new band; it continues as you integrate this personalized accessory into your daily routine. Your Fitbit is now ready to accompany you on your fitness endeavors, providing accurate data and insights while exuding the style that resonates with you.
In the world of wearables, the ability to personalize and adapt is paramount. Your Fitbit band serves as a testament to your commitment to both fashion and fitness, seamlessly merging technology with personal expression. As you continue on your journey with your newly adorned Fitbit, may it inspire you to embrace your individuality and pursue your wellness goals with confidence and style.
So, as you embark on the next phase of your fitness journey, take pride in your personalized Fitbit, knowing that it's not just a device—it's a reflection of your unique identity and unwavering dedication to a healthier and more active lifestyle.