Introduction
Changing the band on your Fitbit Versa 2 can breathe new life into your wearable device, allowing you to express your personal style and keep up with the latest fashion trends. Whether you're looking to replace a worn-out band or simply want to switch up the look of your device, this step-by-step guide will walk you through the process with ease. With just a few simple tools and a spare band of your choice, you can transform the appearance of your Fitbit Versa 2 in no time.
The band of your Fitbit Versa 2 serves as more than just a functional component; it's a fashion statement that reflects your individuality. By customizing the band, you can seamlessly integrate your wearable device into your personal style, whether you're hitting the gym, attending a formal event, or simply going about your daily routine. This simple yet impactful change can breathe new life into your Fitbit Versa 2, making it feel like a brand-new accessory.
In the following steps, you'll learn how to remove the old band from your Fitbit Versa 2 and securely attach a new band. Additionally, you'll discover how to adjust the fit to ensure optimal comfort and functionality. By the end of this guide, you'll have a newfound confidence in transforming the band on your Fitbit Versa 2, allowing you to effortlessly adapt your wearable device to suit any occasion.
Embark on this band transformation journey with excitement, knowing that you have the power to elevate the appearance of your Fitbit Versa 2 and make it uniquely yours. Let's dive into the step-by-step process of changing the band, and watch as your Fitbit Versa 2 undergoes a stunning metamorphosis.
Step 1: Gather the necessary tools
Before embarking on the band transformation journey for your Fitbit Versa 2, it's essential to gather the necessary tools to ensure a seamless and successful process. Here's a comprehensive list of tools you'll need:
-
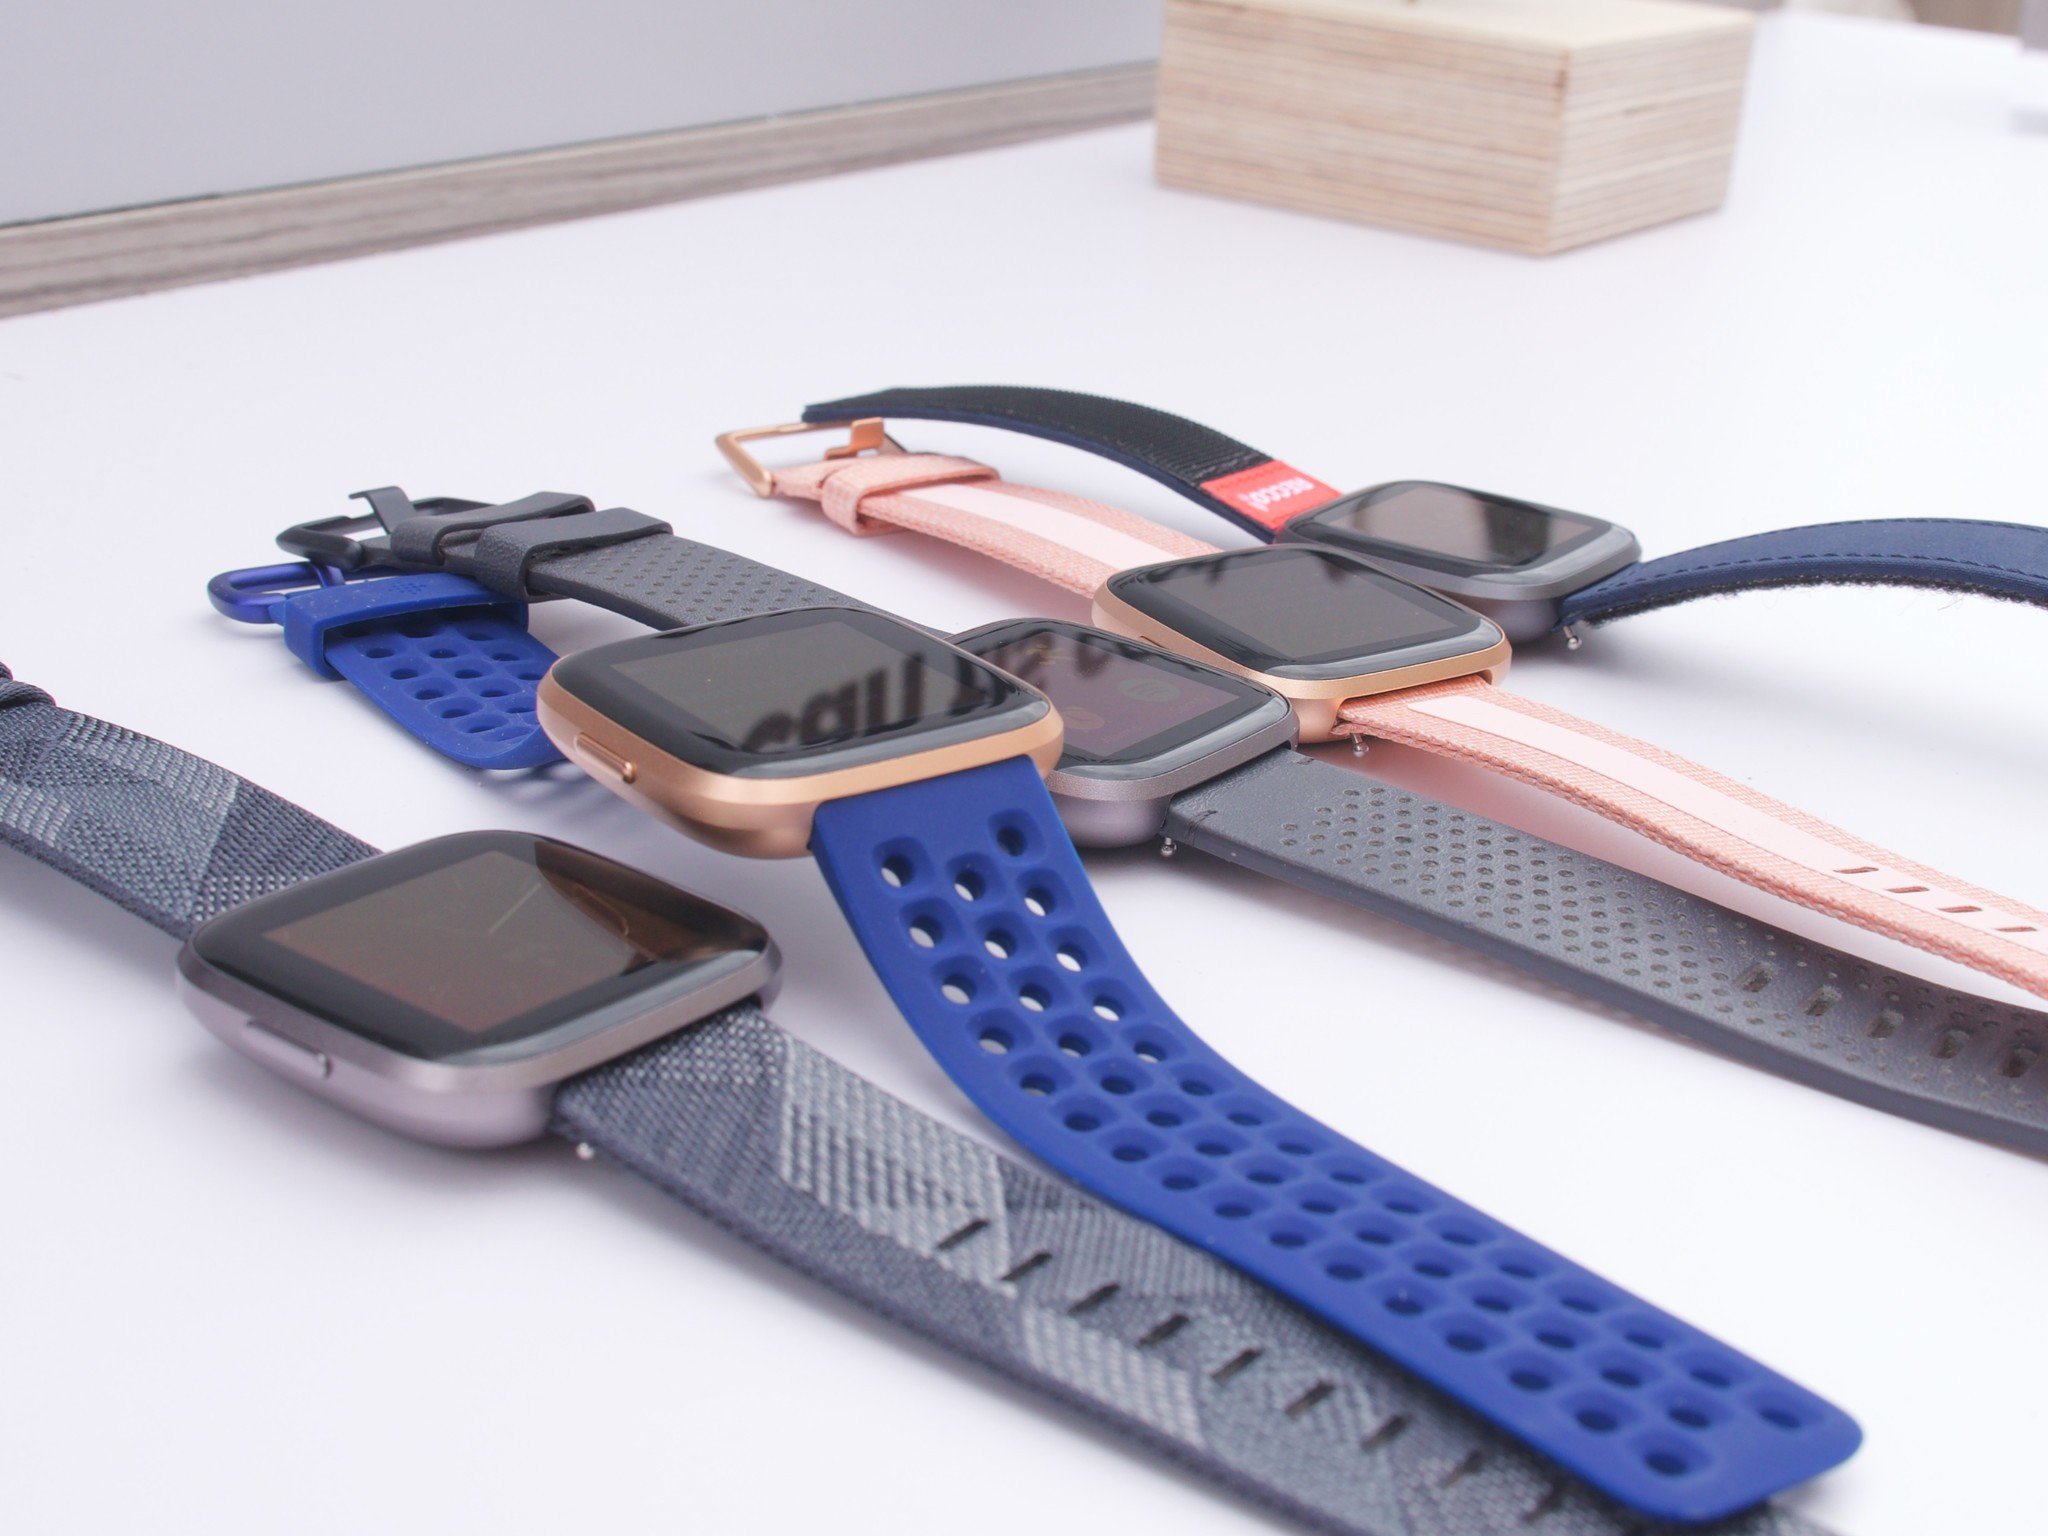
Replacement Band: Select a replacement band that aligns with your style preferences and functional needs. Whether you opt for a sleek metal band for a sophisticated look or a durable silicone band for active pursuits, choose a band that resonates with your lifestyle.
-
Spring Bar Tool: This specialized tool is essential for safely removing and attaching the band to your Fitbit Versa 2. The spring bar tool facilitates the release of the spring bars, which secure the band to the device, without causing damage.
-
Cleaning Cloth: A soft, lint-free cleaning cloth will help you maintain the cleanliness and integrity of your Fitbit Versa 2 during the band replacement process. This ensures that your device remains free from dust, fingerprints, and smudges as you work with it.
-
Flat Surface: Prepare a clean, flat surface to serve as your workspace. This will provide a stable area for you to comfortably work on your Fitbit Versa 2 and prevent any small components from rolling away or getting lost during the band transformation process.
-
Good Lighting: Adequate lighting is crucial for clearly seeing the intricate details of your Fitbit Versa 2 and the band replacement mechanism. Ensure that your workspace is well-lit to facilitate a smooth and precise band transformation experience.
By gathering these essential tools, you'll set the stage for a successful band transformation process for your Fitbit Versa 2. With the right tools at your disposal, you'll be ready to move on to the next step and seamlessly remove the old band from your device, paving the way for the exciting addition of a new and personalized band.
Step 2: Remove the old band
Removing the old band from your Fitbit Versa 2 is a crucial step in the band transformation process. This step requires precision and attention to detail to ensure that the old band is safely detached without causing any damage to the device. Follow these detailed instructions to seamlessly remove the old band and prepare your Fitbit Versa 2 for the exciting addition of a new band.
-
Prepare Your Workspace: Begin by finding a clean, flat surface to serve as your workspace. This will provide a stable area for you to comfortably work on your Fitbit Versa 2 and prevent any small components from getting misplaced during the band removal process.
-
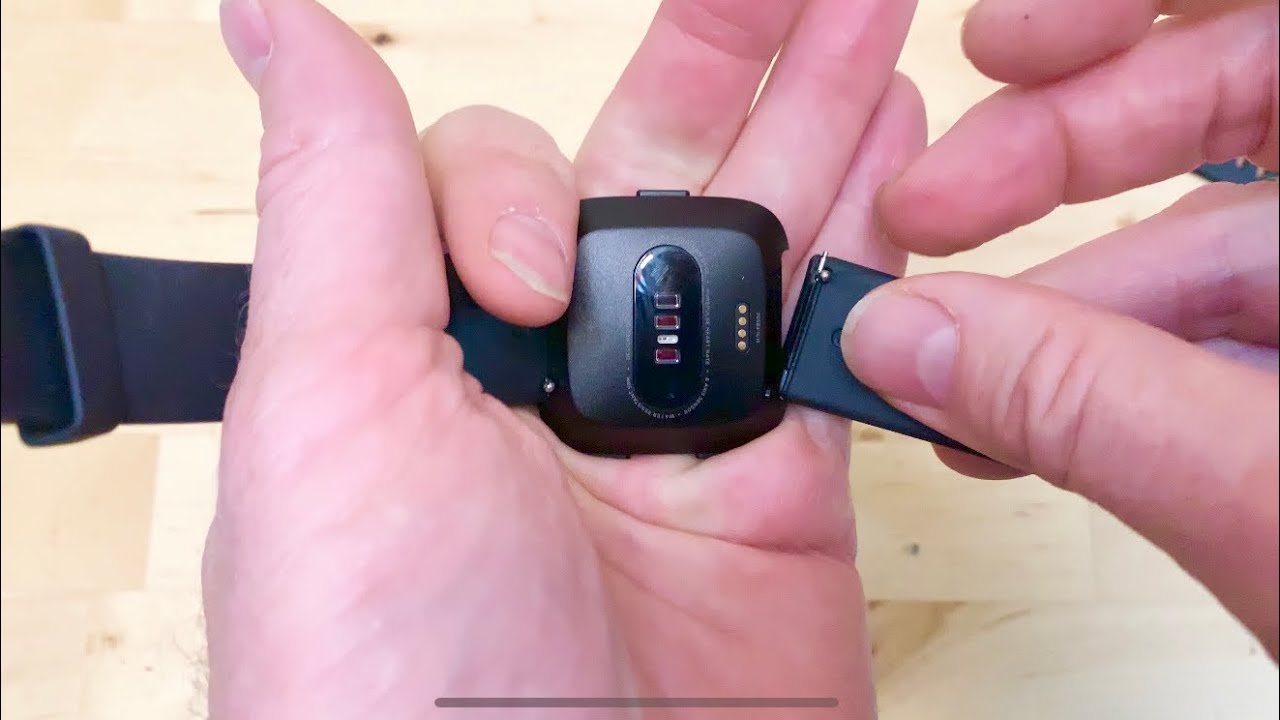
Use the Spring Bar Tool: The spring bar tool will be your trusted ally in safely removing the old band from your Fitbit Versa 2. Locate the small recessed area on the underside of the watch where the band meets the device. Gently insert the forked end of the spring bar tool into the recess, applying slight pressure to release the spring bar. Repeat this process on the other side of the device to fully release the old band.
-
Carefully Remove the Old Band: With the spring bars released, carefully detach the old band from the Fitbit Versa 2 by gently sliding it out of the grooves. Take your time to ensure a smooth removal process, being mindful not to force the band or cause any unnecessary strain on the device.
-
Inspect for Debris: Once the old band has been removed, take a moment to inspect the area where the band was attached for any debris or residue. Use a soft, lint-free cleaning cloth to gently wipe the attachment points, ensuring that they are clean and free from any obstructions that could hinder the attachment of the new band.
By following these meticulous steps, you will successfully remove the old band from your Fitbit Versa 2, setting the stage for the exciting next phase of attaching a new band. With the old band safely detached, you are now ready to embark on the transformative journey of adding a new band to your Fitbit Versa 2, allowing you to infuse your personal style into this essential wearable device.
Step 3: Attach the new band
With the old band successfully removed, it's time to embark on the exciting phase of attaching a new band to your Fitbit Versa 2. This pivotal step allows you to infuse your personal style into your wearable device, creating a seamless blend of fashion and functionality. Follow these detailed instructions to securely attach the new band to your Fitbit Versa 2, ensuring a snug and reliable fit that complements your lifestyle.
-
Select the New Band: Begin by selecting the new band that best aligns with your style preferences and activity needs. Whether you opt for a sleek metal band for a sophisticated look, a durable silicone band for active pursuits, or a stylish fabric band for everyday wear, choose a band that resonates with your individuality and enhances the versatility of your Fitbit Versa 2.
-
Align the Band: Hold the Fitbit Versa 2 with the underside facing up and locate the attachment points on each side of the device. Align the new band with the attachment points, ensuring that it is oriented correctly and ready for secure installation.
-
Use the Spring Bars: Retrieve the spring bars provided with the new band, ensuring that they are compatible with the Fitbit Versa 2. Insert one end of the spring bar into the small hole on one side of the device, then carefully compress the spring bar using the spring bar tool. With the spring bar compressed, guide it into the corresponding slot on the new band, allowing it to securely lock into place. Repeat this process on the other side of the device to attach the opposite end of the new band.
-
Ensure a Secure Fit: Once both ends of the new band are attached to the Fitbit Versa 2, gently tug on the band to confirm that it is securely in place. Verify that the spring bars have engaged with the attachment points, providing a reliable and snug fit that prevents the band from dislodging during daily wear.
-
Inspect for Proper Alignment: Take a moment to inspect the new band and ensure that it is aligned symmetrically with the device. Verify that the band sits flush against the Fitbit Versa 2 and does not obstruct the functionality of the device's sensors or buttons.
By meticulously following these steps, you will successfully attach a new band to your Fitbit Versa 2, elevating its aesthetic appeal and personalizing it to suit your unique style. With the new band securely in place, your Fitbit Versa 2 will undergo a remarkable transformation, seamlessly integrating into your daily activities while exuding a touch of individuality and flair.
Step 4: Adjust the fit
Ensuring the perfect fit of your new band is essential to guarantee comfort, functionality, and style. Proper adjustment not only enhances the overall wearing experience but also prevents the band from slipping or causing discomfort during daily activities. Follow these detailed instructions to fine-tune the fit of your new band, allowing you to enjoy optimal comfort and confidence in your Fitbit Versa 2.
-
Evaluate the Fit: Begin by wearing your Fitbit Versa 2 with the new band attached. Take a moment to assess the initial fit, paying attention to any areas of tightness or looseness. This initial evaluation will provide valuable insights into the adjustments needed to achieve the perfect fit for your individual wrist size and comfort preferences.
-
Adjust the Band: If the band feels too tight or too loose, it's time to make the necessary adjustments. For a tighter fit, consider removing a link from a metal band or adjusting the buckle on a fabric or silicone band. Conversely, if the band feels too loose, add a link to a metal band or tighten the buckle on a fabric or silicone band. Follow the specific adjustment instructions provided with your chosen band to achieve the desired fit.
-
Test and Refine: After making the initial adjustments, wear the Fitbit Versa 2 for a brief period to test the modified fit. Pay attention to the comfort level and ensure that the band sits securely on your wrist without causing any discomfort. If further adjustments are needed, repeat the process until you achieve a fit that feels comfortable and secure for extended wear.
-
Consider Activity-Specific Fit: If you engage in various activities throughout the day, such as exercise or sports, consider adjusting the fit of your band to accommodate these activities. A snugger fit during physical activities can prevent the band from shifting or sliding, ensuring that your Fitbit Versa 2 remains securely in place during movement.
-
Verify Sensor Contact: As you refine the fit, verify that the sensors on the underside of the Fitbit Versa 2 maintain consistent contact with your skin. Proper sensor contact is crucial for accurate tracking of your health and fitness metrics, so ensure that the band adjustment does not compromise this essential functionality.
By meticulously adjusting the fit of your new band, you'll elevate the wearing experience of your Fitbit Versa 2, allowing you to enjoy personalized comfort and style tailored to your unique preferences. With the fit perfectly tuned to your wrist, your transformed Fitbit Versa 2 will seamlessly integrate into your daily routine, empowering you to stay connected, active, and stylish with every wear.
Step 5: Test the new band
Testing the new band on your Fitbit Versa 2 is a critical step to ensure that the attachment is secure, the fit is comfortable, and the functionality of the device remains uncompromised. By conducting a thorough evaluation of the new band, you can verify its reliability and comfort, setting the stage for seamless integration into your daily activities.
Comfort and Flexibility
Begin by wearing the Fitbit Versa 2 with the new band attached and take note of the initial comfort level. Pay attention to any pressure points, irritation, or discomfort that may arise during regular movement. Flex your wrist and perform typical activities to gauge the flexibility and adaptability of the new band. A comfortable and flexible band is essential for uninterrupted wear throughout the day.
Secure Attachment
As you wear the Fitbit Versa 2 with the new band, pay close attention to the attachment points and verify that the band remains securely in place. Perform gentle movements and activities to test the stability of the attachment, ensuring that the band does not shift or loosen during regular use. A secure attachment is vital to prevent the risk of the band detaching during physical activities or daily wear.
Functionality Check
Test the functionality of the Fitbit Versa 2 with the new band in place. Verify that the buttons and sensors remain easily accessible and responsive. Interact with the device as you normally would, ensuring that the new band does not hinder the operation of essential features. Additionally, confirm that the heart rate monitor, step tracker, and other health monitoring functions continue to operate accurately with the new band.
Sweat and Moisture Resistance
If your daily activities involve perspiration or exposure to moisture, consider conducting a sweat and moisture resistance test on the new band. Engage in light physical activity or expose the band to a damp environment to assess its resilience against moisture. A moisture-resistant band is essential for maintaining its integrity and comfort during workouts or in humid conditions.
Long-Term Wear Assessment
Wear the Fitbit Versa 2 with the new band for an extended period to assess its suitability for long-term wear. Pay attention to any changes in comfort or fit over time, ensuring that the band remains comfortable and secure throughout the day. Evaluate the band's breathability and skin contact to determine its compatibility with prolonged use.
By meticulously testing the new band on your Fitbit Versa 2, you can confidently ensure its comfort, reliability, and functionality in various scenarios. A successful band test will provide you with the assurance that your transformed Fitbit Versa 2 seamlessly integrates into your lifestyle, empowering you to enjoy personalized style and functionality with every wear.
Conclusion
In conclusion, the process of changing the band on your Fitbit Versa 2 is not only a practical endeavor but also a transformative journey that allows you to infuse your personal style into this essential wearable device. By following the step-by-step guide outlined in this article, you have gained valuable insights into seamlessly transitioning from an old band to a new one, enhancing the aesthetic appeal and functionality of your Fitbit Versa 2.
The act of changing the band goes beyond mere customization; it represents a personal statement, a reflection of your individuality and lifestyle. With the ability to select from a diverse range of bands, including sleek metal options, durable silicone bands, and stylish fabric choices, you have the power to adapt your Fitbit Versa 2 to suit any occasion, whether it's a casual outing, a rigorous workout, or a formal event.
The meticulous process of removing the old band, attaching the new one, and adjusting the fit ensures that your Fitbit Versa 2 becomes an extension of your personal style, seamlessly integrating into your daily activities. The new band not only enhances the visual appeal of the device but also contributes to your comfort and confidence, allowing you to wear your Fitbit Versa 2 with pride and enthusiasm.
As you embark on this band transformation journey, remember that the process is not merely about the physical act of changing a band; it's about embracing the opportunity to express yourself and adapt your wearable device to your evolving tastes and preferences. The versatility and adaptability of the Fitbit Versa 2, combined with the diverse options for band customization, empower you to make a bold statement and elevate your overall experience with this innovative wearable technology.
With the new band securely in place and seamlessly integrated into your lifestyle, your Fitbit Versa 2 becomes more than just a device; it becomes a reflection of your unique identity and a companion on your journey to health, wellness, and personal expression. Embrace the endless possibilities of band customization and embark on this transformative experience, knowing that your Fitbit Versa 2 will continue to evolve alongside you, reflecting your individuality and enhancing your everyday adventures.