Introduction
Are you a movie enthusiast or a music lover looking to take your audio experience to the next level? Look no further than a surround sound system. Whether you’re watching your favorite movie or enjoying your favorite album, a surround sound system can immerse you in a world of rich and realistic sound. If you’ve recently purchased a Sony RM-AAU071 surround sound system and are unsure of how to set it up, you’ve come to the right place.
In this guide, we will walk you through the step-by-step process of setting up your Sony RM-AAU071 surround sound system. We’ll cover everything from unboxing the system to configuring the speaker placement and calibrating the audio settings. By the end of this article, you’ll have a fully functional surround sound system that’s ready to deliver an unparalleled audio experience in your home.
Before we dive into the setup process, let’s briefly discuss what surround sound is and why it’s worth investing in.
Surround sound is a technology that creates a three-dimensional audio experience by using multiple strategically placed speakers. Unlike traditional stereo sound, which only comes from two speakers, surround sound systems can deliver sound from all directions, including the front, sides, and rear.
This immersive audio technology allows you to feel like you’re in the middle of the action, whether you’re watching a thrilling movie or playing a video game. It enhances your overall audio experience by providing depth, clarity, and realism to the sound. With a surround sound system, you won’t miss the subtle details or the impactful moments, giving you a more immersive and engaging entertainment experience.
Now that you understand the benefits of a surround sound system, let’s move on to selecting the right one for your needs. Choosing the perfect surround sound system is crucial to ensure you get the best audio quality and compatibility with your devices.
What is Surround Sound?
Surround sound is an audio technology that enhances the listening experience by creating a three-dimensional sound field. It involves the use of multiple speakers strategically placed around the room to produce realistic and immersive audio. This technology is widely used in home theater systems, gaming consoles, and music setups to deliver high-quality audio.
The primary purpose of surround sound is to recreate the sensation of being enveloped in sound, similar to what you would experience in a movie theater or a concert hall. By distributing the audio across multiple speakers, surround sound systems provide a more accurate representation of the original recording. This allows you to hear distinct sounds coming from different directions, creating a sense of depth and realism.
Surround sound systems typically consist of a combination of front, center, rear, and subwoofer speakers. The front speakers are responsible for reproducing the main audio channels, while the center speaker ensures that dialogue and other important sound elements are clear and well-defined. The rear speakers provide ambient and background sounds, immersing you in a 360-degree audio environment. The subwoofer handles the low-frequency sounds, adding depth and impact to explosions, music, and other bass-heavy effects.
There are various surround sound formats available, including Dolby Digital, DTS (Digital Theater System), and THX. These formats differ in terms of audio quality and encoding methods, but the goal remains the same – to provide an immersive and realistic audio experience.
Surround sound technology is not only limited to movies but is also widely utilized in gaming. Many video games are designed to take advantage of surround sound, allowing players to accurately locate in-game sounds such as footsteps, gunfire, or incoming enemies. This spatial audio enhances the gaming experience by providing a competitive edge and a heightened sense of immersion.
When choosing a surround sound system, it is important to consider the size of your room, audio quality, connectivity options, and compatibility with your existing audio-visual devices. The Sony RM-AAU071 surround sound system is renowned for its versatility, ease of use, and high-quality audio output.
Now that we have a clear understanding of what surround sound is, let’s move on to selecting the right surround sound system that suits your needs and preferences.
Choosing the Right Surround Sound System
When it comes to selecting the right surround sound system for your home, there are several factors to consider. By taking the time to assess your needs and preferences, you can ensure that you invest in a system that provides the best audio experience possible.
The first consideration is the size and layout of your room. The size of your room will determine the power and capabilities you need from your surround sound system. If you have a larger room, you may require a system with more speakers and higher wattage to fill the space with sound. Conversely, a smaller room may not require as many speakers or as much power.
Next, assess your audio preferences. Are you an avid movie watcher, a music enthusiast, or a passionate gamer? Different surround sound systems excel in different areas. For example, if you prioritize cinematic sound quality, choose a system that supports Dolby Digital or DTS formats. If you’re more focused on gaming, look for a system with low latency and positional audio capabilities.
Consider the connectivity options of the surround sound system. Ensure it is compatible with your existing audio-visual equipment, such as your TV, Blu-ray player, or gaming console. Most modern surround sound systems offer multiple connectivity options, including HDMI, optical, and Bluetooth, allowing you to connect your devices seamlessly.
Budget is another crucial factor to consider. Surround sound systems range in price, so it’s important to set a budget and stick to it. Determine the features and quality level you require and find a system that fits within your financial constraints. Remember, expensive doesn’t always mean better, so do your research and read reviews to find the best value for your money.
Lastly, consider the usability and user interface of the surround sound system. Look for a system that is intuitive and easy to set up and operate. This will ensure that you can enjoy your audio experience without any frustrations or complexities.
With these considerations in mind, you can narrow down your options and find the perfect surround sound system for your needs. The Sony RM-AAU071 surround sound system is an excellent choice, as it offers a balanced combination of features, audio quality, and affordability.
Now that you understand the key factors to consider when choosing a surround sound system, let’s move on to unboxing the Sony RM-AAU071 surround sound system.
Unboxing the Sony RM-AAU071 Surround Sound System
Unboxing a new audio system is always an exciting experience, and the Sony RM-AAU071 surround sound system is no exception. In this section, we will guide you through the unboxing process, ensuring that you set up your system with ease.
When you receive your Sony RM-AAU071 surround sound system, carefully inspect the packaging for any signs of damage during shipping. If you notice any damage, contact the seller or the shipping company immediately to address the issue.
Start by finding a clean and spacious area to unbox your surround sound system. Prepare a soft surface, such as a table or a clean cloth, to protect the components from scratches or accidental damage.
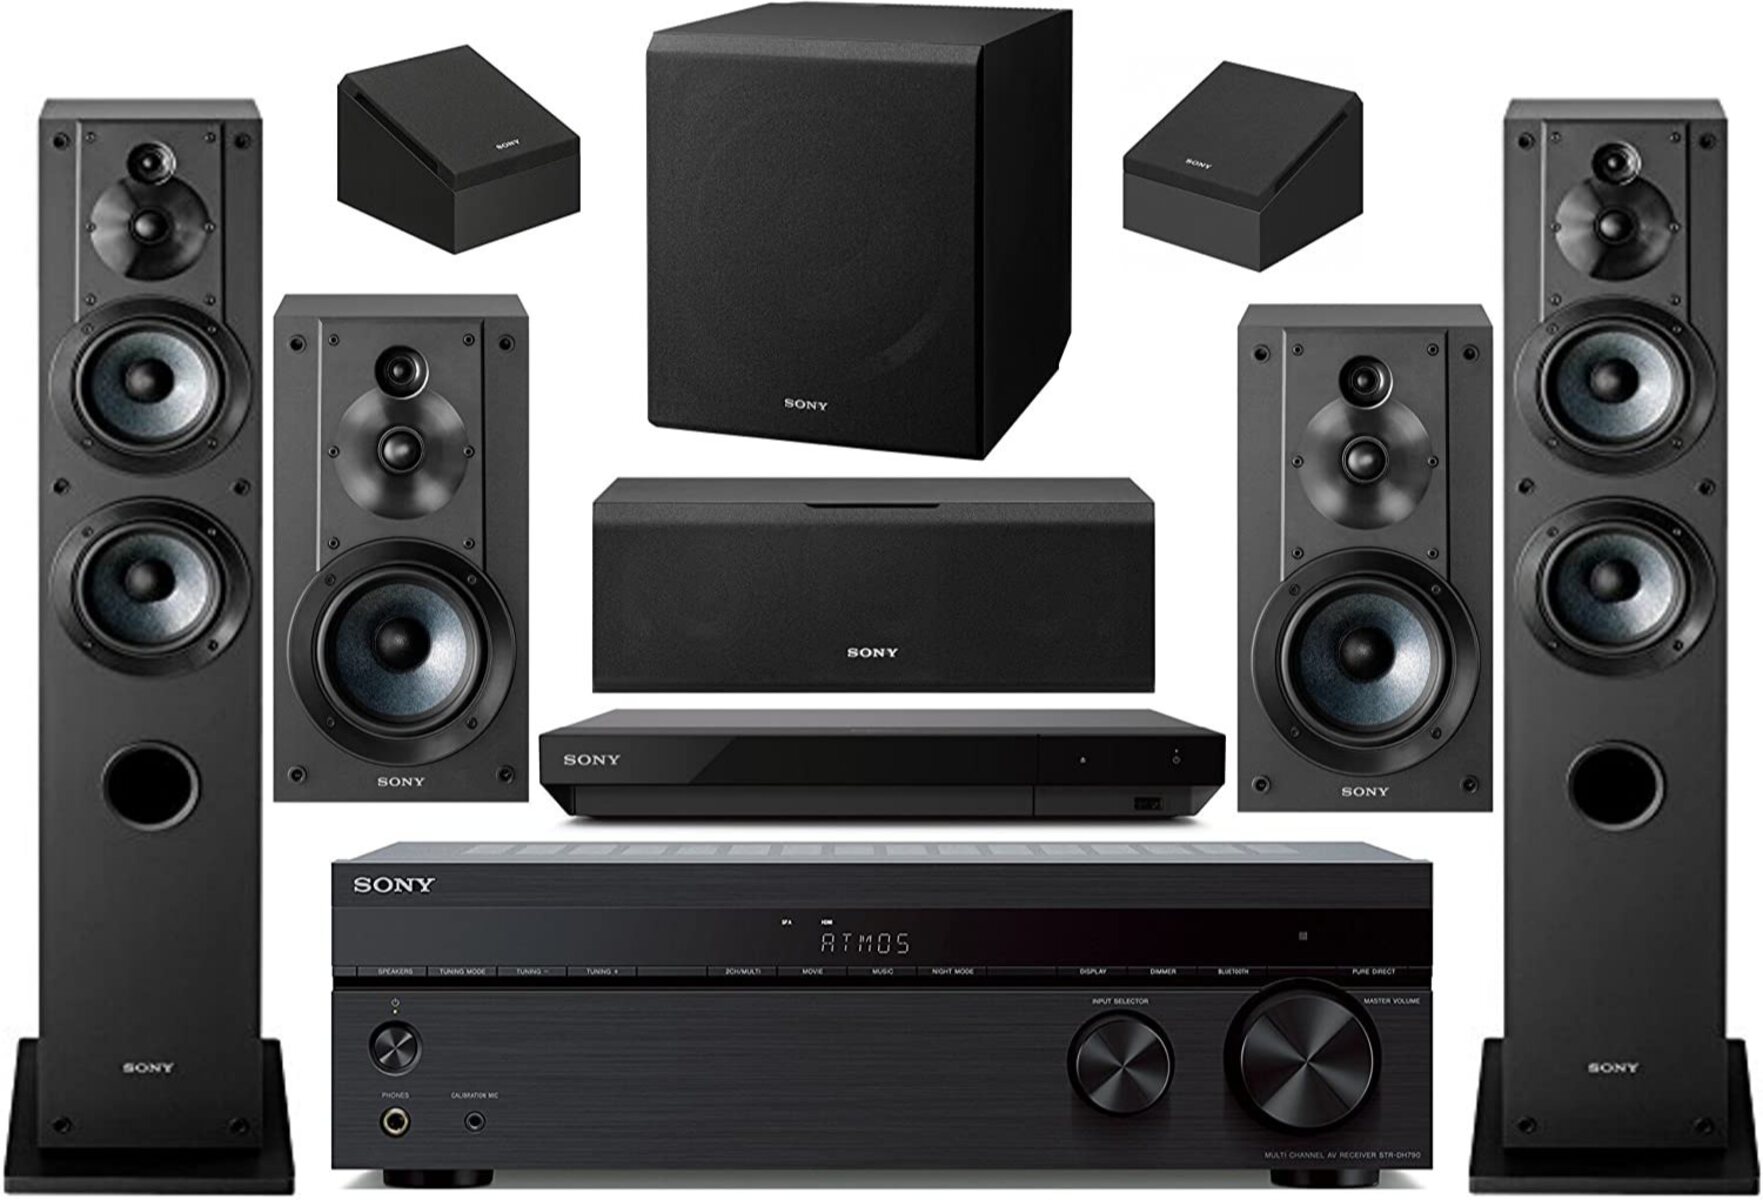
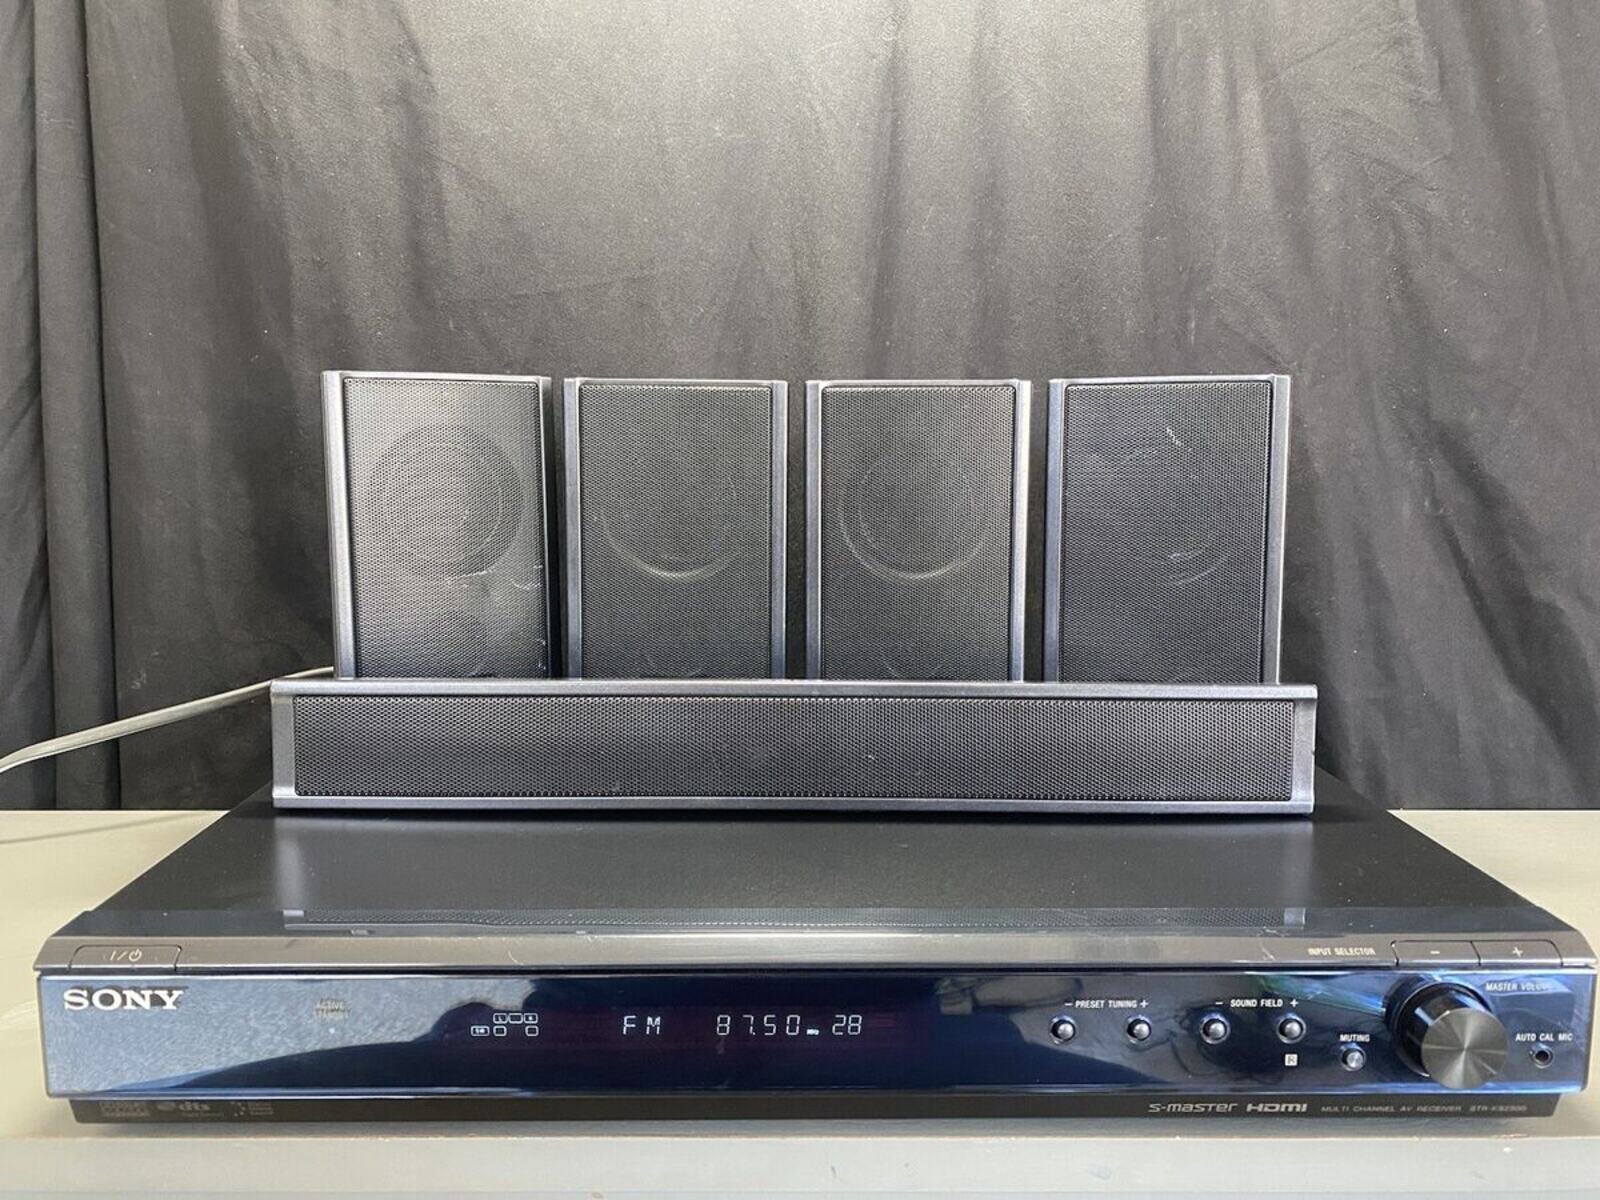
Open the box and remove the contents one by one. The Sony RM-AAU071 surround sound system typically includes the following components:
- Receiver: The central hub of the surround sound system, responsible for processing audio signals and distributing them to the speakers.
- Speakers: Depending on the specific package you purchased, you may receive front speakers, center speaker, rear speakers, and a subwoofer.
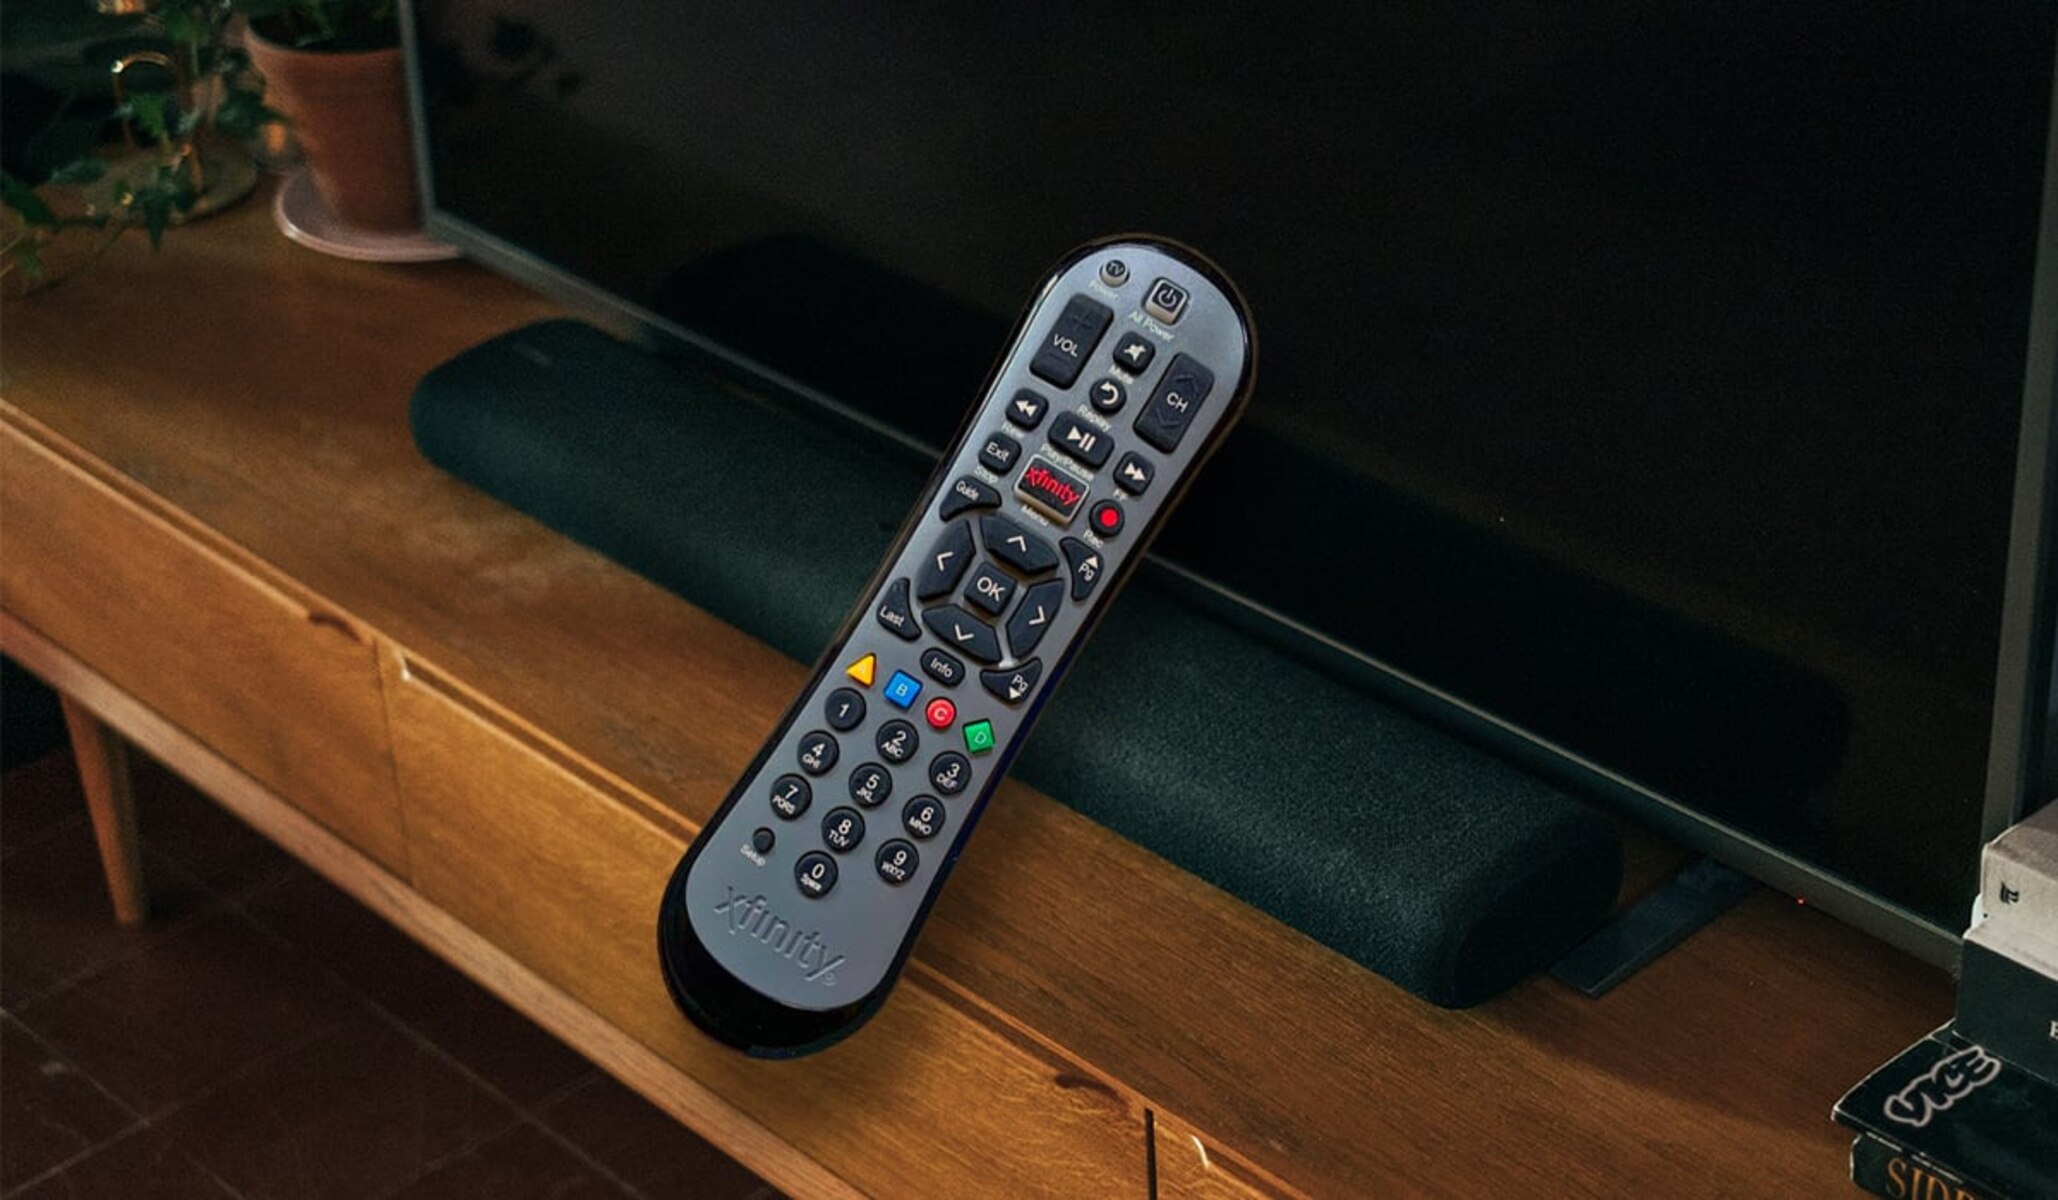
- Remote Control: A remote control that allows you to control the settings and functions of the surround sound system from a distance.
- Cables: The necessary cables for connecting the speakers to the receiver and other audio-visual devices.
- Instruction Manual: A detailed guide that provides step-by-step instructions on setting up and operating the surround sound system.
Before proceeding with the setup, take a moment to familiarize yourself with the components and their respective connections. Refer to the instruction manual for diagrams and explanations of how the speakers and receiver should be connected.
Ensure that you have all the necessary cables and accessories. If any items are missing or damaged, reach out to the seller or manufacturer for replacements.
Now that you have unboxed your Sony RM-AAU071 surround sound system and familiarized yourself with its components, it’s time to move on to the next step – connecting the speakers to the receiver.
Connecting the Speakers to the Receiver
Properly connecting the speakers to the receiver is essential to ensure optimal audio performance in your Sony RM-AAU071 surround sound system. In this section, we will guide you through the process, step by step.
First, identify the speaker terminals on the back of the receiver. These terminals are typically color-coded to match the corresponding speaker cables. The most common colors are red and black, denoting positive (+) and negative (-) connections respectively.
Next, locate the speaker cables that came with your surround sound system. Measure the required length for each cable, taking into account the distance between the receiver and the respective speakers. Cut the cables to the appropriate length if needed, ensuring they can reach the speakers without strain.
Strip a small amount of insulation from the ends of each speaker cable to expose the bare wire. Ensure that you have a clean and undamaged wire with no frayed ends, as this can affect the sound quality.
Insert one end of each speaker cable into the corresponding speaker terminal on the back of the receiver. Make sure to match the correct polarity by connecting the positive terminal (+) on the speaker cable to the positive terminal (+) on the receiver, and the negative terminal (-) to the negative terminal (-).
Once the speaker cables are securely connected, move on to connecting the other ends of the cables to the respective speakers. Again, ensure that you observe the correct polarity by connecting the positive (+) wire to the positive (+) terminal on the speaker and the negative (-) wire to the negative (-) terminal.
Repeat this process for each speaker, including the front speakers, center speaker, rear speakers, and subwoofer if included in your setup. Double-check that all connections are tight and secure to prevent any audio issues.
It’s important to note that some speakers may have different connection types, such as binding posts, spring clips, or banana plugs. Refer to the instruction manual for your specific speakers to determine the appropriate method of connection and adjust accordingly.
With all the speakers properly connected to the receiver, you have completed a crucial step in setting up your Sony RM-AAU071 surround sound system. The next step is connecting the receiver to your TV.
Connecting the Receiver to the TV
Now that you have successfully connected the speakers to the receiver in your Sony RM-AAU071 surround sound system, it’s time to connect the receiver to your TV. This step is essential to ensure that audio from your TV is routed through the surround sound system, providing an immersive audio experience.
Start by locating the HDMI output port on the receiver. This port is usually labeled as “HDMI Out” and is where you will connect the HDMI cable.
Next, identify the HDMI input port on your TV. It is typically labeled as “HDMI In” and may be numbered to correspond with the specific HDMI input source.
Take one end of the HDMI cable and insert it into the HDMI output port on the receiver. Ensure that it is securely connected by pushing it in until it clicks into place.
Now, take the other end of the HDMI cable and insert it into the HDMI input port on your TV. Again, make sure it is firmly connected.
If your TV and receiver have multiple HDMI input and output ports, make sure to note which port you have connected to. This will be important when selecting the correct input source on your TV to route the audio through the surround sound system.
Once the HDMI cable is connected, power on your TV and receiver. On your TV, access the settings menu and navigate to the audio settings. Look for an option to change the audio output source and select the HDMI input that you connected to your receiver.
With the correct audio output source selected on your TV, the audio from your TV will now be routed through the Sony RM-AAU071 surround sound system. This means that the sound produced by your TV, including audio from streaming services, gaming consoles, or Blu-ray players, will be played back through your surround sound speakers.
It’s important to note that if your TV and receiver support other audio connection options, such as optical or RCA cables, you can utilize those as alternatives. However, HDMI is typically the preferred method as it supports both audio and video signals in a single cable.
With the receiver successfully connected to your TV, you have completed another crucial step in setting up your Sony RM-AAU071 surround sound system. The next step is configuring the audio settings on your TV for optimal audio performance.
Setting up the Audio Settings on the TV
Now that you have connected the receiver to your TV in your Sony RM-AAU071 surround sound system, it’s time to configure the audio settings on your TV. Adjusting these settings helps ensure that the audio is optimized for your surround sound system and provides the best audio experience possible.
Start by turning on your TV and accessing the settings menu. The location and layout of the settings menu may vary depending on your TV model, but it is typically accessed through a dedicated button on your remote control or through the main menu.
Once you’re in the settings menu, look for an option related to audio or sound settings. It may be labeled as “Audio Settings,” “Sound Settings,” or something similar.
Within the audio settings menu, you should find various options to customize the sound output. Some common settings you may encounter include:
- Audio Output: This setting allows you to select the audio output source. Choose the HDMI input that you connected to the receiver.
- Sound Mode: This option lets you select the desired sound mode for your viewing experience. Depending on your TV, you may have options such as Standard, Cinema, Music, or Sport. Select the mode that best suits your preferences.
- Equalizer: The equalizer allows you to adjust the audio frequencies to your liking. You can boost or reduce certain frequency ranges to enhance the audio quality based on personal preference.
- Audio Format: This setting is particularly important if your TV supports different audio formats, such as Dolby Digital or DTS. Choose the appropriate format that matches the capabilities of your surround sound system.
- Volume Leveling: Some TVs offer a volume leveling feature that helps balance out the audio levels across different sources to prevent sudden volume changes. Enable or adjust this setting if desired.
Take your time to explore the available audio settings and make adjustments based on your preferences. Be sure to refer to the TV’s user manual for detailed instructions specific to your model.
Once you have configured the audio settings to your liking, save the changes and exit the settings menu.
With the audio settings on your TV properly configured, you’re one step closer to enjoying exceptional sound quality from your Sony RM-AAU071 surround sound system. The next step is to adjust the speaker placement for optimal audio performance.
Adjusting the Speaker Placement
Properly positioning and aligning the speakers in your Sony RM-AAU071 surround sound system is crucial to achieve optimal audio performance. In this section, we will guide you through the process of adjusting the speaker placement to enhance your surround sound experience.
Begin by referencing the instruction manual for recommendations on the ideal speaker placement for your specific model. It will provide guidelines on speaker positioning based on the intended layout and dimensions of your room.
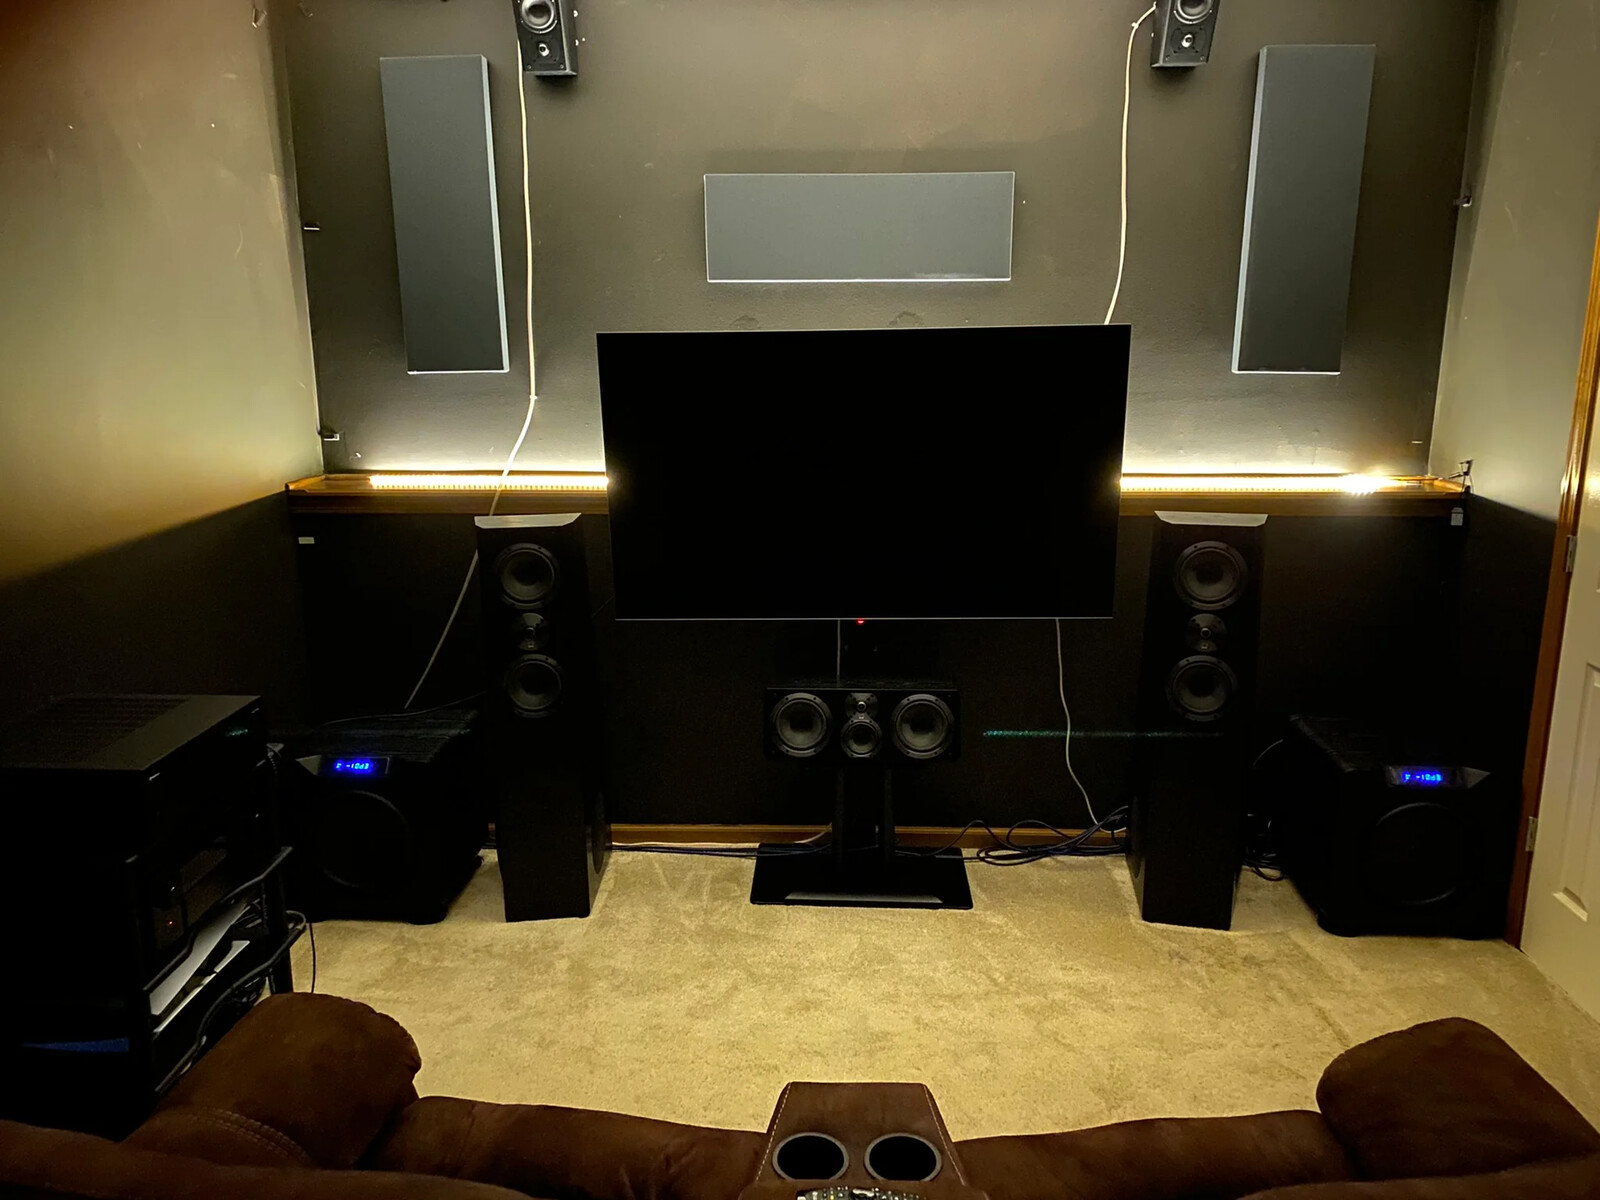
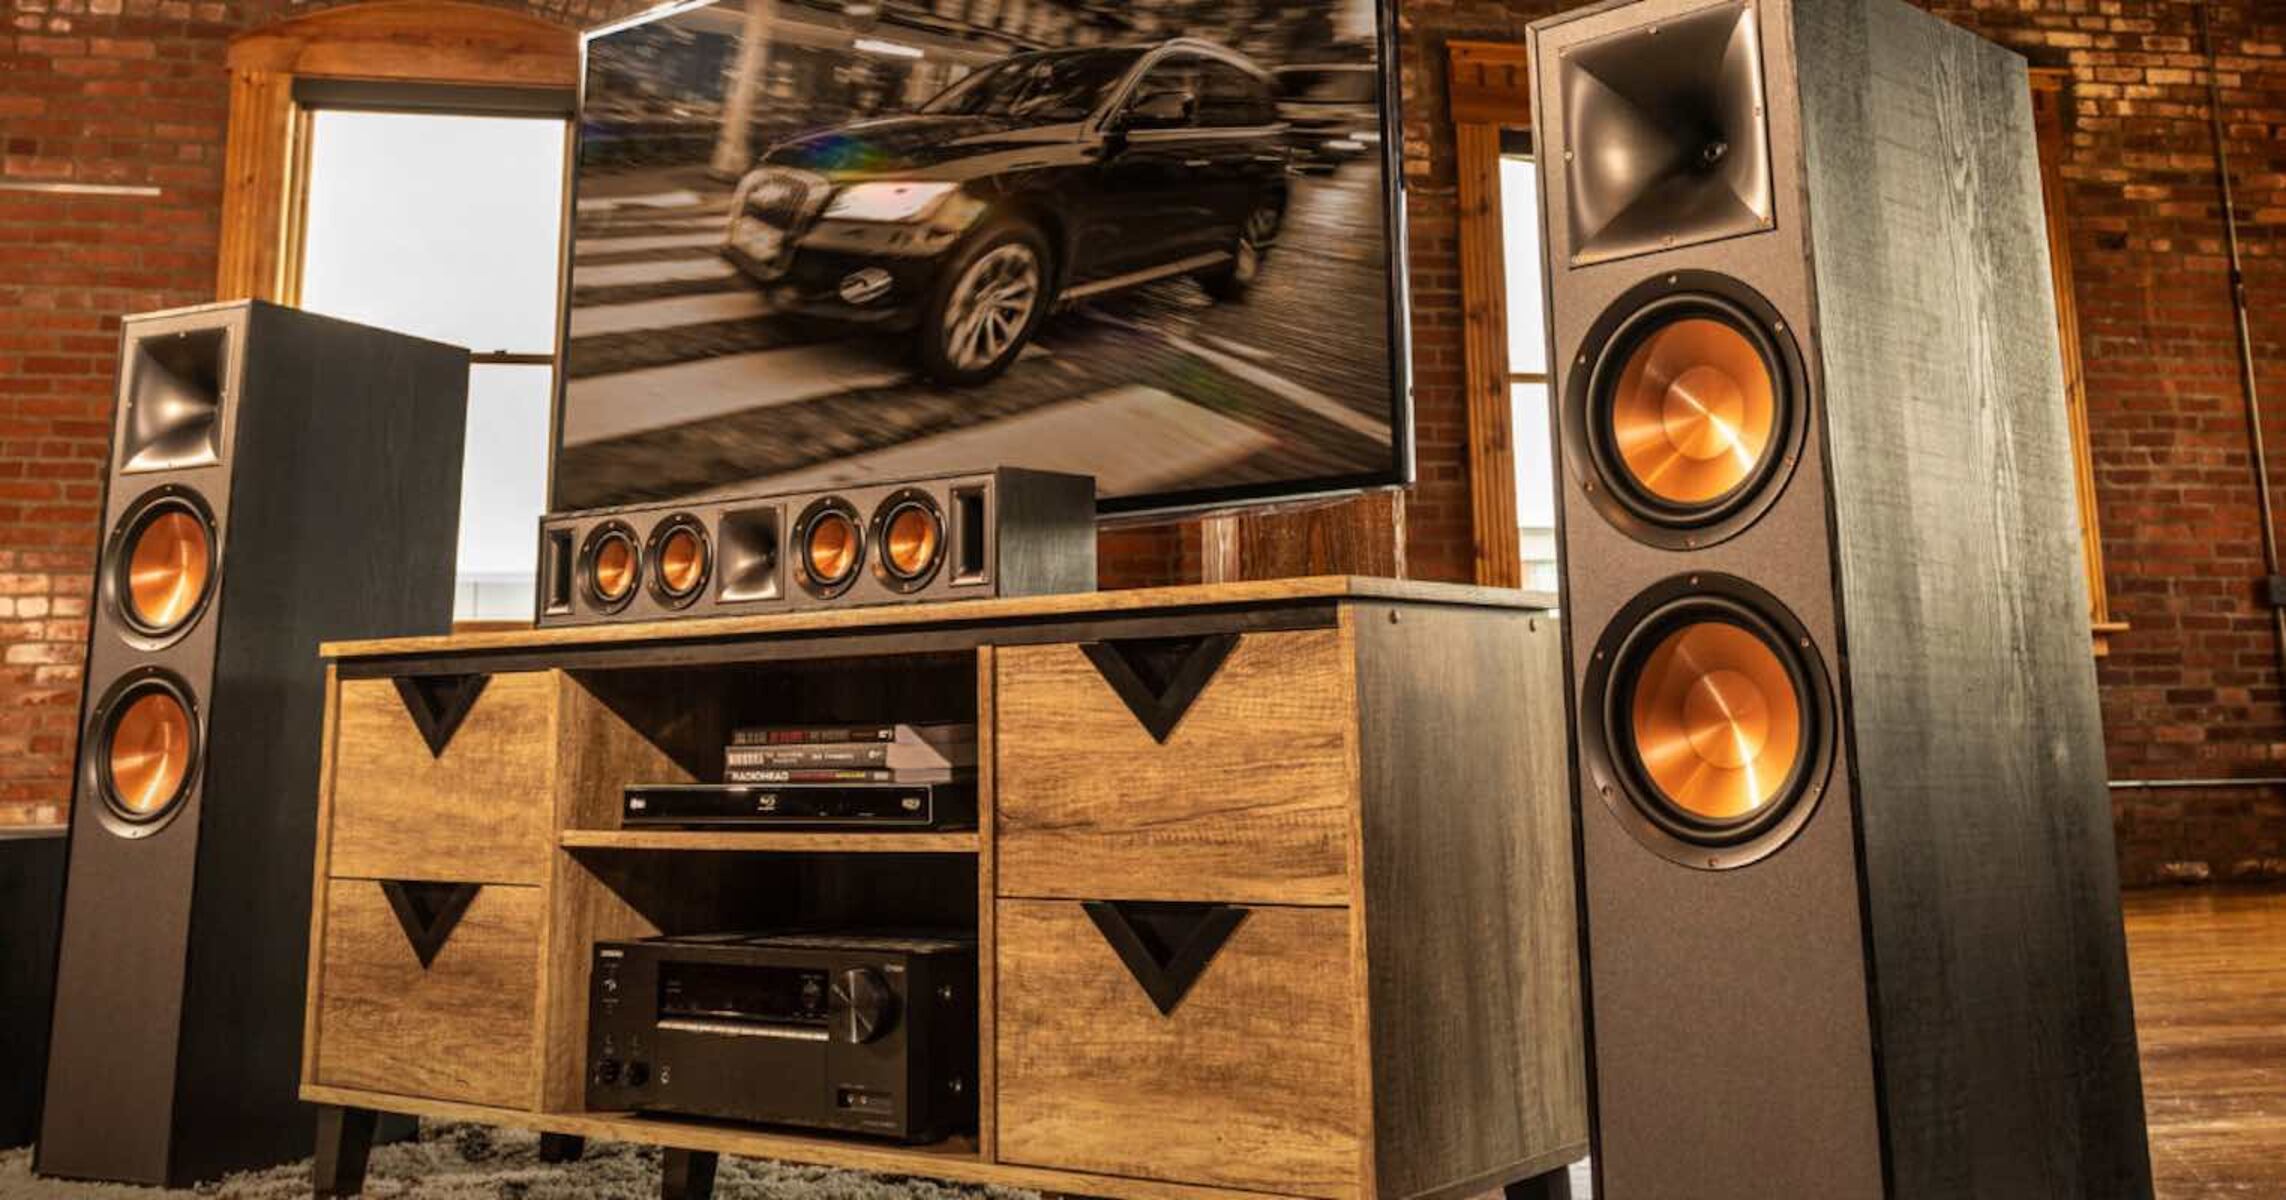
For a standard surround sound setup, start by positioning the front left and right speakers on either side of your TV or display. These speakers should be placed at an equal distance from the center point, forming an angle that points towards the listening area.
The center speaker, responsible for dialogue and central sound imaging, should be placed directly above or below the TV, facing the listeners at ear level. Ensure that it is centered and aligned with the display to maintain accurate audio synchronization.
Next, position the rear speakers, also known as surround speakers, behind the listening area. Ideally, they should be placed slightly above ear level and angled inward towards the main listening spot. The goal is to create an immersive sound field that envelopes the listeners.
If your Sony RM-AAU071 surround sound system includes a subwoofer, it can be placed anywhere in the room, as low-frequency bass sounds are non-directional. Experiment with different locations to find the sweet spot where the bass response is most balanced and impactful. Keep in mind that placing the subwoofer near a wall or corner can enhance bass resonance.
When positioning the speakers, ensure that there are no obstructions or objects that may interfere with the soundwaves. Avoid placing speakers too close to walls or corners, as this can result in reflected sound and compromise audio clarity.
Once you’ve positioned the speakers according to the recommended guidelines, take some time to fine-tune their angles and aim them towards the main listening area. Make slight adjustments within the recommended range to optimize audio localization and create a balanced soundstage.
It’s important to note that every room is unique, and the recommended guidelines may not always be suitable for your specific space. Feel free to experiment with speaker placement and angles to find the configuration that best suits your listening environment and personal preferences.
With the speakers properly positioned and aligned, you have achieved an essential step in optimizing your Sony RM-AAU071 surround sound system. The next step is to configure the speaker levels to ensure balanced audio reproduction.
Configuring the Speaker Levels
Configuring the speaker levels in your Sony RM-AAU071 surround sound system is crucial to achieving balanced and immersive audio playback. Properly adjusted speaker levels ensure that sound is evenly distributed and that no speaker overpowers or gets drowned out by others. In this section, we will guide you through the process of configuring the speaker levels for optimal audio performance.
Start by accessing the audio settings on the receiver. Consult the instruction manual or menu options specific to your model for guidance on accessing the speaker level settings.
In the speaker level settings menu, you will find controls for adjusting the volume levels of individual speakers. The most common adjustment options include:
- Front Speaker Level: This option allows you to adjust the volume level of the front left and right speakers.
- Center Speaker Level: Adjusts the volume level of the center speaker, responsible for dialogue and central sound imaging.
- Surround Speaker Level: Controls the volume level of the rear or surround speakers.
- Subwoofer Level: Adjusts the volume level of the subwoofer, responsible for low-frequency sounds.
Begin by playing a test tone or audio sample that cycles through each speaker. This will help you assess the balance and volume of each speaker in relation to one another.
Listen carefully as the test tone plays through each speaker. Take note of any speakers that sound too loud or too soft compared to the others.
Adjust the speaker levels accordingly using the controls provided in the speaker level settings menu. Increase the volume for speakers that sound too soft and decrease it for speakers that are overpowering the others.
Make subtle adjustments to the volume levels, iterating through the test tone or audio sample until you are satisfied with the balance and cohesion of the sound. The goal is to achieve a harmonious soundstage where each speaker complements the others without drowning them out.
Continue making fine-tuned adjustments until you have achieved the desired audio balance. It may take some trial and error, but patience and attentive listening will lead to optimal results.
Once you are happy with the speaker level configuration, save the settings and exit the speaker level menu on your receiver. Take another moment to listen to some audio content to ensure that the adjustments have resulted in a well-balanced soundstage.
With the speaker levels properly configured, your Sony RM-AAU071 surround sound system is now ready to deliver an immersive and satisfying audio experience. The next step is to calibrate the surround sound system for optimal performance.
Calibrating the Surround Sound System
Calibrating your Sony RM-AAU071 surround sound system is a crucial step to ensure that the audio is optimized for your specific room and listening environment. By calibrating the system, you can fine-tune settings such as speaker distance, speaker size, and audio delay to achieve the best possible audio performance. In this section, we will guide you through the process of calibrating your surround sound system.
Begin by accessing the calibration settings on your receiver. Consult the instruction manual or menu options specific to your model for guidance on accessing the calibration settings.
Within the calibration settings, you will typically find options such as:
- Speaker Distance: This setting allows you to specify the physical distance between each speaker and the listening position. Measure the actual distance and input the values into the receiver to ensure accurate sound localization.
- Speaker Size: Adjust the speaker size settings based on the capabilities of your speakers. Specify whether each speaker is large or small to help the receiver allocate bass frequencies appropriately.
- Audio Delay or Lip Sync: If you notice any audio delay between the video and audio playback, use this setting to adjust the delay and synchronize the audio with the visuals.
Follow the on-screen instructions provided by the receiver to complete the calibration process. This may involve playing test tones or audio signals to measure the sound characteristics in your room.
Depending on your receiver model, you may also have the option to perform an automatic calibration with a built-in calibration microphone. Follow the instructions to place the microphone in the listening position and allow the receiver to analyze the room acoustics and make necessary adjustments automatically.
Take your time to carefully follow the calibration process and make the necessary adjustments as instructed. Consult the instruction manual or reach out to the manufacturer’s support if you encounter any difficulties or have questions.
After completing the calibration process, save the settings and exit the calibration menu. You should now have a surround sound system that is finely tuned to your specific room, delivering immersive and accurate audio reproduction.
It’s important to note that room acoustics and personal preferences can vary, so the calibration settings provided by the receiver may serve as a starting point. Feel free to make additional manual adjustments based on your listening preferences and the acoustic characteristics of your room.
With your Sony RM-AAU071 surround sound system properly calibrated, you’re ready to enjoy a truly immersive audio experience. The next step is to test the surround sound system to ensure everything is functioning as expected.
Testing the Surround Sound System
Now that you have set up and calibrated your Sony RM-AAU071 surround sound system, it’s essential to test the system to ensure that all speakers are functioning correctly and that you’re experiencing the full potential of the audio immersion. In this section, we will guide you through the process of testing your surround sound system.
Start by playing a variety of content that showcases different audio elements such as dialogue, music, and sound effects. This can include your favorite movies, TV shows, music, or even video games.
As the content plays, pay close attention to the audio coming from each speaker in your surround sound system. Verify that sound is being produced from all speakers at the appropriate times.
Listen to the front speakers and ensure that dialogue and main audio elements are clear and centrally located, coming from the center speaker if applicable.
Focus on the rear or surround speakers and confirm that they are delivering ambient sounds, background effects, or directional audio cues effectively. These speakers should contribute to the overall immersive experience by enveloping you in a 360-degree sound field.
Test the subwoofer by playing content that contains deep bass sounds or rumbling effects. Verify that the subwoofer is delivering a powerful and balanced low-frequency response without overwhelming the other speakers.
During the testing phase, make sure to adjust the volume levels according to your preferences and the specific content you are playing. This will help you fine-tune the audio experience to your liking.
If you notice any issues, such as a speaker not producing sound or audio imbalances, double-check all connections to ensure they are secure. Review the speaker level settings and recalibrate if necessary.
Take the time to explore different audio formats, such as Dolby Digital or DTS, if supported by your content and surround sound system. These formats can enhance the audio experience and provide a more immersive surround sound experience.
Continue to test different types of content and genres to truly evaluate the capabilities of your surround sound system. Diverse content, including action-packed movies, music concerts, and immersive video games, can help you gauge the overall performance and quality of the audio.
By thoroughly testing your Sony RM-AAU071 surround sound system, you can ensure that it is functioning as intended and that you’re enjoying the immersive audio experience you desired. If you encounter any persistent issues or have further questions, consult the user manual or contact the manufacturer’s support for assistance.
With your surround sound system successfully tested, you’re ready to sit back, relax, and immerse yourself in a captivating audio journey.
Troubleshooting Common Issues
While setting up and using your Sony RM-AAU071 surround sound system, you may encounter some common issues that can affect the audio quality or functionality of the system. In this section, we will discuss some troubleshooting tips to help you address these issues and enjoy a seamless surround sound experience.
No sound from one or more speakers:
- Ensure that all speaker cables are securely connected to the receiver and speakers. Check for any loose connections or damaged cables.
- Confirm that the speaker settings in the receiver menu are correctly configured. Adjust the speaker levels if necessary.
- Check the audio source and make sure it is properly set to output sound through the correct audio output (e.g., HDMI, optical) connected to the receiver.
- If using an HDMI connection, verify that the devices (TV, Blu-ray player, etc.) are all compatible with the HDMI version used and that the HDMI cables are not faulty.
Poor sound quality or imbalanced audio:
- Make sure the speakers are positioned correctly and aimed towards the listening area as per the recommended guidelines.
- Check the speaker wires for any damage or frayed ends, and replace them if necessary.
- Adjust the speaker levels in the receiver menu to balance the sound output among all speakers.
- Experiment with the audio settings on your TV or source device to ensure they are optimized for surround sound playback.
Audio delay or synchronization issues:
- Access the audio settings on your TV and adjust the audio delay or lip sync settings to align the audio with the visuals if you notice any delay.
- Ensure that all devices, including the TV and external audio sources, are using the same audio format and settings.
- Consider updating the firmware or software of your TV and receiver to their latest versions to address any compatibility issues.
Interference or distorted sound:
- Keep speakers and the receiver away from other electronic devices or appliances that may cause interference, such as cordless phones or Wi-Fi routers.
- Check for any sources of electrical interference near the audio cables or speaker wires, and rearrange them if necessary.
- Verify that the speakers and receiver are using compatible impedance levels to prevent overload or distortion.
If you’ve tried these troubleshooting tips and are still experiencing issues, consult the user manual for your Sony RM-AAU071 surround sound system or contact the manufacturer’s support for further assistance. They can provide specific guidance and help resolve any persistent issues you may be facing.
By addressing common issues and following the troubleshooting steps, you can ensure smooth operation and enjoy optimal performance from your surround sound system.
Conclusion
Congratulations! You have successfully set up your Sony RM-AAU071 surround sound system and optimized it for the best audio experience in your home. By following the steps outlined in this guide, you have learned how to unbox the system, connect the speakers to the receiver, configure the audio settings on your TV, adjust the speaker placement, calibrate the system, and troubleshoot common issues.
A properly set up and calibrated surround sound system can transform your movie nights, music listening sessions, and gaming experiences into immersive and captivating moments. With the Sony RM-AAU071 surround sound system, you can now enjoy deep bass, clear dialogue, and surround effects that transport you into the heart of the action.
Remember to regularly check and update firmware/software for your system’s devices, as this can further enhance performance and compatibility.
If you ever encounter any challenges or have specific questions regarding your Sony RM-AAU071 surround sound system, refer to the user manual or reach out to the manufacturer’s support for professional assistance.
Now, sit back, relax, and indulge in the incredible audio experience provided by your Sony RM-AAU071 surround sound system. Enjoy the immersive soundstage, stunning clarity, and the thrill of being surrounded by your favorite movies, music, and games. Get ready to embark on an audio adventure like never before!