Introduction
Connecting a soundbar to a cable box and TV can greatly enhance your audio experience while watching your favorite shows, movies, or sporting events. A soundbar is a sleek and compact audio device that provides crisp and immersive sound without the need for a complex speaker setup. Whether you’re looking to amplify the dialogue, boost the bass, or simply enjoy a more dynamic audio performance, connecting a soundbar to your cable box and TV is a simple process that can make a noticeable difference in your overall entertainment setup.
In this guide, we will walk you through the step-by-step process of connecting a soundbar to your cable box and TV. We will cover various connection options, including HDMI ARC, optical cable, digital coaxial cable, and RCA cables, to ensure that you can choose the best method for your specific setup. Additionally, we will provide tips on adjusting audio settings on both the TV and cable box to optimize the soundbar’s performance.
Whether you’re an avid movie lover, sports enthusiast, or simply want to elevate your TV viewing experience, connecting a soundbar to your cable box and TV is a worthwhile investment. So, let’s dive into the step-by-step instructions and get ready to enjoy a whole new level of audio quality!
Step 1: Determine the soundbar’s connection options
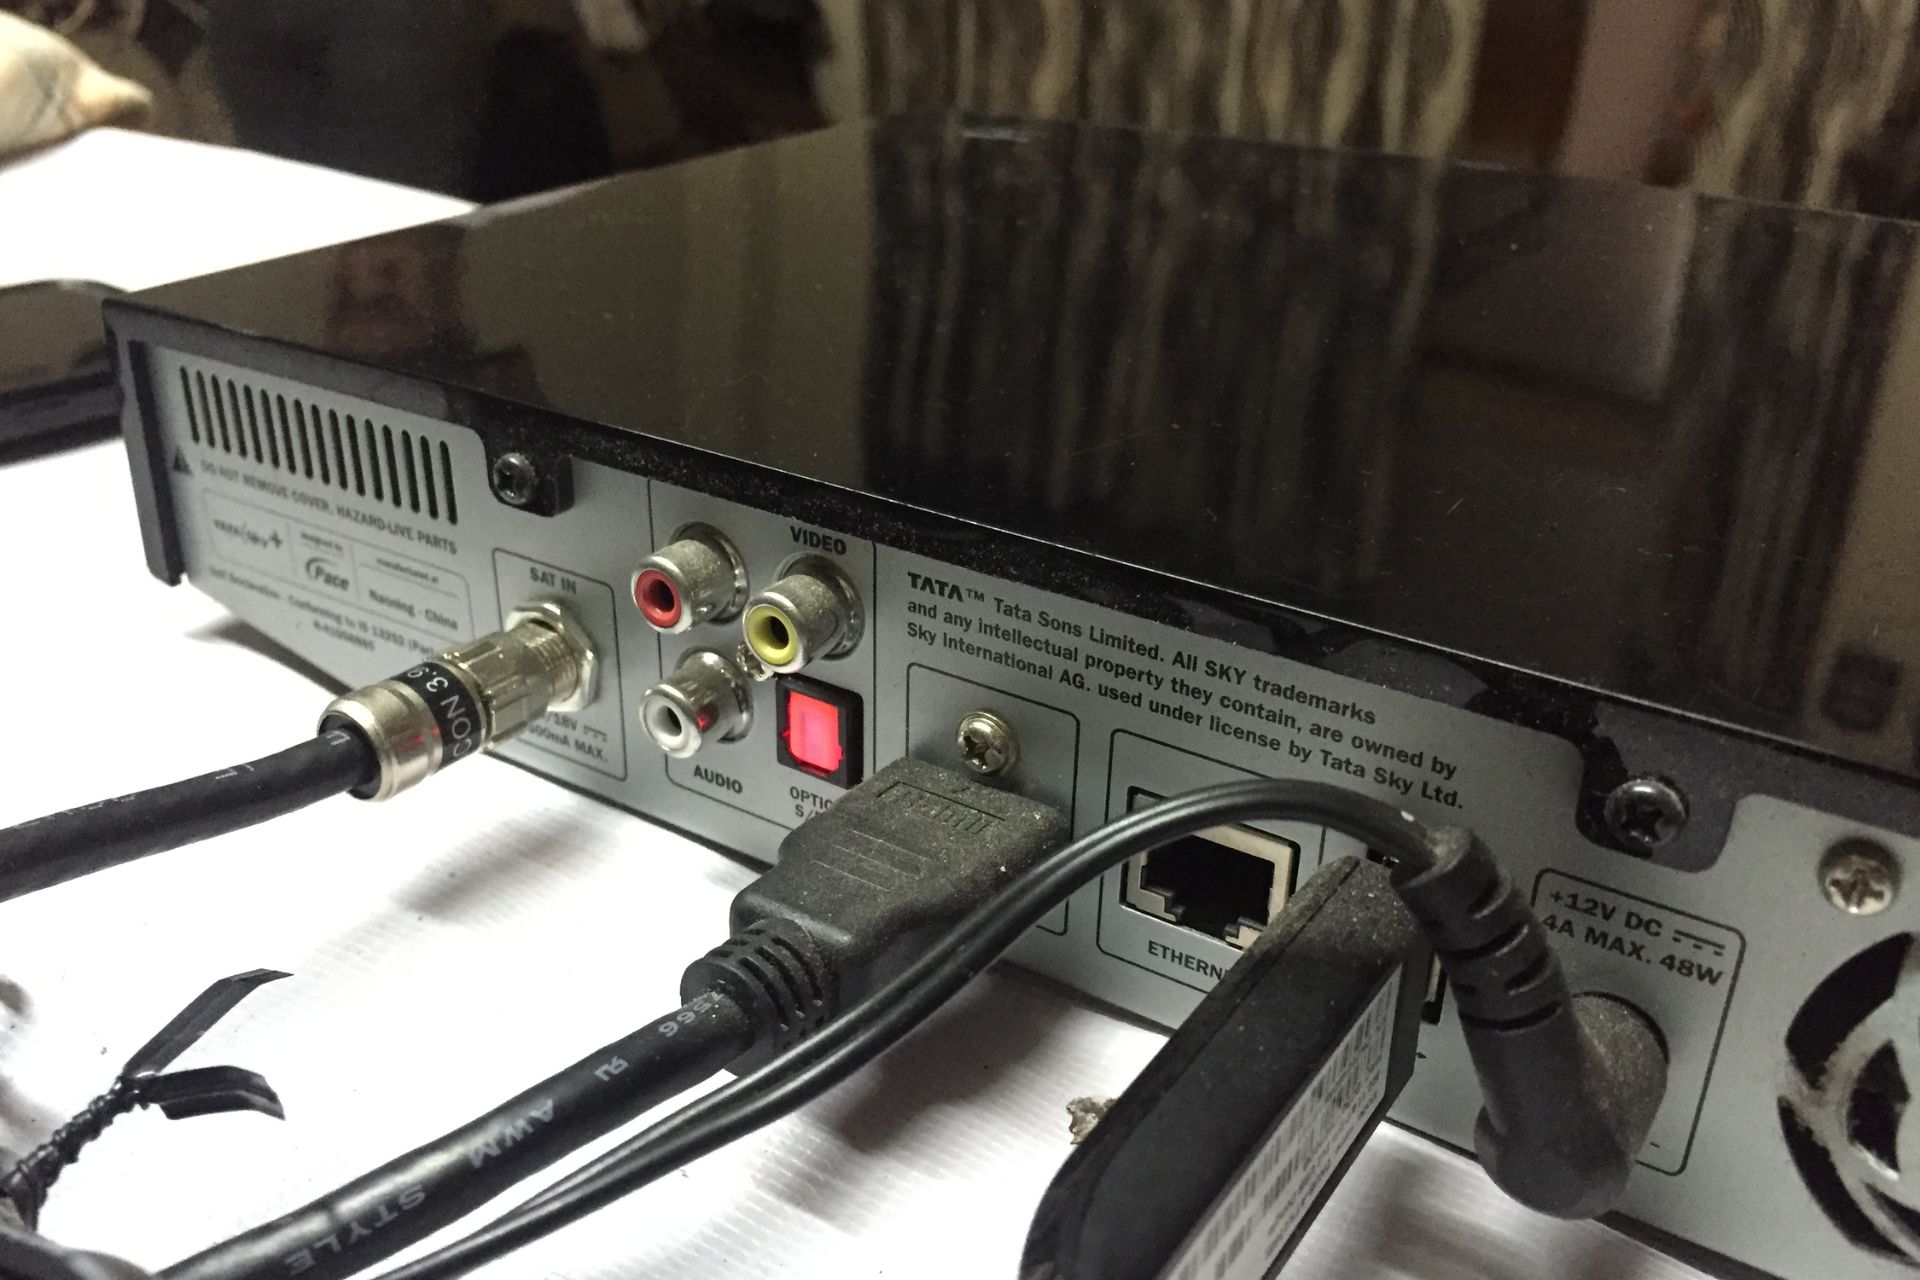
Before you can connect your soundbar to your cable box and TV, it’s important to determine the available connection options on your soundbar. Different soundbars have varying input and output options, so it’s essential to understand what connections you have at your disposal. Here are some common soundbar connection options to look out for:
- HDMI ARC (Audio Return Channel): This is the preferred method as it allows for both audio output from the TV and control of the soundbar using a single HDMI cable. It simplifies the setup and provides high-quality audio.
- Optical cable (TOSLINK): This connection option transmits audio signals via a fiber optic cable. While not as versatile as HDMI, it still provides a reliable digital audio connection.
- Digital coaxial cable: This connection uses a coaxial cable to transmit digital audio signals. Some soundbars may have this input option, and it can be an alternative to optical cables.
- RCA cables: These are the traditional red-and-white analog audio cables. While not as common nowadays, some soundbars and TVs may still have RCA input/output ports.
Take a look at the back panel of your soundbar and check for these connection options. Note down the available ports and their corresponding labels. This will help you choose the appropriate connection method based on the available ports on your TV and cable box.
In the next steps, we will cover the different connection options in detail and guide you through the process of connecting your soundbar to your cable box and TV. Whether you have HDMI ARC, optical, digital coaxial, or RCA inputs on your soundbar, we have you covered. So, let’s move on to step 2 and start connecting your soundbar!
Step 2: Connect the soundbar to the TV using HDMI ARC
If your soundbar and TV both support HDMI ARC (Audio Return Channel), this is the recommended method for connecting them. HDMI ARC allows for both audio output from the TV and control of the soundbar using a single HDMI cable, simplifying the setup process. Here’s how you can connect the soundbar to the TV using HDMI ARC:
- Locate the HDMI ARC port on your TV. It is usually labeled “HDMI-ARC” or “ARC”. Take note of its location.
- Locate the HDMI ARC port on your soundbar. It is also usually labeled “HDMI-ARC” or “ARC”. Connect one end of the HDMI cable to this port.
- Connect the other end of the HDMI cable to the HDMI ARC port on your TV.
- Turn on your TV and soundbar. Using the TV’s remote control, navigate to the audio settings. Look for the option to enable HDMI ARC or eARC.
- Once HDMI ARC is enabled on your TV, the soundbar should automatically recognize the connection and switch to the ARC input.
That’s it! Your soundbar is now connected to your TV using HDMI ARC. When you turn on the TV, the sound will be automatically routed through the soundbar, providing you with enhanced audio quality.
It’s important to note that some TVs may have specific HDMI ports designated for ARC. If you encounter any issues with the soundbar not being detected or audio not playing through the soundbar, try connecting to a different HDMI port on your TV, specifically one labeled for ARC.
In the next steps, we will cover alternative connection options if your TV or soundbar doesn’t support HDMI ARC. Whether you need to use an optical cable, digital coaxial cable, or RCA cables, we will provide step-by-step instructions to help you connect your soundbar effectively. So let’s move on to step 3!
Step 3: Connect the soundbar to the TV using an optical cable
If your soundbar and TV do not support HDMI ARC, another popular connection option is using an optical cable (TOSLINK). The optical cable provides a reliable digital audio connection between the devices. Here’s how you can connect the soundbar to the TV using an optical cable:
- Locate the optical audio output port on your TV. It is usually labeled “Optical”, “TOSLINK”, or “Digital Audio Out”. Take note of its location.
- Locate the optical audio input port on your soundbar. It is also usually labeled “Optical”, “TOSLINK”, or “Digital Audio In”. Connect one end of the optical cable to this port.
- Connect the other end of the optical cable to the optical audio output port on your TV.
- Turn on your TV and soundbar. On your TV’s remote control, navigate to the audio settings. Look for the option to select “Optical” or “Digital Audio Out” as the audio output.
- Make sure to select the corresponding input on your soundbar. This might be labeled as “Optical”, “TOSLINK”, or “Digital Audio In”. Refer to your soundbar’s user manual if necessary.
With the optical cable properly connected and the audio settings configured, your soundbar is now linked to the TV. When you power on the TV, the audio will be directed through the soundbar, enhancing your audio experience.
Remember that some soundbars may have multiple optical inputs. If you encounter any issues, make sure you have selected the correct input on your soundbar to receive the audio signal from the TV through the optical cable.
If neither HDMI ARC nor an optical cable is an option, don’t worry. In the next step, we will explore using a digital coaxial cable as an alternative connection method. So let’s move on to step 4!
Step 4: Connect the soundbar to the TV using a digital coaxial cable
If your soundbar and TV do not have HDMI ARC or optical cable options, you can still connect them using a digital coaxial cable. The digital coaxial cable uses a coaxial connection to transmit digital audio signals between devices. Here’s how you can connect the soundbar to the TV using a digital coaxial cable:
- Locate the digital audio output port on your TV. It is typically labeled “Digital Audio Out” or “Coaxial”. Take note of its location.
- Locate the digital audio input port on your soundbar. It is usually labeled “Digital Audio In” or “Coaxial”. Connect one end of the digital coaxial cable to this port.
- Connect the other end of the digital coaxial cable to the digital audio output port on your TV.
- Turn on your TV and soundbar. On your TV’s remote control, navigate to the audio settings. Look for the option to select “Digital Audio Out” or “Coaxial” as the audio output.
- Ensure that you have selected the corresponding input on your soundbar. This might be labeled as “Digital Audio In” or “Coaxial”. Refer to your soundbar’s user manual for guidance.
Once the digital coaxial cable is properly connected and the audio settings are configured, your soundbar will be connected to the TV. Whenever you power on the TV, the audio will be transmitted via the digital coaxial cable to the soundbar, enhancing your audio experience.
Keep in mind that some soundbars may have multiple digital coaxial inputs. If you encounter any issues, double-check that you have selected the correct input on your soundbar to receive the audio signal from the TV via the digital coaxial cable.
If neither HDMI ARC, optical cable, nor digital coaxial cable are available options, don’t worry. In the next step, we will explore using RCA cables as an alternative connection method. So let’s move on to step 5!
Step 5: Connect the soundbar to the TV using RCA cables
If your soundbar or TV does not have HDMI ARC, optical, or digital coaxial cable connections, you can still connect them using RCA cables. RCA cables are the traditional red-and-white analog audio cables. While not as common nowadays, some soundbars and TVs may still have RCA input/output ports. Here’s how you can connect the soundbar to the TV using RCA cables:
- Locate the RCA output ports on your TV. They are usually color-coded as red and white and labeled “Audio Out” or “Output”. Take note of their location.
- Locate the RCA input ports on your soundbar. They are also color-coded as red and white and labeled “Audio In” or “Input”. Connect the corresponding red RCA plug to the red input port and the white RCA plug to the white input port.
- Connect the other end of the RCA cables to the RCA output ports on your TV, matching the colors of the plugs with the colors of the ports.
- Turn on your TV and soundbar. Using your TV’s remote control, navigate to the audio settings. Look for the option to select “Analog Audio Out” or “RCA Out” as the audio output.
- Ensure that you have selected the corresponding input on your soundbar. This might be labeled as “Analog Audio In” or “RCA In”. Refer to your soundbar’s user manual if needed.
Once the RCA cables are properly connected and the audio settings are configured, your soundbar will be connected to the TV. When you power on the TV, the audio will be transmitted through the RCA cables to the soundbar, improving your audio experience.
Please note that RCA cables transmit analog audio signals and may not provide the same level of audio quality as digital connections like HDMI ARC or optical cables. However, this connection method can still be used if no other options are available.
Now that you’ve successfully connected the soundbar to the TV using RCA cables, let’s move on to step 6, where we’ll discuss connecting the soundbar to the cable box using HDMI.
Step 6: Connect the soundbar to the cable box using HDMI
In addition to connecting your soundbar to the TV, you can also enhance your audio experience by connecting the soundbar directly to the cable box using HDMI. This allows the soundbar to receive the audio signal directly from the cable box, ensuring you get high-quality sound when watching your favorite TV shows or movies. Here’s how you can connect the soundbar to the cable box using HDMI:
- Locate the HDMI output port on your cable box. It is typically labeled “HDMI OUT” or “Output”. Take note of its location.
- Locate an available HDMI input port on your soundbar. It is usually labeled “HDMI IN” or “Input”. Connect one end of the HDMI cable to this port.
- Connect the other end of the HDMI cable to the HDMI output port on your cable box.
- Turn on your cable box and soundbar. On your TV’s remote control, navigate to the audio settings or input settings. Look for the option to select the HDMI input connected to the soundbar.
With the HDMI cable properly connected and the audio settings configured, your soundbar is now connected to the cable box. When you select the corresponding HDMI input on your TV, the audio signal from the cable box will be routed to the soundbar, providing you with immersive and enhanced sound quality.
It’s important to note that some cable boxes may have multiple HDMI output ports. If you encounter any issues with the sound not playing through the soundbar, make sure you have selected the correct HDMI output port on the cable box and the corresponding HDMI input on your soundbar.
Now that you’ve successfully connected the soundbar to the cable box, you’re one step closer to enjoying an immersive audio experience. In the next step, we’ll discuss adjusting the audio settings on the TV and cable box to optimize the soundbar’s performance. So, let’s move on to step 7!
Step 7: Adjust the audio settings on the TV and cable box
After connecting the soundbar to both the TV and cable box, it’s important to adjust the audio settings on these devices to optimize the performance of the soundbar. Here are some key settings to consider adjusting:
- TV audio settings: Using your TV’s remote control, navigate to the audio settings menu. Look for options such as “Audio Output”, “Sound”, or “Speaker Settings”. Here, you can select the audio output to be routed through the soundbar. Choose the appropriate audio output option (HDMI ARC, optical, etc.) to ensure the sound is properly transmitted to the soundbar.
- Cable box audio settings: Similarly, navigate to the audio settings menu on your cable box. Look for options like “Audio Output”, “Audio Settings”, or “Sound”. Depending on the cable box model, you may have options to adjust audio output format (Stereo, Dolby Digital, etc.) or enable/disable secondary audio programming (SAP). Ensure the audio output settings are set to the desired format and that any unnecessary audio features (like SAP) are disabled.
- Soundbar settings: Refer to your soundbar’s user manual for instructions on accessing its settings. Depending on the model, you may have options to adjust equalizer settings, sound modes (such as movie or music modes), or audio enhancements like virtual surround sound. Experiment with these settings to find the audio output that best suits your preference.
- Volume synchronization: In some cases, you may experience audio delay or mismatch between the TV and soundbar. Check for an option in your TV’s settings to synchronize the volume control with the soundbar. This ensures that adjusting the volume on the TV’s remote control also changes the soundbar’s volume simultaneously.
By adjusting these audio settings on your TV, cable box, and soundbar, you can achieve optimal sound quality and synchronization between the devices. Take the time to explore and fine-tune the settings until you’re satisfied with the audio performance.
Now that you’ve adjusted the audio settings, it’s time to move on to the final step and test your soundbar to ensure it’s functioning as expected. Let’s proceed to step 8!
Step 8: Test the soundbar and enjoy enhanced audio
Now that you’ve connected and adjusted the audio settings for your soundbar, it’s time to test it and experience the enhanced audio quality. Here’s what you can do to ensure everything is working correctly:
- Turn on your TV, cable box, and soundbar.
- Select an audio source, such as your favorite TV show, movie, or music.
- Use the TV’s remote control to navigate to the input or source selection menu. Choose the input option corresponding to the soundbar connection (HDMI ARC, optical, etc.).
- Play the audio and listen for the sound coming from the soundbar. Make sure the sound is clear, immersive, and synchronized with the on-screen action.
- Adjust the volume using either the TV’s remote control or the soundbar’s remote control to ensure the desired sound level.
During the testing phase, pay attention to any issues like audio delays, distortion, or mismatched sound. If you experience any problems, double-check the connections and audio settings to ensure they are configured properly. Troubleshoot any issues by referring to the user manuals of your devices or seeking support from the manufacturers if necessary.
Once you’ve verified that the soundbar is working correctly, sit back, relax, and enjoy the enhanced audio experience. Whether you’re watching your favorite TV shows, enjoying movies at home, or listening to music, the soundbar will provide a more immersive and enjoyable audio output.
Remember, if you ever need to make changes to your setup or upgrade your equipment, refer to the user manuals or online resources for detailed instructions. Technology is constantly evolving, and staying informed will help you get the most out of your soundbar and entertainment system.
Congratulations! You have successfully connected your soundbar to your cable box and TV, adjusted the audio settings, and tested the soundbar. Now, sit back, relax, and indulge in a truly immersive audio experience. Enjoy!