Introduction
Welcome to the world of smart thermostats! These innovative devices have revolutionized the way we control and monitor our home’s heating and cooling systems. With their advanced features and connectivity capabilities, smart thermostats offer convenience, energy efficiency, and customization options that traditional thermostats simply cannot match.
However, if your home has a 2-wire HVAC (heating, ventilation, and air conditioning) system, you may have some concerns about whether you can take advantage of the benefits offered by a smart thermostat. Unlike traditional thermostats, which typically require more wires for proper functioning, smart thermostats are designed to work with a wider range of HVAC systems, including those with just two wires.
In this article, we will explore how you can use a smart thermostat with a 2-wire system. We will guide you through the steps to ensure compatibility, installation, and setup, so that you can enjoy all the advantages of a smart thermostat in your home, even with a limited wire setup.
Before we dive into the details, let’s first take a closer look at what smart thermostats are and why they are rising in popularity among homeowners.
Understanding Smart Thermostats
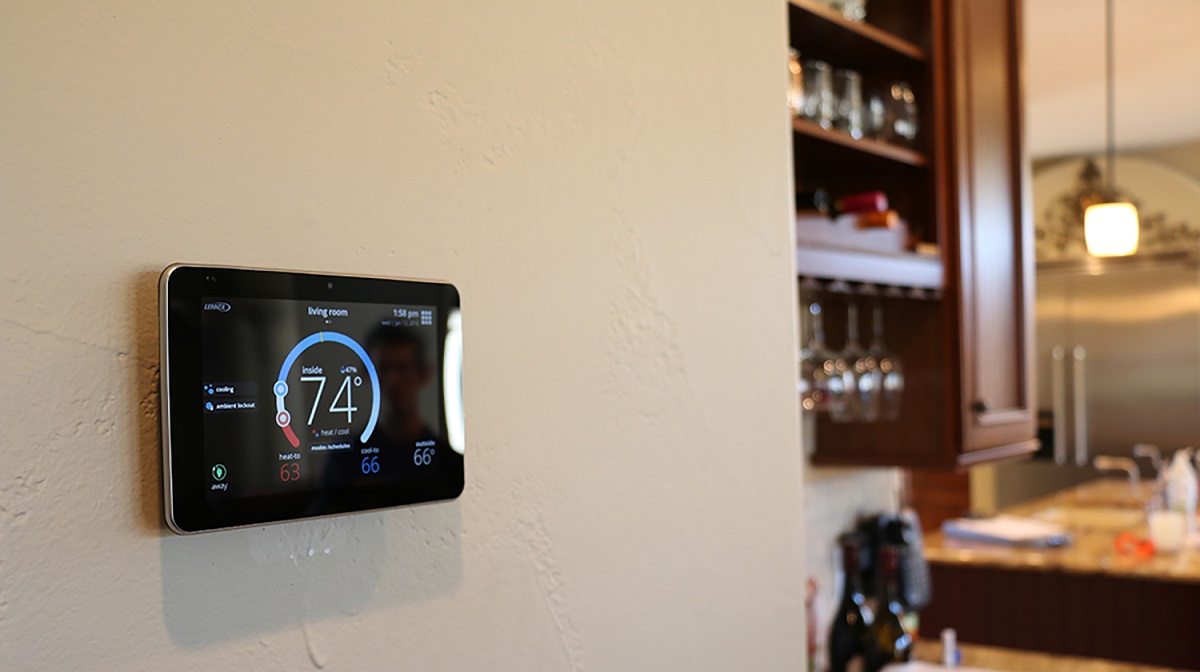
Smart thermostats are intelligent devices that allow you to remotely control and monitor your home’s heating and cooling system using a smartphone, tablet, or computer. They offer advanced features such as programmable schedules, energy usage reports, and even integration with voice assistants like Amazon Alexa or Google Assistant.
One of the key benefits of a smart thermostat is its ability to optimize temperature settings based on your lifestyle and preferences. For example, you can set different temperature levels for different times of the day, ensuring that your home is comfortable when you wake up, return from work, or go to bed. Some smart thermostats can even learn your habits and adjust settings automatically, saving you energy and money in the long run.
Moreover, smart thermostats can be controlled remotely. This means that even if you’re away from home, you can access and adjust the temperature settings from your smartphone. This feature not only provides convenience but also allows you to efficiently manage your energy usage. For instance, if you forgot to adjust the thermostat before leaving for a vacation, you can easily change the settings to save energy and avoid unnecessary heating or cooling costs.
In addition to remote control, smart thermostats often come with energy usage reports. These reports provide valuable insights into your HVAC system’s energy consumption, helping you identify areas where you can make adjustments to further optimize energy efficiency. By being more aware of your energy usage, you can make informed decisions and potentially reduce your utility bills.
Lastly, smart thermostats often integrate with other smart devices in your home, creating a connected ecosystem. For example, you can synchronize your smart thermostat with your smart lighting system so that when you leave the house, the lights automatically turn off, and the thermostat adjusts the temperature to an energy-saving level. This seamless integration enhances your home’s overall convenience and efficiency.
Now that we have a better understanding of smart thermostats and their features, let’s explore how you can utilize them with a 2-wire HVAC system.
Compatibility with 2-Wire Systems
Smart thermostats are designed to be compatible with a wide range of HVAC systems, including those with just 2 wires. However, before you proceed with installing a smart thermostat, it’s important to determine if your 2-wire system is compatible with the device.
In a 2-wire HVAC system, the two wires typically control the heating and cooling functions. One wire is responsible for activating the heat, while the other controls the cooling. Unlike systems with more wires, where additional wires provide power and control signals, 2-wire systems rely on the existing wiring to handle these functions.
The compatibility of your 2-wire system with a smart thermostat depends on several factors. One such factor is the type of heating and cooling system you have. Common types include forced-air systems, heat pumps, and radiant heating systems. It’s important to ensure that the smart thermostat you choose is compatible with your specific heating and cooling system.
Another factor to consider is the voltage of your system. Smart thermostats typically operate on either low voltage (24V) or line voltage (120V or 240V). Most 2-wire systems use low voltage, but it’s crucial to double-check before proceeding with the installation. The voltage information can usually be found on your existing thermostat or in the system’s documentation.
Additionally, some smart thermostats require a C-wire (common wire) for proper operation. The C-wire provides continuous power to the thermostat, ensuring stable functionality and preventing potential power-related issues. If your 2-wire system does not have a C-wire, you may need to install a C-wire adapter or make other adjustments to provide power to the smart thermostat.
It’s worth noting that some smart thermostats are specifically designed to be compatible with 2-wire systems. These thermostats are equipped with features and algorithms that work efficiently with limited wiring setups. If you have a 2-wire system, it is advisable to choose a smart thermostat that explicitly supports this configuration.
In the next sections, we’ll walk you through the steps to install and set up a smart thermostat with your 2-wire HVAC system. But before we begin, make sure to check your existing system and verify its compatibility with the smart thermostat you plan to install.
Step 1: Check Your Existing 2-Wire System
Before you start installing a smart thermostat with your 2-wire HVAC system, it’s crucial to check your existing system and gather some essential information. This step will help you ensure compatibility and make the installation process smoother.
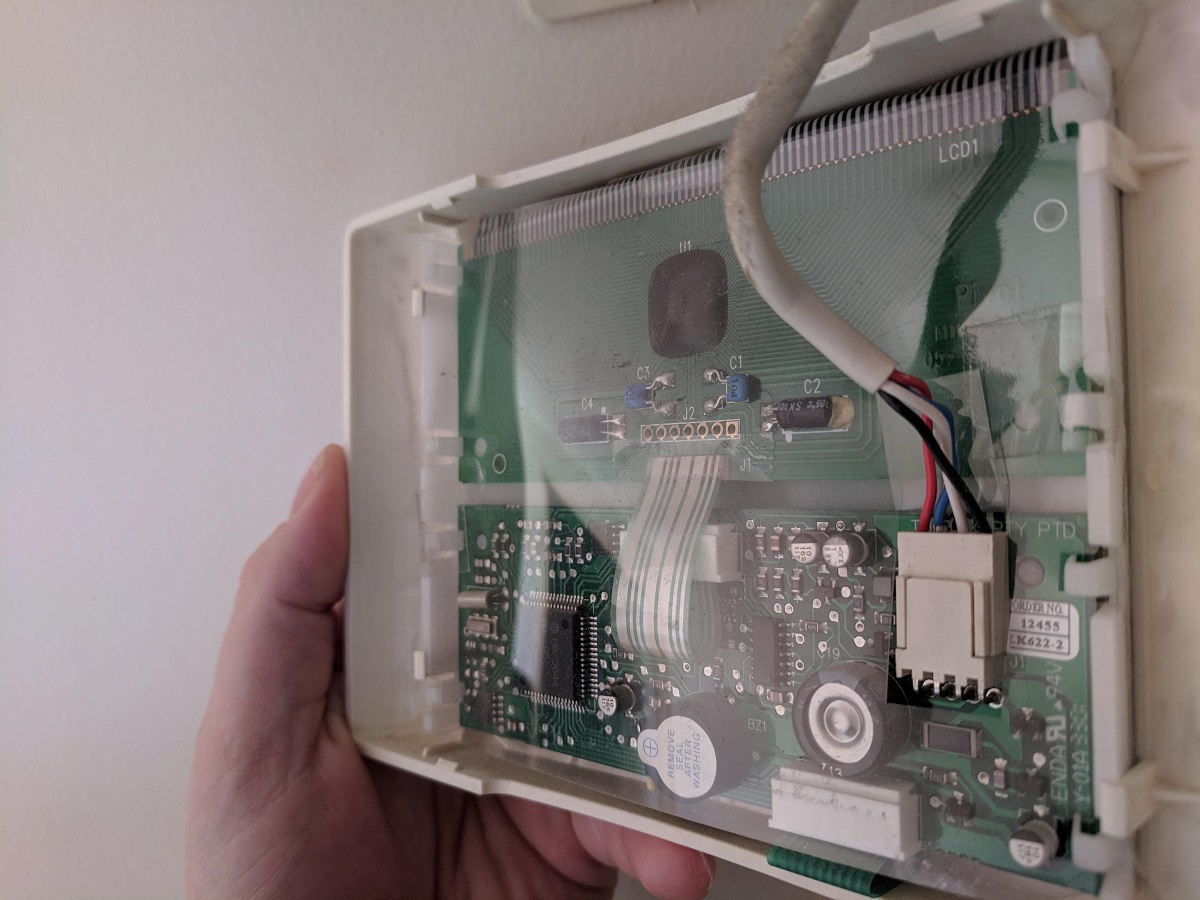
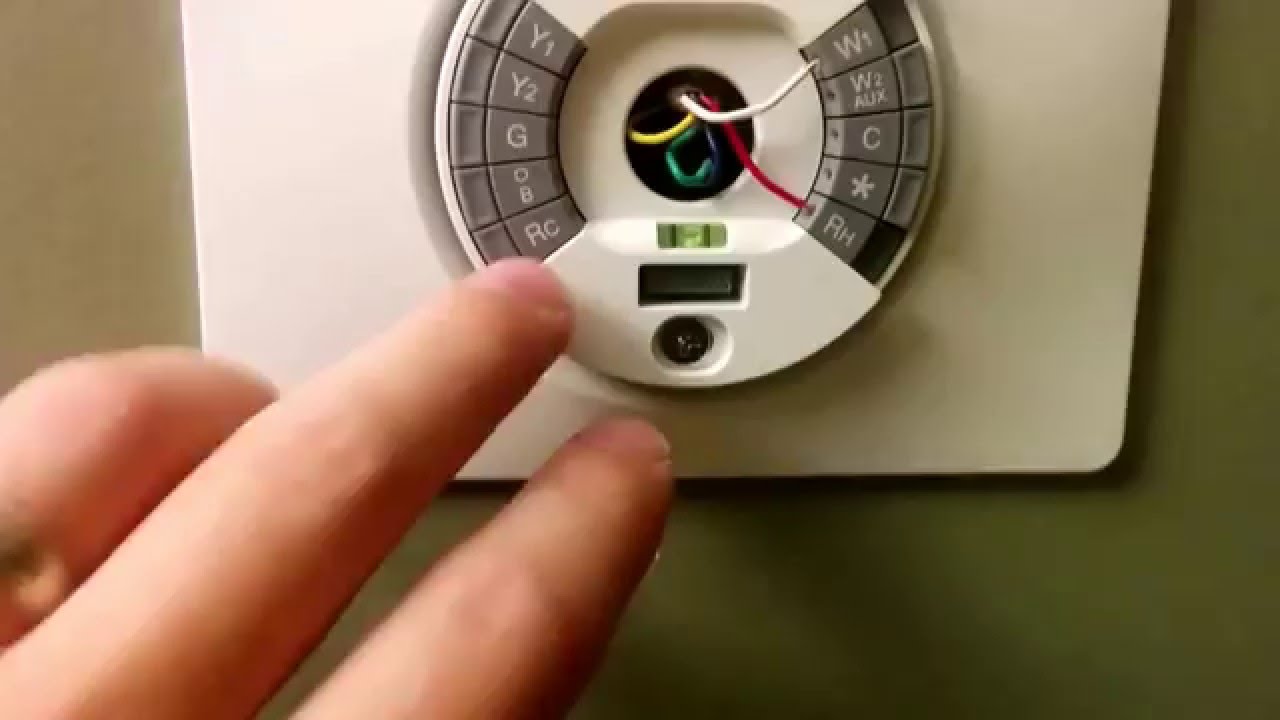
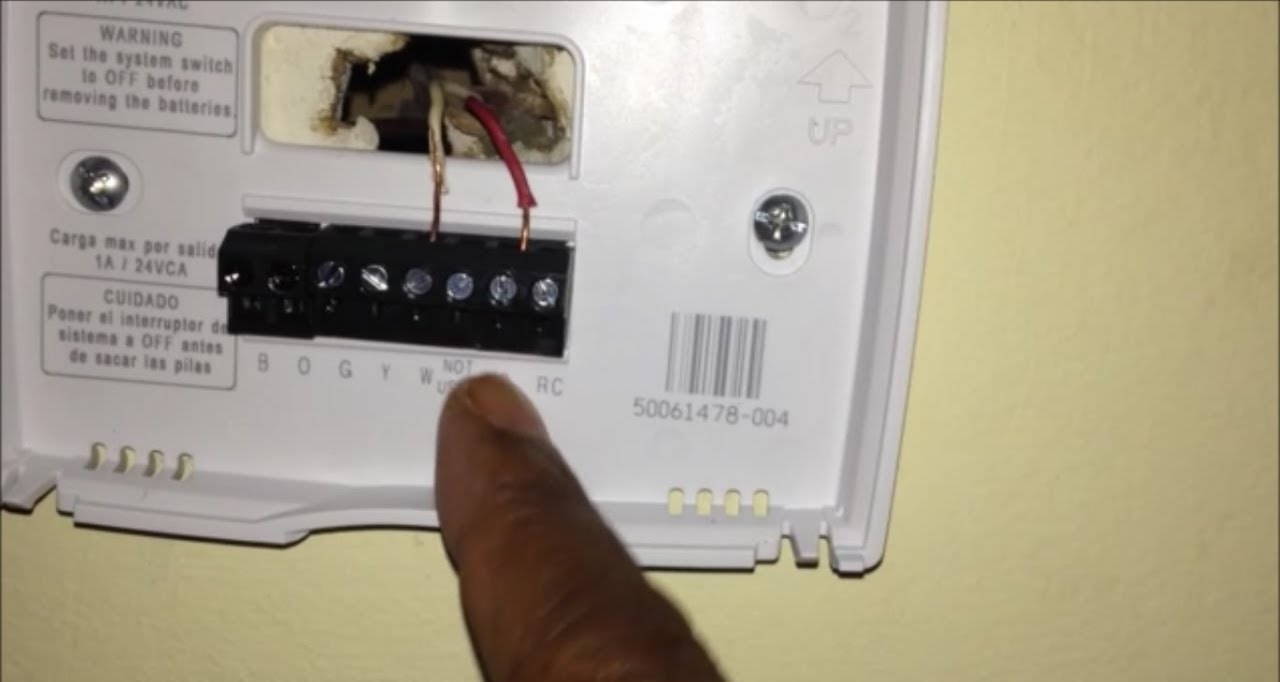
The first thing you need to do is locate your existing thermostat. Look for the control panel or unit that controls your heating and cooling system. Take note of the wires connected to the thermostat terminals. In a 2-wire system, you should see two wires attached to the terminals.
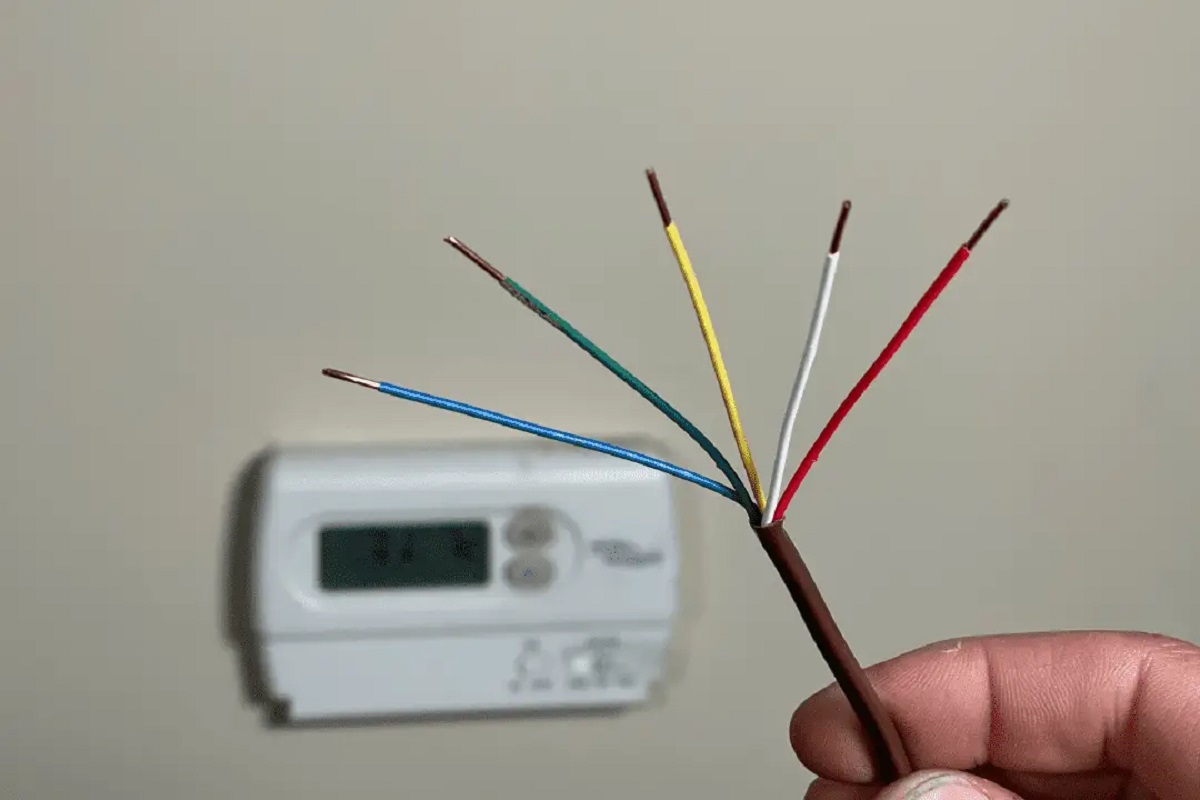
Next, carefully label and identify the wires. The most common wire colors you may encounter are red (R) and white (W). However, wire colors can vary, so it’s important to verify the function of each wire rather than relying solely on the colors.
Once you have identified the wires, take note of their functions. Typically, one wire will be responsible for activating the heat (W terminal), and the other wire will control the cooling function (Y terminal). Understanding the functions of the wires will be helpful during the installation and setup process.
Additionally, check the voltage of your system. Most 2-wire systems operate on low voltage (24V), but it’s essential to confirm this information. You can usually find the voltage specifications on your existing thermostat or in the system’s documentation.
Finally, determine if your 2-wire system has a C-wire (common wire). The C-wire provides continuous power to the thermostat, ensuring stable operation and preventing potential power-related issues. However, not all 2-wire systems have a C-wire. If your system doesn’t have one, don’t worry! There are alternative solutions, such as using a C-wire adapter or making adjustments to provide power to the smart thermostat.
By checking your existing 2-wire system and gathering the necessary information, you will have a better understanding of its compatibility with a smart thermostat. This step will help you make informed decisions during the installation process and ensure a successful setup of your new smart thermostat.
Step 2: Determine Compatibility of Your Smart Thermostat
Once you have assessed your existing 2-wire system, the next step is to determine the compatibility of your chosen smart thermostat. Not all smart thermostats are compatible with 2-wire systems, so it’s important to ensure that the one you’ve selected will work seamlessly with your setup.
Start by reading the product specifications and user manual of your chosen smart thermostat. Look for information about compatibility with 2-wire HVAC systems. Manufacturers typically provide clear instructions and compatibility guidelines to help you make an informed decision.
If the smart thermostat is compatible with 2-wire systems, make note of any specific instructions or additional components that may be needed for proper installation. This could include using a C-wire adapter or following specific wiring configurations.
Furthermore, check if your smart thermostat requires a specific app or software to control and monitor settings. Ensure that the app is compatible with your smartphone or mobile device, as this will be essential for remotely accessing and adjusting the thermostat’s settings.
If you’re unsure about the compatibility of your chosen smart thermostat, it’s recommended to reach out to the manufacturer’s customer support team. They will be able to provide guidance and address any questions or concerns you may have.
Remember, ensuring compatibility between your chosen smart thermostat and your 2-wire system is crucial for a successful installation and optimal performance. Take the time to research and gather all the necessary information before moving forward with the installation process.
Step 3: Install a C-Wire Adapter (If Needed)
If your 2-wire HVAC system does not have a C-wire (common wire), you may need to install a C-wire adapter to provide power to your smart thermostat. The C-wire adapter acts as a workaround to supply continuous power to the thermostat, ensuring its proper functionality.
Before proceeding with the installation of a C-wire adapter, it’s important to ensure that your chosen smart thermostat is compatible with this type of solution.
To install a C-wire adapter, follow these steps:
- Turn off the power to your heating and cooling system from the circuit breaker. This step ensures your safety during the installation process.
- Locate the control panel or unit where your HVAC system’s wiring is located. Disconnect the existing wires from the thermostat terminals.
- Identify the C-terminal on the control panel. This terminal is often labeled as “C” or “COM”. If you can’t find the C-terminal, consult the system’s documentation or reach out to a professional for assistance.
- Connect one end of a short wire (usually included with the C-wire adapter kit) to the C-terminal on the control panel.
- Attach the other end of the wire to the C-terminal on the C-wire adapter.
- Plug the C-wire adapter into an electrical outlet. This will provide continuous power to your smart thermostat.
- Reconnect the existing wires from your HVAC system to the appropriate terminals on the C-wire adapter. Follow the manufacturer’s instructions for proper wiring configurations.
- Turn on the power to your heating and cooling system from the circuit breaker.
Once the C-wire adapter is installed, you can proceed to the next step of wiring and setting up your smart thermostat.
If you’re unsure about the installation process or feel uncomfortable working with electrical components, it’s highly recommended to seek assistance from a professional HVAC technician. They have the expertise and knowledge to ensure a safe and proper installation of the C-wire adapter.
Remember, installing a C-wire adapter is an additional step that may be necessary for systems without a C-wire. However, not all smart thermostats require a C-wire, so be sure to verify the requirements of your chosen smart thermostat before proceeding with this installation.
Step 4: Adjust Wiring for Your Smart Thermostat
With your 2-wire system and, if needed, the C-wire adapter installed, it’s time to adjust the wiring to correctly connect your smart thermostat. Proper wiring ensures that the thermostat can effectively communicate with your heating and cooling system.
Follow these steps to adjust the wiring for your smart thermostat:
- Start by turning off the power to your heating and cooling system from the circuit breaker. This is crucial for your safety as you work with the wiring.
- Remove the existing thermostat from the wall by carefully unscrewing its mounting plate.
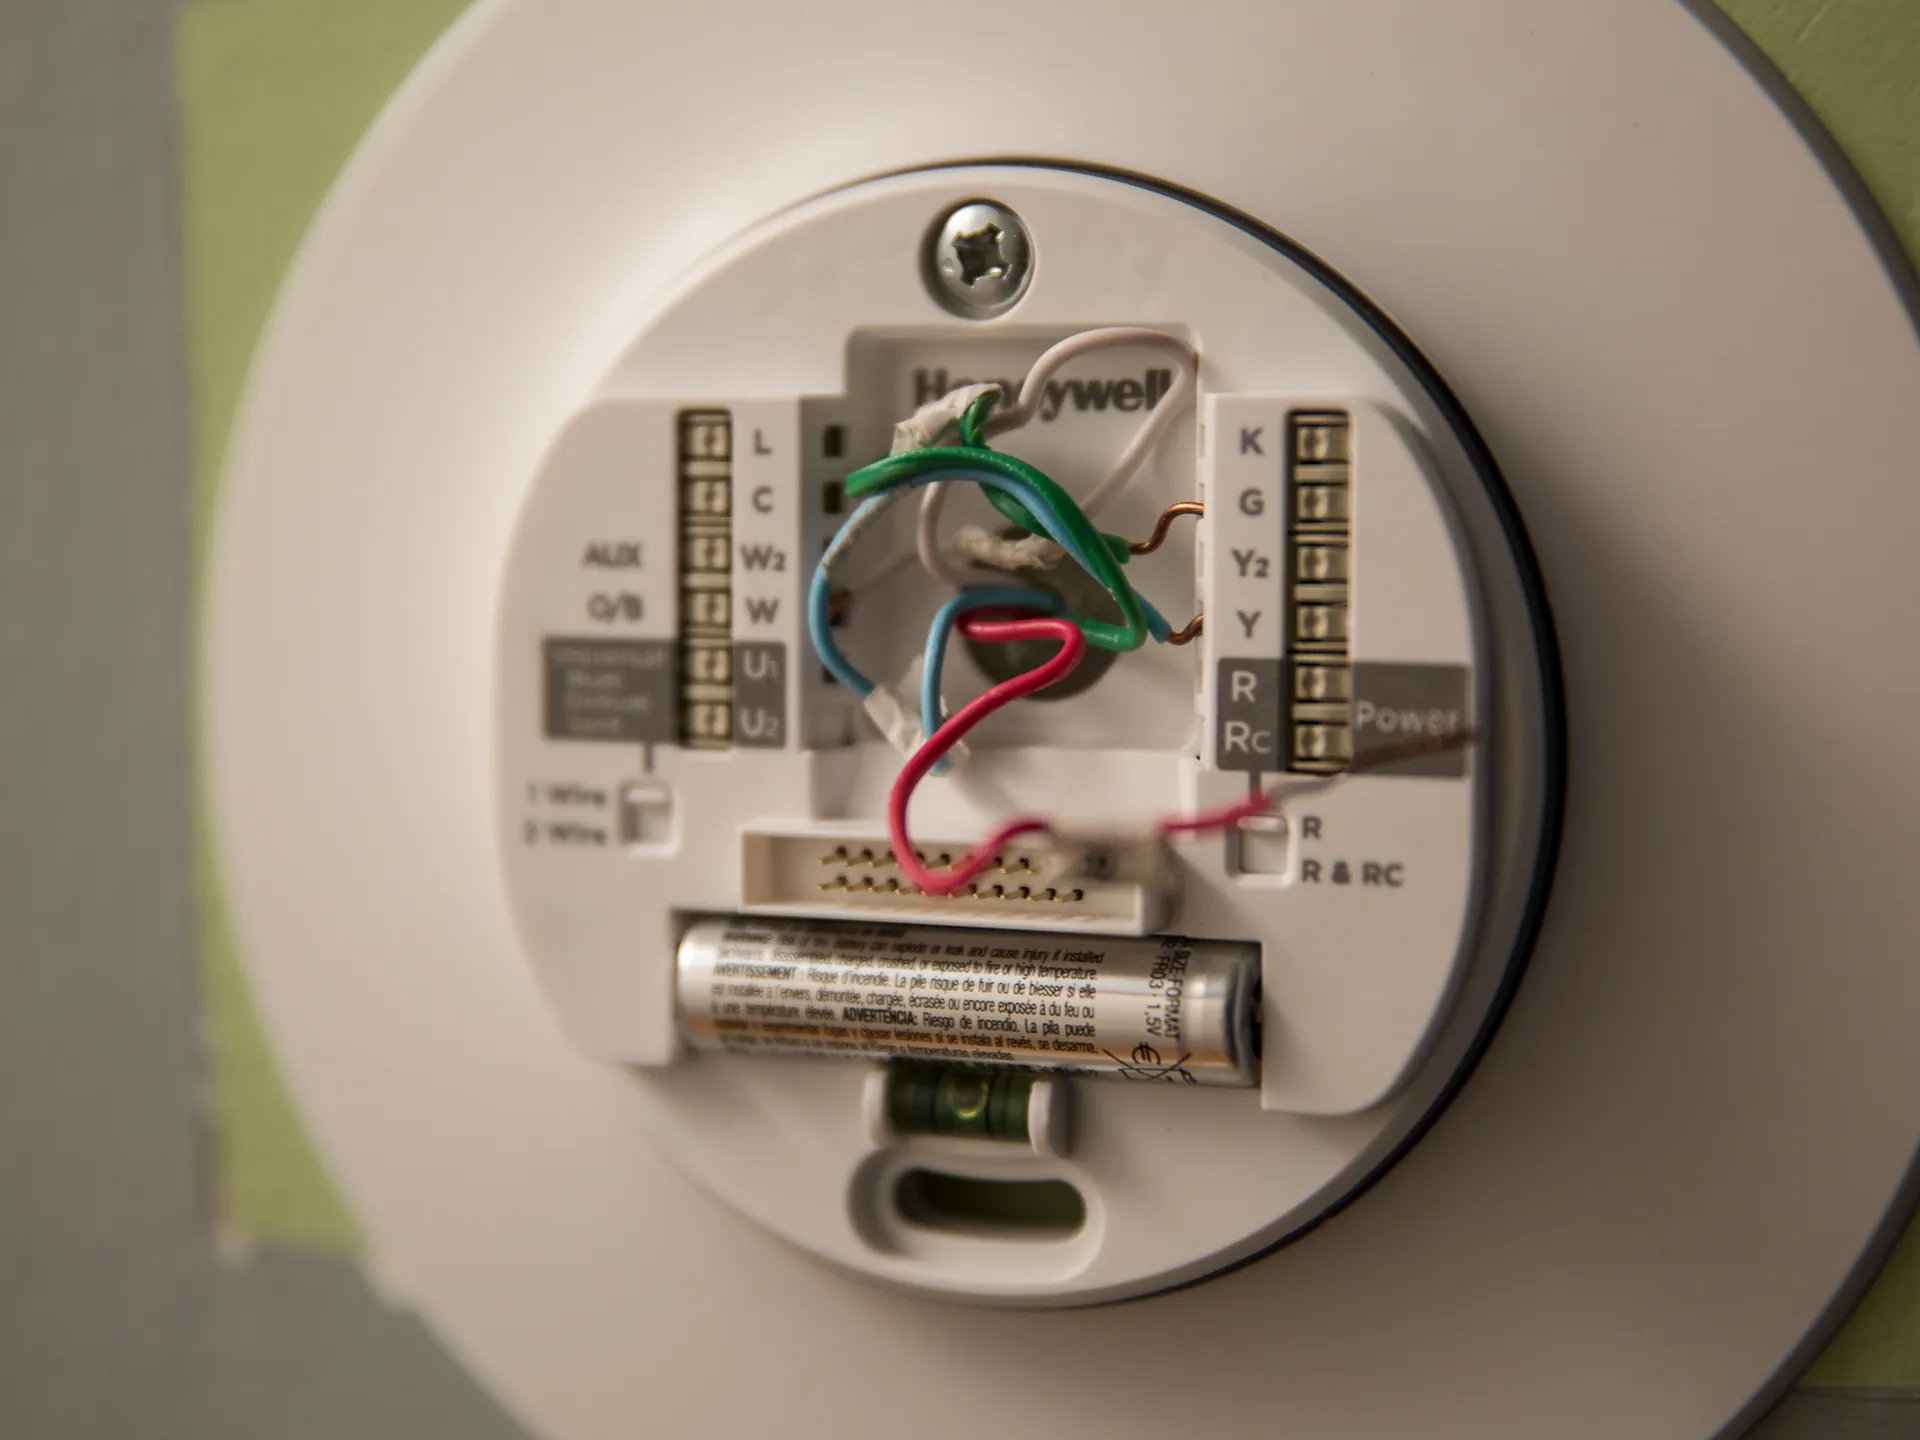
- Take note of the wiring connections on the existing thermostat. Label each wire with its corresponding terminal (e.g., R, W, Y, G) to ensure accuracy during the installation process.
- Disconnect the wires from the terminals of the old thermostat. Be gentle to avoid damaging the wires.
- Refer to the manufacturer’s instructions for your smart thermostat to determine the proper wiring configuration. Typically, you will connect the corresponding wires from your 2-wire system to the appropriate terminals on the smart thermostat (e.g., W to W, Y to Y).
- Carefully attach the wires to the designated terminals of the smart thermostat. Make sure they are securely connected.
- Mount your smart thermostat onto the wall by aligning it with the mounting plate and securing it with screws.
- Turn on the power to your heating and cooling system from the circuit breaker.
Once the wiring adjustments are complete, follow the remaining steps outlined in the smart thermostat’s user manual to proceed with the setup and configuration.
It’s important to note that the specific wiring configurations may vary depending on your smart thermostat and the manufacturer’s instructions. Always refer to the provided documentation for accuracy and follow the recommended wiring practices.
If you encounter any difficulties or confusion during the wiring process, it’s advisable to consult a professional HVAC technician for assistance. They can ensure that the wiring is correctly adjusted and your smart thermostat is properly connected to your 2-wire system.
Now that the wiring has been adjusted, you are ready to move on to the final step of connecting and setting up your smart thermostat.
Step 5: Connect and Set up Your Smart Thermostat
With the wiring adjusted and in place, it’s time to connect and set up your smart thermostat. This step will get your thermostat up and running, allowing you to start enjoying all its features and benefits.
Follow these steps to connect and set up your smart thermostat:
- Ensure that the power to your heating and cooling system is turned on from the circuit breaker.
- Follow the manufacturer’s instructions to download and install the required app or software on your smartphone or mobile device.
- Open the app or software and follow the on-screen prompts to create an account or sign in if you already have one.
- In the app or software, look for the option to add a new device or set up a smart thermostat.
- Follow the step-by-step instructions provided by the app or software to connect your smart thermostat to your Wi-Fi network. This step may involve scanning a QR code or entering a specific code provided by the thermostat.
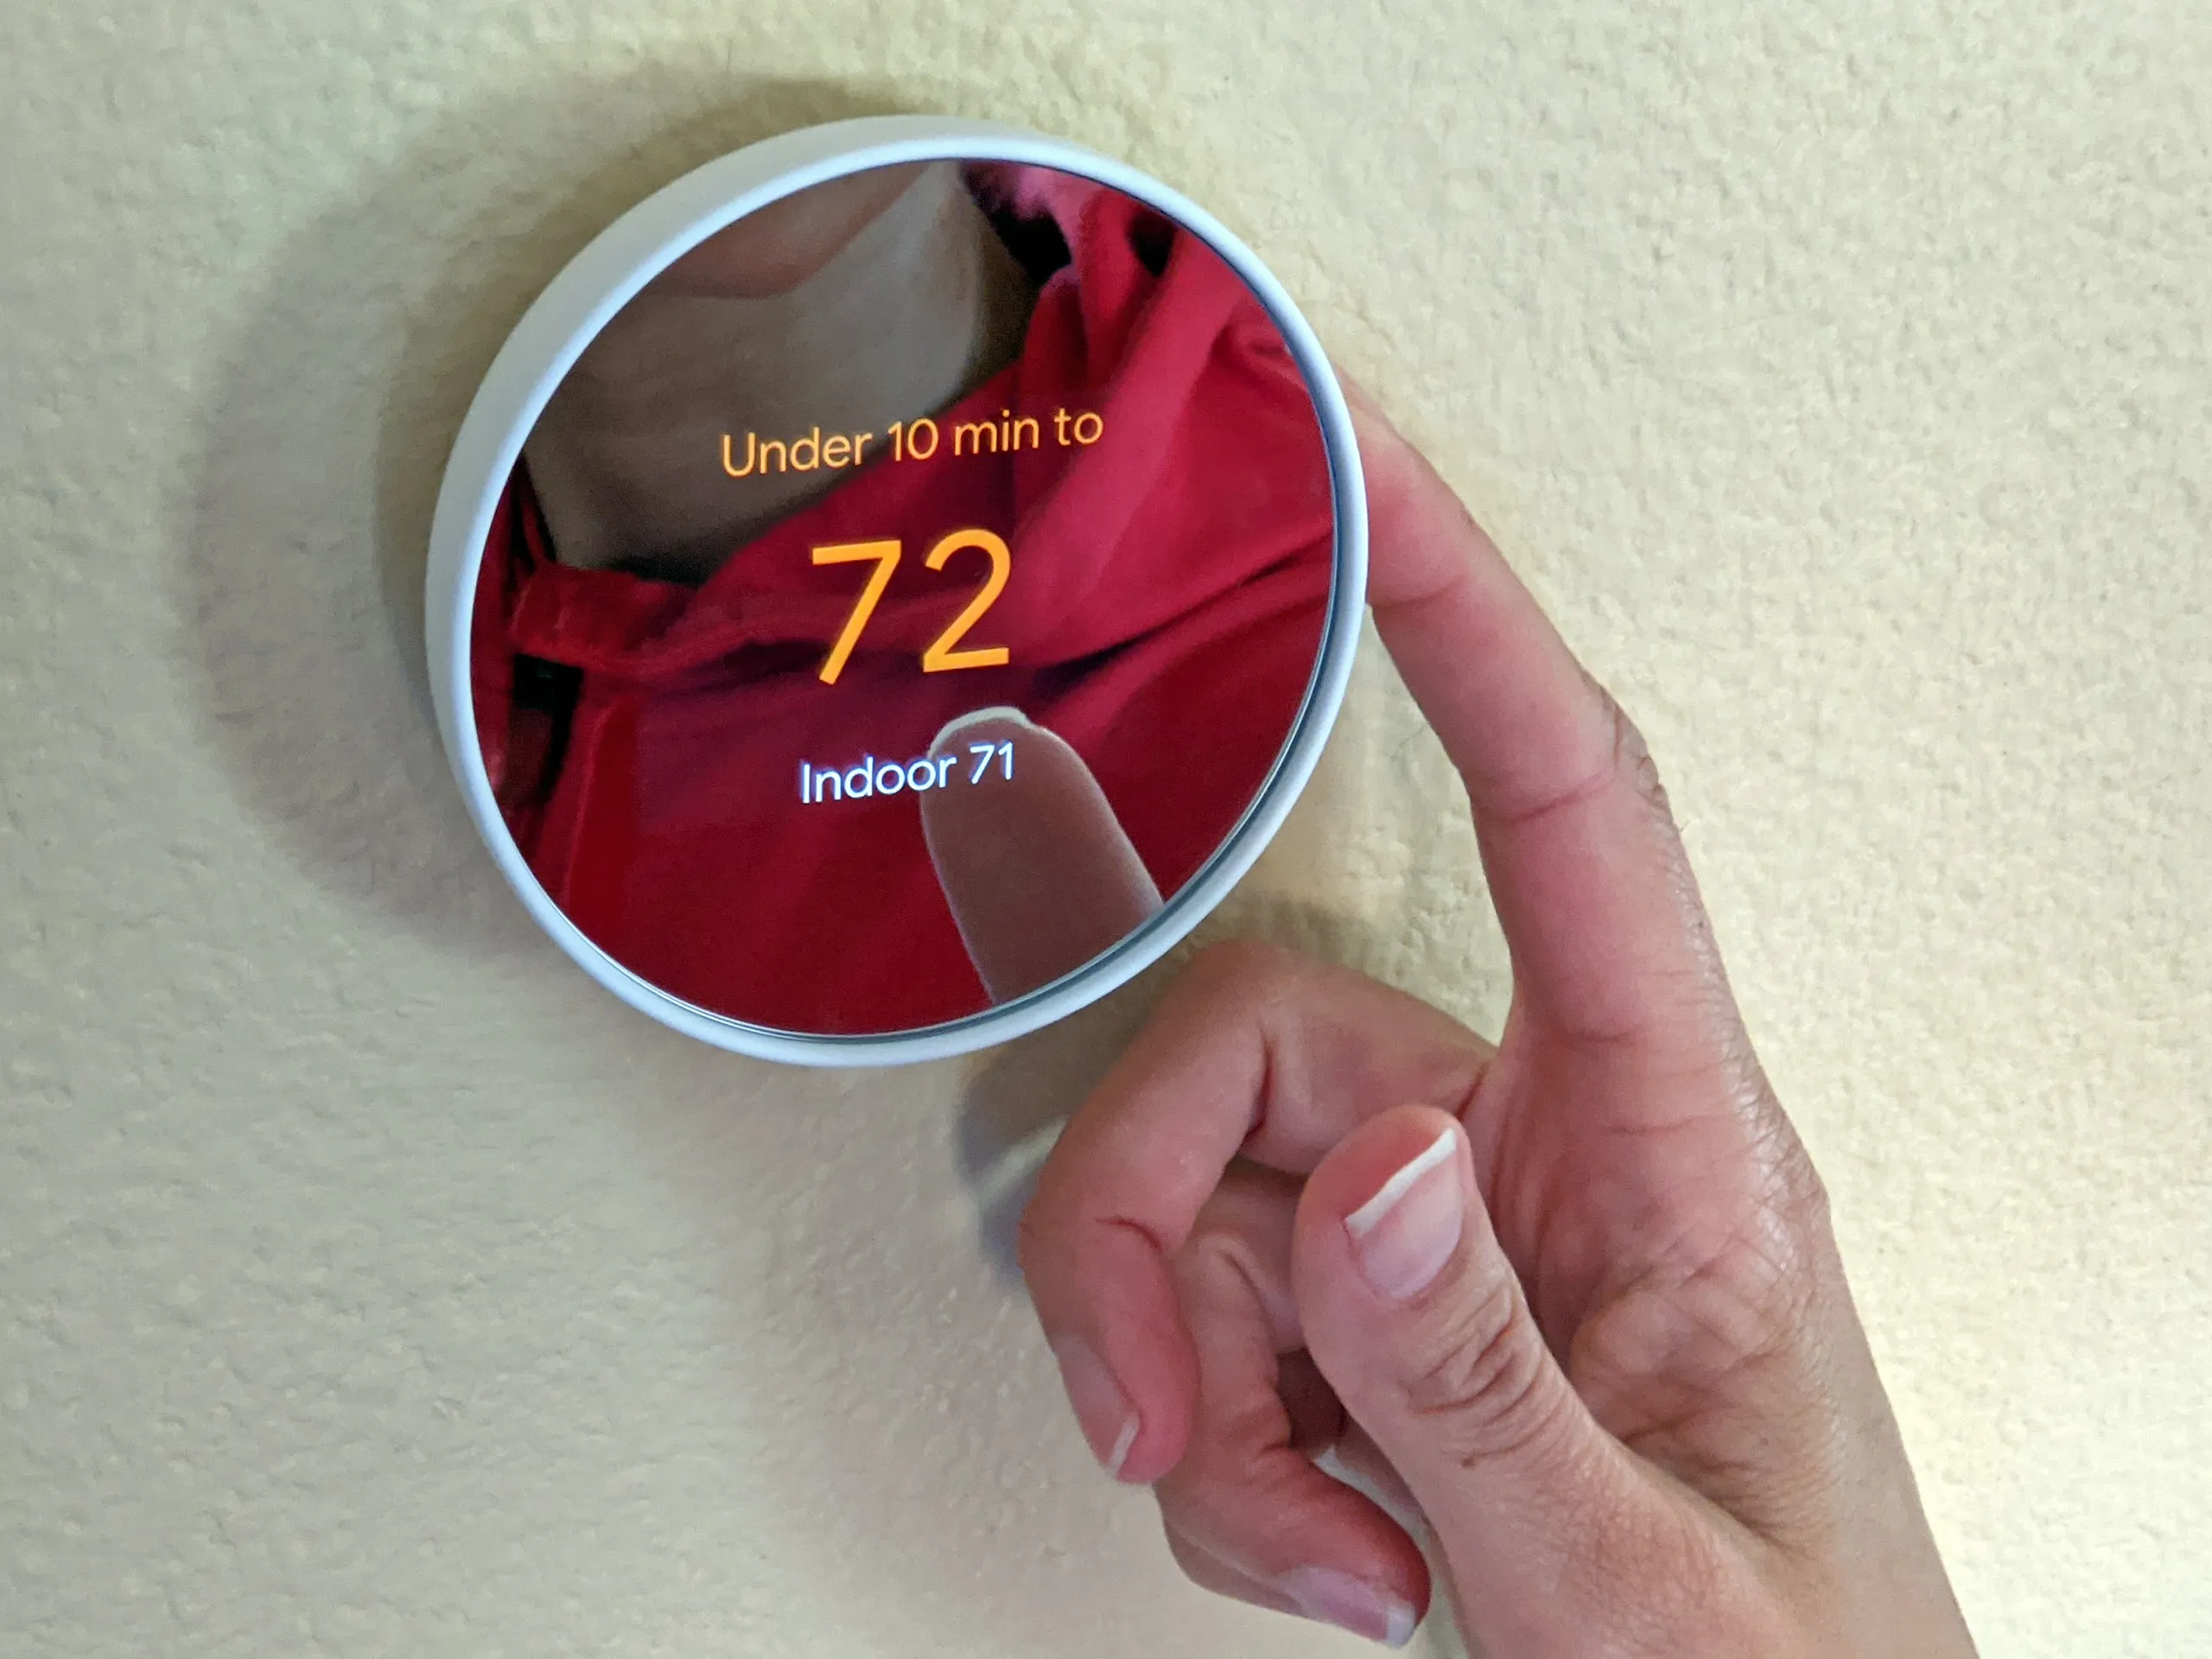
- Once the smart thermostat is successfully connected to your Wi-Fi network, it will detect the heating and cooling system and display the necessary information on the screen.
- Configure your desired temperature settings, scheduling preferences, and any other customizations offered by your smart thermostat. Take advantage of the advanced features such as geofencing, adaptive learning, and energy-saving modes to optimize your comfort and energy efficiency.
- After setting up your preferences, save the settings and exit the app or software.
- Test the functionality of your smart thermostat by adjusting the temperature settings using the app or software. Verify that your HVAC system responds accordingly.
Once your smart thermostat is connected and set up, you can start enjoying the convenience and energy-saving benefits it offers. Monitor and adjust your home’s temperature from anywhere using your smartphone or mobile device.
Remember to refer to the user manual or online resources provided by the manufacturer for detailed instructions on using all the features of your specific smart thermostat model.
If you encounter any issues during the setup process or have any questions, reach out to the manufacturer’s customer support team for assistance. They can provide guidance and troubleshoot any problems you may encounter.
Now, sit back and enjoy the comfort and control of your newly installed smart thermostat!
Conclusion
In conclusion, using a smart thermostat with a 2-wire system is indeed possible, allowing you to enjoy the benefits and convenience of advanced temperature control in your home. By following the step-by-step process outlined in this guide, you can successfully install and set up a smart thermostat with your 2-wire HVAC system.
Start by checking your existing 2-wire system to gather important information about its compatibility and requirements. Determine if a C-wire adapter is needed and install it if required. Adjust the wiring to connect your smart thermostat properly, making sure to follow the manufacturer’s guidelines.
After the wiring is adjusted, connect and set up your smart thermostat using the provided app or software. Customize the temperature settings, schedule preferences, and other features to optimize your comfort and energy efficiency.
Remember, it’s crucial to choose a smart thermostat that explicitly supports 2-wire systems and to verify compatibility before starting the installation process. Refer to the manufacturer’s instructions and reach out to their customer support if you have any questions or need assistance.
By integrating a smart thermostat into your 2-wire system, you can enjoy increased convenience, energy savings, and customization options for your home’s heating and cooling. Monitor and control your thermostat remotely using your smartphone or mobile device, and make informed decisions about optimizing energy usage.
Upgrade your home’s HVAC system with a smart thermostat, and experience the benefits of advanced technology and energy-efficient temperature control. Make your home a smart and comfortable haven with the flexibility and customization options offered by smart thermostats.